本文主要是介绍Linux|centos7|yum和编译安装ImageMagick记录,希望对大家解决编程问题提供一定的参考价值,需要的开发者们随着小编来一起学习吧!
一,
yum安装imagemagick
imagemagick这个软件是图像文件的处理神器,可以文字转图像以及图像的剪辑等等工作,也是配合人工智能工程的不可或缺的工具,具体的用处和特点就不在这里废话了,有兴趣的百度就行了
本次是在centos7最小化安装基础上安装此软件,因此,首先需要配置yum源,由于centos7已经算是弃用版本,因此,yum源需要配置centos-valute
wget -O /etc/yum.repos.d/epel.repo https://mirrors.aliyun.com/repo/epel-7.repo
wget -O /etc/yum.repos.d/CentOS-Base.repo https://mirrors.aliyun.com/repo/Centos-7.repo
以上两个源是阿里云的基础源和epel源,这两个源的作用是安装ImageMagick的时候担心某些依赖没有的话,做一个补充
下面开始配置centos的过期源,过期源里包含有centos7的一些比较不常用的软件,例如这个ImageMagick
查看本机的centos版本:
[root@node2 SPECS]# cat /etc/redhat-release
CentOS Linux release 7.7.1908 (Core)
编写repo文件,文件内容如下,其它centos版本都一样,只是把版本号替换掉就可以了,此源里包含ImageMagick
[ewrew]
name=12321
baseurl=https://mirrors.aliyun.com/centos-vault/7.7.1908/os/x86_64
enable=1
gpgcheck=0
🆗,现在就可以使用yum安装ImageMagick了,命令如下:
yum install ImageMagick -y
###安装完毕后,查看convert命令的版本,验证是否正常安装完毕
[root@node1 ~]# convert --version
Version: ImageMagick 6.9.10-68 Q16 x86_64 2024-01-12 https://imagemagick.org
Copyright: © 1999-2019 ImageMagick Studio LLC
License: https://imagemagick.org/script/license.php
Features: Cipher DPC Modules OpenMP(3.1)
Delegates (built-in): bzlib cairo fontconfig freetype gslib jng jp2 jpeg lcms ltdl lzma openexr pangocairo png ps rsvg tiff wmf x xml zlib
######注:convert命令 就是magick命令,随之安装的还有import,identify,display等等命令
ImageMagick就这么简单的安装好了!!!!!
二、
编译安装ImageMagick
编译安装也有很多方式,比如,直接源码包经过预编译-编译-安装这样的方式,也有将这三个阶段合并到一起的方式,例如src-rpm的方式,直接编译出rpm文件
第二种方式方便移植,自动化程度高一点,本次将采用src-rpm的方式安装
源码包下载地址:
Index of /archive/linux/SRPMS/releases
这里版本比较多,尽量使用7版本的,反正6.5版本我是没有编译成功
我使用的是ImageMagick-7.0.10-34.src.rpm,这个安装包看起来比较奇怪,带一个src,这里的意思是源码的意思
此包rpm -ivh 后将会自动创建rpmbuild目录,然后进入此目录编译并生成当前版本可用的rpm包,下面是编译步骤
1、
将上面的rpm包上传到服务器上备用,先配置yum源:
wget -O /etc/yum.repos.d/epel.repo https://mirrors.aliyun.com/repo/epel-7.repo
wget -O /etc/yum.repos.d/CentOS-Base.repo https://mirrors.aliyun.com/repo/Centos-7.repo
2、
安装ImageMagick-7.0.10-34.src.rpm,以创建rpmbuild文件夹,并安装rpmbuild命令
[root@centos7 ~]# rpm -ivh ImageMagick-7.0.10-34.src.rpm
Updating / installing...1:ImageMagick-7.0.10-34            ################################# [100%]
warning: user cristy does not exist - using root
warning: group cristy does not exist - using root
warning: user cristy does not exist - using root
warning: group cristy does not exist - using root[root@centos7 ~]# ls -al rpmbuild/SPECS/
total 12
drwxr-xr-x 2 root root    30 Feb 28 04:35 .
drwxr-xr-x 4 root root    34 Feb 28 04:35 ..
-rw-rw-r-- 1 root root 11023 Oct  8  2020 ImageMagick.spec[root@centos7 SPECS]# yum install rpm-build -y
ImageMagick.spec 是编译脚本,内容是哪些依赖,如何调用,怎么编译,怎么安装的,这里就不详细讲了
3、
测试安装看缺少哪些依赖并安装依赖
[root@centos7 SPECS]# rpmbuild -ba ImageMagick.spec
error: Failed build dependencies:bzip2-devel is needed by ImageMagick-7.0.10-34.x86_64freetype-devel is needed by ImageMagick-7.0.10-34.x86_64libjpeg-devel is needed by ImageMagick-7.0.10-34.x86_64libpng-devel is needed by ImageMagick-7.0.10-34.x86_64libtiff-devel is needed by ImageMagick-7.0.10-34.x86_64giflib-devel is needed by ImageMagick-7.0.10-34.x86_64perl-devel >= 5.8.1 is needed by ImageMagick-7.0.10-34.x86_64perl-generators is needed by ImageMagick-7.0.10-34.x86_64ghostscript-devel is needed by ImageMagick-7.0.10-34.x86_64djvulibre-devel is needed by ImageMagick-7.0.10-34.x86_64libwmf-devel is needed by ImageMagick-7.0.10-34.x86_64libX11-devel is needed by ImageMagick-7.0.10-34.x86_64libXext-devel is needed by ImageMagick-7.0.10-34.x86_64libXt-devel is needed by ImageMagick-7.0.10-34.x86_64lcms2-devel is needed by ImageMagick-7.0.10-34.x86_64libxml2-devel is needed by ImageMagick-7.0.10-34.x86_64librsvg2-devel is needed by ImageMagick-7.0.10-34.x86_64OpenEXR-devel is needed by ImageMagick-7.0.10-34.x86_64fftw-devel is needed by ImageMagick-7.0.10-34.x86_64libwebp-devel is needed by ImageMagick-7.0.10-34.x86_64jbigkit-devel is needed by ImageMagick-7.0.10-34.x86_64openjpeg2-devel >= 2.1.0 is needed by ImageMagick-7.0.10-34.x86_64autoconf is needed by ImageMagick-7.0.10-34.x86_64automake is needed by ImageMagick-7.0.10-34.x86_64libtool-ltdl-devel is needed by ImageMagick-7.0.10-34.x86_64
可以看到缺少的依赖比较多,但有两个比较特殊openjpeg2-devel >= 2.1.0 ,perl-devel >= 5.8.1这两个个依赖对版本有要求,那么这个软件是在centos-valute过期源里面的,因此,添加过期源:
[ewrew]
name=12321
baseurl=https://mirrors.aliyun.com/centos-vault/7.7.1908/os/x86_64
enable=1
gpgcheck=0
开始安装依赖,命令如下:
yum install bzip2-devel freetype-devel libjpeg-devel libpng-devel libtiff-devel giflib-devel perl-devel perl-generators ghostscript-devel djvulibre-devel ibwmf-devel libX11-devel libXext-devel libXt-devel lcms2-devel libxml2-devel OpenEXR-devel fftw-devel libwebp-devel jbigkit-devel openjpeg2-devel autoconf automake libtool-ltdl-devel -y安装完毕后,在执行上面的命令,可以看到还缺少两个依赖,安装命令如下:
缺少依赖的报错:
[root@centos7 SPECS]# rpmbuild -ba ImageMagick.spec
error: Failed build dependencies:libwmf-devel is needed by ImageMagick-7.0.10-34.x86_64librsvg2-devel is needed by ImageMagick-7.0.10-34.x86_64
依赖安装命令:
yum install libwmf-devel librsvg2-devel -y###看看上面两个指定版本的依赖安装情况,可以看到都符合要求了:
[root@centos7 x86_64]# rpm -qa |grep openjpeg2-devel
openjpeg2-devel-2.3.1-3.el7_7.x86_64
[root@centos7 x86_64]# rpm -qa |grep perl-devel
perl-devel-5.16.3-299.el7_9.x86_64
4、
这个最后两个依赖安装完就可以顺畅的执行rpmbuild -ba ImageMagick.spec这个命令了。编译完成的末尾日志如下:
Wrote: /root/rpmbuild/SRPMS/ImageMagick-7.0.10-34.src.rpm
Wrote: /root/rpmbuild/RPMS/x86_64/ImageMagick-7.0.10-34.x86_64.rpm
Wrote: /root/rpmbuild/RPMS/x86_64/ImageMagick-devel-7.0.10-34.x86_64.rpm
Wrote: /root/rpmbuild/RPMS/x86_64/ImageMagick-libs-7.0.10-34.x86_64.rpm
Wrote: /root/rpmbuild/RPMS/x86_64/ImageMagick-djvu-7.0.10-34.x86_64.rpm
Wrote: /root/rpmbuild/RPMS/x86_64/ImageMagick-doc-7.0.10-34.x86_64.rpm
Wrote: /root/rpmbuild/RPMS/x86_64/ImageMagick-perl-7.0.10-34.x86_64.rpm
Wrote: /root/rpmbuild/RPMS/x86_64/ImageMagick-c++-7.0.10-34.x86_64.rpm
Wrote: /root/rpmbuild/RPMS/x86_64/ImageMagick-c++-devel-7.0.10-34.x86_64.rpm
Wrote: /root/rpmbuild/RPMS/x86_64/ImageMagick-debuginfo-7.0.10-34.x86_64.rpm
Executing(%clean): /bin/sh -e /var/tmp/rpm-tmp.zyhQ3N
+ umask 022
+ cd /root/rpmbuild/BUILD
+ cd ImageMagick-7.0.10-34
+ /usr/bin/rm -rf /root/rpmbuild/BUILDROOT/ImageMagick-7.0.10-34.x86_64
+ exit 0
[root@centos7 SPECS]# echo $?
0
编译成果如下,在RPMS这个目录下:
[root@centos7 SPECS]# cd ../RPMS/x86_64/
[root@centos7 x86_64]# ls
ImageMagick-7.0.10-34.x86_64.rpm      ImageMagick-c++-devel-7.0.10-34.x86_64.rpm  ImageMagick-devel-7.0.10-34.x86_64.rpm  ImageMagick-doc-7.0.10-34.x86_64.rpm   ImageMagick-perl-7.0.10-34.x86_64.rpm
ImageMagick-c++-7.0.10-34.x86_64.rpm  ImageMagick-debuginfo-7.0.10-34.x86_64.rpm  ImageMagick-djvu-7.0.10-34.x86_64.rpm   ImageMagick-libs-7.0.10-34.x86_64.rpm
5、
使用这些rpm包
[root@centos7 x86_64]# yum install ./*ImageMagick就这么简单的安装完毕了,完结!!!!撒花!!!!
三、
windows和Linux源码以及简单编译
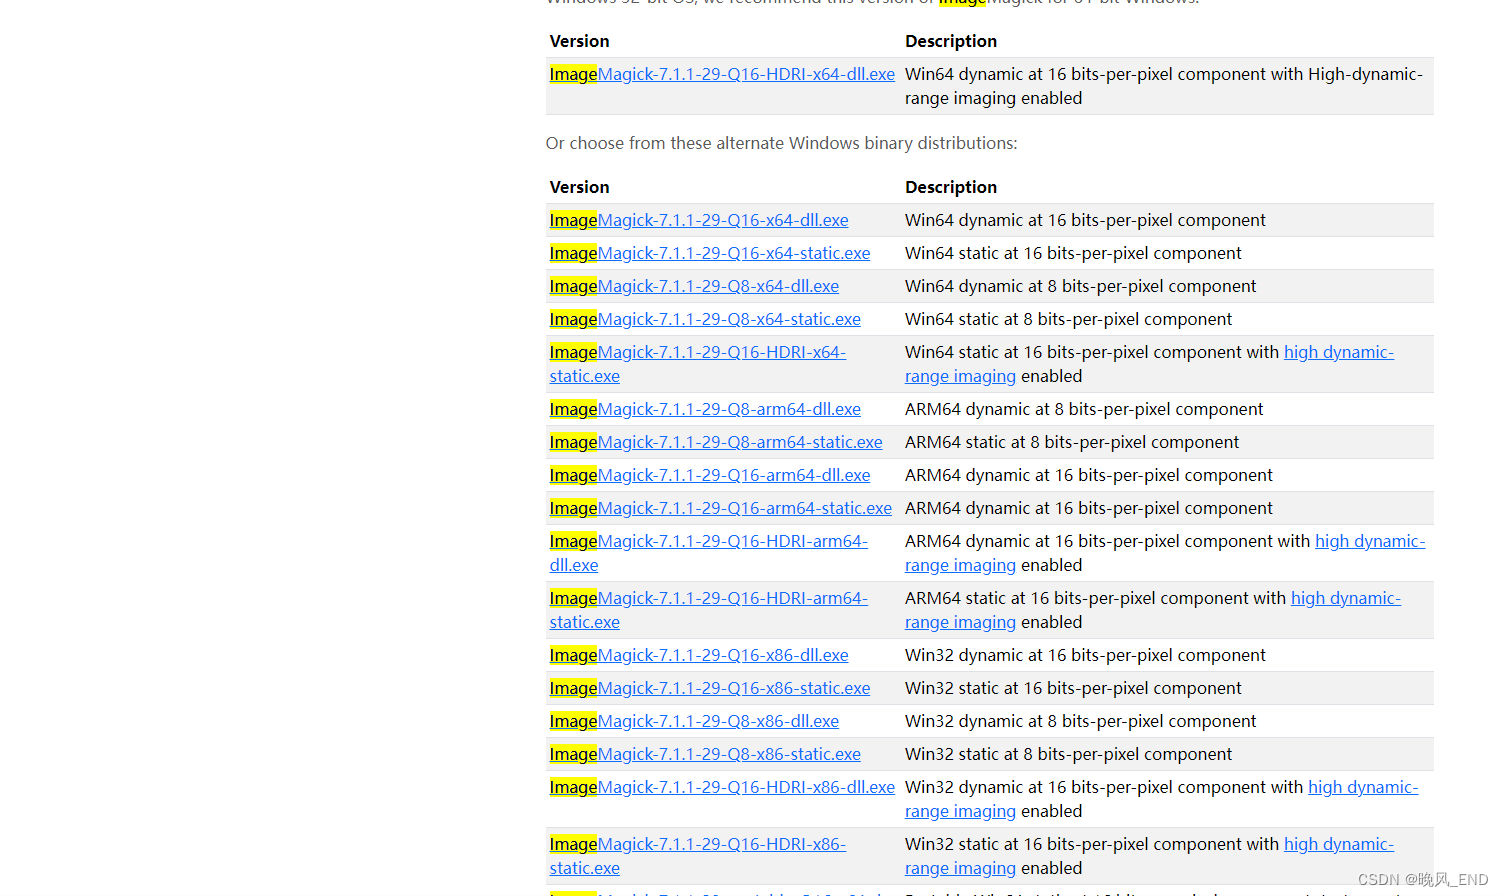
Windows版本的ImageMagick下载地址:
ImageMagick – Download
Linux的源码包下载地址:
https://github.com/ImageMagick/ImageMagick/releases
源码编译:
编译前的依赖安装如下:
yum install bzip2-devel freetype-devel libjpeg-devel libpng-devel libtiff-devel giflib-devel perl-devel perl-generators ghostscript-devel djvulibre-devel ibwmf-devel libX11-devel libXext-devel libXt-devel lcms2-devel libxml2-devel OpenEXR-devel fftw-devel libwebp-devel jbigkit-devel openjpeg2-devel autoconf automake libtool-ltdl-devel libzstd-devel zstd autotrace-devel autotrace libzip zlib zlib-devel libtool-ltdl-devel perl perl-devel gcc gcc-c++ libwebp-devel libwebp-tools -y预编译命令:
进入解压后的目录,新建build目录然后进入build目录执行编译,如果有错找不到原因,可以删空build目录,重新编译
mkdir build
cd build../configure --enable-shared         --disable-static         --with-modules         --with-perl         --with-x         --with-threads         --with-magick_plus_plus         --with-wmf         --with-webp         --with-openexr         --with-gslib         --with-rsvg         --with-xml         --with-perl-options="INSTALLDIRS=vendor %{?perl_prefix} CC='%__cc -L$PWD/MagickCore/.libs' LDDLFLAGS='-shared -L$PWD/MagickCore/.libs'"                  --without-gcc-arch         --with-jbig --with-fftw --with-fpx --with-flif --with-autotrace=yes
预编译的日志,可以看到基本各种图像格式都开启支持了:
Host system type: x86_64-pc-linux-gnu
Build system type: x86_64-pc-linux-gnuOption                              Value
------------------------------------------------------------------------------
Shared libraries    --enable-shared=yes		        yes
Static libraries    --enable-static=no		        no
Module support      --with-modules=yes		        yes
GNU ld              --with-gnu-ld=yes		        yes
OpenMP              --enable-openmp=		        yes
Security policy     --with-security-policy=open	        open
Quantum depth       --with-quantum-depth=16	        16
High Dynamic Range Imagery--enable-hdri=no		        noInstall documentation:				        yesMemory allocation library:JEMalloc          --with-jemalloc=no		        noMTMalloc          --with-mtmalloc=no		        noTCMalloc          --with-tcmalloc=no		        noUMem              --with-umem=no		        noDelegate library configuration:BZLIB             --with-bzlib=yes		        yesAutotrace         --with-autotrace=yes		        noDJVU              --with-djvu=yes		        yesDPS               --with-dps=no		        noFFTW              --with-fftw=yes		        yesFLIF              --with-flif=yes		        noFlashPIX          --with-fpx=yes		        noFontConfig        --with-fontconfig=yes	        yesFreeType          --with-freetype=yes		        yesGhostscript lib   --with-gslib=yes		        yesGraphviz          --with-gvc=yes		        noHEIC              --with-heic=yes		        noJBIG              --with-jbig=yes		        yesJPEG v1           --with-jpeg=yes		        yesLCMS              --with-lcms=yes		        yesLQR               --with-lqr=yes		        noLTDL              --with-ltdl=yes		        yesLZMA              --with-lzma=yes		        yesMagick++          --with-magick-plus-plus=yes	        yesOpenEXR           --with-openexr=yes		        yesOpenJP2           --with-openjp2=yes		        yesPANGO             --with-pango=yes		        yesPERL              --with-perl=yes		        /usr/bin/perlPNG               --with-png=yes		        yesRAQM              --with-raqm=yes		        noRAW               --with-raw=yes		        noRSVG              --with-rsvg=yes		        yesTIFF              --with-tiff=yes		        yesWEBP              --with-webp=yes		        noWMF               --with-wmf=yes		        yesX11               --with-x=yes			        yesXML               --with-xml=yes		        yesZLIB              --with-zlib=yes		        yesZSTD              --with-zstd=yes		        yesDelegate program configuration:GhostPCL          None			        pcl6 (unknown)GhostXPS          None			        gxps (unknown)Ghostscript       None			        gs (unknown)Font configuration:Apple fonts       --with-apple-font-dir=default	Dejavu fonts      --with-dejavu-font-dir=default	noneGhostscript fonts --with-gs-font-dir=default		noneURW-base35 fonts  --with-urw-base35-font-dir=default	/usr/share/fonts/urw-base35/Windows fonts     --with-windows-font-dir=default	none
这个基本没什么好说的,上面提到的依赖都安装好自然就水到渠成了,预编译完成后,make&& make install 就完成了
编译完成的日志如下:
la -rpath /usr/local/lib/ImageMagick-7.1.1/modules-Q16HDRI/filters filters/analyze_la-analyze.lo MagickCore/libMagickCore-7.Q16HDRI.la -lm )
libtool: install: /usr/bin/install -c filters/.libs/analyze.soT /usr/local/lib/ImageMagick-7.1.1/modules-Q16HDRI/filters/analyze.so
libtool: install: /usr/bin/install -c filters/.libs/analyze.lai /usr/local/lib/ImageMagick-7.1.1/modules-Q16HDRI/filters/analyze.la
libtool: finish: PATH="/usr/local/sbin:/usr/local/bin:/usr/sbin:/usr/bin:/root/bin:/sbin" ldconfig -n /usr/local/lib/ImageMagick-7.1.1/modules-Q16HDRI/filters
----------------------------------------------------------------------
Libraries have been installed in:/usr/local/lib/ImageMagick-7.1.1/modules-Q16HDRI/filtersIf you ever happen to want to link against installed libraries
in a given directory, LIBDIR, you must either use libtool, and
specify the full pathname of the library, or use the '-LLIBDIR'
flag during linking and do at least one of the following:- add LIBDIR to the 'LD_LIBRARY_PATH' environment variableduring execution- add LIBDIR to the 'LD_RUN_PATH' environment variableduring linking- use the '-Wl,-rpath -Wl,LIBDIR' linker flag- have your system administrator add LIBDIR to '/etc/ld.so.conf'。。。。。。。。。。。。。。。。。。。。。。。。。。。。。。。。。/usr/bin/install -c -m 644 ../Magick++/lib/Magick++/Blob.h ../Magick++/lib/Magick++/CoderInfo.h ../Magick++/lib/Magick++/Color.h ../Magick++/lib/Magick++/Drawable.h ../Magick++/lib/Magick++/Exception.h ../Magick++/lib/Magick++/Functions.h ../Magick++/lib/Magick++/Geometry.h ../Magick++/lib/Magick++/Image.h ../Magick++/lib/Magick++/Include.h ../Magick++/lib/Magick++/Montage.h ../Magick++/lib/Magick++/Pixels.h ../Magick++/lib/Magick++/ResourceLimits.h ../Magick++/lib/Magick++/SecurityPolicy.h ../Magick++/lib/Magick++/Statistic.h ../Magick++/lib/Magick++/STL.h ../Magick++/lib/Magick++/TypeMetric.h '/usr/local/include/ImageMagick-7/Magick++'/usr/bin/mkdir -p '/usr/local/include/ImageMagick-7'/usr/bin/install -c -m 644 ../Magick++/lib/Magick++.h '/usr/local/include/ImageMagick-7'/usr/bin/mkdir -p '/usr/local/share/man/man1'/usr/bin/install -c -m 644 ../MagickCore/MagickCore-config.1 ../MagickWand/MagickWand-config.1 ../Magick++/bin/Magick++-config.1 utilities/ImageMagick.1 utilities/animate.1 utilities/compare.1 utilities/composite.1 utilities/conjure.1 utilities/convert.1 utilities/display.1 utilities/identify.1 utilities/import.1 utilities/magick.1 utilities/magick-script.1 utilities/mogrify.1 utilities/montage.1 utilities/stream.1 '/usr/local/share/man/man1'/usr/bin/mkdir -p '/usr/local/lib/pkgconfig'/usr/bin/install -c -m 644 MagickCore/ImageMagick.pc MagickCore/ImageMagick-7.Q16HDRI.pc MagickCore/MagickCore.pc MagickCore/MagickCore-7.Q16HDRI.pc MagickWand/MagickWand.pc MagickWand/MagickWand-7.Q16HDRI.pc Magick++/lib/Magick++.pc Magick++/lib/Magick++-7.Q16HDRI.pc '/usr/local/lib/pkgconfig'
make[2]: Leaving directory `/root/ImageMagick-7.1.1-20/build'
make[1]: Leaving directory `/root/ImageMagick-7.1.1-20/build'
编译的时候需要注意,上面提到的预编译里面no不要太多,要不很多功能用不了,最后注意上面日志的提示
Libraries have been installed in:
/usr/local/lib/ImageMagick-7.1.1/modules-Q16HDRI/filters
这个目录还是加入到/etc/ld.so.conf 文件内,防止一些不清楚的错误
[root@centos7 ~]# ls -al /usr/local/lib/ImageMagick-6.9.13/modules-Q16/filters
total 40
drwxr-xr-x 2 root root    42 Feb 29 06:12 .
drwxr-xr-x 4 root root    35 Feb 29 06:12 ..
-rwxr-xr-x 1 root root  1100 Feb 29 06:12 analyze.la
-rwxr-xr-x 1 root root 35976 Feb 29 06:12 analyze.so
加入ld.so.conf 文件内,防止lib库不正常
[root@centos7 ~]# echo /usr/local/lib/ImageMagick-6.9.13/modules-Q16/filters >>/etc/ld.so.conf
[root@centos7 ~]# ldconfig
这篇关于Linux|centos7|yum和编译安装ImageMagick记录的文章就介绍到这儿,希望我们推荐的文章对编程师们有所帮助!


