本文主要是介绍华清远见嵌入式学习——驱动开发——day9,希望对大家解决编程问题提供一定的参考价值,需要的开发者们随着小编来一起学习吧!
目录
作业要求:
作业答案:
代码效果:
编辑
Platform总线驱动代码:
应用程序代码:
设备树配置:
作业要求:
通过platform总线驱动框架编写LED灯的驱动,编写应用程序测试,发布到CSDN
作业答案:
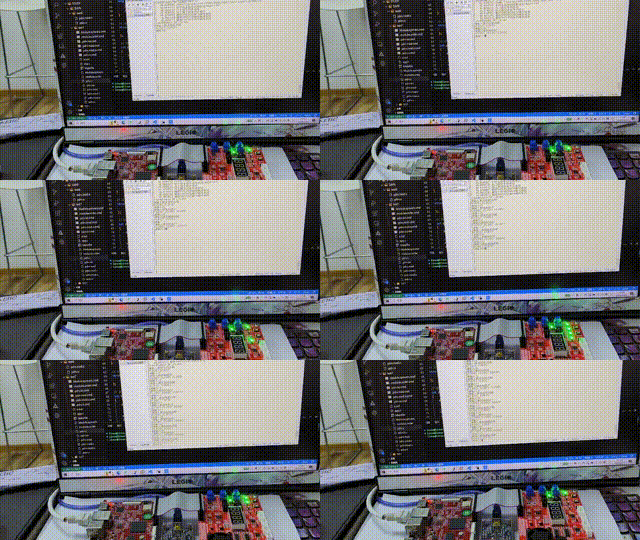
代码效果:
Platform总线驱动代码:
#include <linux/init.h>
#include <linux/module.h>
#include <linux/of_gpio.h>
#include <linux/gpio.h>
#include <linux/platform_device.h>
#include <linux/mod_devicetable.h>//主设备号
int major;//用于上传目录和设备节点信息
struct class *cls;
struct device *device;// led设备号
struct gpio_desc *gpiono1;
struct gpio_desc *gpiono2;
struct gpio_desc *gpiono3;// 创建功能码
#define LED_ON _IOW('l', 1, int)
#define LED_OFF _IOW('l', 0, int)// ioctl函数,用于控制led设备
long mycdev_ioctl(struct file *file, unsigned int cmd, unsigned long arg)
{switch (cmd){case LED_ON:switch (arg){case 1:gpiod_set_value(gpiono1, 1);break;case 2:gpiod_set_value(gpiono2, 1);break;case 3:gpiod_set_value(gpiono3, 1);break;}break;case LED_OFF:switch (arg){case 1:gpiod_set_value(gpiono1, 0);break;case 2:gpiod_set_value(gpiono2, 0);break;case 3:gpiod_set_value(gpiono3, 0);break;}break;}return 0;
}// 定义操作方法结构体变量并赋值
struct file_operations fops = {.unlocked_ioctl = mycdev_ioctl,
};// 封装probe函数,当设备和驱动匹配成功之后执行
int pdrv_probe(struct platform_device *dev)
{printk("%s:%s:%d\n", __FILE__, __func__, __LINE__);// 字符设备驱动注册major = register_chrdev(0, "mychrdev", &fops);if (major < 0){printk("字符设备驱动注册失败\n");return major;}printk("字符设备驱动注册成功:major=%d\n", major);// 向上提交目录cls = class_create(THIS_MODULE, "mychrdev");if (IS_ERR(cls)){printk("向上提交目录失败\n");return -PTR_ERR(cls);}printk("向上提交目录成功\n");// 向上提交设备节点信息int i; // 向上提交三次设备节点信息for (i = 0; i < 3; i++){device = device_create(cls, NULL, MKDEV(major, i), NULL, "myled%d", i);if (IS_ERR(dev)){printk("向上提交设备节点失败\n");return -PTR_ERR(dev);}}printk("向上提交设备节点成功\n");// 解析LED1的gpio编号gpiono1 = gpiod_get_from_of_node(dev->dev.of_node, "led1-gpio", 0, GPIOD_OUT_LOW, NULL);if (gpiono1 == NULL){printk("解析led1对应gpio编号失败\n");return -ENXIO;}printk("解析led1对应gpio编号成功\n");// 解析LED1的gpio编号gpiono2 = gpiod_get_from_of_node(dev->dev.of_node, "led2-gpio", 0, GPIOD_OUT_LOW, NULL);if (gpiono2 == NULL){printk("解析led2对应gpio编号失败\n");return -ENXIO;}printk("解析led2对应gpio编号成功\n");// 解析LED1的gpio编号gpiono3 = gpiod_get_from_of_node(dev->dev.of_node, "led3-gpio", 0, GPIOD_OUT_LOW, NULL);if (gpiono3 == NULL){printk("解析led3对应gpio编号失败\n");return -ENXIO;}printk("解析led3对应gpio编号成功\n");return 0;
}
// 封装remove函数,用于驱动和设备卸载时执行
int pdrv_remove(struct platform_device *dev)
{// 销毁设备节点信息device_destroy(cls, MKDEV(major, 0));// 销毁设备节点信息int i;for (i = 0; i < 3; i++){device_destroy(cls, MKDEV(major, i));}// 释放gpio编号gpiod_put(gpiono1);gpiod_put(gpiono2);gpiod_put(gpiono3);// 销毁目录class_destroy(cls);// 注销字符设备驱动unregister_chrdev(major, "mychrdev");printk("%s:%s:%d\n", __FILE__, __func__, __LINE__);return 0;
}
// 构建用于匹配的设备树表
struct of_device_id oftable[] = {{.compatible = "hqyj,myplatform",},{/* end node */}, // 防止数组越界
};
// 分配驱动对象并初始化
struct platform_driver pdrv = {.probe = pdrv_probe,.remove = pdrv_remove,.driver = {.name = "bbbbb",.of_match_table = oftable, // 设置设备树匹配},};
// 一键注册宏
module_platform_driver(pdrv);
MODULE_LICENSE("GPL");
应用程序代码:
#include<stdlib.h>
#include<stdio.h>
#include <sys/types.h>
#include <sys/stat.h>
#include <fcntl.h>
#include<unistd.h>
#include<string.h>
#include<sys/ioctl.h>//创建功能码
#define LED_ON _IOW('l',1,int)
#define LED_OFF _IOW('l',0,int)int main(int argc, char const *argv[])
{int a,b;int fd=open("/dev/myled0",O_RDWR);if(fd<0){printf("打开设备文件失败\n");exit(-1);}while(1){//从终端读取printf("请输入要实现的功能\n");printf("0(关灯) 1(开灯)\n");printf("请输入>");scanf("%d",&a);printf("请输入要控制的灯\n");printf("1(LED1) 2(LED2) 3(LED3)\n");printf("请输入>");scanf("%d",&b);switch(a){case 1:ioctl(fd,LED_ON,b);break;case 0:ioctl(fd,LED_OFF,b);break;}}close(fd);return 0;
}
设备树配置:
/dts-v1/;
#include "stm32mp157.dtsi"
#include "stm32mp15xa.dtsi"
#include "stm32mp15-pinctrl.dtsi"
#include "stm32mp15xxac-pinctrl.dtsi"
#include "stm32mp15xx-fsmp1x.dtsi"
/ {model = "HQYJ STM32MP157 FSMP1A Discovery Board";compatible = "st,stm32mp157a-dk1", "st,stm32mp157";aliases {serial0 = &uart4;serial5 = &usart3;};chosen {stdout-path = "serial0:115200n8";};reserved-memory {gpu_reserved: gpu@d4000000 {reg = <0xd4000000 0x4000000>;no-map;};optee_memory: optee@0xde000000 {reg = <0xde000000 0x02000000>;no-map;};};mynode@0x12345678{compatible = "hqyj,mynode";astring="hello 23091";uint  =<0xaabbccdd 0x11223344>;binarry=[00 0c 29 7b f9 be];mixed ="hello",[11 22],<0x12345678>;};myled{led1-gpio=<&gpioe 10 0>; led2-gpio=<&gpiof 10 0>;led3-gpio=<&gpioe 8 0>;           };myirq{compatible = "hqyj,myirq";interrupt-parent = <&gpiof>;interrupts=<9 0>,<7 0>,<8 0>;};myplatform{compatible = "hqyj,myplatform";led1-gpio=<&gpioe 10 0>;led2-gpio=<&gpiof 10 0>;led3-gpio=<&gpioe 8 0>;           interrupt-parent = <&gpiof>;interrupts=<9 0>;reg=<0X12345678 0X400>;};
};
这篇关于华清远见嵌入式学习——驱动开发——day9的文章就介绍到这儿,希望我们推荐的文章对编程师们有所帮助!


