本文主要是介绍NestJS入门4:MySQL typeorm 增删改查,希望对大家解决编程问题提供一定的参考价值,需要的开发者们随着小编来一起学习吧!
前文参考:
NestJS入门1
NestJS入门2:创建模块
NestJS入门3:不同请求方式前后端写法
1. 安装数据库相关模块
npm install @nestjs/typeorm typeorm mysql -S2. MySql中创建数据库

3. 添加连接数据库代码
app.module.ts
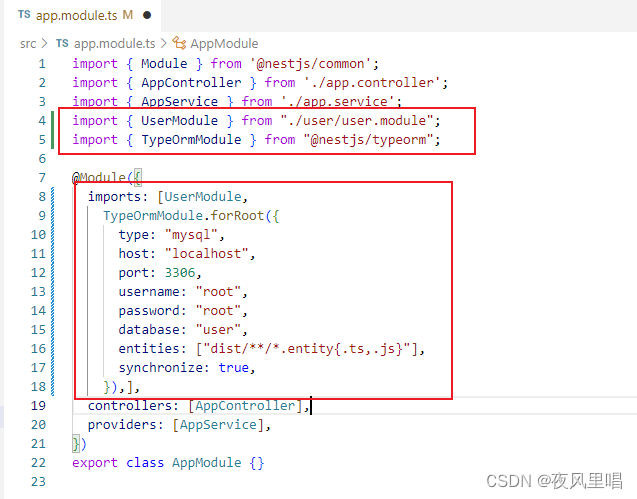
import { Module } from '@nestjs/common';
import { AppController } from './app.controller';
import { AppService } from './app.service';
import { UserModule } from "./user/user.module";
import { TypeOrmModule } from "@nestjs/typeorm";@Module({imports: [UserModule,TypeOrmModule.forRoot({type: "mysql",host: "localhost",port: 3306,username: "root",password: "root",database: "user",entities: ["dist/**/*.entity{.ts,.js}"],synchronize: true,}),],controllers: [AppController],providers: [AppService],
})
export class AppModule {}
4. 创建数据表
user/entities/user.entity.ts修改为
import { Column, Entity, PrimaryGeneratedColumn } from "typeorm";@Entity("user")//数据表名称,由本程序创建
export class UserEntity {@PrimaryGeneratedColumn()id: number; // 标记为主键,值自动生成@Column({ length: 20 })username: string;@Column({ length: 20 })password: string;@Column({ type: "timestamp", default: () => "CURRENT_TIMESTAMP" })create_time: Date;@Column({ type: "timestamp", default: () => "CURRENT_TIMESTAMP" })update_time: Date;
}
以上代码重新运行后,可以看到数据表

5. user.module导入并注册实体

import { Module } from '@nestjs/common';
import { UserService } from './user.service';
import { UserController } from './user.controller';
import { UserEntity } from "./entities/user.entity"; //增加语句
import { TypeOrmModule } from "@nestjs/typeorm"; // 增加语句@Module({imports: [TypeOrmModule.forFeature([UserEntity])], //增加语句:导入并注册实体controllers: [UserController],providers: [UserService],
})
export class UserModule {}
6. user.services增加数据库操作
import { Injectable } from '@nestjs/common';
import { CreateUserDto } from './dto/create-user.dto';
import { UpdateUserDto } from './dto/update-user.dto';
import { UserEntity } from './entities/user.entity';
import { InjectRepository } from '@nestjs/typeorm';
import { Repository } from 'typeorm';@Injectable()
export class UserService {constructor(@InjectRepository(UserEntity)private userRepository: Repository<UserEntity>,) {}// 增加async create(createUserDto: CreateUserDto) {this.userRepository.save(createUserDto);}// 查询所有async findAll() {return await this.userRepository.find();}// 查询特定
async findOne(id: number) {return await this.userRepository.findOne({where:{id:id}});}// 更新 async  update(id: number, updateUserDto: UpdateUserDto) {return await this.userRepository.update({id:id}, updateUserDto);}// 删除
async  remove(id: number) {return await this.userRepository.delete({id:id});}
}
user.controller.ts不需要修改
import { Controller, Get, Post, Body, Patch, Param, Delete } from '@nestjs/common';
import { UserService } from './user.service';
import { CreateUserDto } from './dto/create-user.dto';
import { UpdateUserDto } from './dto/update-user.dto';@Controller('user')
export class UserController {constructor(private readonly userService: UserService) {}// POST http://localhost:3000/user  Body加上X-www-form-urlencoded数据   @Post()create(@Body() createUserDto: CreateUserDto) {return this.userService.create(createUserDto);}//GET http://localhost:3000/user@Get()findAll() {console.log('Get');return this.userService.findAll();}//GET http://localhost:3000/user/1@Get(':id')findOne(@Param('id') id: string) {console.log('Get ' + id);return this.userService.findOne(+id);}//PATCH http://localhost:3000/user/1  Body加上数据@Patch(':id')update(@Param('id') id: string, @Body() updateUserDto: UpdateUserDto) {console.log('Patch ' + id);console.log(UpdateUserDto);return this.userService.update(+id, updateUserDto);}//DELETE http://localhost:3000/user/1 @Delete(':id')remove(@Param('id') id: string) {console.log('Delete ' + id);return this.userService.remove(+id);}
}
7. 运行验证
以上代码通过post可以数据到数据库,如下
(1)增加


(3)查询所有

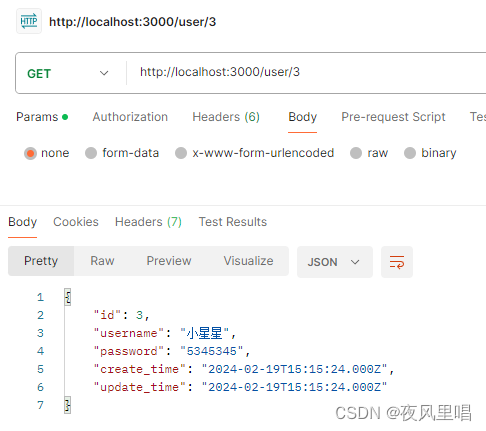
(4)查询单个
(5)更新

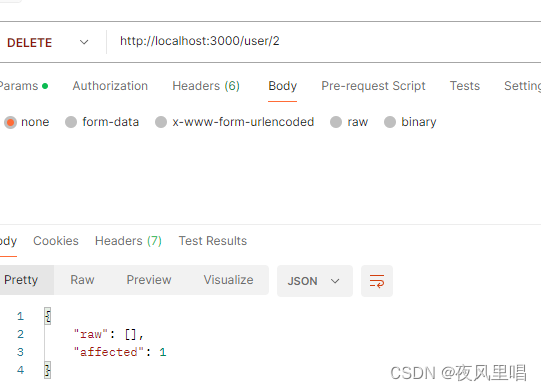
(2)删除
这篇关于NestJS入门4:MySQL typeorm 增删改查的文章就介绍到这儿,希望我们推荐的文章对编程师们有所帮助!


