本文主要是介绍java使用spirng框架之spring security,希望对大家解决编程问题提供一定的参考价值,需要的开发者们随着小编来一起学习吧!
spring security 核心功能
- 认证
- 授权
- 攻击防护
使用
引入pom依赖
<dependency><groupId>org.springframework.boot</groupId><artifactId>spring-boot-starter-security</artifactId></dependency>有两种授权认证方式
- 基于内存
- 基于数据库
一、基于内存的认证
1、创建类继承WebSecurityConfigurerAdapter重写两个configure方法
一个是配置AuthenticationManagerBuilder(添加用户),另一个配置HttpSecurity
/*** 多Security安全配置*/
@Configuration
public class MuitSecurityConfiguration{/*** 定义默认的加密方式为不加密* @return*/@BeanPasswordEncoder passwordEncoder(){return NoOpPasswordEncoder.getInstance();}/***管理员安全配置*/@Configuration@Order(1)//数字越小优先级高,没有order注解,优先级最低class AdminSecurityConfiguration extends WebSecurityConfigurerAdapter {@Overrideprotected void configure(AuthenticationManagerBuilder auth) throws Exception {//创建一个用户admin,并赋予md5密码和admin角色(角色前面需要加ROLE_)User user=new User("admin","202cb962ac59075b964b07152d234b70", Arrays.asList(new SimpleGrantedAuthority("ROLE_admin")));//使用基于内存认证方式//第一种 使用UserDetailsauth.inMemoryAuthentication().withUser(user).passwordEncoder(new MessageDigestPasswordEncoder("MD5"));//添加一个用户admin,并设置密码加密方式md5}@Overrideprotected void configure(HttpSecurity http) throws Exception {http.csrf().disable()//禁用csrf跨站脚本攻击防御.formLogin()//登录//.loginPage("/login.html")//登录页面地址(未登录重定向的路径).loginProcessingUrl("/login")//登录接口(处理认证请求的路径,表单form中action的地址.usernameParameter("username")//登录接口参数名username.passwordParameter("password")//登录接口参数名password.defaultSuccessUrl("/index.html")//登录成功后的页面.successHandler(new MyAuthenticationSuccessHandler())//登录成功后处理逻辑.failureHandler(new MyAuthenticationFailureHandler())//登录失败后处理逻辑.permitAll()//不需要通过验证就能访问.and().authorizeRequests()//请求验证.antMatchers("/**.css","/**.js").permitAll()//css文件和js文件都运行访问.antMatchers("/user/**").hasAnyRole("admin","user")//有admin或user的角色才能访问/user前缀的url.antMatchers("/db/**").hasAnyAuthority("db")//有访问db资源权限的用户才能访问/user前缀的url.anyRequest().authenticated()//其他的请求都需要登录后才能访问.and().logout()//退出登录.logoutUrl("/logout")//退出登录请求的url.clearAuthentication(true)//清除身份认证信息.invalidateHttpSession(true)//清除session.logoutSuccessHandler(new MySimpleUrlLogoutSuccessHandler());//退出登录后处理逻辑}}/***普通用户单独安全配置*/@Configurationpublic class OtherSecurityConfiguration extends WebSecurityConfigurerAdapter {@Overrideprotected void configure(AuthenticationManagerBuilder auth) throws Exception {//第二种 使用UserDetailsBuilder和上面Bean的空密码加密方式auth.inMemoryAuthentication().withUser("user").password("123").roles("user")//添加一个用户user,密码123,并赋予user角色.and().withUser("db").password("123").authorities("db");//添加一个用户db,密码123,并赋予访问db资源的权限}@Overrideprotected void configure(HttpSecurity http) throws Exception {http.authorizeRequests()//请求验证.antMatchers("/**.css","/**.js").permitAll()//css文件和js文件都运行访问.antMatchers("/admin/**").hasRole("admin")//有admin的角色才能访问/admin前缀的url.anyRequest().authenticated();//其他的请求都需要登录后才能访问}}}
2、创建自定义处理类:
/*** 自定义登录成功处理类*/class MyAuthenticationSuccessHandler extends SimpleUrlAuthenticationSuccessHandler{public void onAuthenticationSuccess(HttpServletRequest request, HttpServletResponse response, Authentication authentication) throws IOException, ServletException {System.out.println("自定义的成功处理逻辑");//第一种 重定向到defaultSuccessUrl成功页面(适合传统项目)//super.onAuthenticationSuccess(request, response, authentication);//第二种 或是返回json串登录成功(适合前后端分离项目)response.setContentType("text/html;charset=utf-8");PrintWriter writer = response.getWriter();HashMap<String, Object> map = new HashMap<>();map.put("code",0);map.put("message","登录成功");writer.write(new ObjectMapper().writeValueAsString(map));writer.flush();writer.close();}}/*** 自定义登录失败处理类*/class MyAuthenticationFailureHandler extends SimpleUrlAuthenticationFailureHandler {@Overridepublic void onAuthenticationFailure(HttpServletRequest request, HttpServletResponse response, AuthenticationException exception) throws IOException, ServletException {System.out.println("自定义的失败处理逻辑");//第一种 重定向到失败页面(适合传统项目)//super.onAuthenticationFailure(request, response, exception);//第二种 或是返回json串登录失败及原因(适合前后端分离项目)response.setContentType("text/html;charset=utf-8");PrintWriter writer = response.getWriter();response.setStatus(401);HashMap<String, Object> map = new HashMap<>();map.put("code",401);if(exception instanceof LockedException){map.put("message","账户已锁定,登录失败");}else if(exception instanceof BadCredentialsException){map.put("message","用户名或密码错误,登录失败");}else if(exception instanceof DisabledException){map.put("message","账户已禁用,登录失败");}else if(exception instanceof AccountExpiredException){map.put("message","账户已过期,登录失败");}else if(exception instanceof CredentialsExpiredException){map.put("message","密码已过期,登录失败");}else{map.put("message","登录失败");}writer.write(new ObjectMapper().writeValueAsString(map));writer.flush();writer.close();}}/*** 自定义退出登录成功处理类*/class MySimpleUrlLogoutSuccessHandler extends SimpleUrlLogoutSuccessHandler {@Overridepublic void onLogoutSuccess(HttpServletRequest request, HttpServletResponse response, Authentication authentication) throws IOException, ServletException {System.out.println("自定义的退出登录处理逻辑");//第一种 重定向到退出成功的页面(适合传统项目)//super.onLogoutSuccess(request, response, authentication);//第二种 或是返回json串登录成功(适合前后端分离项目)response.setContentType("text/html;charset=utf-8");PrintWriter writer = response.getWriter();HashMap<String, Object> map = new HashMap<>();map.put("code",0);map.put("message","退出登录成功");writer.write(new ObjectMapper().writeValueAsString(map));writer.flush();writer.close();}}3、创建controller接口测试
@RequestMapping("/admin/get")public String test2() {return "hello admin";}@RequestMapping("/user/get")public String test3() {return "hello user";}@RequestMapping("/db/get")public String test4() {return "hello db";}二、基于数据库的认证方式
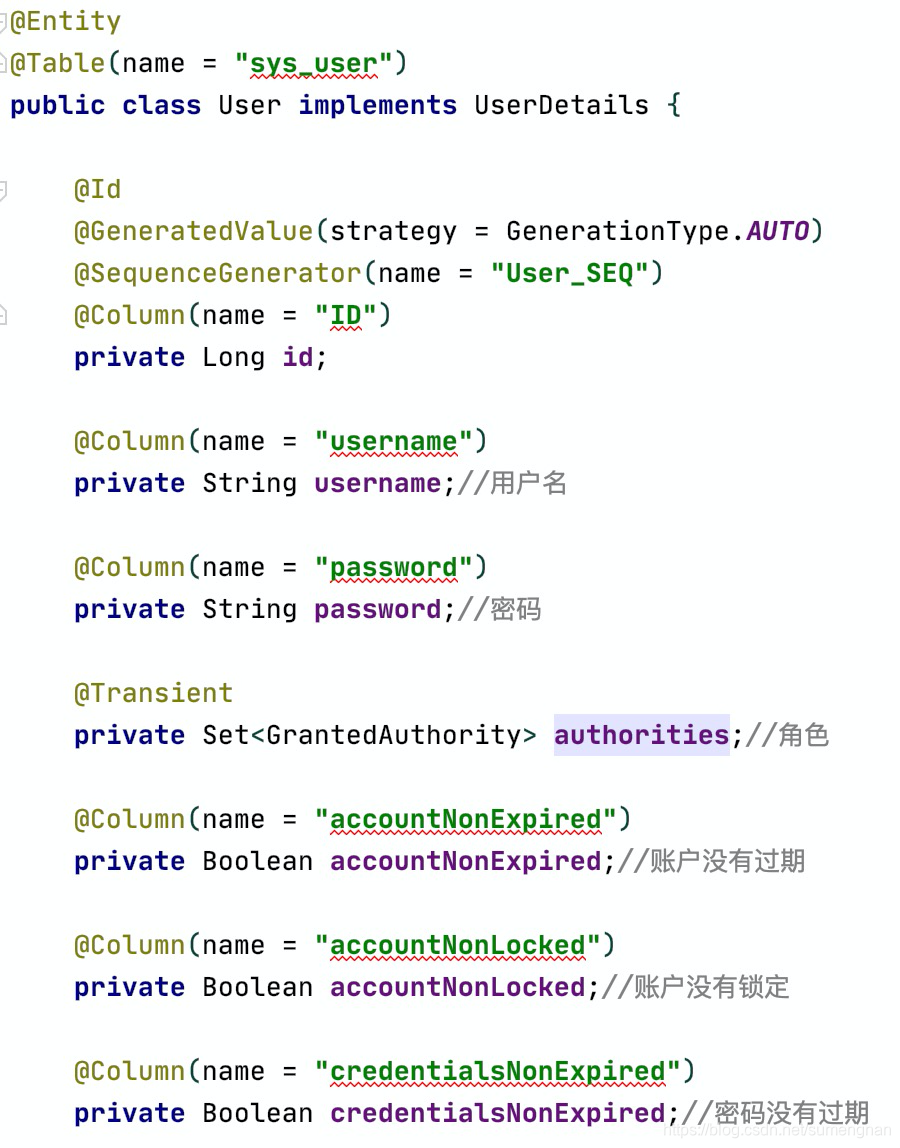
1、创建user实体,实现UserDetails接口(也可以不用实现,只是第二步会有一点改变)
@Entity
@Table(name = "my_user")
public class User implements UserDetails {@Id@GeneratedValue(strategy = GenerationType.AUTO)@SequenceGenerator(name = "User_SEQ")@Column(name = "ID")private Long id;@Column(name = "username")private String username;//用户名@Column(name = "password")private String password;//密码@Transientprivate Set<GrantedAuthority> authorities;//角色@Column(name = "accountNonExpired")private Boolean accountNonExpired;//账户没有过期@Column(name = "accountNonLocked")private Boolean accountNonLocked;//账户没有锁定@Column(name = "credentialsNonExpired")private Boolean credentialsNonExpired;//密码没有过期@Column(name = "enabled")private Boolean enabled;//账户可用public Long getId() {return id;}public void setId(Long id) {this.id = id;}public void setPassword(String password) {this.password = password;}@Overridepublic Collection<? extends GrantedAuthority> getAuthorities() {return authorities;}@Overridepublic String getPassword() {return password;}@Overridepublic String getUsername() {return username;}public void setUsername(String username) {this.username = username;}public void setAuthorities(Set<GrantedAuthority> authorities) {this.authorities = authorities;}public Boolean getAccountNonExpired() {return accountNonExpired;}public void setAccountNonExpired(Boolean accountNonExpired) {this.accountNonExpired = accountNonExpired;}public Boolean getAccountNonLocked() {return accountNonLocked;}public void setAccountNonLocked(Boolean accountNonLocked) {this.accountNonLocked = accountNonLocked;}public Boolean getCredentialsNonExpired() {return credentialsNonExpired;}public void setCredentialsNonExpired(Boolean credentialsNonExpired) {this.credentialsNonExpired = credentialsNonExpired;}public Boolean getEnabled() {return enabled;}public void setEnabled(Boolean enabled) {this.enabled = enabled;}@Overridepublic boolean isAccountNonExpired() {return accountNonExpired;}@Overridepublic boolean isAccountNonLocked() {return accountNonLocked;}@Overridepublic boolean isCredentialsNonExpired() {return credentialsNonExpired;}@Overridepublic boolean isEnabled() {return enabled;}
}
2、添加repository写一个根据username查询用户的sql,以下是heirbnate的写法,也可用mybatis
public interface UserRepository extends CrudRepository<User, Long> {User findByUsername(String username);//根据用户名查询
}
3、添加service接口,继承UserDetailsService。或者serviceImpl实现UserDetailsService也行
public interface UserService extends UserDetailsService {
}
4、 添加serviceImpl实现service。重写loadUserByUsername方法
@Service
public class UserServiceImpl implements UserService {@AutowiredUserRepository userRepository;@Overridepublic UserDetails loadUserByUsername(String username) throws UsernameNotFoundException {User user = userRepository.findByUsername(username);if(user==null){throw new UsernameNotFoundException("登录失败,用户名不存在!");}return user;//如果用户没有实现UserDetails接口,则需要拼装org.springframework.security.core.userdetails.User类(UserDetails的实现类)再返回//例如:/*User user=userRepository.findByUsername(username);org.springframework.security.core.userdetails.User user2=new org.springframework.security.core.userdetails.User(user.getUsername(),user.getPassword(), Arrays.asList(new SimpleGrantedAuthority("ROLE_admin")));return user2;* */}
}
用户登录时,security会调用loadUserByUsername方法去数据库查询数据
5、添加配置。auth.userDetailsService使用基于数据库的认证方式
@Configuration
public class SecurityConfiguration extends WebSecurityConfigurerAdapter {@AutowiredUserService userService;@BeanPasswordEncoder passwordEncoder(){return NoOpPasswordEncoder.getInstance();}@Overrideprotected void configure(AuthenticationManagerBuilder auth) throws Exception {auth.userDetailsService(userService);}@Overrideprotected void configure(HttpSecurity http) throws Exception {//……胜率代码}
}
6、添加数据库用户数据,实验登录

7、完毕
三、基于注解的拦截方式
以上都是基于url的拦截方式
还有一种基于注解的拦截方式,用于保护方法
1、添加@EnableGlobalMethodSecurity注解,prePostEnabled ,securedEnabled设置为true
@SpringBootApplication
//打开Security方法安全注解,可以使用@PreAuthorize、@PostAuthorize和@Secured注解
@EnableGlobalMethodSecurity(prePostEnabled = true,securedEnabled = true)
public class DemoApplication {public static void main(String[] args) {SpringApplication.run(DemoApplication.class, args);}}
2、在controller方法中添加 @PreAuthorize、@PostAuthorize、@Secured注解
@RequestMapping("/test")@PreAuthorize("hasRole('normal') and hasRole('normal3')")//有normal和normal3角色才能访问此接口public String test() {return "hello normal and normal3";}@RequestMapping("/testt")@PostAuthorize("hasAnyRole('admin','normal2')")//有normal1或normal2角色才能访问此接口public String testt() {return "hello admin or normal2";}@RequestMapping("/testtt")@Secured("normal3")//有normal3角色才能访问此接口public String testtt() {return "hello normal3";}四、角色继承关系
* 例如:admin角色同时具有db角色和user角色的权限
* db角色同时具有user角色的权限
/*** 角色继承关系* 例如:admin角色同时具有db角色和user角色的权限* db角色同时具有user角色的权限* @return*/@BeanRoleHierarchy roleHierarchy(){RoleHierarchyImpl roleHierarchy = new RoleHierarchyImpl();roleHierarchy.setHierarchy("ROLE_admin > ROLE_db ROLE_db > ROLE_user");return roleHierarchy;}五、动态权限配置
以上权限都是写死在代码里,不够灵活,无法实现资源和角色的动态跳转
除此之外还可以自定义权限配置(记录在数据库表中),实现动态url权限
一、增加四个表
1、用户表sys_user (id、username、password)

对应数据库表增加一条测试数据admin

2、角色表sys_role (id、name)

对应数据库表增加一条测试数据admin

3、权限表sys_authority (id、code、url_pattern)

对应数据库表增加两条权限

4、用户角色权限关联表sys_user_role_authority (id、user_id、role_id、authority_id)

对应数据库表增加两条关联数据 admin拥有admin角色和user角色

二、添加repository写一些查询
public interface UserRepository extends CrudRepository<User, Long> {/*** 根据用户名查询用户* @param username* @return*/User findByUsername(String username);/*** 根据用户名查询用户拥有的权限* @param username* @return*/@Query("select u.authority from UserRoleAuthority u where  u.user.username=?1 ")List<Authority> findAuthorityByUsername(String username);/*** 查询所有的权限* @return*/@Query("from Authority")List<Authority> findAllAuthority();
}
三、自定义类实现FilterInvocationSecurityMetadataSource接口的getAttributes、getAllConfigAttributes和supports三个方法
/*** 自定义认证规则,* 也就是用于加载URL与权限对应关系的*/@Configurationclass MyFilterInvocationSecurityMetadataSource implements FilterInvocationSecurityMetadataSource {/*** 定义成员变量spring的AntPathMatcher用来匹配url(构造方法设置分隔符)*/AntPathMatcher pathMatcher = new AntPathMatcher(AntPathMatcher.DEFAULT_PATH_SEPARATOR);/*** 获取某个受保护的安全对象object的所需要的权限信息,是一组ConfigAttribute对象的集合,* 如果该安全对象object不被当前SecurityMetadataSource对象支持,则抛出异常IllegalArgumentException。* 与supports配合使用*/@Overridepublic Collection<ConfigAttribute> getAttributes(Object object) throws IllegalArgumentException {String requestUrl = ((FilterInvocation) object).getRequestUrl();//获取用户请求的路径//应使用数据库查询角色和拦截路径的关系//查询出所有的url和和权限List<Authority> list = userRepository.findAllAuthority();List<ConfigAttribute> matchedList = new ArrayList<>();for (Authority authority : list) {if(pathMatcher.match(authority.getUrl_pattern(),requestUrl)){//进行url匹配规则校验matchedList.add(new SecurityConfig(authority.getCode()));}}if(!matchedList.isEmpty()){//如果规则能够匹配return matchedList;}return SecurityConfig.createList("ROLE_LOGIN");}/*** 获取该SecurityMetadataSource对象中保存的针对所有安全对象的权限信息的集合。* 该方法的主要目的是被AbstractSecurityInterceptor用于启动时校验每个ConfigAttribute对象。* @return*/@Overridepublic Collection<ConfigAttribute> getAllConfigAttributes() {return null;}/*** 用于告知调用者当前SecurityMetadataSource是否支持此类安全对象,只有支持的时候,才能对这类安全对象调用getAttributes方法* @param clazz* @return*/@Overridepublic boolean supports(Class<?> clazz) {return true;}}四、自定义类实现AccessDecisionManager接口的decide和supports方法
/*** 自定义的决策管理器,* 用来决定对于一个用户的请求是否基于通过的中心控制*/class MyAccessDecisionManager implements AccessDecisionManager{/*** 对比决策.如果当前用户允许登录,那么直接return即可。* 如果当前用户不许运行登录,则抛出一个 AccessDeniedException异常。* @param authentication 当前登录用户信息* @param configAttributes SecurityMetadataSource.getAttributes() 方法获取这个URL相关的权限*/@Overridepublic void decide(Authentication authentication, Object object, Collection<ConfigAttribute> configAttributes) throws AccessDeniedException, InsufficientAuthenticationException {//非空判断if(configAttributes.isEmpty()){return;}//获取访问此url所需要的权限集合Iterator<ConfigAttribute> iterator = configAttributes.iterator();while (iterator.hasNext()){ConfigAttribute configAttribute = iterator.next();//获取当前用户的权限和url权限集合进行比较。如果运行则return,否则抛出异常for (GrantedAuthority authority : authentication.getAuthorities()) {if(authority.getAuthority().equals(configAttribute.getAttribute())){return;}}}throw new AccessDeniedException("No Authority");}@Overridepublic boolean supports(ConfigAttribute attribute) {return true;}@Overridepublic boolean supports(Class<?> clazz) {return true;}}五、增加config配置
@Configuration
public class SecurityConfiguration extends WebSecurityConfigurerAdapter{@AutowiredUserService userService;@AutowiredUserRepository userRepository;@BeanPasswordEncoder passwordEncoder(){return NoOpPasswordEncoder.getInstance();}@Overrideprotected void configure(AuthenticationManagerBuilder auth) throws Exception {auth.userDetailsService(userService);}@Overrideprotected void configure(HttpSecurity http) throws Exception {http.csrf().disable()//禁用csrf跨站脚本攻击防御.formLogin()//登录.permitAll()//不需要通过验证就能访问.and().authorizeRequests()//请求验证.antMatchers("/**.css","/**.js").permitAll()//css文件和js文件都运行访问.withObjectPostProcessor(new ObjectPostProcessor<FilterSecurityInterceptor>() {@Overridepublic <O extends FilterSecurityInterceptor> O postProcess(O object) {object.setAccessDecisionManager(new MyAccessDecisionManager());//注入用户登录权限object.setSecurityMetadataSource(new MyFilterInvocationSecurityMetadataSource());//注入用户所请求的地址所需要的权限return object;}}).anyRequest().authenticated()//其他的请求都需要登录后才能访问.and().logout()//退出登录.logoutUrl("/logout")//退出登录请求的url.clearAuthentication(true)//清除身份认证信息.invalidateHttpSession(true);//清除session}
}
六、登录测试admin
访问/admin/get可以访问

访问/db/get,报错403

这篇关于java使用spirng框架之spring security的文章就介绍到这儿,希望我们推荐的文章对编程师们有所帮助!


