本文主要是介绍MirrorLink(四 VNC --Ubuntu下编译),希望对大家解决编程问题提供一定的参考价值,需要的开发者们随着小编来一起学习吧!
《libvncserver-LibVNCServer-0.9.12.tar.gz》里面是libvncserver/libvncclient 的源码;
下载路径是:
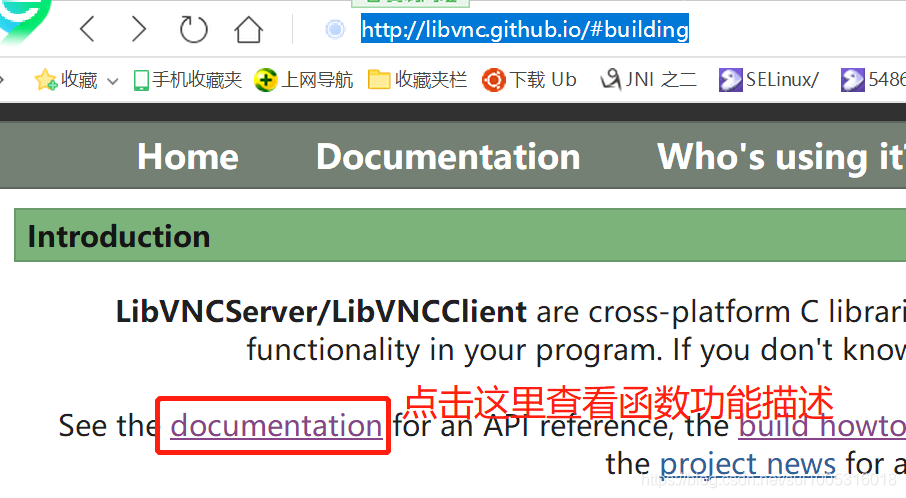
http://libvnc.github.io/#building;
而函数的说明在

里面也描述了如何compile:
Building:
LibVNCServer uses CMake, so you can build via:
mkdir build
cd build
cmake .. ---注意这有2点
cmake --build . ---注意这有1点
For some more comprehensive examples that include installation of dependencies, see the Unix CI and Windows CI build setups.
If building for Android (see the NDK CMake guide as a reference):
mkdir build
cd build
cmake .. -DANDROID_NDK= -DCMAKE_TOOLCHAIN_FILE= -DANDROID_NATIVE_API_LEVEL= -DWITH_PNG=OFF # NDK not shipping png per default
cmake --build .
在Ubuntu 14.04中实际编译:
mkdir build
cd build
cmake .. ---注意这有2点
cmake --build . ---注意这有1点
问题点:提示没有“cmake”, 执行 apt-get install cmake 安装;
重新执行“cmake ..” 提示:“CMake 3.4 or higher is required. You are running version 2.8.12.2” 即需要更高版本的CMake
----从网路中看到Ubuntu只能自动安装到2.8 , 所以更高版本需要自行下载更高版本的Cmake 源码,编译后进行安装;
下载Cmake 源码的网址是:https://cmake.org/download/
解压不要在“共享文件夹”中进行,否则很慢;解压后先cd 到解压文件夹下,然后自行“./configure”, 待其执行完成后,再输入“make”进行编译。后面操作可以参考:https://www.linuxidc.com/Linux/2018-09/154165.htm
à” 3. 创建软链接”, 但在执行软链接前需要先编译等到bin 文件夹,
----紫色部分的,实际测试异常会提示cmake 异常;如下:
软链接后,尝试执行“cmake --version” ,但提示“CMake Error: Could not find CMAKE_ROOT !!!”

实际测试能正常安装cmake 的方式是:
以下是测试例子:
cd /path/to/cmake-3.10.2
// 先执行
./bootstrap --prefix=/usr
make
sudo make install
make编译前需要先执行
./bootstrap --prefix=/usr
最后再
make install
自动会安装到/usr/bin/目录;
安装完成后,执行cmake –version
root@ubuntu:/home/liyingbin/Documents/cmake-3.14.0-rc3# cmake --version
cmake version 3.14.0-rc3
CMake suite maintained and supported by Kitware (kitware.com/cmake).
root@ubuntu:/home/liyingbin/Documents/cmake-3.14.0-rc3#
问题点:执行“cmake ..” 时提示以下错误,

网路中,Ubuntu 安装LZO 的方法:
https://blog.csdn.net/leon1741/article/details/78189194
lzo 的解压以及编译、安装方式:
tar -xzvf lzo-2.10.tar.gz
cd lzo-2.10
./configure --enable-shared
make
make install
复制lib
cp /usr/local/lib/*lzo* /usr/lib/
此时再次执行“cmake ..”, 发现其已经找到了lzo 对应的so

问题点:没有找到JPEG,此时应该直接下载libjpeg-turbo;
libjpeg-turbo的下载路径是
https://sourceforge.net/projects/libjpeg-turbo/files/
解压后看到,libjpeg-turbo使用cmake 形式进行编译

使用cat BUILDING.md 查看编译方式
一定要先确认Ubuntu 中是否已经安装了nasm , 否则编译libjpeg-turbo会提示错误
编译以及安装方式:
mkdir build
cd build
cmake .. ---注意这有2点; 或者cmake -G "Unix Makefiles" .. 这也有2点;
make
make install
编译方式以及注意事项参考https://blog.csdn.net/dancer__sky/article/details/78631577
问题点:执行“cmake ..” 依然提示错误

重新参考https://blog.csdn.net/dancer__sky/article/details/78631577进行编译,
问题点:提示没有找到PNG
Libpng 的下载路径是:https://sourceforge.net/projects/libpng/files/
安装command 是:
./configure --prefix=/usr
make
make install
安装后重新执行“cmake ..”,已经已经找到了libpng.so

问题点:提示没有找到SDL2;
可以参考:https://blog.csdn.net/zhouzhenhe2008/article/details/54428761
执行这两个命令就可以了
sudo apt-get install libsdl2-2.0
sudo apt-get install libsdl2-dev

问题点:提示没有找到GnuTLS;
可以参考:https://www.linuxidc.com/Linux/2013-10/91966.htm
https://gnutls.org/ ----GnuTLS 网址,当前下载的是3.6.6版本
编译:
xz -d gnutls-3.6.6.tar.xz
tar xf gnutls-3.6.6.tar
cd gnutls-3.6.6.tar
PKG_CONFIG_PATH=/usr/local/lib64/pkgconfig:/usr/lib64/pkgconfig:/usr/local/lib/pkgconfig:/usr/lib/pkgconfig ./configure --enable-shared
make
make install
编译错误:当执行
“PKG_CONFIG_PATH=/usr/local/lib64/pkgconfig:/usr/lib64/pkgconfig:/usr/local/lib/pkgconfig:/usr/lib/pkgconfig ./configure --enable-shared”提示错误:

Libnettle 3.4.1的下载路径是:
http://www.linuxfromscratch.org/blfs/view/svn/postlfs/nettle.html
tar zxvf nettle-3.4.1.tar.gz
./configure --prefix=/usr --disable-static &&
make
make install &&
chmod -v 755 /usr/lib/lib{hogweed,nettle}.so &&
install -v -m755 -d /usr/share/doc/nettle-3.4.1 &&
install -v -m644 nettle.html /usr/share/doc/nettle-3.4.1
执行以上command 时提示错误:

同时重新在gnutls-3.6.6中执行
“PKG_CONFIG_PATH=/usr/local/lib64/pkgconfig:/usr/lib64/pkgconfig:/usr/local/lib/pkgconfig:/usr/lib/pkgconfig ./configure --enable-shared”,提示以下错误

以上错误可以参考http://www.cnblogs.com/siikee/p/4272104.html,以上错误的关键是GMP;
安装GMP 可以参考:https://blog.csdn.net/shengerjianku/article/details/80721510
GMP 安装完成后,重新安装nettle
此时重新编译Nettle ,提示错误:
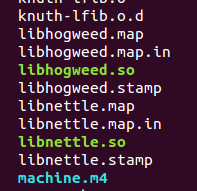
 修改了ras-sing-tr.c后,能正常编译得到libhogweed.so 和 libnettle.so,而在安装GMP前编译nettle只能得到libnettle.so

同时之前的
 错误也没有;
此时重新在gnutls-3.6.6下执行
PKG_CONFIG_PATH=/usr/local/lib64/pkgconfig:/usr/lib64/pkgconfig:/usr/local/lib/pkgconfig:/usr/lib/pkgconfig ./configure --enable-shared
之前的

关闭;
但新的问题点是:

需要注意的是,这里需要的是“Libtasn1 4.9”,实测安装别的版本,问题依旧;
版本可以从:https://ftp.gnu.org/gnu/libtasn1/下载;
同时我们可以在https://ftp.gnu.org/gnu/中找到很多gnu使用的lib;
编译
./configure --prefix=/usr --disable-static
make
make install
编译、安装后实测,问题close;
问题点:在gnutls-3.6.6下执行
PKG_CONFIG_PATH=/usr/local/lib64/pkgconfig:/usr/lib64/pkgconfig:/usr/local/lib/pkgconfig:/usr/lib/pkgconfig ./configure --enable-shared ,
提示错误“Libunistring was not found”

libunistring的下载网址是:https://ftp.gnu.org/gnu/libunistring/
编译
./configure --prefix=/usr --disable-static
make
make install
编译、安装后实测,问题close;
问题点:在gnutls-3.6.6下执行
PKG_CONFIG_PATH=/usr/local/lib64/pkgconfig:/usr/lib64/pkgconfig:/usr/local/lib/pkgconfig:/usr/lib/pkgconfig ./configure --enable-shared ,
提示错误“Nettle lacks the required rsa_sec_decrypt function”
 ibidn2 的下载路径是:https://ftp.gnu.org/gnu/libidn/
编译
./configure --prefix=/usr --disable-static
make
make install
编译安装后提idn2已经找到

checking for nettle_secp_192r1 in -lhogweed... no
checking for nettle_rsa_sec_decrypt... no
configure: error: Nettle lacks the required rsa_sec_decrypt function
以上问题点:“configure: error: Nettle lacks the required rsa_sec_decrypt function”,改为使用gnutls-3.5.9 没有此config要求;
-----基于后续在“gnutls-3.5.9”中遇到的问题点解决,间接理清了以上问题原因:以上问题原因是其调用了OS中发现在/usr/lib/x86_64-linux-gnu 中比较旧版本的 GMP 库,把其修改名字后就能识别到新安装到/usr/lib/ 的新版本;

重新执行config 动作,之前提示no的错误close;

问题点:对gnutls-3.5.9执行“./configure --prefix=/usr --disable-static”后,提示的问题点是:

Unbound的网址是:http://www.linuxfromscratch.org/blfs/view/svn/server/unbound.html
此时先安装OpenSSL,可以参考:https://blog.csdn.net/xiatiancc/article/details/78913163
若第一种当时提示异常,
请按照网址中的第二种方式操作,OpenSSL的下载网址是https://www.openssl.org/source/
libexpat的下载路径是:https://packages.ubuntu.com/zh-cn/trusty/libexpat1-dev

安装完成libunbound 后重新对gnutls-3.5.9执行“./configure --prefix=/usr --disable-static”

提示unbound 已经是支援状态
问题点:对gnutls-3.5.9执行“./configure --prefix=/usr --disable-static”,
提示错误 “p11-kit >= 0.23.1 was not found”

p11-kit的下载路径是:https://github.com/p11-glue/p11-kit/releases
编译
./configure --prefix=/usr --disable-static
make
make install
对p11-kit-0.23.15执行“./configure --prefix=/usr --disable-static”,
提示问题点:libffi 没有找到;

libffi的下载路径是:http://sourceware.org/libffi/
编译
./configure --prefix=/usr --disable-static
make
make install
此时重新对gnutls-3.5.9执行“./configure --prefix=/usr --disable-static”,显示config 完成;

后续执行
make
make install
问题点:对gnutls-3.5.9执行“make”操作,出现的问题点是:
//usr/lib/libhogweed.so.4: undefined reference to `__gmpn_sec_powm_itch'
//usr/lib/libhogweed.so.4: undefined reference to `__gmpz_limbs_write'
../lib/.libs/libgnutls.so: undefined reference to `p11_kit_uri_get_pin_value'
//usr/lib/libhogweed.so.4: undefined reference to `__gmpz_limbs_finish'
//usr/lib/libhogweed.so.4: undefined reference to `__gmpn_sec_powm'
//usr/lib/libhogweed.so.4: undefined reference to `__gmpn_sec_invert'
../lib/.libs/libgnutls.so: undefined reference to `asn1_decode_simple_ber@LIBTASN1_0_3'
//usr/lib/libhogweed.so.4: undefined reference to `__gmpz_roinit_n'
//usr/lib/libhogweed.so.4: undefined reference to `__gmpz_limbs_modify'
//usr/lib/libhogweed.so.4: undefined reference to `__gmpn_sec_add_1'
//usr/lib/libhogweed.so.4: undefined reference to `__gmpn_sec_mul_itch'
//usr/lib/libhogweed.so.4: undefined reference to `__gmpn_cnd_sub_n'
//usr/lib/libhogweed.so.4: undefined reference to `__gmpn_sec_mul'
../lib/.libs/libgnutls.so: undefined reference to `asn1_der_decoding2@LIBTASN1_0_3'
//usr/lib/libhogweed.so.4: undefined reference to `__gmpn_sec_invert_itch'
//usr/lib/libhogweed.so.4: undefined reference to `__gmpn_sec_div_r'
//usr/lib/libhogweed.so.4: undefined reference to `__gmpz_limbs_read'
//usr/lib/libhogweed.so.4: undefined reference to `__gmpn_cnd_add_n'
//usr/lib/libhogweed.so.4: undefined reference to `__gmpn_sec_add_1_itch'
../lib/.libs/libgnutls.so: undefined reference to `_idn2_punycode_decode'
//usr/lib/libhogweed.so.4: undefined reference to `__gmpn_sec_div_r_itch'
这里的API 识别方式:
如undefined reference to `__gmpn_sec_powm_itch',其中“mpn_sec_powm_itch”是函数名称;
以上的“mpn_xxx”函数都是GMP 库中的;
解决方式:
在OS 中,通过command “find / -name libgmp*”查看“libgmp.so”相关版本
得到,发现在/usr/lib/x86_64-linux-gnu 中比较旧版本的 GMP 库,把其修改名字后就能识别到新安装到/usr/lib/ 的新版本;

修改后,不能找到GMP库函数的错误close;

实测发现:以上修改“/usr/lib/x86_64-linux-gnu 中比较旧版本的 GMP 库”后,此时重新编译gnutls-3.6.6 的“./configure --prefix=/usr --disable-static” 也能configure 通过;
对gnutls-3.6.6执行make操作也有同样的错误:

问题点:../lib/.libs/libgnutls.so: undefined reference to `p11_kit_uri_get_pin_value'
通过command 查看当前OS 中的libp11-kit.so

发现同样在/usr/lib/x86_64-linux-gnu/ 中存在libp11-kit.so,把其名字修改;
修改名字后实际测试,问题点close;
问题点:
./lib/.libs/libgnutls.so: undefined reference to `asn1_decode_simple_ber@LIBTASN1_0_3'
../lib/.libs/libgnutls.so: undefined reference to `asn1_der_decoding2@LIBTASN1_0_3'
在车机中搜索“find / -name libtasn1.so*”

发现同样在/usr/lib/x86_64-linux-gnu/ 中存在libtasn1.so,把其名字修改;
修改名字后实际测试,问题点close;
gnutls-3.6.6执行make 编译通过的截图:

问题点:编译libvnc 提示没有
-- No package 'libsystemd' found
-- Building crypto with OpenSSL
下载'libsystemd'的网址是:https://launchpad.net/ubuntu/+source/systemd/240-6ubuntu1
编译
./configure --prefix=/usr
make
make install
Attention:
因为后续一直遇到mount 版本不匹配的问题,所以后面改用了Ubuntu14.04 对应的systemd-204版本
https://launchpad.net/ubuntu/+source/systemd/204-5ubuntu20.26
问题点:执行./configure 时候提示没有meson

Meson下载可以参考:https://packages.ubuntu.com/zh-cn/disco/meson
但咱可以参考此网路的操作:https://blog.csdn.net/syx3239/article/details/83038132,
但此时下载到的python版本,可能不符合最低版本要求;
因为meson 使用的是python 安装方式,请阅读压缩档中的“Read.md”文档:
#### Installing from source
You can run Meson directly from a revision control checkout or an
extracted tarball. If you wish you can install it locally with the
standard Python distutils command `python3 setup.py install <your
options here>`.
Meson is also available from
[PyPi](https://pypi.python.org/pypi/meson), so it can be installed
with `pip3 install meson` (this does not require a source checkout,
pip will download the package automatically). The exact command to
type to install with pip can vary between systems, be sure to use the
Python 3 version of pip.
需要注意的是:meson 安装时使用的软链接是python3 ,而非python;
编译分2步骤:
python3 setup.py build
python3 setup.py install
问题点:ImportError: No module named '_gdbm'

---以上错误:在python3.6 同样存在,但是“apt-get install python3.6-gdbm”指令能正常执行;
实际测试发现,python3.5有问题;如果把OS中python3软链接到3.5版本,也会导致别的问题;
如:

此时重新把python3 软链接到3.4m 就正常;

Meson 也可以使用deb 包形式进行安装,下载网址是:https://packages.ubuntu.com/zh-cn/disco/all/meson/download;
deb包安装command是“dpkg -i xxx.deb”
如:dpkg -i meson_0.49.0-2ubuntu1_all.deb
Re2c 的编译方式可参考网路:https://blog.csdn.net/steven_liwen/article/details/52046054
./configure --prefix=/usr/local/re2c
make
make install
问题点:对“systemd-240”执行“./configure”出现的问题点:
ModuleNotFoundError: No module named 'apt_pkg'
解决方法可以参考:https://blog.csdn.net/u014221090/article/details/82657401
新的问题点:
AttributeError: module 'importlib._bootstrap' has no attribute 'SourceFileLoader'
参考网路的做法:https://blog.csdn.net/tiankongtiankong01/article/details/85158340
另外libsystemd0也可使用deb格式安装,
下载地址是https://packages.ubuntu.com/disco/libsystemd0
libc6、glibc的下载是:https://packages.ubuntu.com/disco/libc6
编译 ,可参考:https://blog.csdn.net/xqhrs232/article/details/56287055
编译:
../glibc-2.29/configure --disable-sanity-checks
make
make install
解压后在根目录下创建一个文件夹
glibc编译遇到的问题可以参考:http://www.mamicode.com/info-detail-1725825.html
但gcc的升级参考https://blog.csdn.net/qingrenufo/article/details/78661513
关于“
checking for as... as
checking version of as... 2.24, bad
checking for ld... ld
checking version of ld... 2.24, bad
”下载新版本的binutils解决,下载路径是:ftp://sourceware.org/pub/binutils/snapshots
编译方式:
./configure --prefix=/usr
make
make install
另外binutils2.21版本编译时候,最好使用./configure --prefix=/usr --with-sysroot --disable-werror,用于屏蔽错误:
bfd.h:537:65: error: right-hand operand of comma expression has no effect [-Werror=unused-value]
#define bfd_set_cacheable(abfd,bool) (((abfd)->cacheable = bool), TRUE)
可以参考https://blog.csdn.net/capture_bbom/article/details/64437791;
另外binutils2.24版本编译时候,最好使用./configure --prefix=/usr --with-sysroot --enable-plugins --disable-werror
对binutils2.24执行./configure --prefix=/usr --with-sysroot --enable-plugins --disable-werror,提示问题点:
compress-debug.o: access beyond end of merged section (707)

解决方式:把当前压缩包删除,再次解压binutils-2.24.51.tar.bz2 进行编译,问题不存在;
----当前执行“./configure --prefix=/usr --with-sysroot --enable-plugins --disable-werror”编译前执行过一次没有“--enable-plugins”参数设置的,目前不确定是否与此有关;
问题点:对“glibc”执行“../glibc-2.29/configure”操作,提示make 版本过低;
“checking version of make... 3.81, bad”

make 的下载网址是:https://ftp.gnu.org/gnu/make/
操作:
解压后执行./configure
执行. build.sh
执行make install
删除已安装的make:sudo apt-get remove make
替换make文件:sudo cp make /usr/bin/make
问题点:对“glibc”执行“make”操作,提示错误:
问题错误参考:https://lists.debian.org/debian-user/2012/04/msg01882.html

*** No rule to make target '../manual/errno.texi', needed by '../sysdeps/gnu/errlist.c'. Stop.
问题点:pip 错误“pkg_resources.DistributionNotFound: pip==1.5.4”
解决方式是:
先安装“distribution”,“distribution”的下载路径是:https://pypi.org/project/distribute/#files
解压后cd到根目录,然后执行“python setup.py install”
然后安装pip1.5.4
可以参考:https://blog.csdn.net/lilongsy/article/details/79994187
用easy_install 重新升级一下pip
easy_install --upgrade pip
pip3安装可以参考:
https://www.cnblogs.com/wenchengxiaopenyou/p/5709218.html
问题点:对“systemd-240”执行“./configure”出现的问题点:
“meson.build:636:0: ERROR: Program(s) ['gperf'] not found or not executable”

直接使用“apt-get install gperf” 安装;
问题点:

没有“Has header "sys/capability.h" : NO”
解决方式:
apt-get install libcap-dev
而libcap的下载路径是:https://mirrors.edge.kernel.org/pub/linux/libs/security/linux-privs/libcap2/; 注意不是libpcap; 下载2.25版本,实测2.26执行make有错误;
libcap编译错误请参考:
https://www.cnblogs.com/AaronDChain/p/6179505.html?utm_source=itdadao&utm_medium=referral;
问题点:

Dependency mount found: NO (tried pkgconfig and cmake)
注意这里需要的不是python3 对应的libmount,
即不是https://pypi.org/project/libmount/0.9/#files
注意libmount-dev 和libmount1是两个不同的;
libmount-dev的下载是:https://packages.ubuntu.com/trusty/libmount-dev
libmount1的下载是:https://packages.ubuntu.com/trusty/amd64/libmount1/download
问题点,当安装完libmount-dev 和libmount1后,异常提示变为:

Dependency mount found: NO (tried cmake) –没有pkgconfig
此时安装了https://packages.ubuntu.com/trusty/amd64/libmount1 中的“util-linux_2.20.1.orig.tar.gz”后,错误提示变为:

Dependency mount found: NO found '2.20.0' but need: '>= 2.30'
以下截图看到2.20.0的出处

实测修改此mount.pc后,以上错误提示close

libmount 2.30以上版本的下载地址是:https://mirrors.edge.kernel.org/pub/linux/utils/util-linux/
从systemd-240目录下的README 文档中看到:
“libmount >= 2.30 (from util-linux)”
![]()

基于“util-linux *must* be built without --enable-libmount-support-mtab”
编译指令:参考util-linux-2.32/Documentation的 howto-build-sys.txt
以及howto-compilation.txt
./autogen.sh ---执行后提示当前OS 中哪些tool 需要安装,使用apt-get install xxx即可;
但libtool-2需要自行下载, 基于autogen.sh中描述“You must have libtool version >= 2.x.x”
所以下载的路径是:https://ftp.gnu.org/gnu/libtool/
./configure
make
make install
或者直接使用“apt-get install libtool” 进行安装
make后把libtool-2.2.2/libltdl/m4下面的文件都拷贝到通过“aclocal --print-ac-dir”找到的路径下
编译util-linux-2.32 for libmount的问题点:
/usr/bin/ld: cannot find -lncursesw

解决方式是:
apt-get install libncursesw5-dev
千万注意点:
make install完成后,此时执行mount –version,如果提示以下内容,此时ubuntu 关机后再重启将无法启动;
所以此时不要重启,不然就得按照D:\工作\工作积累\Ubuntu中的《20190313 Ubuntu 更新libmount 导致重启后无法启动.docx》进行恢复
异常画面:

正常安装完成后并被识别的,应该是这样:

问题原因:
当对util-linux-2.32版本编译后,OS 中/lib/ 文件夹下的libmount.so.1.1.0是变化的,但/lib/x86_64-linux-gnu/中的libmount.so.1.1.0 没有变化,还是2.21.2 版本;
而当我们执行“mount --version”时,其使用的是/lib/x86_64-linux-gnu/libmount.so.1,这是一个软链接,其原来是直接连接到/lib/x86_64-linux-gnu/中的libmount.so.1.1.0;
同时也需要修改libblkid.so.1
修改方式有两种,
一种是直接把/lib中的libmount.so.1.1.0 拷贝到/lib/x86_64-linux-gnu/下;
另外一种是把/lib/x86_64-linux-gnu/libmount.so.1这个软链接,链接到/lib下的libmount.so.1.1.0; 同时libmount.so.1.1.0 也需要同样的修改;---这一种比较动态;
修改后:

locales 2.29版本 包的下载:https://packages.ubuntu.com/disco/locales
libc-bin 2.29-0版本包的下载:https://packages.ubuntu.com/disco/libc-bin
问题点:
当升级了libmount 到2.32以后重新对 “systemd-240”执行“./configure”
还是继续提示

以下截图看到2.20.0的出处

实测修改此mount.pc后,以上错误提示close

在“systemd-240”的meson.build 文件中搜索“mount”,发现其是在/usr/bin/mount中进行Search的

此问题一直不得解决,所以改用Ubuntu14.04 对应的systemd-204版本
https://launchpad.net/ubuntu/+source/systemd/204-5ubuntu20.26
note:Ubuntu14.04的代号是“Trusty Tahr (可靠的塔尔羊)”
对“systemd-204”执行“./configure” 提示问题点:

checking for intltool >= 0.40.0... found
configure: error: Your intltool is too old. You need intltool 0.40.0 or later.
Intltool的下载:https://packages.debian.org/stretch/intltool
Intltool执行“./configure”,提示没有bzr , 可以直接使用“apt-get install bzr”进行安装;
问题点:
执行对“libvncserver-LibVNCServer-0.9.12”执行“cmake ..”操作,还是提示
-- Checking for module 'libsystemd'
-- No package 'libsystemd' found
此时已经安装了“systemd-204”,但有一点值得注意的是,没有找到libsystemd.so
只找到:

此问题可以参考网路:http://www.bubuko.com/infodetail-2681397.html
基于网路描述:“systemd自版本209开始,动态库libsystemd.so 就提供了所有的东西,包括libsystemd-daemon.so”
基于网路描述,需要安装libsystemd-dev
但是在Ubuntu14.04 的systemd-204版本中,其xxx-dev是分开的

而在Ubuntu16.04的229版本中,其就整合为了单独一个包:

问题点:“systemd 229”执行./autogen.sh操作时,提示错误

intltoolize: not found
解决方式是:apt-get install intltool
问题点:编译systemd 229 问题点
“Makefile.am:128: error: Libtool library used but 'LIBTOOL' is undefined”

解决方式参考:https://blog.csdn.net/xiaoxinyu316/article/details/52578973
把libtool-2.2.2/libltdl /m4下面的文件都拷贝到通过“aclocal --print-ac-dir”找到的路径下;
Note:这里的“libtool-2.2.2”是解压后的具体版本;
问题点:“systemd 229”执行./autogen.sh操作时,提示错误

configure.ac:52: warning: AC_LANG_CONFTEST: no AC_LANG_SOURCE call detected in body
../../lib/autoconf/lang.m4:193: AC_LANG_CONFTEST is expanded from...
../../lib/autoconf/general.m4:2661: _AC_LINK_IFELSE is expanded from...
../../lib/autoconf/general.m4:2678: AC_LINK_IFELSE is expanded from...
/usr/share/aclocal/libtool.m4:1009: _LT_SYS_MODULE_PATH_AIX is expanded from...
/usr/share/aclocal/libtool.m4:4118: _LT_LINKER_SHLIBS is expanded from...
/usr/share/aclocal/libtool.m4:5189: _LT_LANG_C_CONFIG is expanded from...
/usr/share/aclocal/libtool.m4:138: _LT_SETUP is expanded from...
/usr/share/aclocal/libtool.m4:67: LT_INIT is expanded from...
configure.ac:52: the top level
目前libtool 版本是2.2.2;
可以参考:http://lists.gnu.org/archive/html/bug-autoconf/2010-10/msg00022.html
解决方法:当执行 “apt-get install libtool”提示升级到libtool (2.4.2-1.7ubuntu1)后,此时再次执行./autogen.sh没有以上异常

问题点:“systemd 229”执行configure操作时,提示错误
“error: *** libmount support required but libraries not found”

通过实测,此问题和systemd240 提示mount 错误是同一个原因:
就是在OS 已经更新为libmount 新版本时候,
但/usr/lib/x86_64-linux-gnu/pkgconfig/mount.pc 还提示是2.20.0 版本;
修改为2.32.0以后,以上问题close;
解决方法:libmount其实就是util-linux,具体下载util-linux-2.32
tar -zxvf util-linux-2.32.tar.gz
cd util-linux-2.32/
./configure
make
sudo make install
问题点:“systemd 229”执行configure操作时,提示错误:
configure: error: *** xsltproc is required for man pages

解决方式:apt-get install xsltproc
问题点:“systemd 229”执行make操作时,提示错误:
sorry - this program has been built without plugin support

参考网路:https://gcc.gnu.org/ml/gcc-help/2012-03/msg00100.html
里面重点提到了:If you are building the GNU binutils yourself,use --enable-plugins when you run configure
解决方式:重编了binutils以后,当前问题close;
systemd209的下载路径是:---里面也包括了其他systemd版本的下载路径
https://github.com/systemd/systemd/tags
问题点:对systemd209执行“./autogen.sh” 提示错误:

You don't have gtk-doc installed, and thus won't be able to generate the documentation.
gtk-doc下载路径是:https://launchpad.net/ubuntu/+source/gtk-doc
对gtk-doc执行“./configure”遇到的问题点:
checking for DocBook XML DTD V4.3 in XML catalog... not found
configure: error: could not find DocBook XML DTD V4.3 in XML catalog
DocBook XML DTD的下载路径是:
https://www.oasis-open.org/docbook/xml/
安装请参考:http://www.linuxfromscratch.org/blfs/view/7.5/pst/DocBook.html
按照网路描述安装完成后,
提示checking for DocBook XML DTD V4.3 in XML catalog... found
xmlcatalog的安装指令是:apt-get install libxml2-utils
新问题点:对gtk-doc执行“./configure”遇到的问题点:

checking for DocBook XSL Stylesheets in XML catalog... not found
docbook-xsl直接使用apt-get install docbook-xsl
安装以后重新gtk-doc执行“./configure”:
checking for DocBook XSL Stylesheets in XML catalog... found
问题点:对systemd209执行“./autogen.sh” 提示错误:
“please use m4_pattern_allow”
error: possibly undefined macro: AM_PATH_LIBGCRYPT

参考网路:http://lists.busybox.net/pipermail/buildroot/2014-June/099227.html
安装libgcrypt;
下载及安装路径:http://www.linuxfromscratch.org/blfs/view/svn/general/libgcrypt.html
libgpg-error 的下载路径:ftp://ftp.gnupg.org/gcrypt/libgpg-error/
gettext的下载路径:https://www.gnu.org/software/gettext/
当在执行“./autogen.sh”遇到错误时,可以尝试直接跳过“./autogen.sh”,直接执行”./configure”;
AM_PATH_LIBGCRYPT问题的解决方式是:把安装libgcrypt得到的libgcrypt.m4 拷贝到
通过“aclocal --print-ac-dir”确认的文件夹下

编译systemd209,执行其提示的“configure”操作,提示错误:

/usr/local/bin/xgettext: error while loading shared libraries: libgettextsrc-0.19.8.1.so: cannot open shared object file: No such file or directory
/usr/local/bin/msgmerge: error while loading shared libraries: libgettextsrc-0.19.8.1.so: cannot open shared object file: No such file or directory
/usr/local/bin/msgfmt: error while loading shared libraries: libgettextsrc-0.19.8.1.so: cannot open shared object file: No such file or directory
configure: error: GNU gettext tools not found; required for intltool
解决方式是:cp /usr/local/lib/libgettextsrc-0.19.8.1.so /usr/lib/
修改后实测,问题close;
问题点:对“systemd209”执行make 操作,提示错误:

/usr/bin/ld: ./.libs/libsystemd-internal.a(libsystemd_internal_la-sd-daemon.o): undefined reference to symbol 'mq_getattr@@GLIBC_2.3.4'
//lib/x86_64-linux-gnu/librt.so.1: error adding symbols: DSO missing from command line
可通过:https://segmentfault.com/a/1190000002462705
以及https://unix.stackexchange.com/questions/369858/udev-build-error-undefined-reference-to-mq-getattr 来了解当前问题点
问题点:“systemd 229”执行make操作时,提示错误
./src/basic/missing.h:522:17: error: expected identifier before numeric constant
#define MS_MOVE 8192

修改方法:参考
https://github.com/dtzWill/systemd/commit/30775d4e675f697d1bd112ba6bbad28b0cc16a8b


然后继续make
补充:
当以上修改完成后自行make 提示以下错误:
src/core/mount.c:1555: error: undefined reference to 'mnt_unref_monitor'
src/core/mount.c:1587: error: undefined reference to 'mnt_new_monitor'
src/core/mount.c:1593: error: undefined reference to 'mnt_monitor_enable_kernel'
src/core/mount.c:1599: error: undefined reference to 'mnt_monitor_enable_userspace'
src/core/mount.c:1606: error: undefined reference to 'mnt_monitor_get_fd'
src/core/mount.c:1648: error: undefined reference to 'mnt_monitor_get_fd'
src/core/mount.c:1659: error: undefined reference to 'mnt_monitor_next_change'

此时执行mount --version 操作,发现其又不能识别到mount 版本;--请在本文档中搜索“ubuntu 关机后再重启将无法启动”
问题点:“systemd 229”继续执行make操作时,提示错误
I/O error : Attempt to load network entity http://docbook.sourceforge.net/release/xsl/current/manpages/docbook.xsl
warning: failed to load external entity "http://docbook.sourceforge.net/release/xsl/current/manpages/docbook.xsl"
compilation error: file ./man/custom-man.xsl line 27 element import
xsl:import : unable to load http://docbook.sourceforge.net/release/xsl/current/manpages/docbook.xsl

修改方法:https://github.com/systemd/systemd/issues/5857

在system229编译的configure中添加上此设置“--disable-manpages”
然后make
“./configure CFLAGS='-g -O0 -ftrapv' --enable-compat-libs --enable-kdbus --sysconfdir=/etc --localstatedir=/var --libdir=/usr/lib --with-rootprefix=/ --with-rootlibdir=/lib --disable-manpages”
问题点:“systemd 229”继续执行make操作时,提示错误
File "tools/make-directive-index.py", line 322, in <module>
f.write(xml_print(make_page(*sys.argv[2:])))
File "tools/make-directive-index.py", line 316, in make_page
raise ValueError("failed to process " + page)
ValueError: failed to process ./man/busctl.xml

修改方法:
https://github.com/systemd/systemd/commit/db374ff564e509be86ed22667de1c245ad2c5387

继续执行make
sudo make install
问题点:编译libvnc 执行“cmake build .”操作时提示以下问题点:
/home/liyingbin/Documents/libvncserver-LibVNCServer-0.9.12/common/rfbcrypto_gnutls.c:25:20: fatal error: gcrypt.h: No such file or directory
compilation terminated.

参考本文档中“安装libgcrypt”部分;
这篇关于MirrorLink(四 VNC --Ubuntu下编译)的文章就介绍到这儿,希望我们推荐的文章对编程师们有所帮助!


