本文主要是介绍spring-authorization-server 公共客户端方式获取授权码和Token的流程,希望对大家解决编程问题提供一定的参考价值,需要的开发者们随着小编来一起学习吧!
spring-authorization-serve【版本1.2.1】官方文档中提及了关于RegisteredClient中所涉及的客户端身份验证方法,也就是RegisteredClient中提及的clientAuthenticationMethods属性对应的“none”值,目前clientAuthenticationMethods属性支持的值包含:client_secret_basic, client_secret_post, private_key_jwt, client_secret_jwt, and none (public clients)。
大家可参考官方文档来了解PKCE相关的标准规范定义。这里我推荐大家看一下附录B,如何通过code_verifier获取code_challenge。
PKCE Protocol Flow
通过code_verifier获取code_challenge
这里直接引用官方文档附录B示例如下:
客户端使用合适的随机数生成器创建出来32个八位字节序列。本例中表示值的八位字节(使用JSON数组表示法)为:
[116, 24, 223, 180, 151, 153, 224, 37, 79, 250, 96, 125, 216, 173, 187, 186, 22, 212, 37, 77, 105, 214, 191, 240, 91, 88, 5, 88, 83, 132, 141, 121]
将此八位字节序列进行base64url编码作为code_verifier的值:dBjftJeZ4CVP-mB92K27uhbUJU1p1r_wW1gFWFOEjXk
然后通过SHA256哈希函数对code_verifier进行哈希,生成:
[19, 211, 30, 150, 26, 26, 216, 236, 47, 22, 177, 12, 76, 152, 46, 8, 118, 168, 120, 173, 109, 241, 68, 86, 110, 225, 137, 74, 203, 112, 249, 195]
将该八位字节序列base64url编码作为code_challenge的值:E9Melhoa2OwvFrEMTJguCHaoeK1t8URWbuGJSstw-cM
最后在授权请求的url中追加如下参数code_challenge和code_challenge_method:
code_challenge=E9Melhoa2OwvFrEMTJguCHaoeK1t8URWbuGJSstw-cM&code_challenge_method=S256
code_verifier和code_challenge的具体用法
下面在是PKCE官网提供的Abstract Protocol Flow如下:
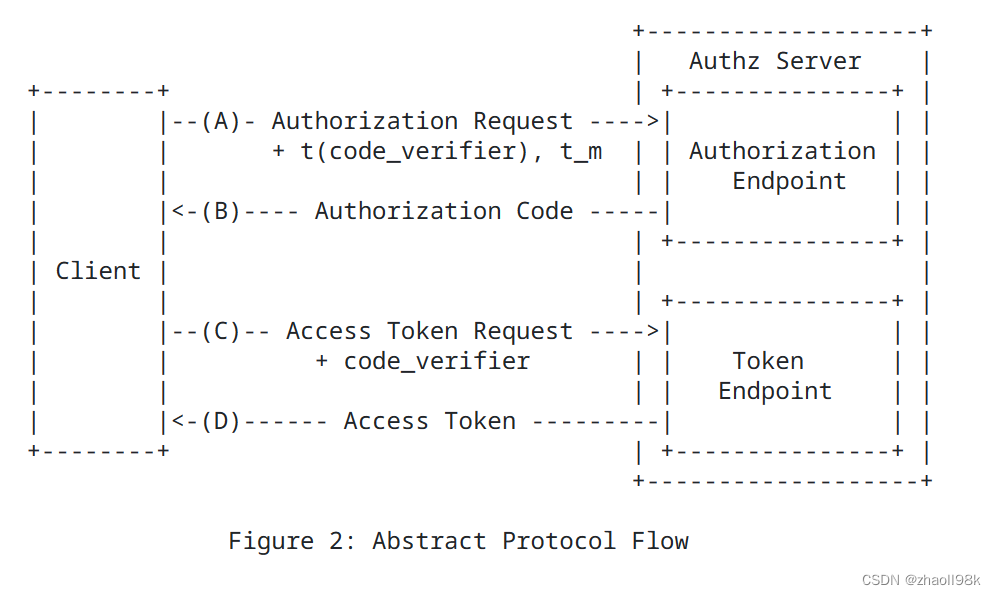
A、客户端在请求授权服务的Authorization Endpoint (授权端点)获取Authorization Code(授权码)时,需要提交的参数需要包含“t(code_verifier)”,和“t_m”,“t(code_verifier)”也就是上面说的code_challenge,“t_m”就是code_challenge_method。这里有个操作是授权服务会把code_challenge和code_challenge_method存储起来。
B、授权服务返回Authorization Code(授权码)给客户端
C、客户端在请求授权服务的Token Endpoint获取token时需要提交参数code_verifier,授权服务会根据此次提交的code_verifier和A步存储的code_challenge_method生成code_challenge来验证是否和A步存储的code_challenge一致。
D、code_challenge一致则进行下面的流程直至成功返回Access Token。
在spring-authorization-server的运用
spring-authorization-server针对公共客户端也是依据PKCE的标准进行处理的。
创建应用程序
在获取授权码前首先需要创建一个SpringBoot应用程序可参考官网的Getting Started,然后稍作修改,如下:
application.yml
server:port: 6001logging:level:org.springframework.security: tracespring:security:oauth2:authorizationserver:client:public-client:registration:client-id: "my-app"client-authentication-methods:- "none"authorization-grant-types:- "authorization_code"- "refresh_token"redirect-uris:- "http://127.0.0.1:6001/oauth2/code"post-logout-redirect-uris:- "http://127.0.0.1:6001/"scopes:- "user_info"- "openid"- "profile"- "client.create"require-authorization-consent: truerequire-proof-key: true
SecurityConfig.java
@Configuration
@EnableWebSecurity
public class SecurityConfig {@Bean@Order(1)public SecurityFilterChain authorizationServerSecurityFilterChain(HttpSecurity http)throws Exception {OAuth2AuthorizationServerConfiguration.applyDefaultSecurity(http);http.getConfigurer(OAuth2AuthorizationServerConfigurer.class).oidc(Customizer.withDefaults());	// Enable OpenID Connect 1.0http// Redirect to the login page when not authenticated from the// authorization endpoint.exceptionHandling((exceptions) -> exceptions.defaultAuthenticationEntryPointFor(new LoginUrlAuthenticationEntryPoint("/login"),new MediaTypeRequestMatcher(MediaType.TEXT_HTML)))// Accept access tokens for User Info and/or Client Registration.oauth2ResourceServer((resourceServer) -> resourceServer.jwt(Customizer.withDefaults()));return http.build();}@Bean@Order(2)public SecurityFilterChain defaultSecurityFilterChain(HttpSecurity http)throws Exception {http.authorizeHttpRequests((authorize) -> authorize.anyRequest().authenticated())// Form login handles the redirect to the login page from the// authorization server filter chain.formLogin(Customizer.withDefaults());return http.build();}@Beanpublic UserDetailsService userDetailsService() {UserDetails userDetails = User.withDefaultPasswordEncoder().username("user").password("password").roles("USER", "user_info", "openid", "profile", "client.create").build();return new InMemoryUserDetailsManager(userDetails);}@Beanpublic JWKSource<SecurityContext> jwkSource() {KeyPair keyPair = generateRsaKey();RSAPublicKey publicKey = (RSAPublicKey) keyPair.getPublic();RSAPrivateKey privateKey = (RSAPrivateKey) keyPair.getPrivate();RSAKey rsaKey = new RSAKey.Builder(publicKey).privateKey(privateKey).keyID(UUID.randomUUID().toString()).build();JWKSet jwkSet = new JWKSet(rsaKey);return new ImmutableJWKSet<>(jwkSet);}private static KeyPair generateRsaKey() {KeyPair keyPair;try {KeyPairGenerator keyPairGenerator = KeyPairGenerator.getInstance("RSA");keyPairGenerator.initialize(2048);keyPair = keyPairGenerator.generateKeyPair();}catch (Exception ex) {throw new IllegalStateException(ex);}return keyPair;}@Beanpublic JwtDecoder jwtDecoder(JWKSource<SecurityContext> jwkSource) {return OAuth2AuthorizationServerConfiguration.jwtDecoder(jwkSource);}@Beanpublic AuthorizationServerSettings authorizationServerSettings() {return AuthorizationServerSettings.builder().build();}
}
maven pom.xml的dependencies:
<dependencies><dependency><groupId>org.springframework.boot</groupId><artifactId>spring-boot-starter-security</artifactId><version>3.2.2</version></dependency><dependency><groupId>org.springframework.boot</groupId><artifactId>spring-boot-starter-oauth2-authorization-server</artifactId><version>3.2.2</version></dependency><dependency><groupId>org.springframework.boot</groupId><artifactId>spring-boot-configuration-processor</artifactId><version>3.2.2</version><optional>true</optional></dependency>
</dependencies>
一切配置完,然后启动程序。
授权码获取
访问授权码获取地址:
http://127.0.0.1:6001/oauth2/authorize?response_type=code&client_id=my-app&scope=user_info%20openid%20client.create&code_challenge=E9Melhoa2OwvFrEMTJguCHaoeK1t8URWbuGJSstw-cM&code_challenge_method=S256&redirect_uri=http://127.0.0.1:600/oauth2/code
想使用公共客户端认证方式,code_challenge和code_challenge_method是必不可少的参数。
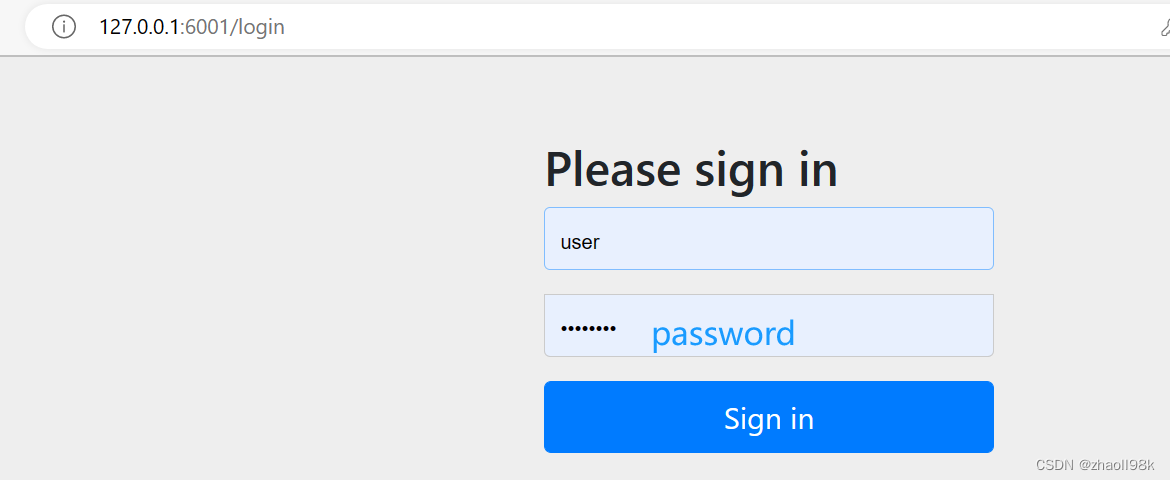
1、在浏览器上输入上面的地址,然后请求会自动跳转到登录页面,输入用户名(user)和密码(password)进行登录。
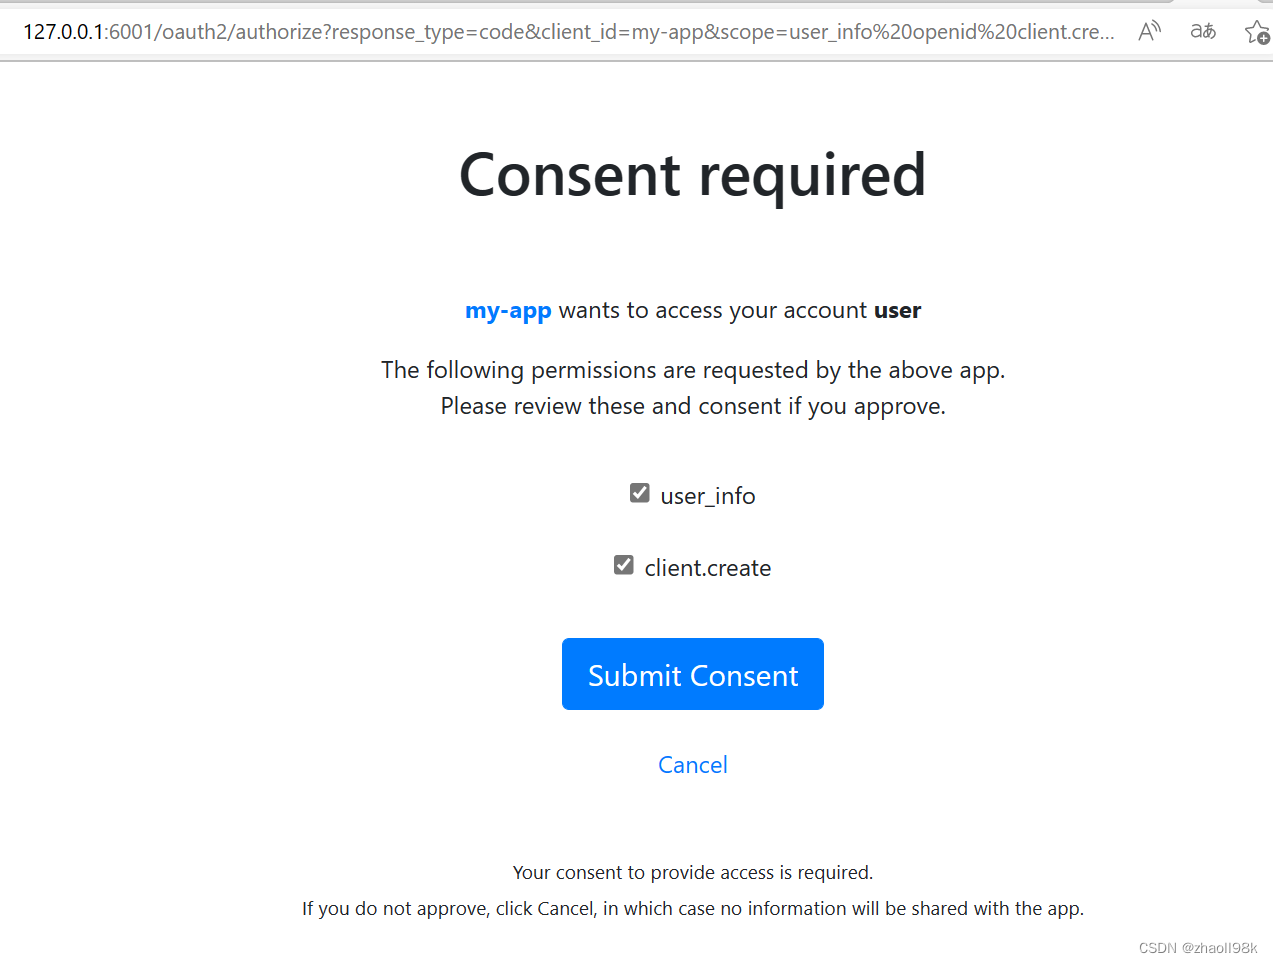
2、登录成功后,会自动跳转到授权同意页面,选中对应的权限进行提交。
3、提交成功后,跳转到对应redirect_uri的地址(对应第1步url中的redirect_uri参数),授权码对应链接中的code值。

http://127.0.0.1:600/oauth2/code?code=UZtsq9o-_6jRdT1C8xrV62dkynoFQ1aBSZtWzhFkoRAzPD-SpQ8UDppbY3VquKUQjFd5niMqzROMnnZQ_IdBpyEGUJ6qkvVuMYJ81M3zqwJodx6f5OerkgcQw4989Vvq
Token的获取
postman请求,使用POST方式,访问获取token地址:http://127.0.0.1:6001/oauth2/token
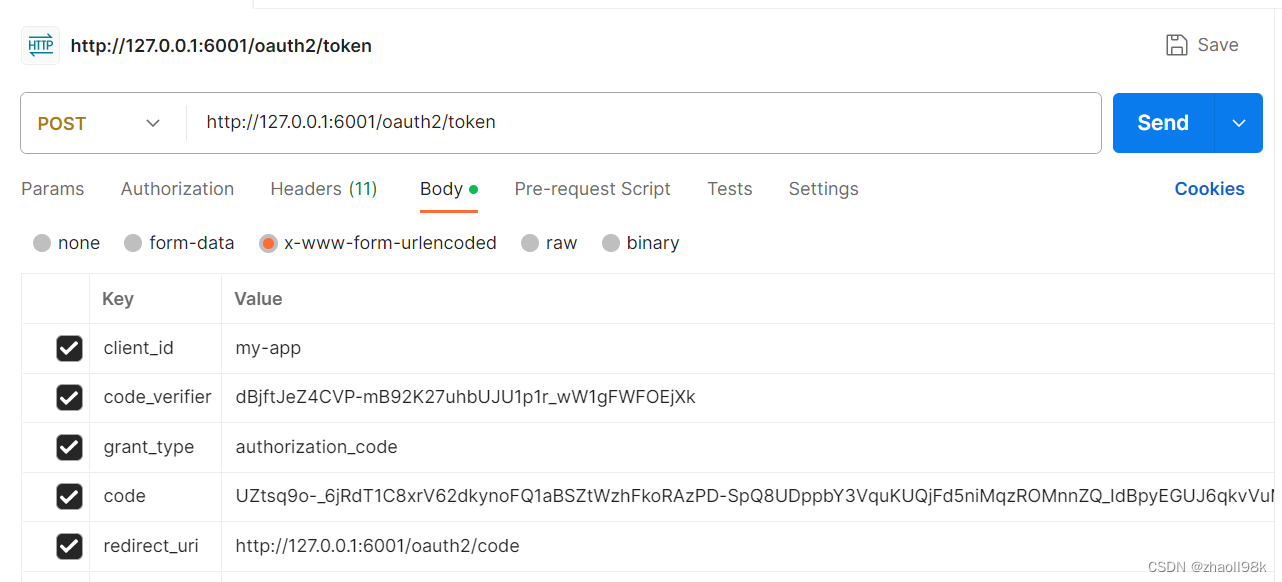
上面的参数都是必传的,code的值是授权码。
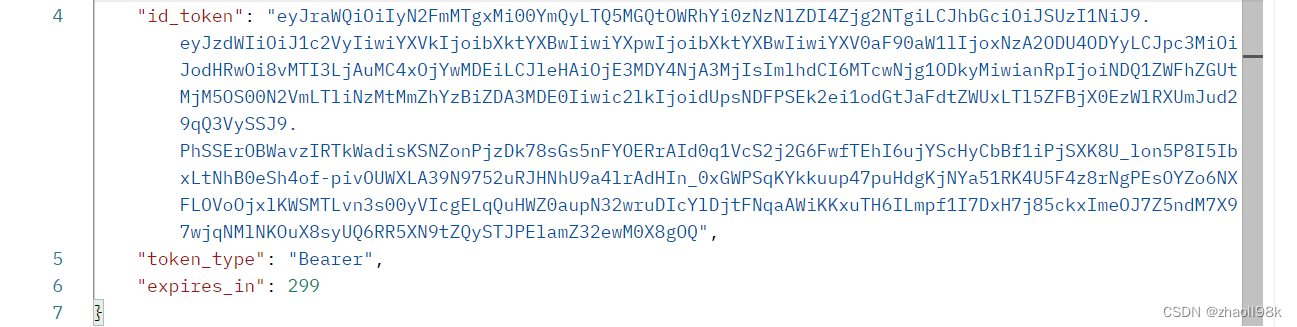
返回token结果:

到这里公共客户端授权码和token的获取到此结束。
如何验证code_verifier的有效性
在请求获取token的时候CodeVerifierAuthenticator.java中的codeVerifierValid方法来验证提交的code_verifier的有效性,如下:
/*** codeVerifier 请求获取token接口提交的code_verifier参数* codeChallenge 授权服务存储的code_challenge* codeChallengeMethod 授权服务存储的code_challenge_method=S256**/
private boolean codeVerifierValid(String codeVerifier, String codeChallenge, String codeChallengeMethod) {if (!StringUtils.hasText(codeVerifier)) {return false;} else if ("S256".equals(codeChallengeMethod)) {try {MessageDigest md = MessageDigest.getInstance("SHA-256");byte[] digest = md.digest(codeVerifier.getBytes(StandardCharsets.US_ASCII));String encodedVerifier = Base64.getUrlEncoder().withoutPadding().encodeToString(digest);return encodedVerifier.equals(codeChallenge);} catch (NoSuchAlgorithmException ex) {// It is unlikely that SHA-256 is not available on the server. If it is not available,// there will likely be bigger issues as well. We default to SERVER_ERROR.throw new OAuth2AuthenticationException(OAuth2ErrorCodes.SERVER_ERROR);}}return false;
}
这篇关于spring-authorization-server 公共客户端方式获取授权码和Token的流程的文章就介绍到这儿,希望我们推荐的文章对编程师们有所帮助!


