本文主要是介绍Netty源码三:NioEventLoop创建与run方法,希望对大家解决编程问题提供一定的参考价值,需要的开发者们随着小编来一起学习吧!
1.入口
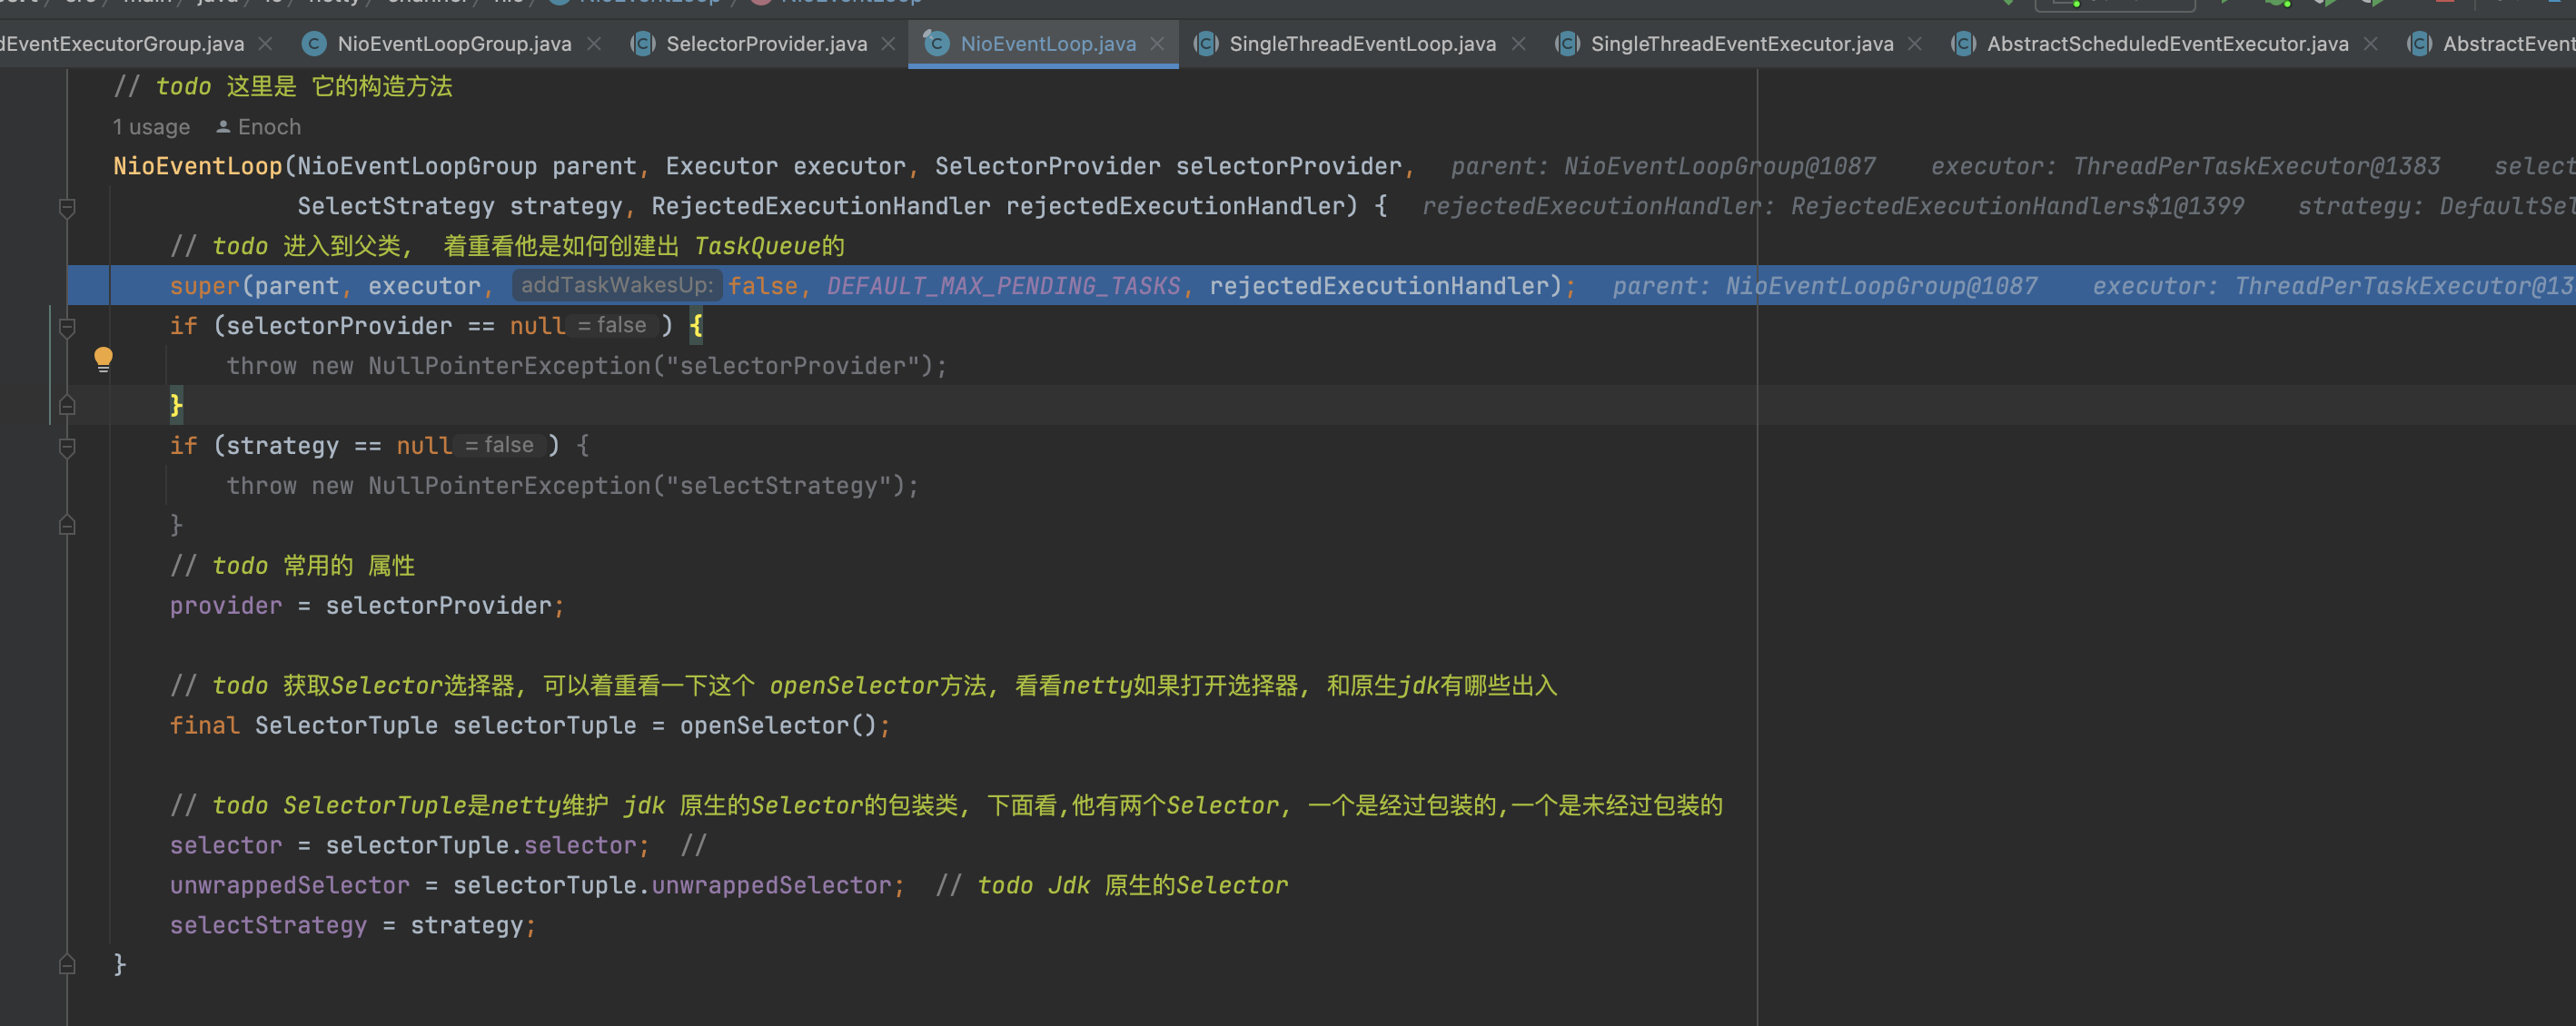
会调用到父类SingleThreadEventLoop的构造方法
2.SingleThreadEventLoop
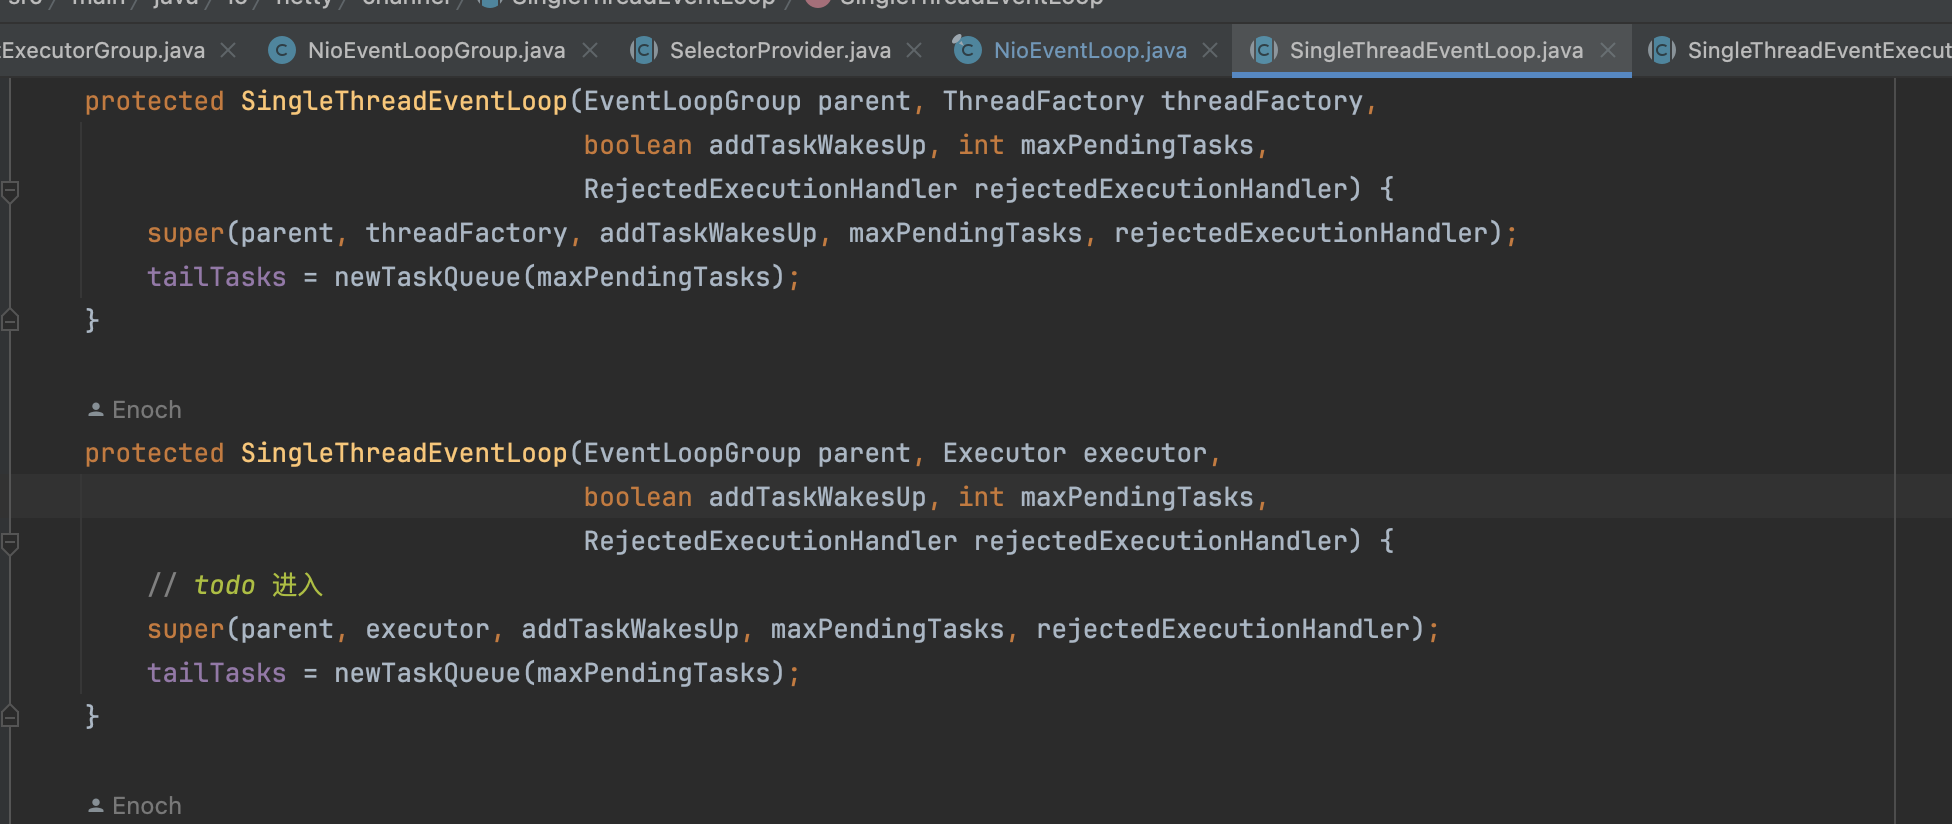
继续调用父类SingleThreadEventExecutor的构造方法
3.SingleThreadEventExecutor
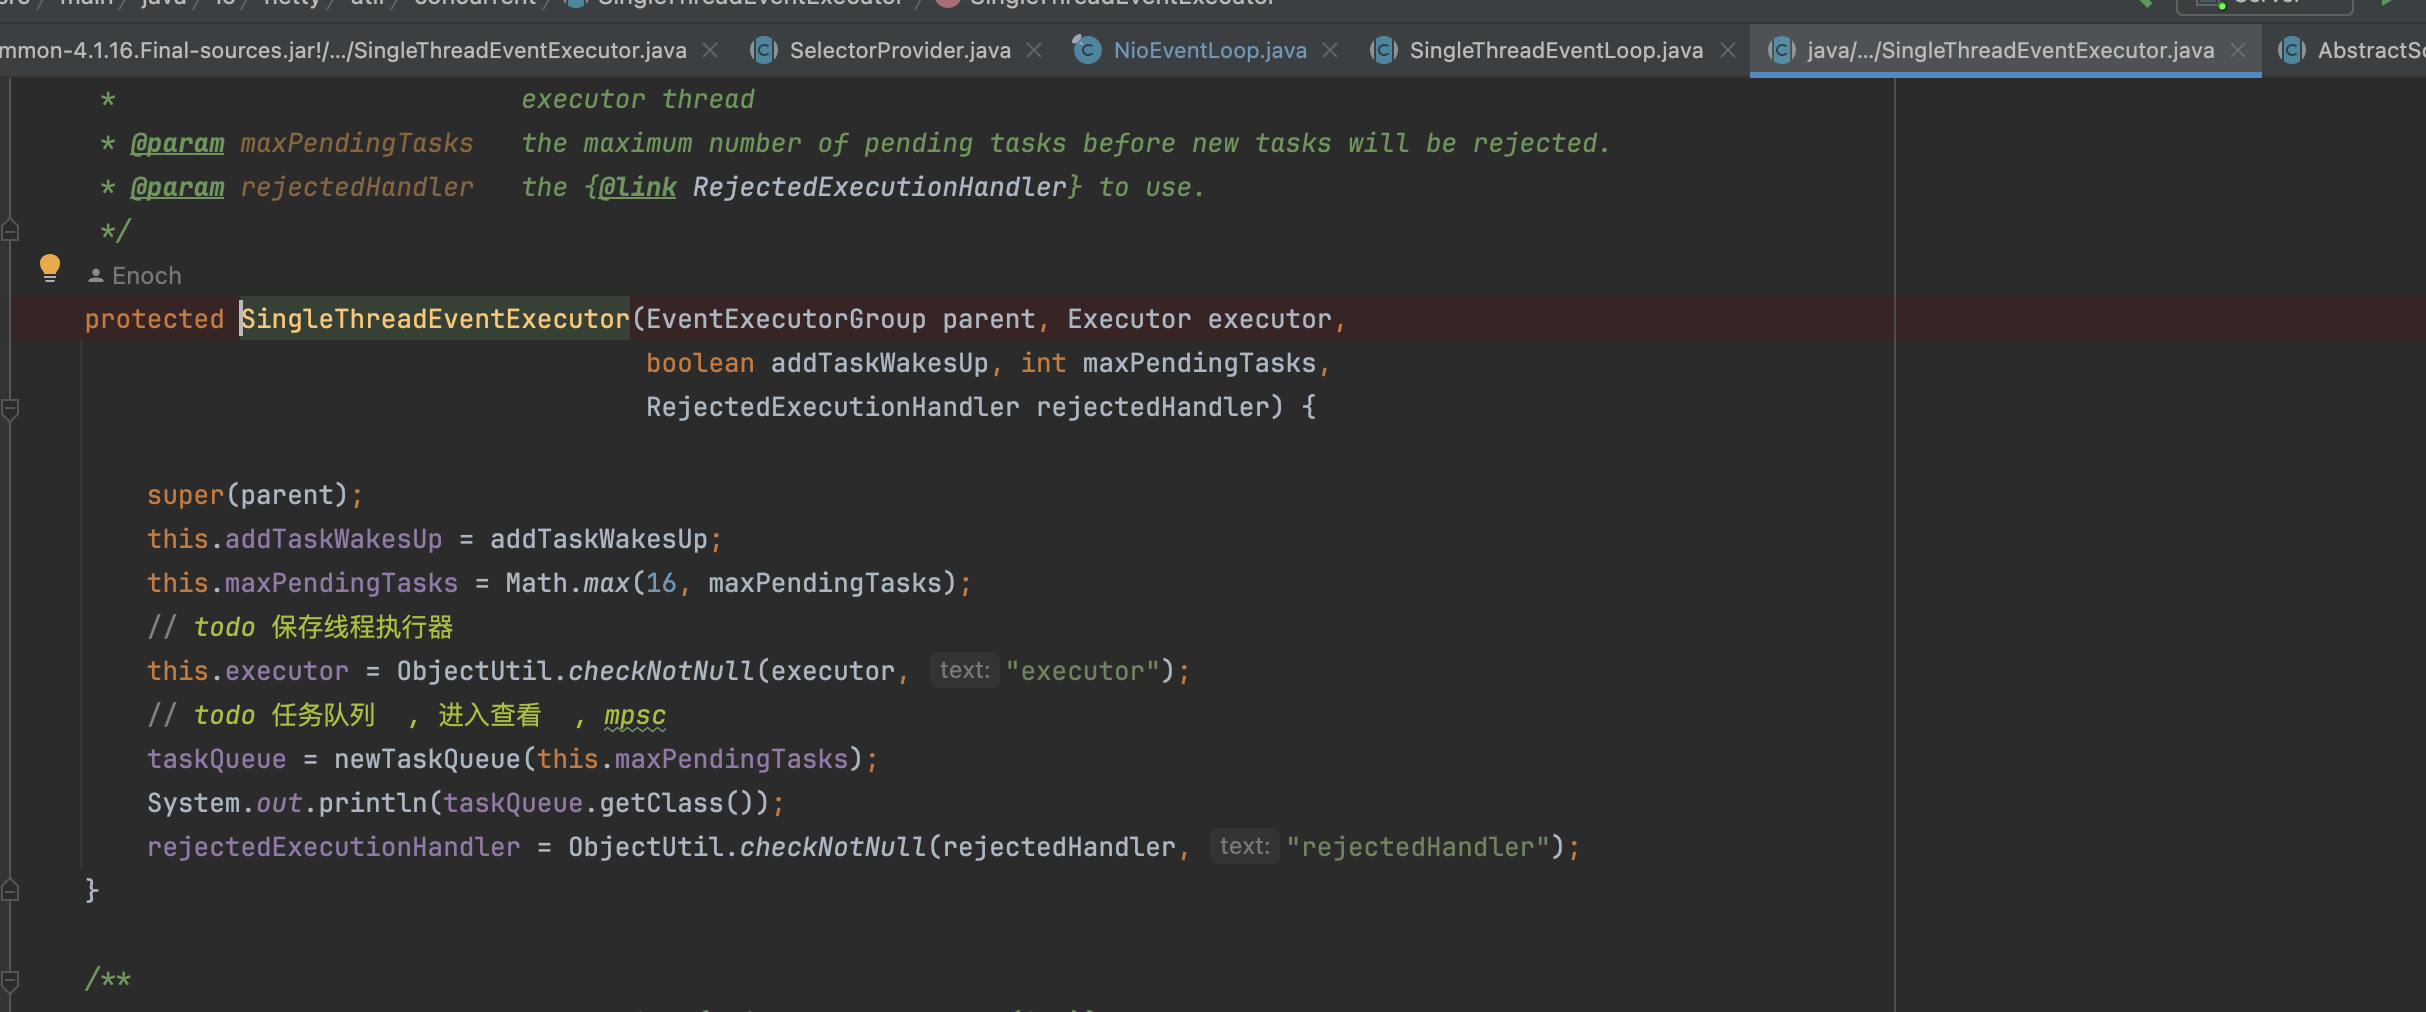
到这里完整的总结一下:
- 将线程执行器保存到每一个SingleThreadEventExcutor里面去
- 创建了MpscQueue,具体为什么,因为在NioEventLoop里面重写了newTaskQueue方法
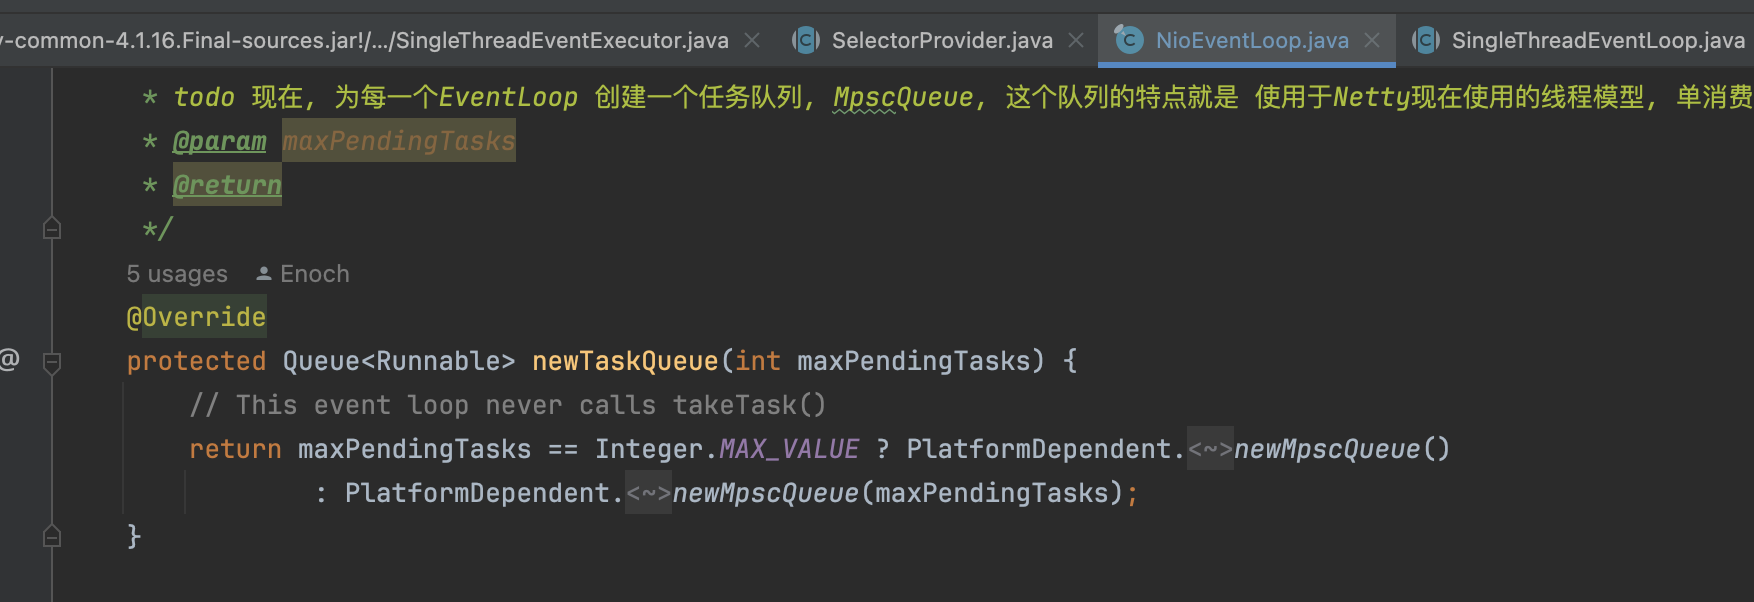
- 等父类调用完毕,最后回到NioEventLoop里面,最重要的一件事:创建Selector
最后那一张图完整的总结一下: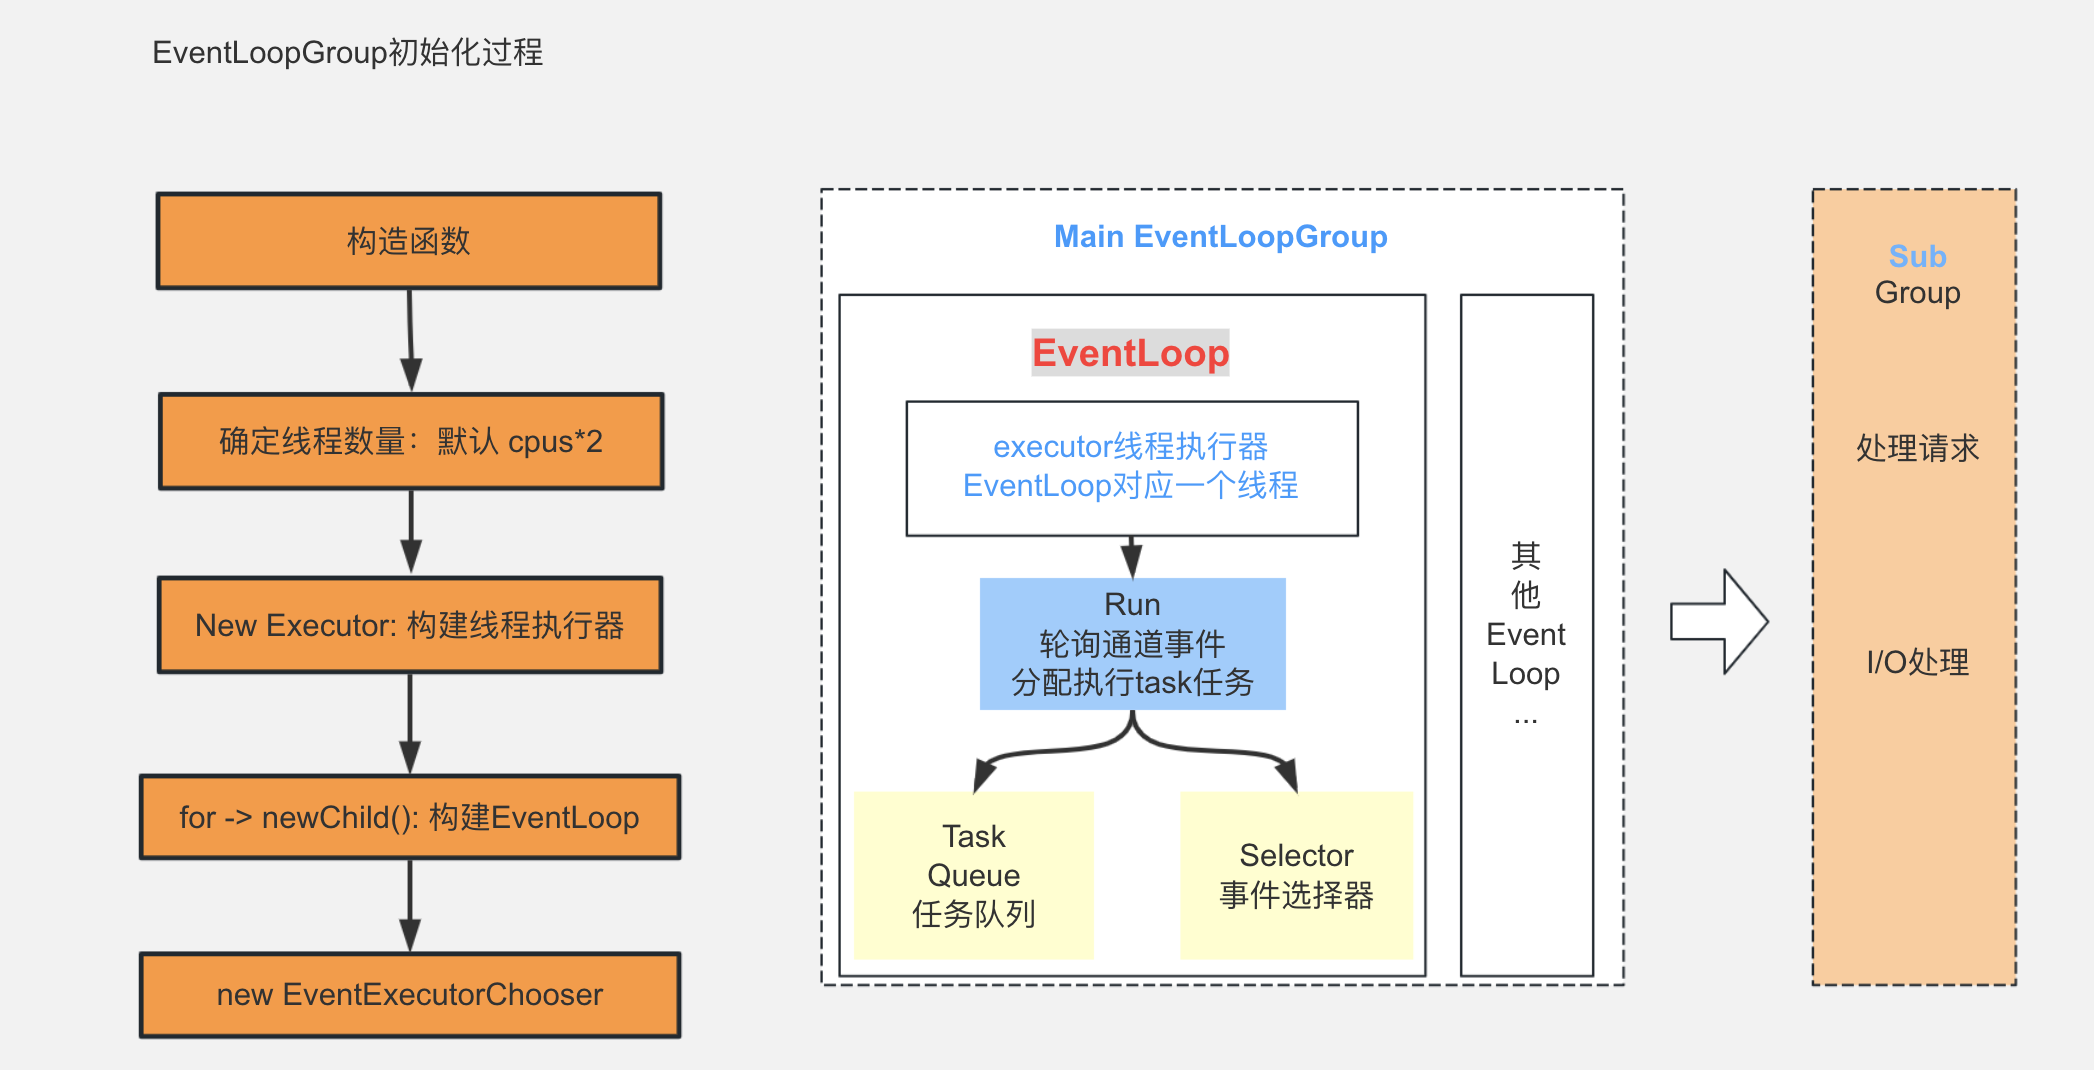
4.NioEventLoop.run
4.1 调用入口
这里还是要回顾一下这个方法是什么时候调用的?
Netty在启动的时候,在调用config().group().register(channel) ,使用bossGroup做channel注册的时候,它会使用EventExecutorChooser找一个NioEventLoop然后去做注册,最终会调用到这个abstractChannel.register方法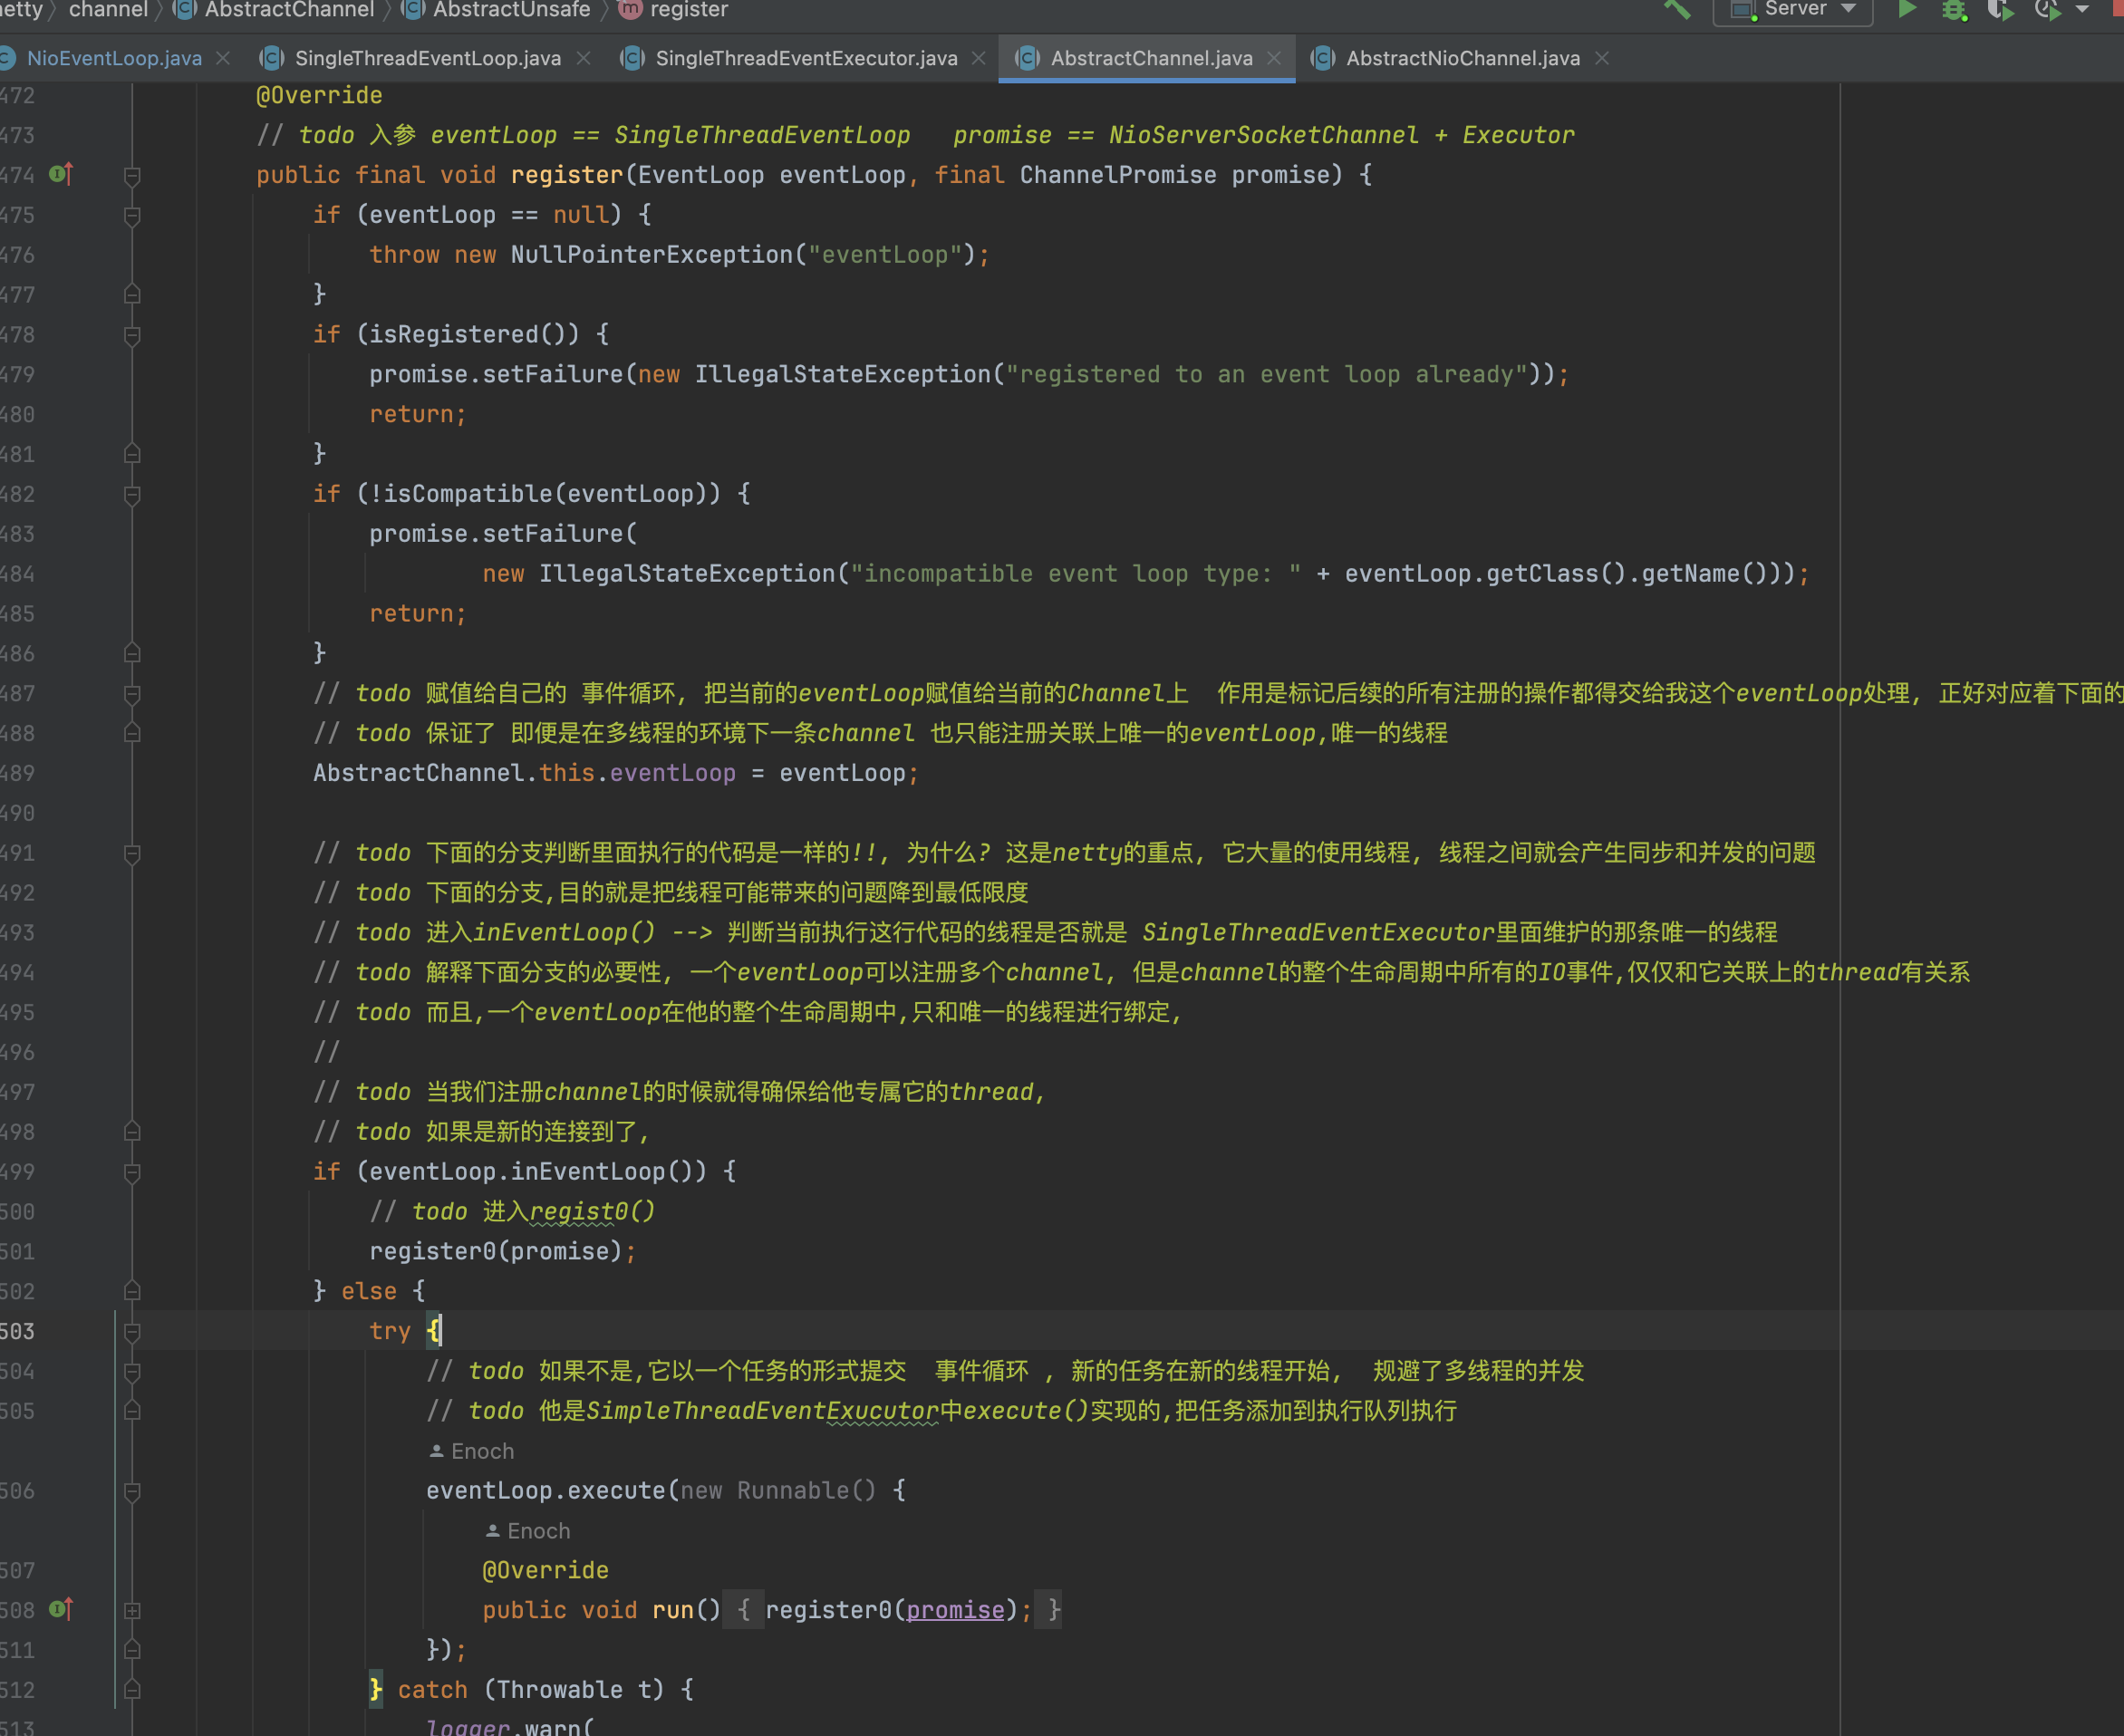
一般来说,我们启动的时候,运行到这里,eventLoop会返回false,所以会调用到eventLoop.execute里面的方法,在这里我们就能找到这个NioEventLoop.run的调用地方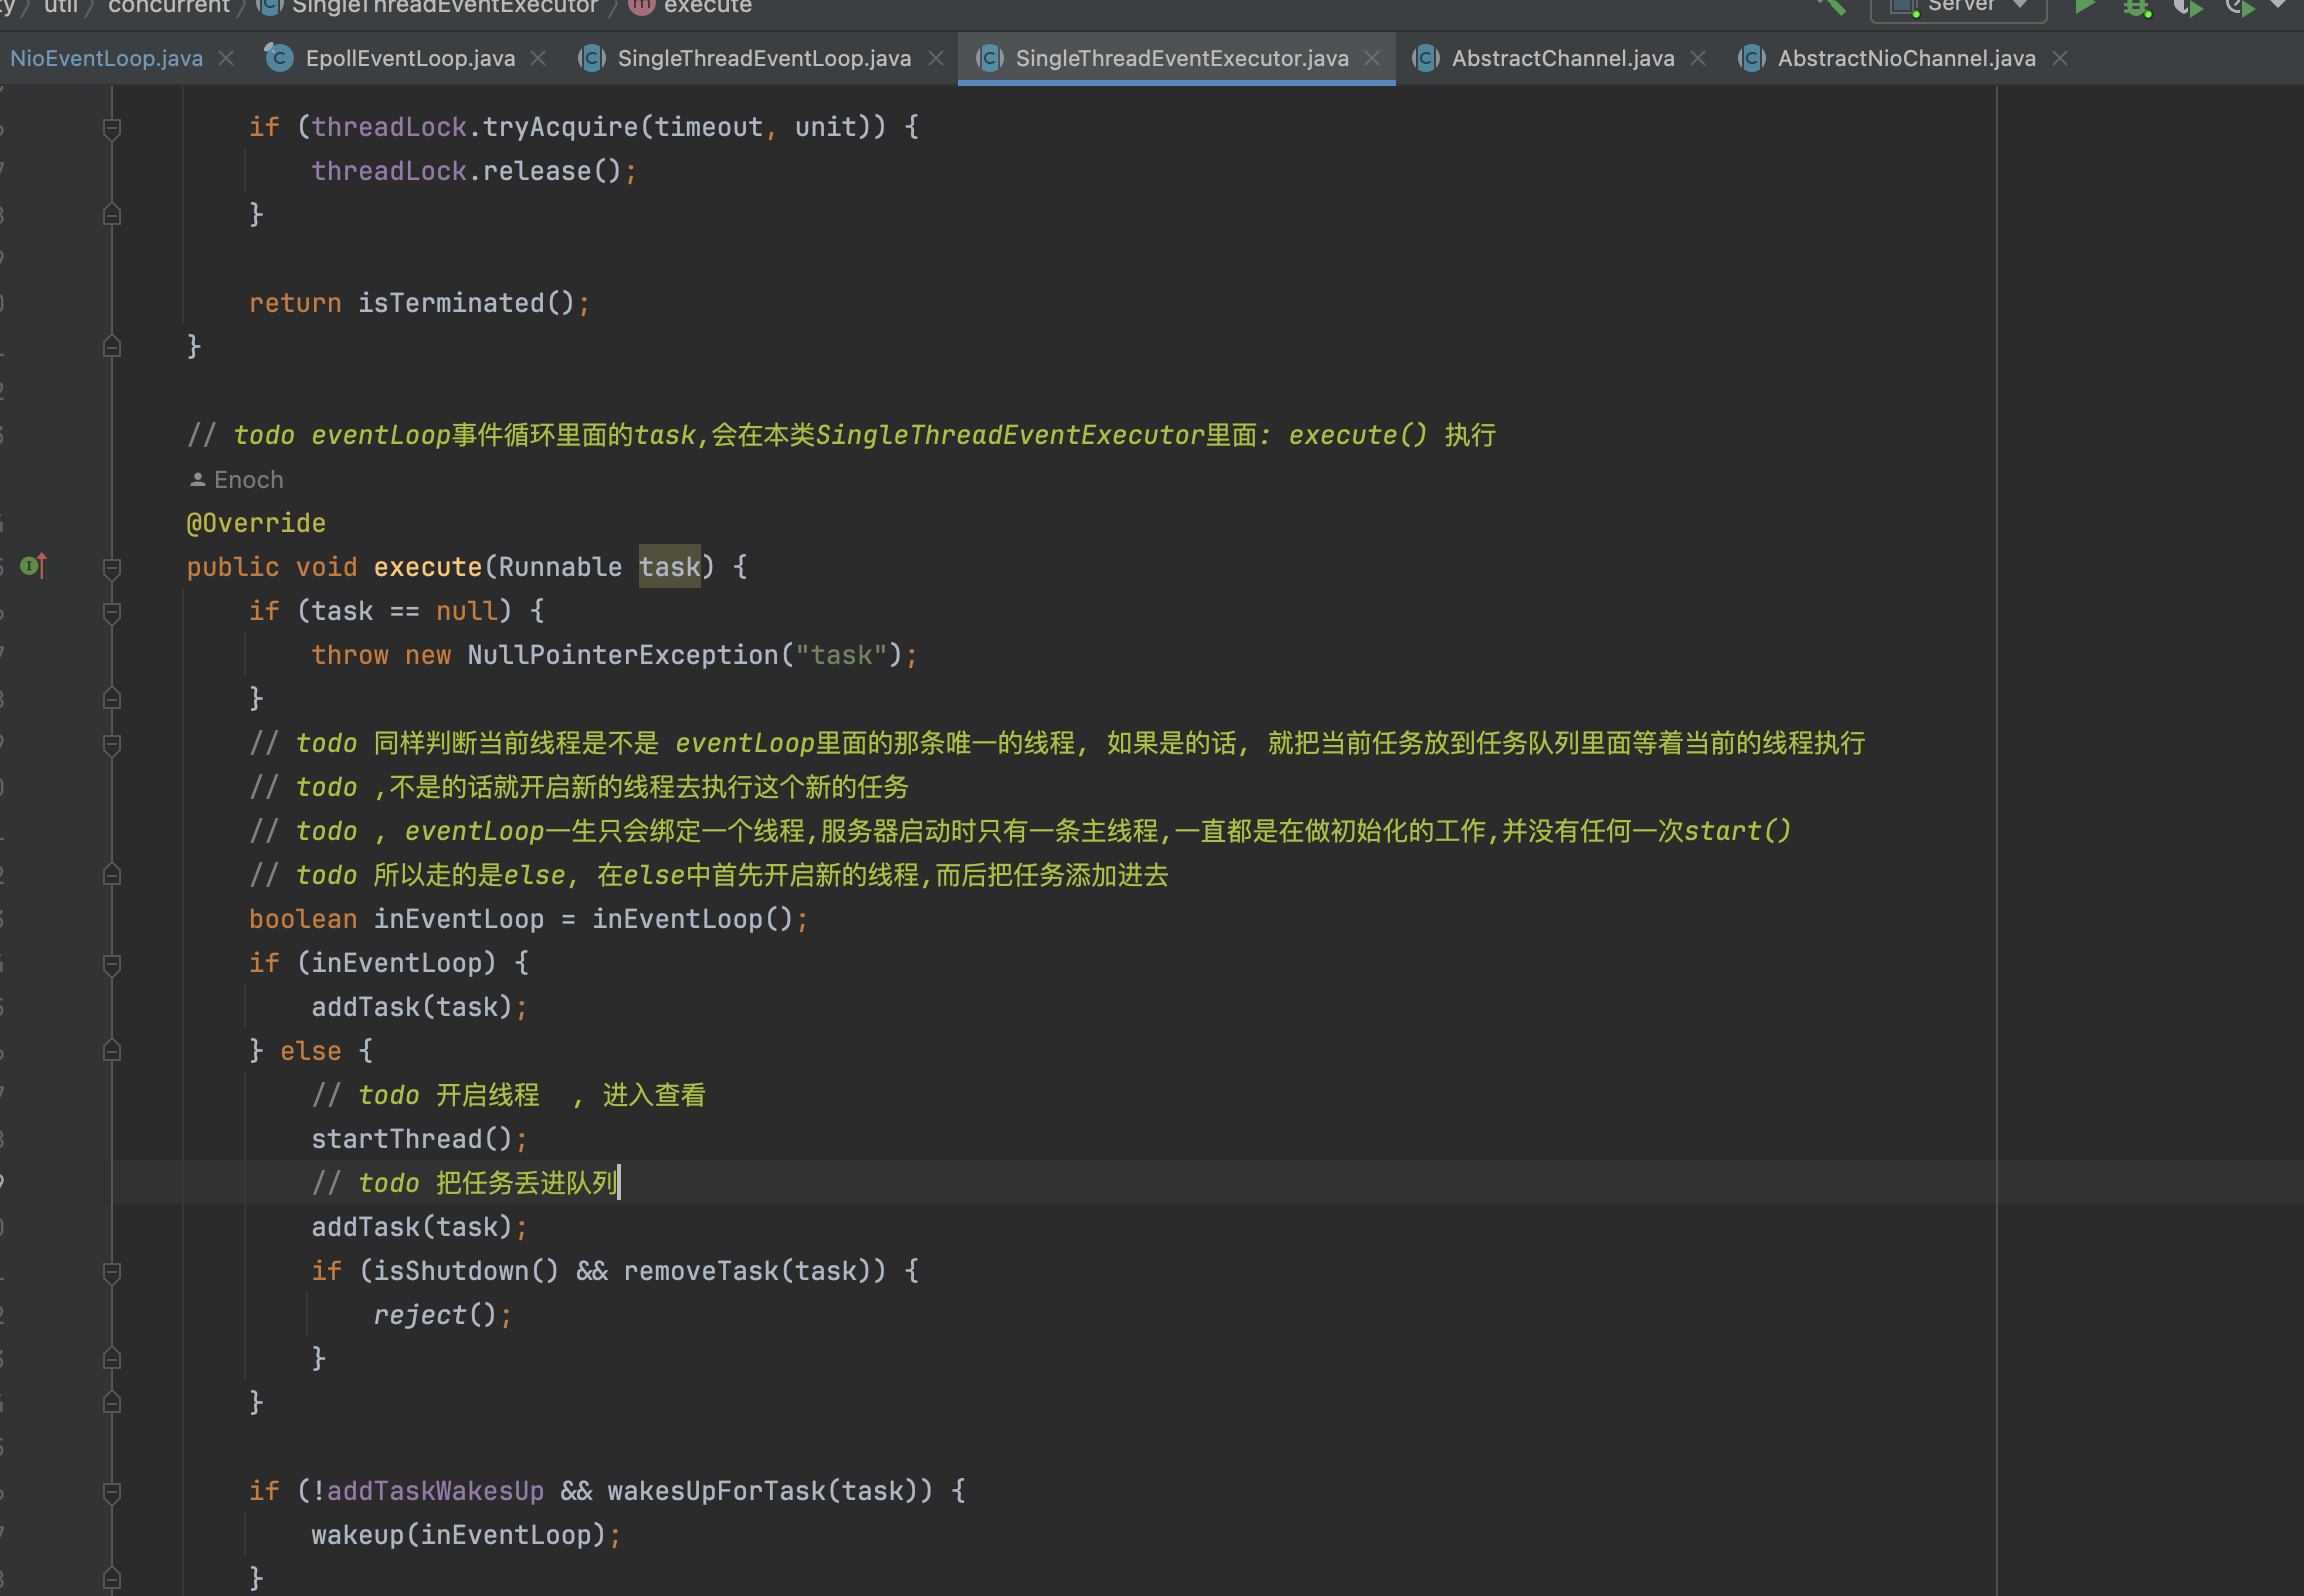
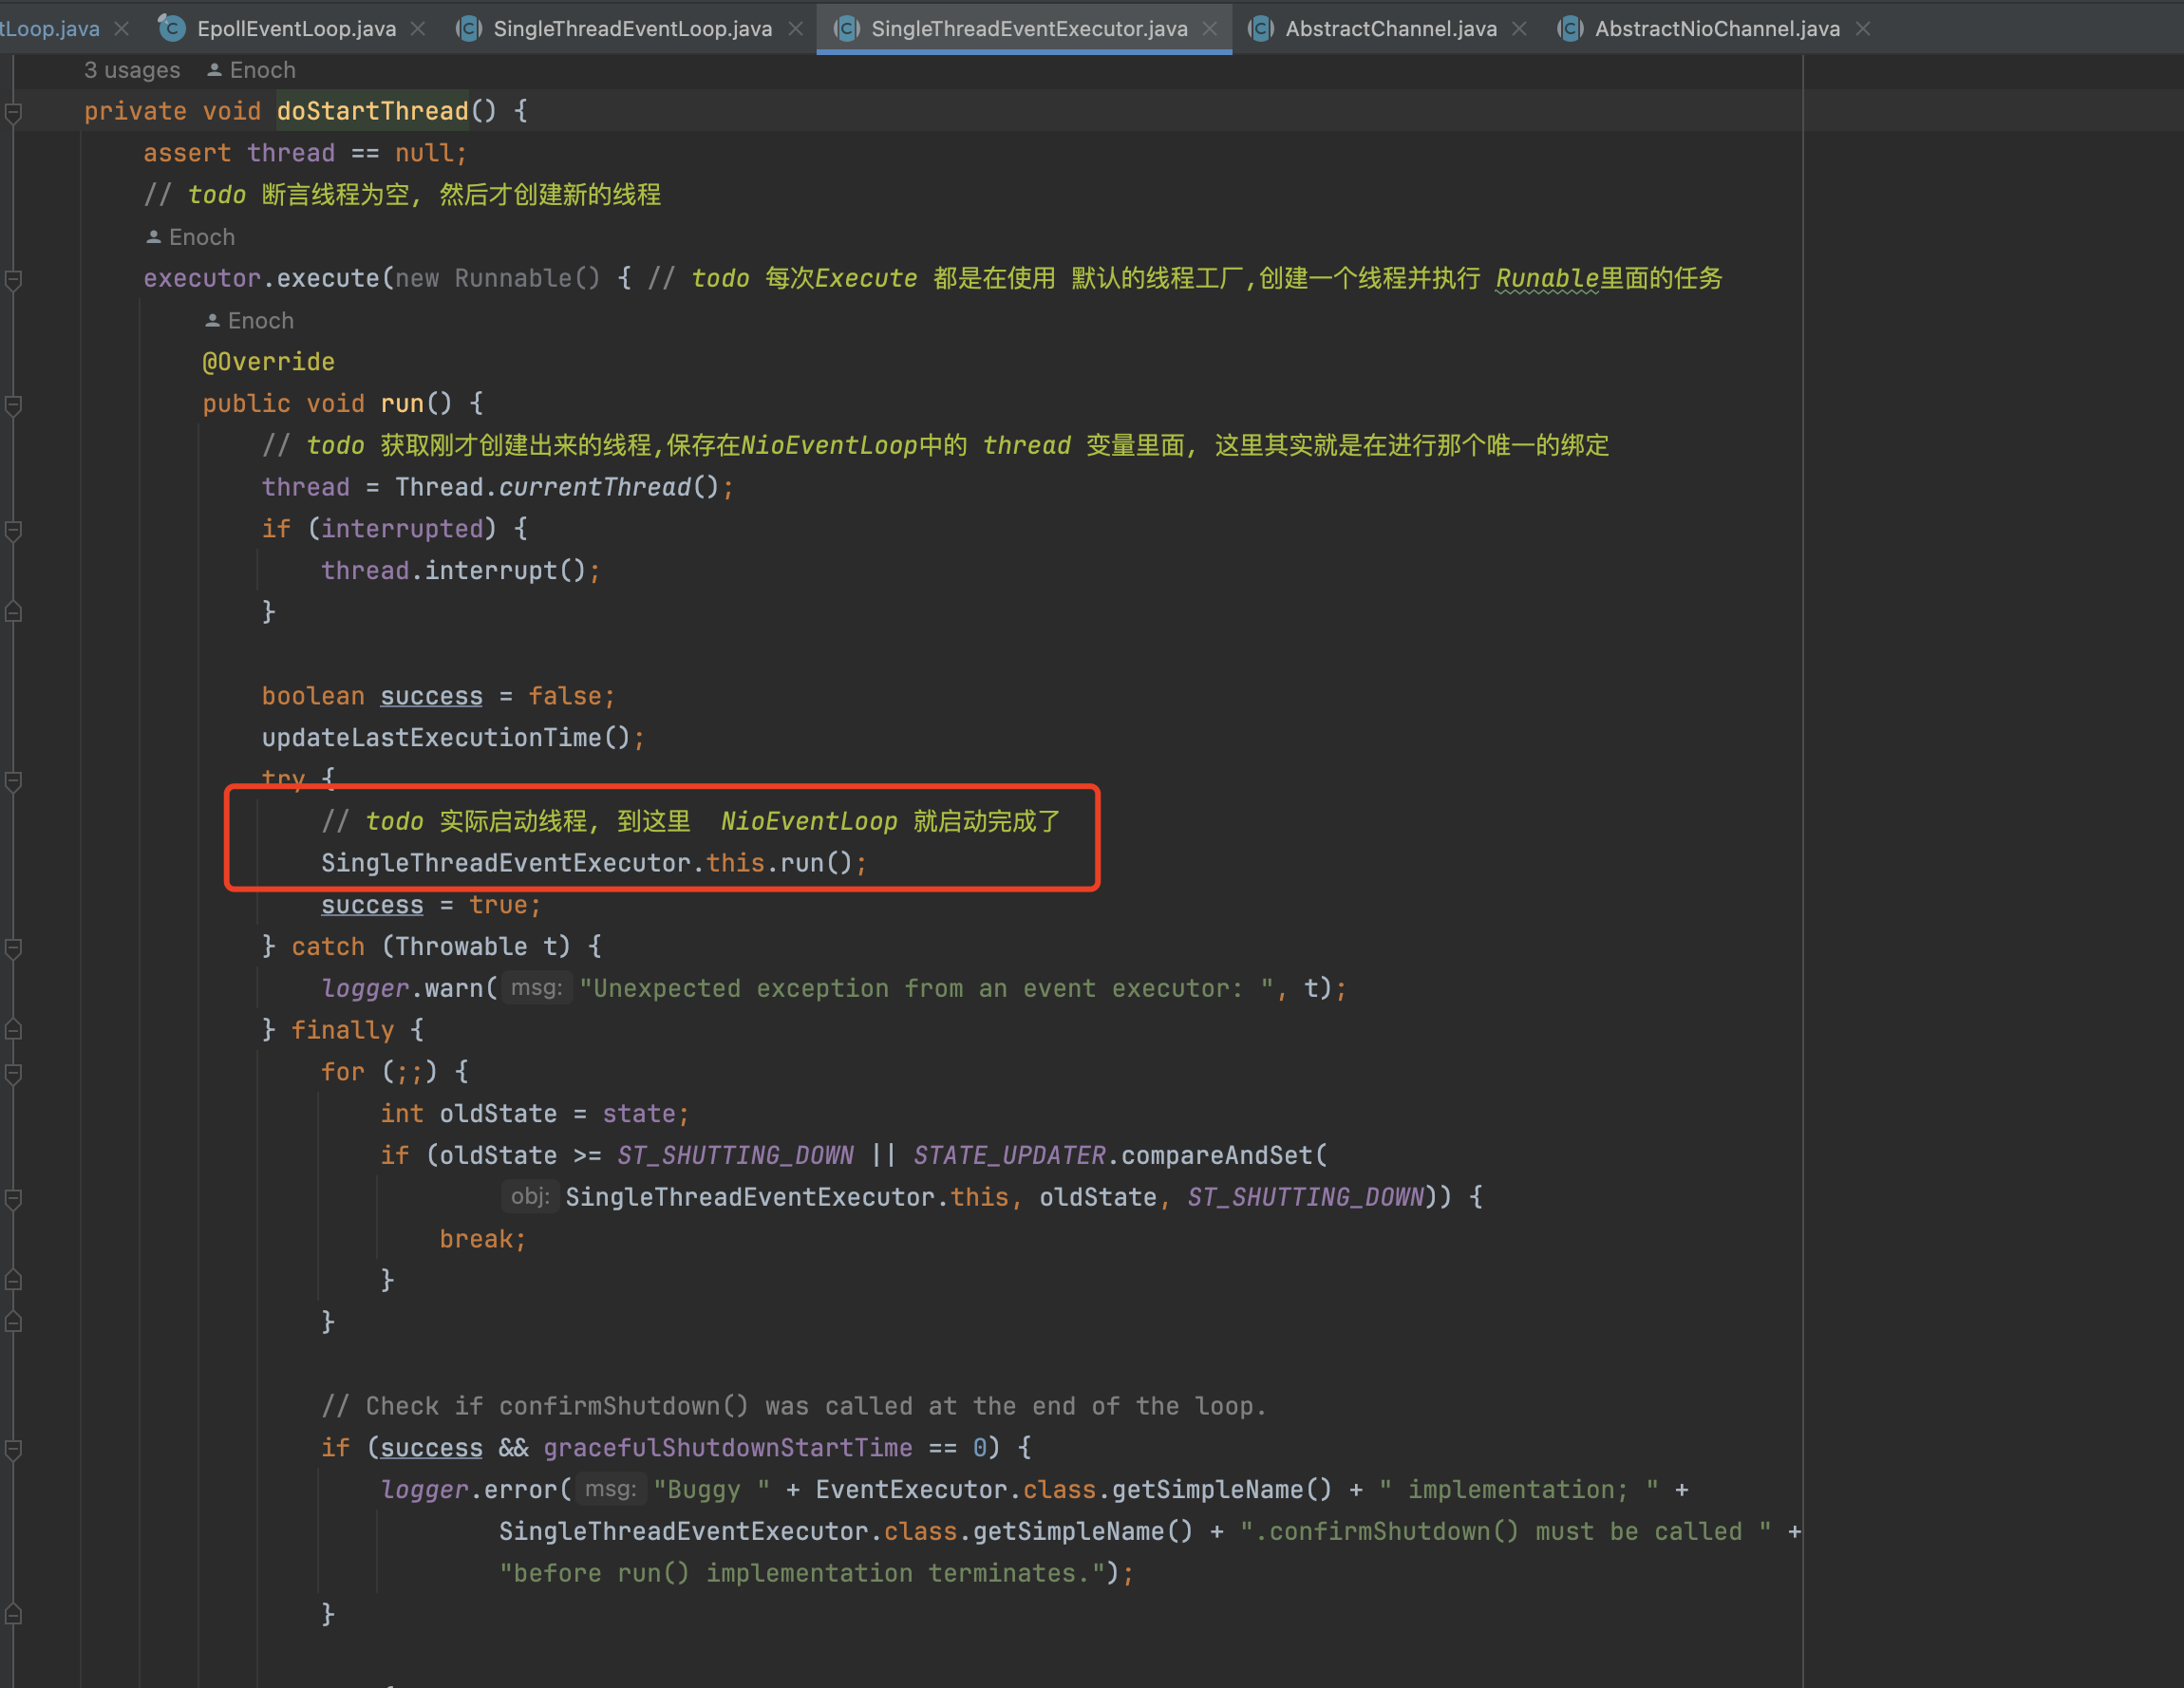
也就说在使用NioEventLoop将channel注册到selector的时候,会判断是不是eventloop线程调用,如果不是就会使用SingleThreadEventExecutor.execute执行,它会将NioEventLoop.run方法包装成一个runnable,然后创建一个线程并启动,然后就调用到NioEventLoop里面了
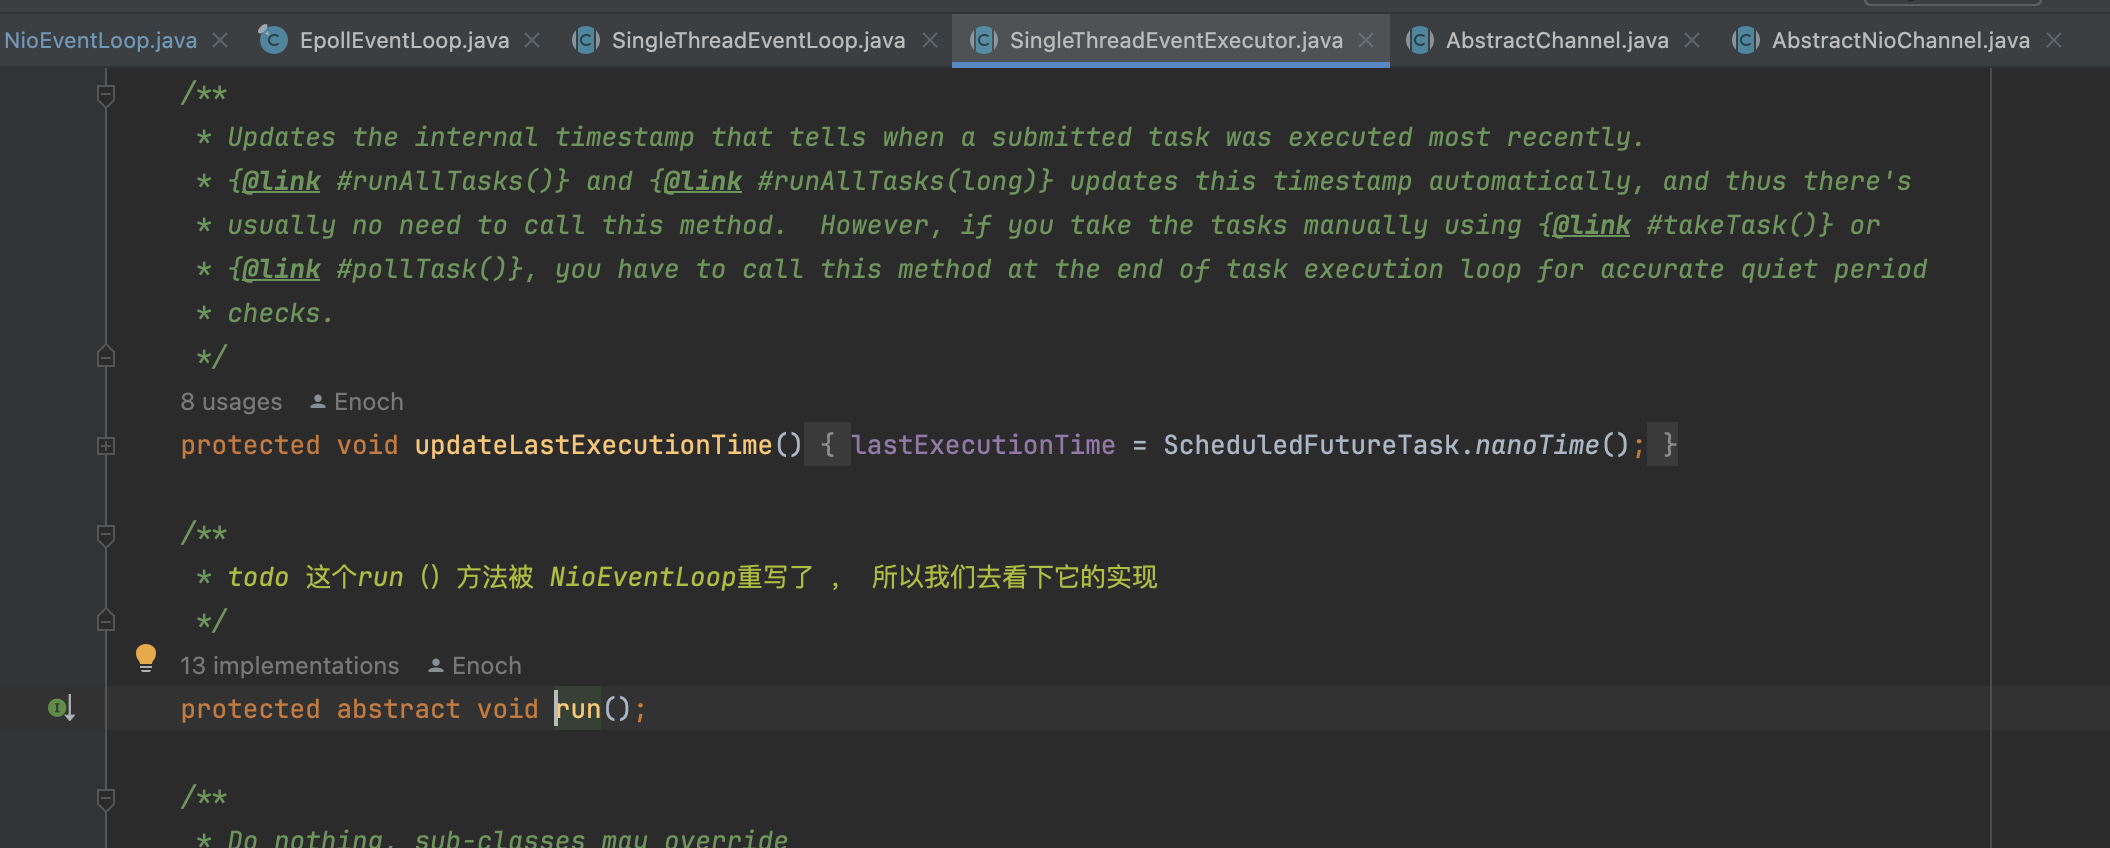
4.2 run方法
/*** todo select()                    检查是否有IO事件* todo ProcessorSelectedKeys()     处理IO事件* todo RunAllTask()                处理异步任务队列*/
@Override
protected void run() {for (; ; ) {try {// todo hasTasks() true代表 任务队列存在任务switch (selectStrategy.calculateStrategy(selectNowSupplier, hasTasks())) {case SelectStrategy.CONTINUE:continue;case SelectStrategy.SELECT:// todo 轮询IO事件, 等待事件的发生, 本方法下面的代码是处理接受到的感性趣的事件, 进入查看本方法select(wakenUp.getAndSet(false));// wakenUp.compareAndSet(false, true)' is always evaluated// before calling 'selector.wakeup()' to reduce the wake-up// overhead. (Selector.wakeup() is an expensive operation.)//// However, there is a race condition in this approach.// The race condition is triggered when 'wakenUp' is set to// true too early.//// 'wakenUp' is set to true too early if:// 1) Selector is waken up between 'wakenUp.set(false)' and//    'selector.select(...)'. (BAD)// 2) Selector is waken up between 'selector.select(...)' and//    'if (wakenUp.get()) { ... }'. (OK)//// In the first case, 'wakenUp' is set to true and the// following 'selector.select(...)' will wake up immediately.// Until 'wakenUp' is set to false again in the next round,// 'wakenUp.compareAndSet(false, true)' will fail, and therefore// any attempt to wake up the Selector will fail, too, causing// the following 'selector.select(...)' call to block// unnecessarily.//// To fix this problem, we wake up the selector again if wakenUp// is true immediately after selector.select(...).// It is inefficient in that it wakes up the selector for both// the first case (BAD - wake-up required) and the second case// (OK - no wake-up required).if (wakenUp.get()) {selector.wakeup();}// fall throughdefault:}cancelledKeys = 0;needsToSelectAgain = false;final int ioRatio = this.ioRatio;  // todo 默认50// todo  如果ioRatio==100 就调用第一个     processSelectedKeys();  否则就调用第二个if (ioRatio == 100) {try {// todo 处理 处理发生的感性趣的事件processSelectedKeys();} finally {// Ensure we always run tasks.// todo 用于处理 本 eventLoop外的线程 扔到taskQueue中的任务runAllTasks();}} else {// todo 因为ioRatio默认是50 , 所以来else// todo 记录下开始的时间final long ioStartTime = System.nanoTime();try {// todo 处理IO事件processSelectedKeys();} finally {// Ensure we always run tasks.// todo  根据处理IO事件耗时 ,控制 下面的runAllTasks执行任务不能超过 ioTime 时间final long ioTime = System.nanoTime() - ioStartTime;// todo 这里面有聚合任务的逻辑runAllTasks(ioTime * (100 - ioRatio) / ioRatio);}}} catch (Throwable t) {handleLoopException(t);}// Always handle shutdown even if the loop processing threw an exception.try {if (isShuttingDown()) {closeAll();if (confirmShutdown()) {return;}}} catch (Throwable t) {handleLoopException(t);}}}
�
这里注释其实说得挺清楚,最后总结一下:
- select(wakenUp.getAndSet(false)):轮训io事件发生,当timeout或者有事件会break
- processSelectedKeys:处理io事件
- 运行taskQueue里面的任务
4.3 processSelectedKeys
在真正执行的时候,最终会走到processSelectedKeysOptimized,netty对底层selectKeys容器进行过优化,用数组代替了keyset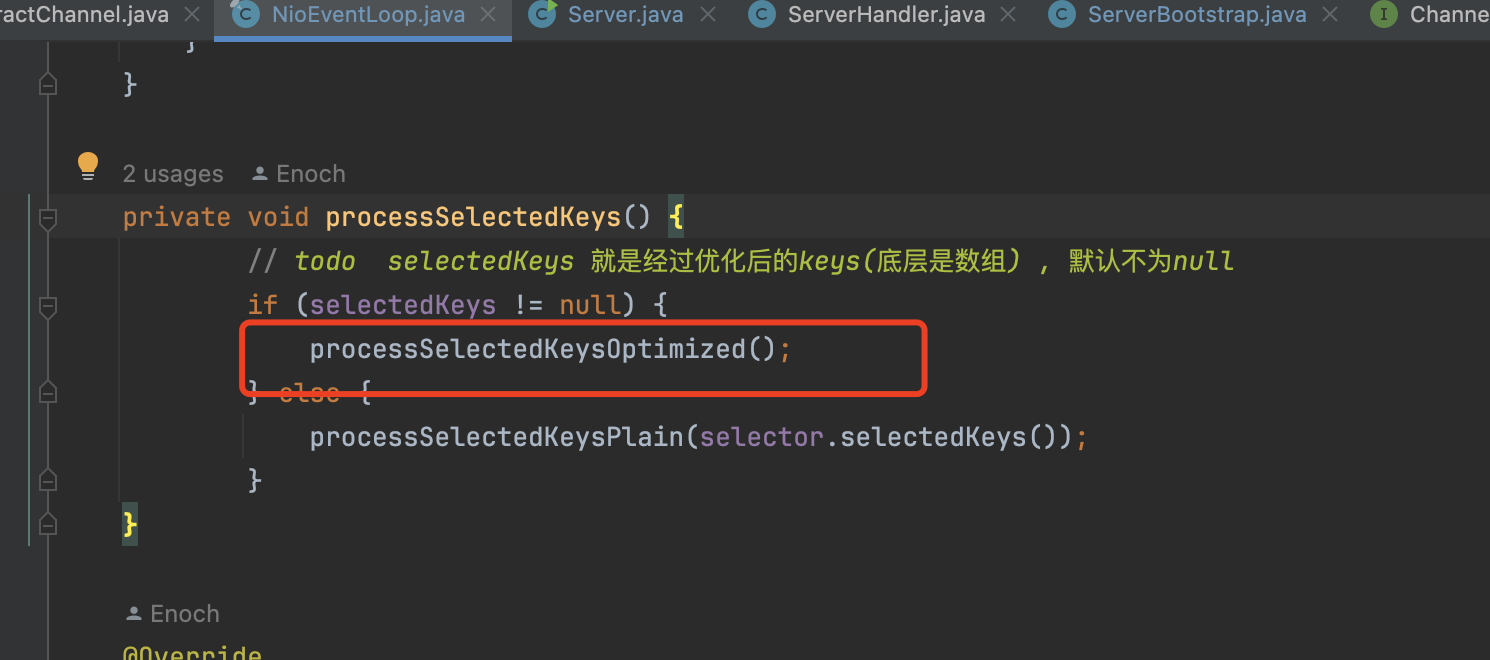
这里我为了debug,使用telnet localhost 8899, 接着就会进入到processSelectedKeysOptimized中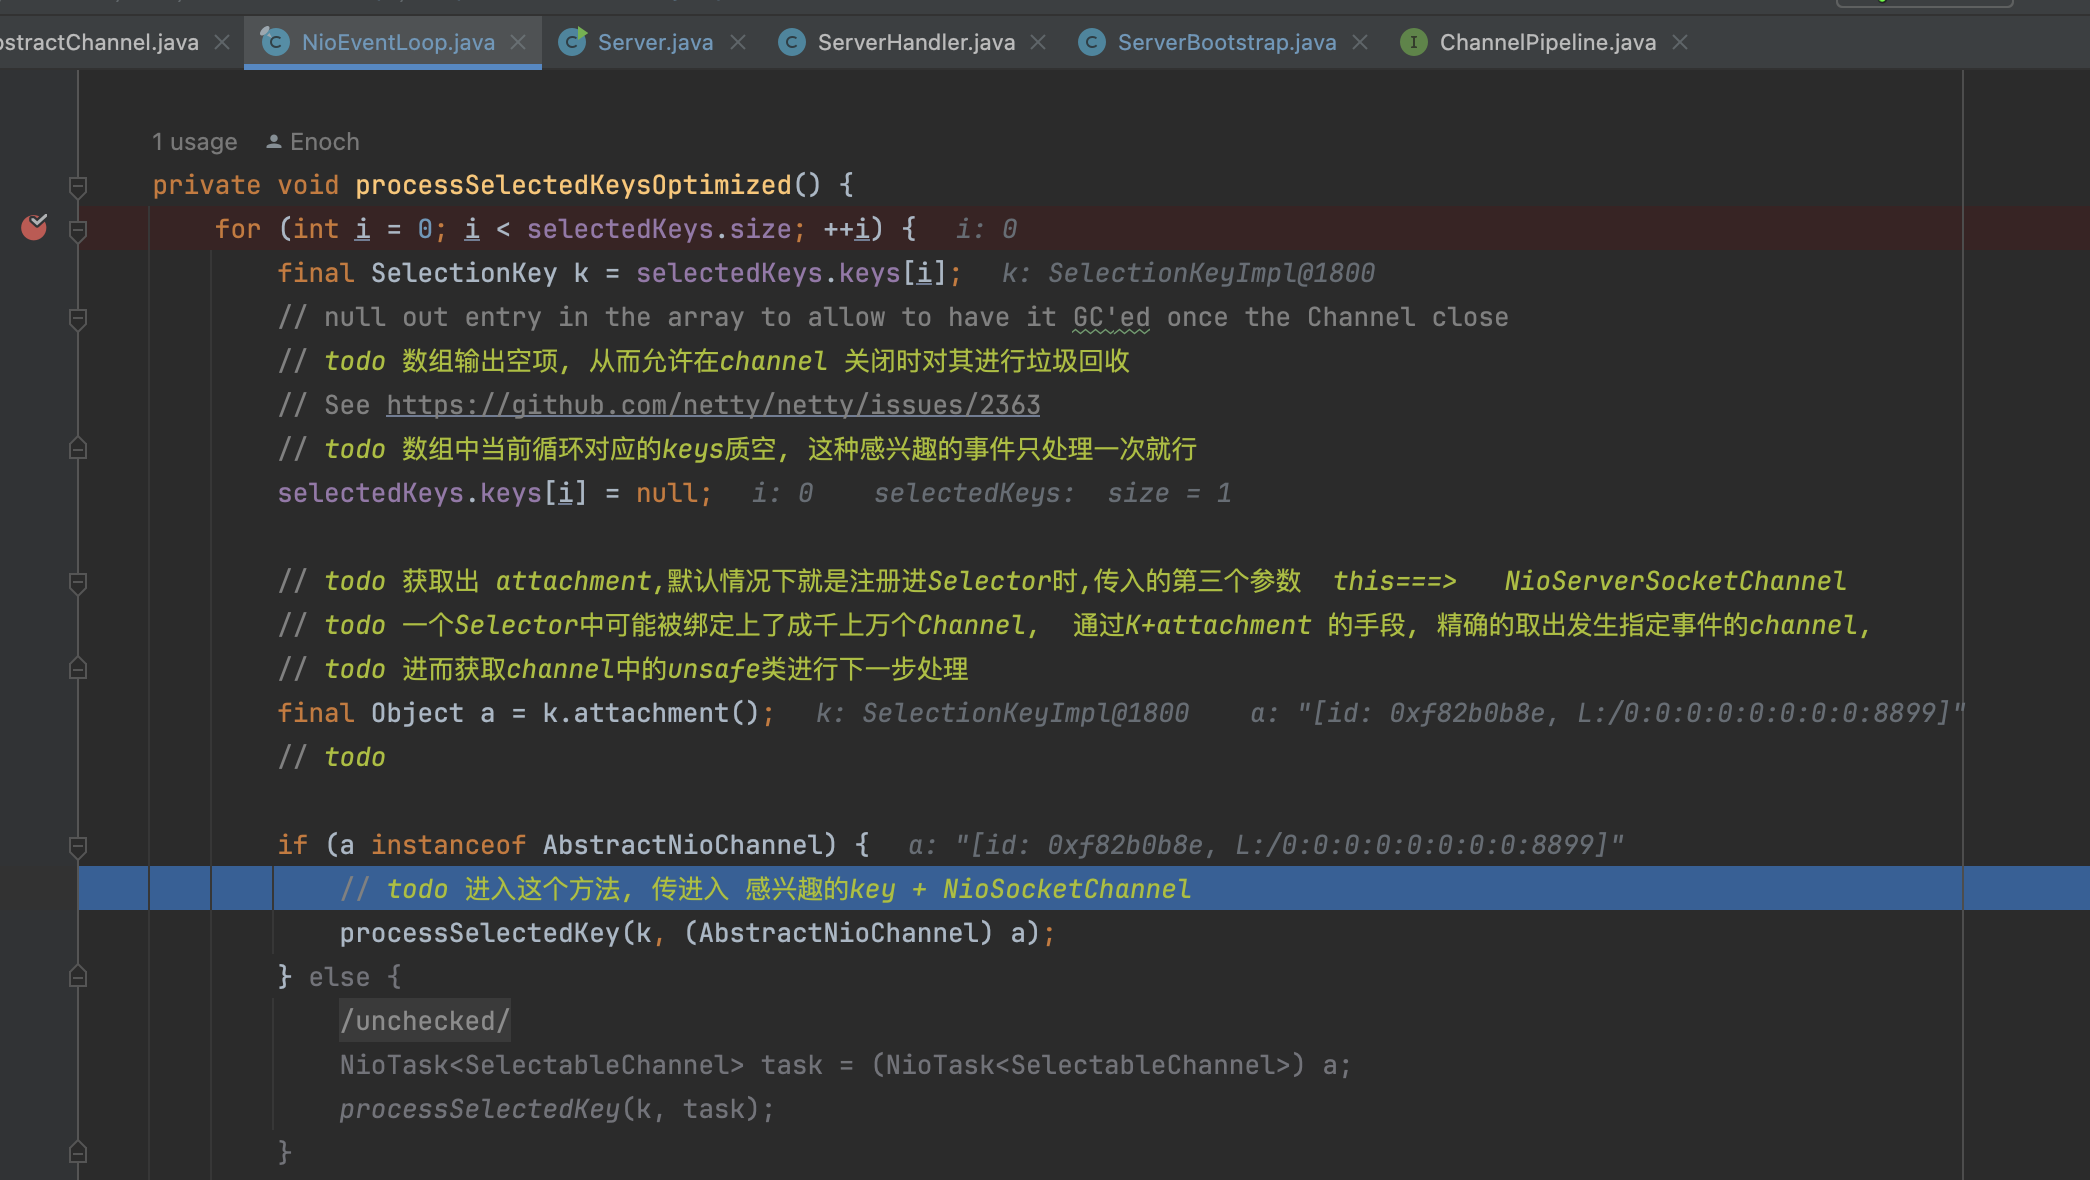
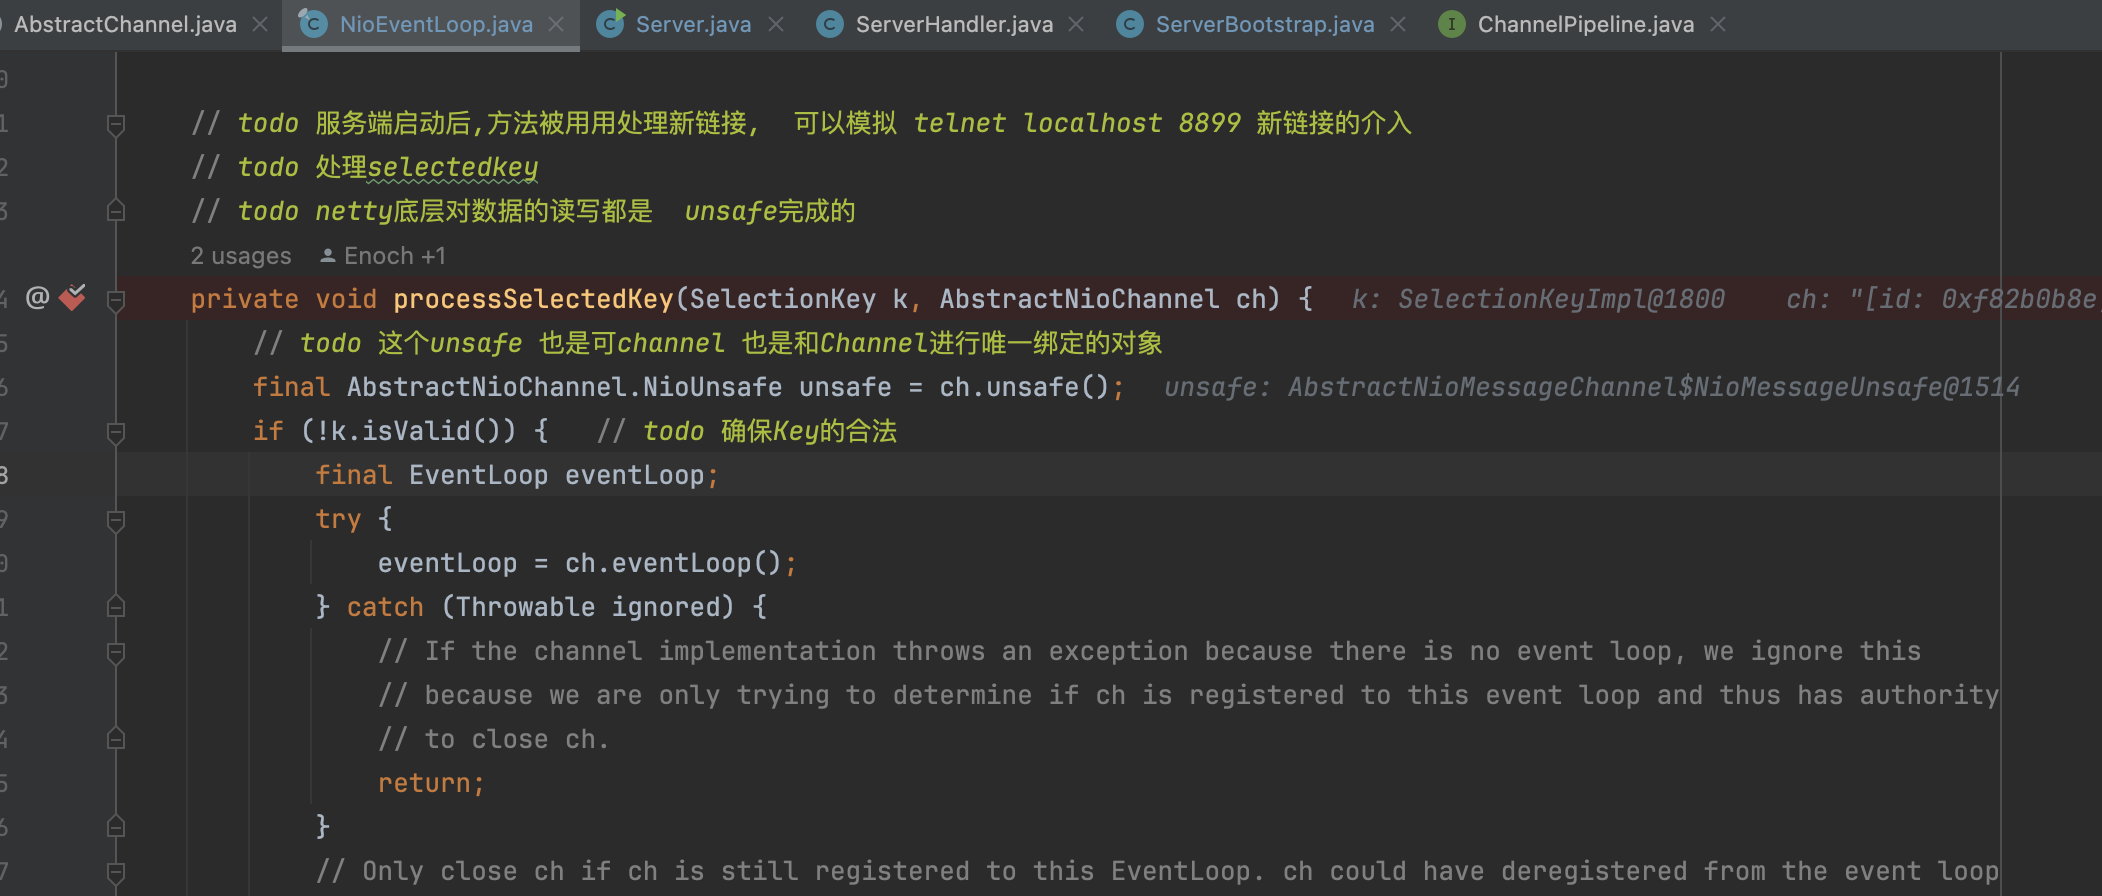
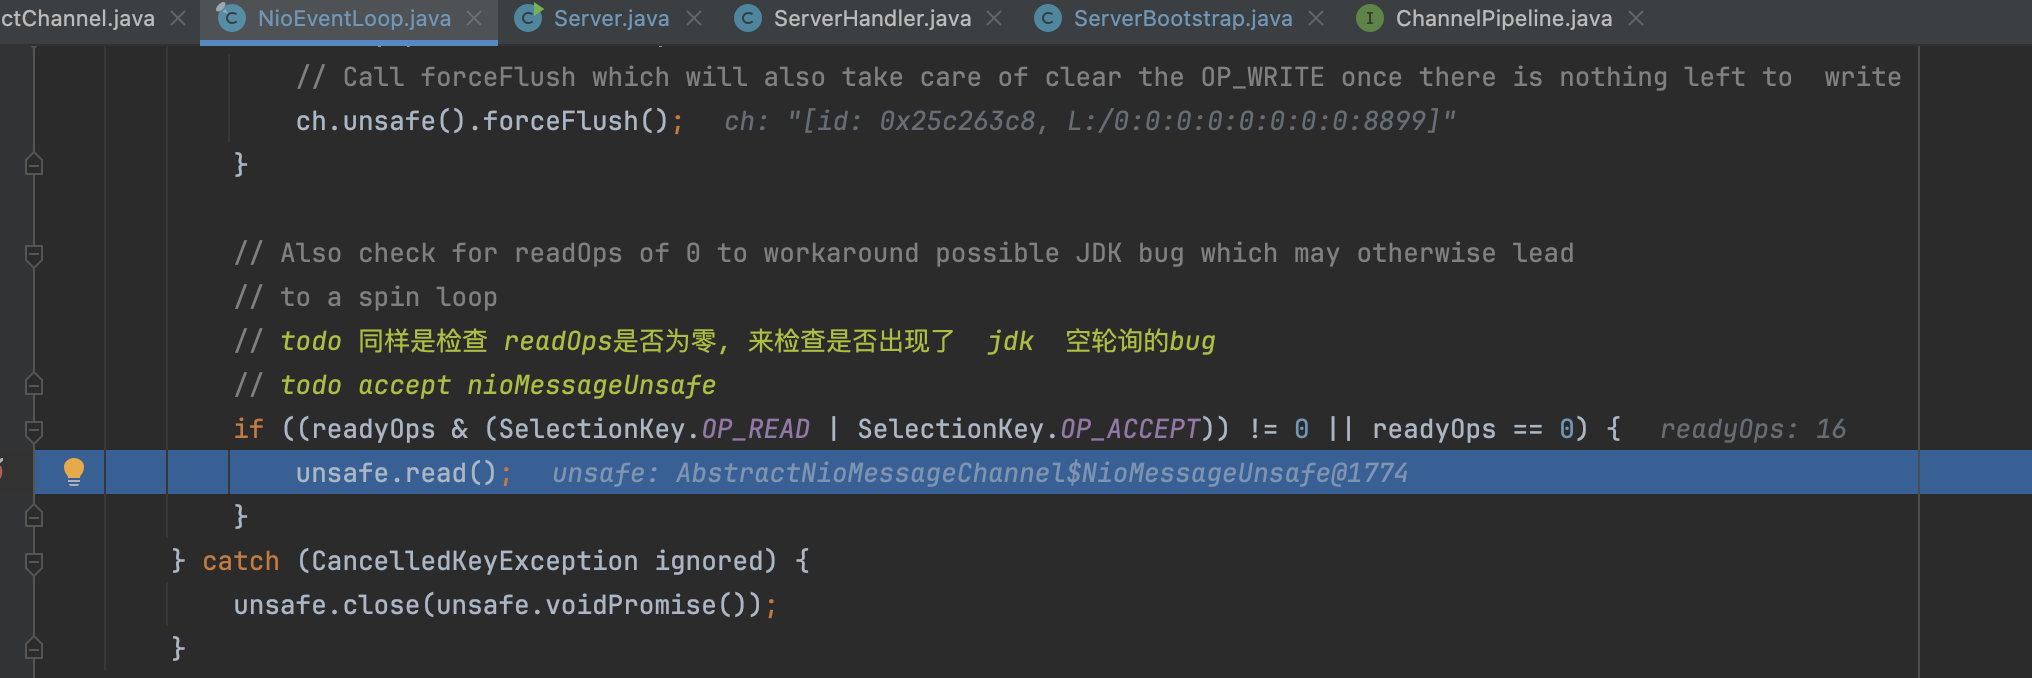
在走进processSelectedKey方法之后,最终会走到unsafe.read方法
�
�
5.AbstractNioMessageChannel
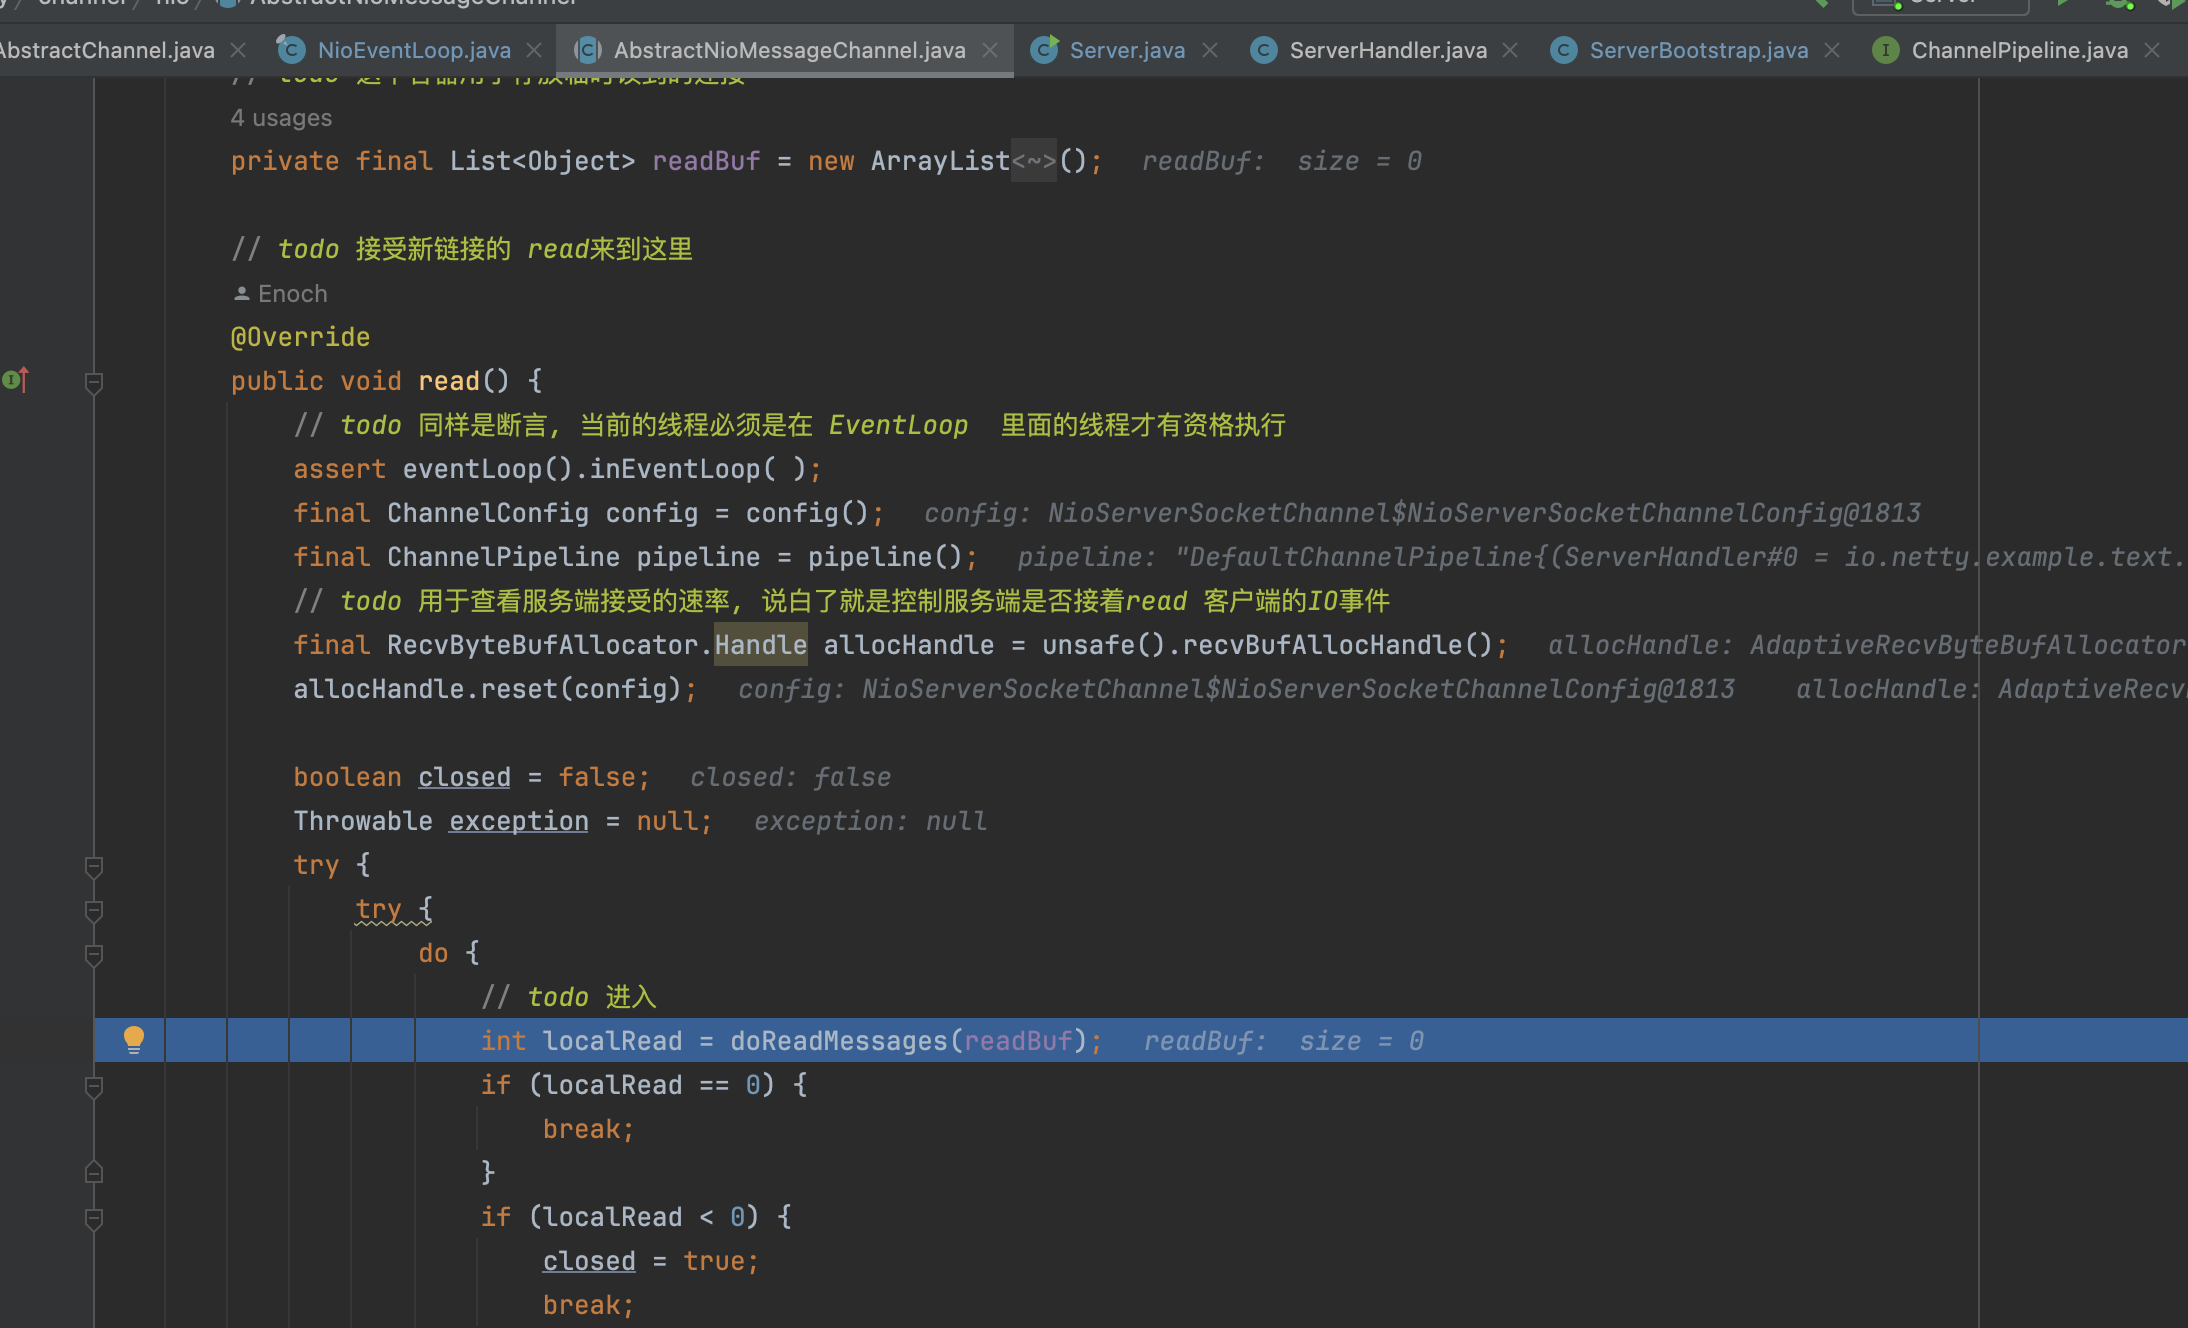
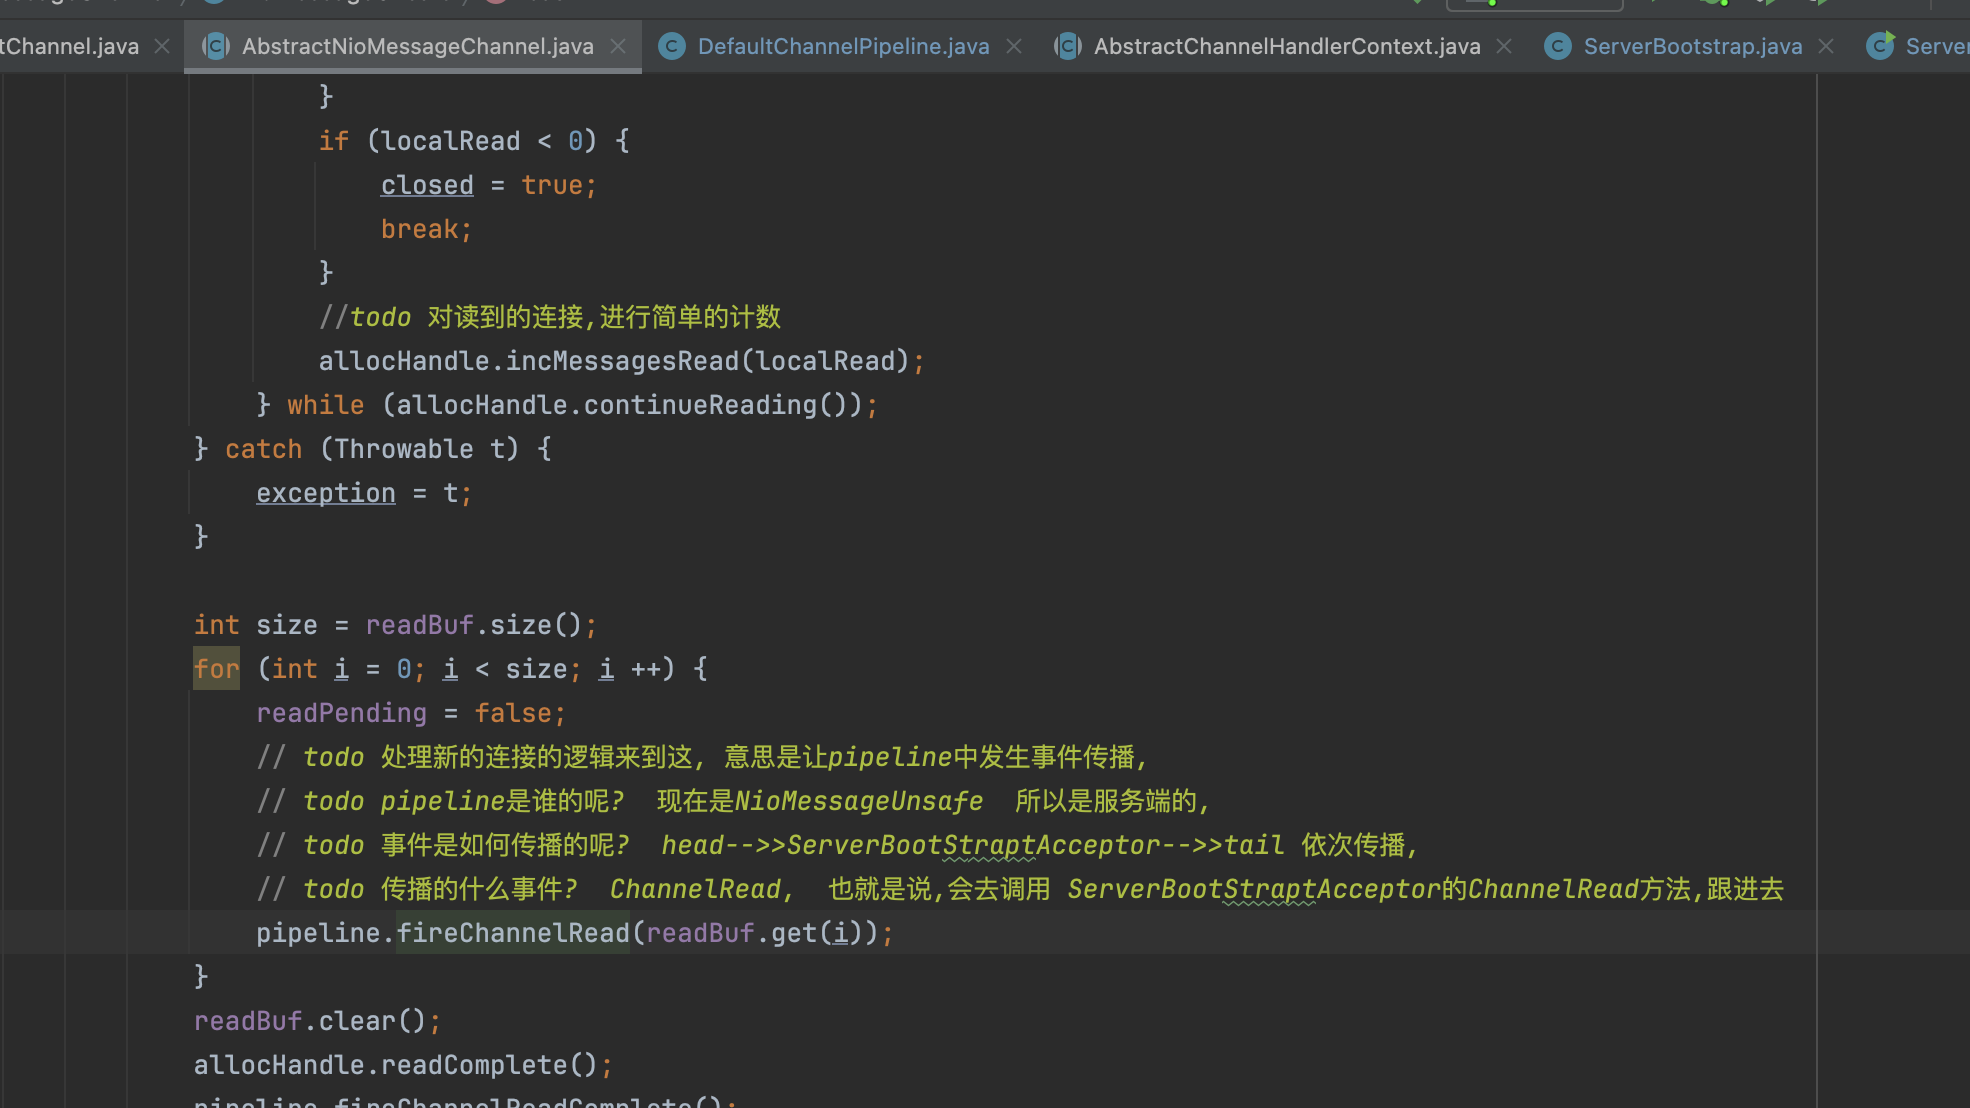
接着会调用到子类NioServerSocketChannel的doReadMessage(readBuf), 调用完子类之后,会通过pipline.fireChannelRead, 意思就是对于server端来说可读了,但是注意这时候传的是子类中创建的NioSocketChannel,说白了给server端一个NioSocketChannel,就是要创建新连接了。最终会调用到ServerBootstrapAcceptor的ChannelRead,具体看后面的ServerBootStrapAcceptor类
�
6.NioServerSocketChannel
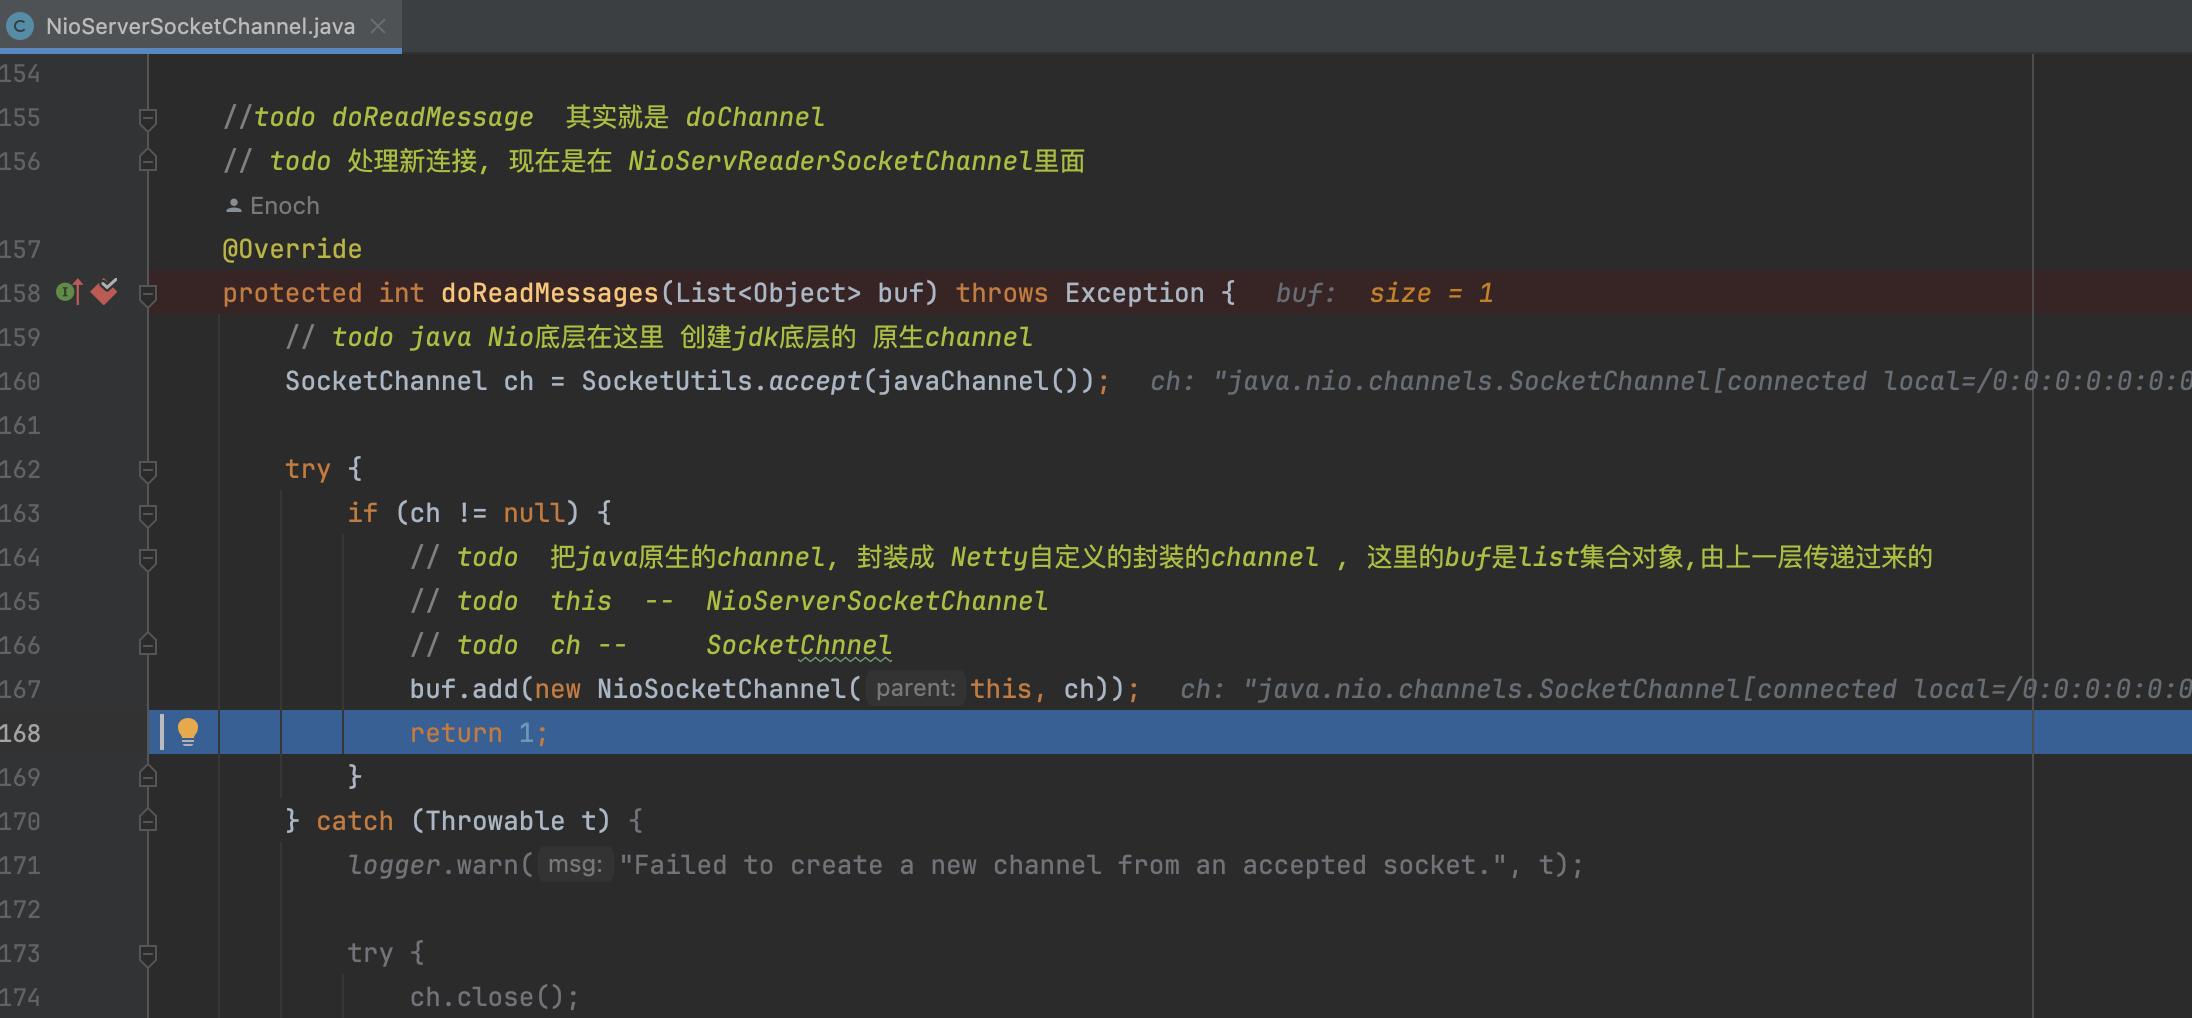
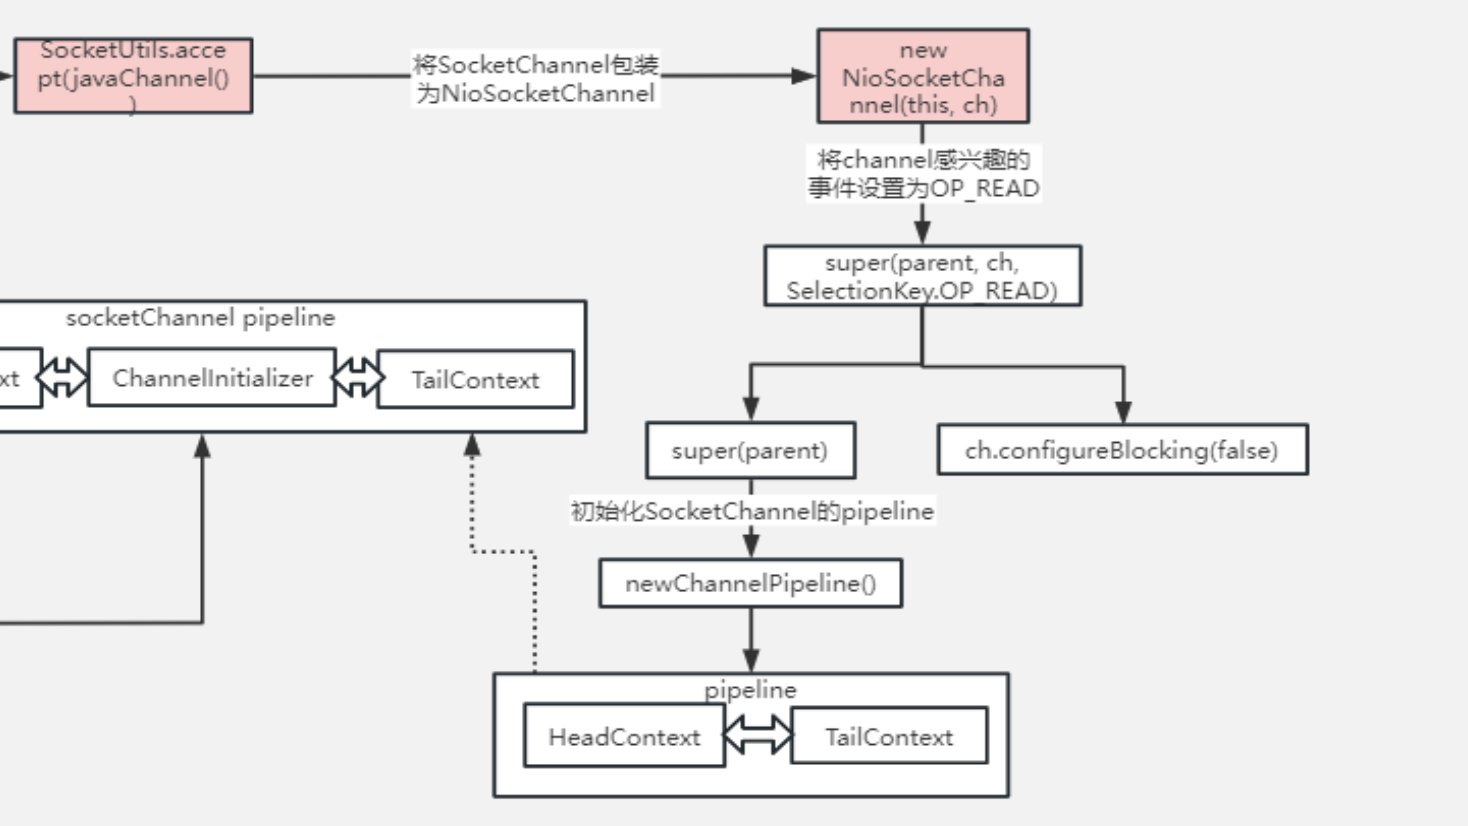
这里主要做了几件事:
- SocketUtils.accpet接受连接,并创建jdk底层的socketChannel
- new NioSocketChannel:将jdk封装成NioSocketChannel,这里和创建NioServerSocketChannel的时候一样,不断的调用父类,同时创建NioServerChannel的pipline,!!!这里注意,这里会设置感兴趣的事件为read
7.ServerBootstrap#ServerBootstrapAcceptor
ServerBootstrapAcceptor是ServerBootstrap的内部类
之前AbstractNioMessageChannel里面的 ,最终会调用到ServerBootstrapAcceptor的channelRead方法
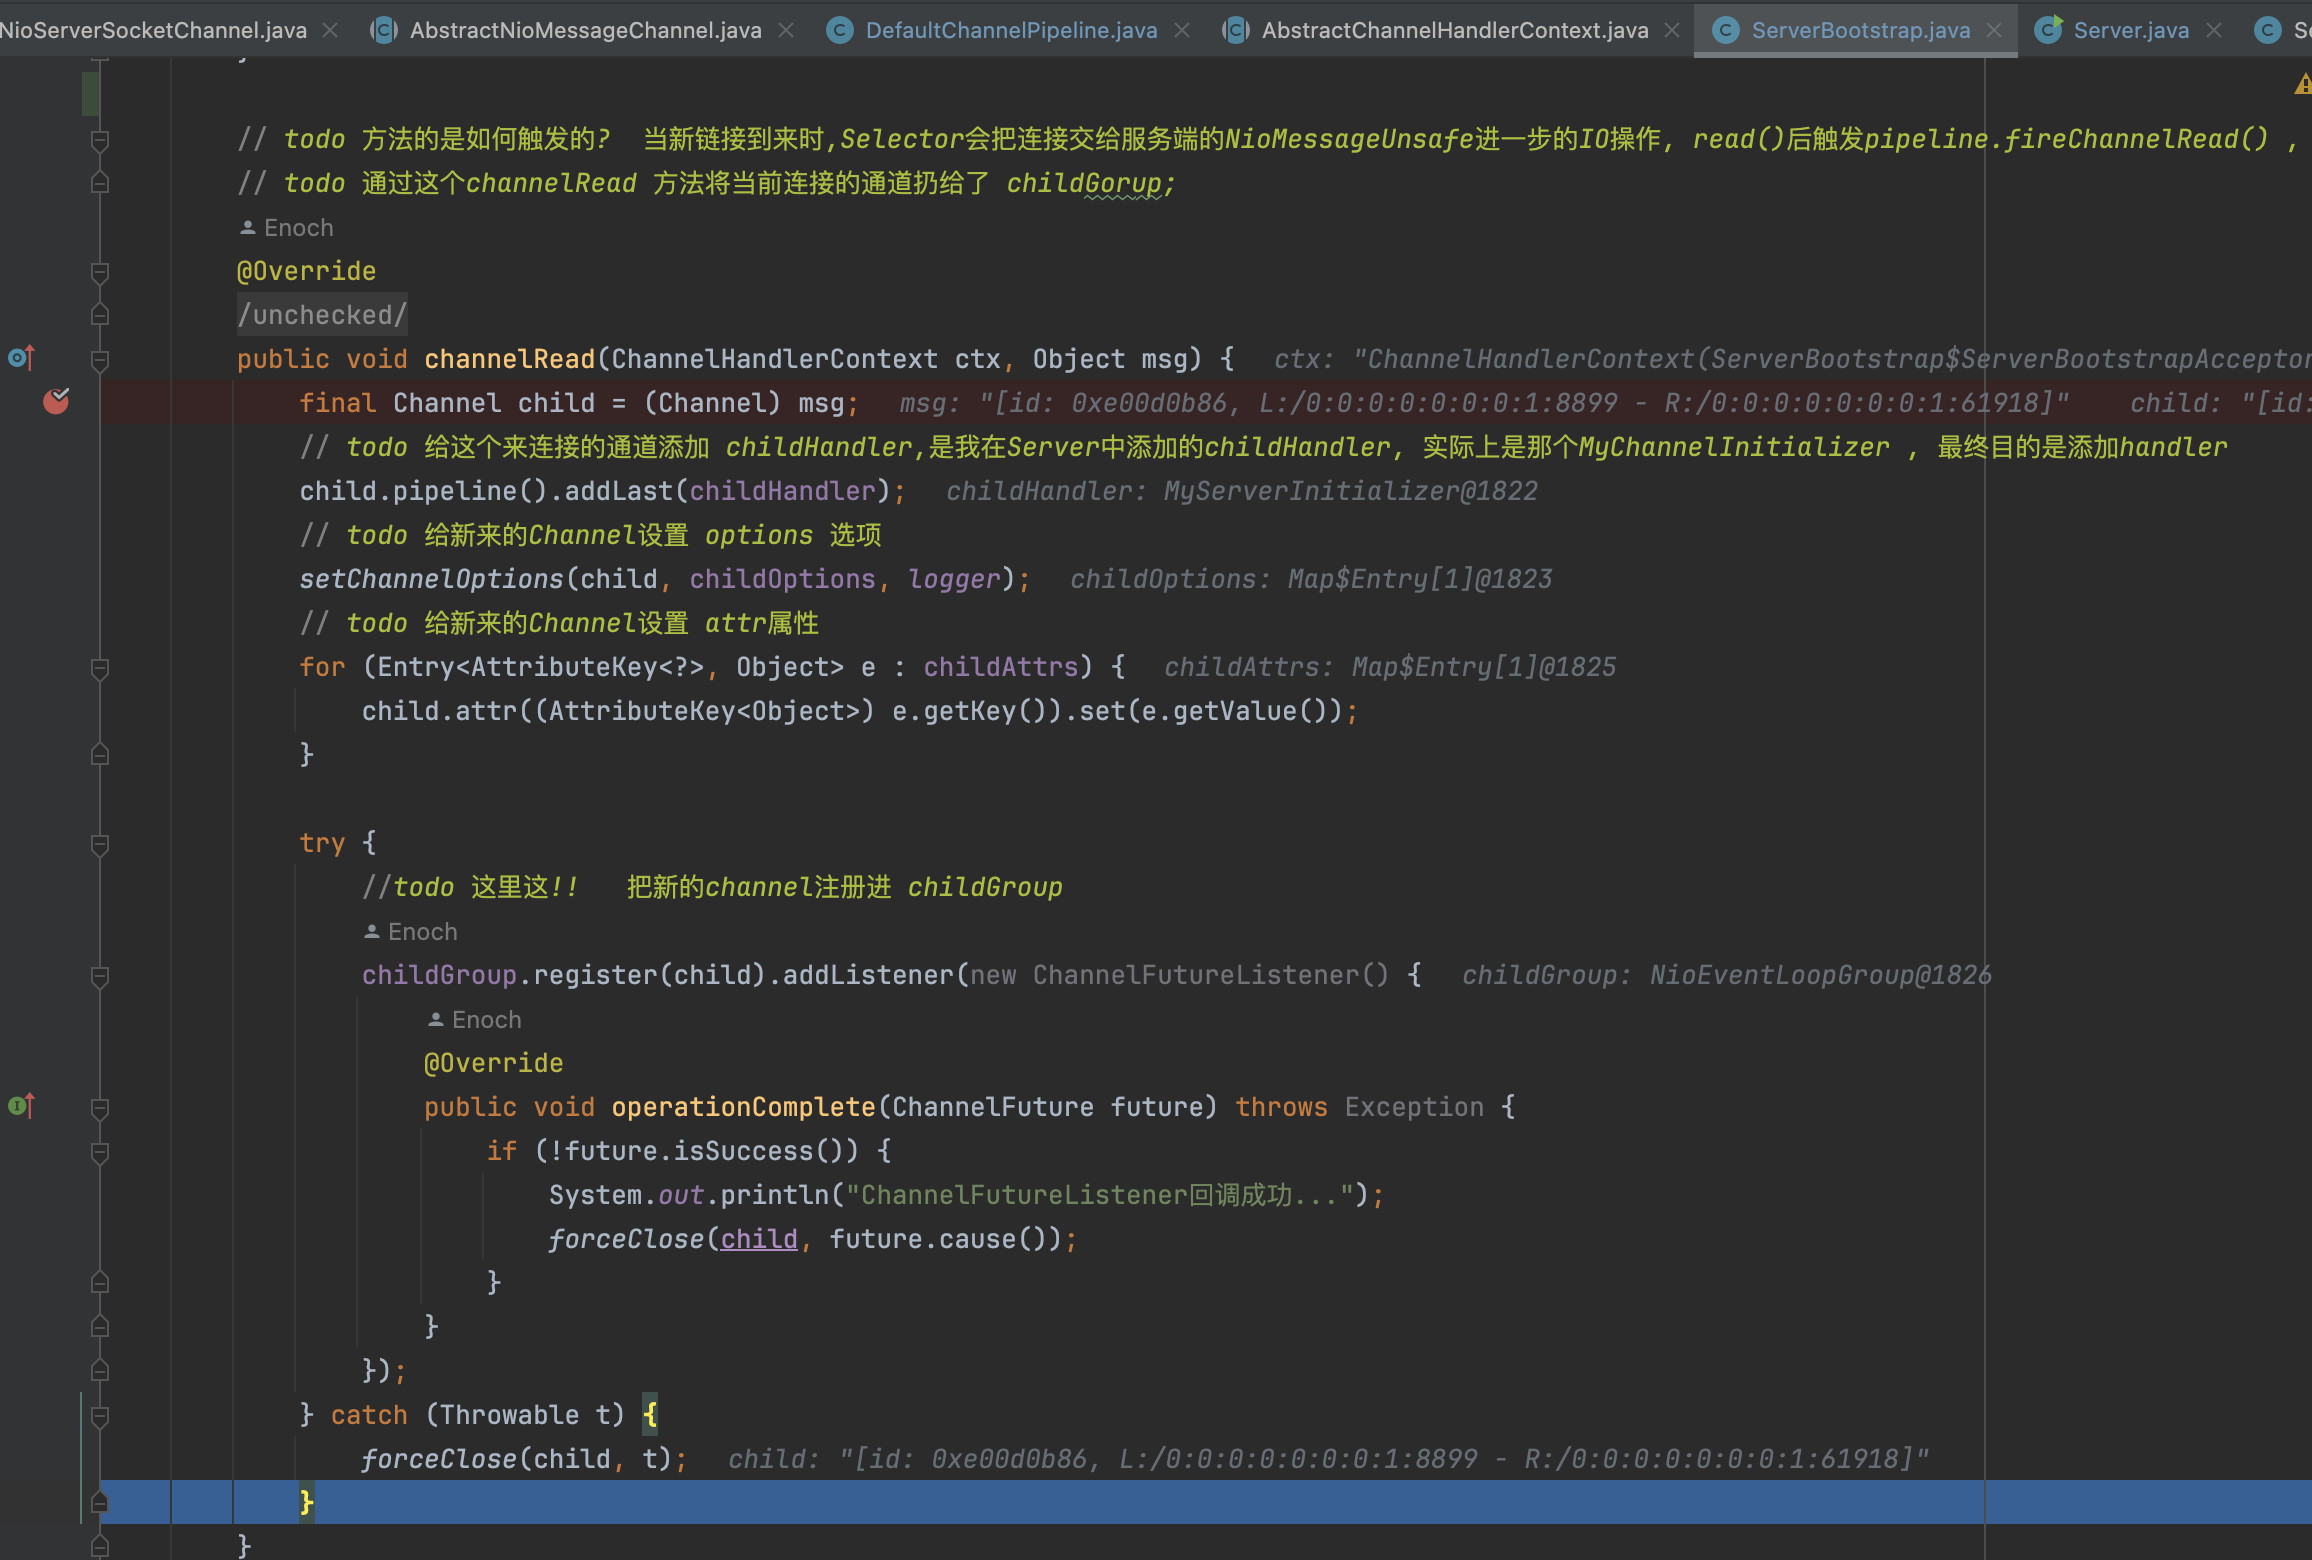
简单的总结一下做了几件事:
- 给sockeChannel(也是这里的child)设置childHandler
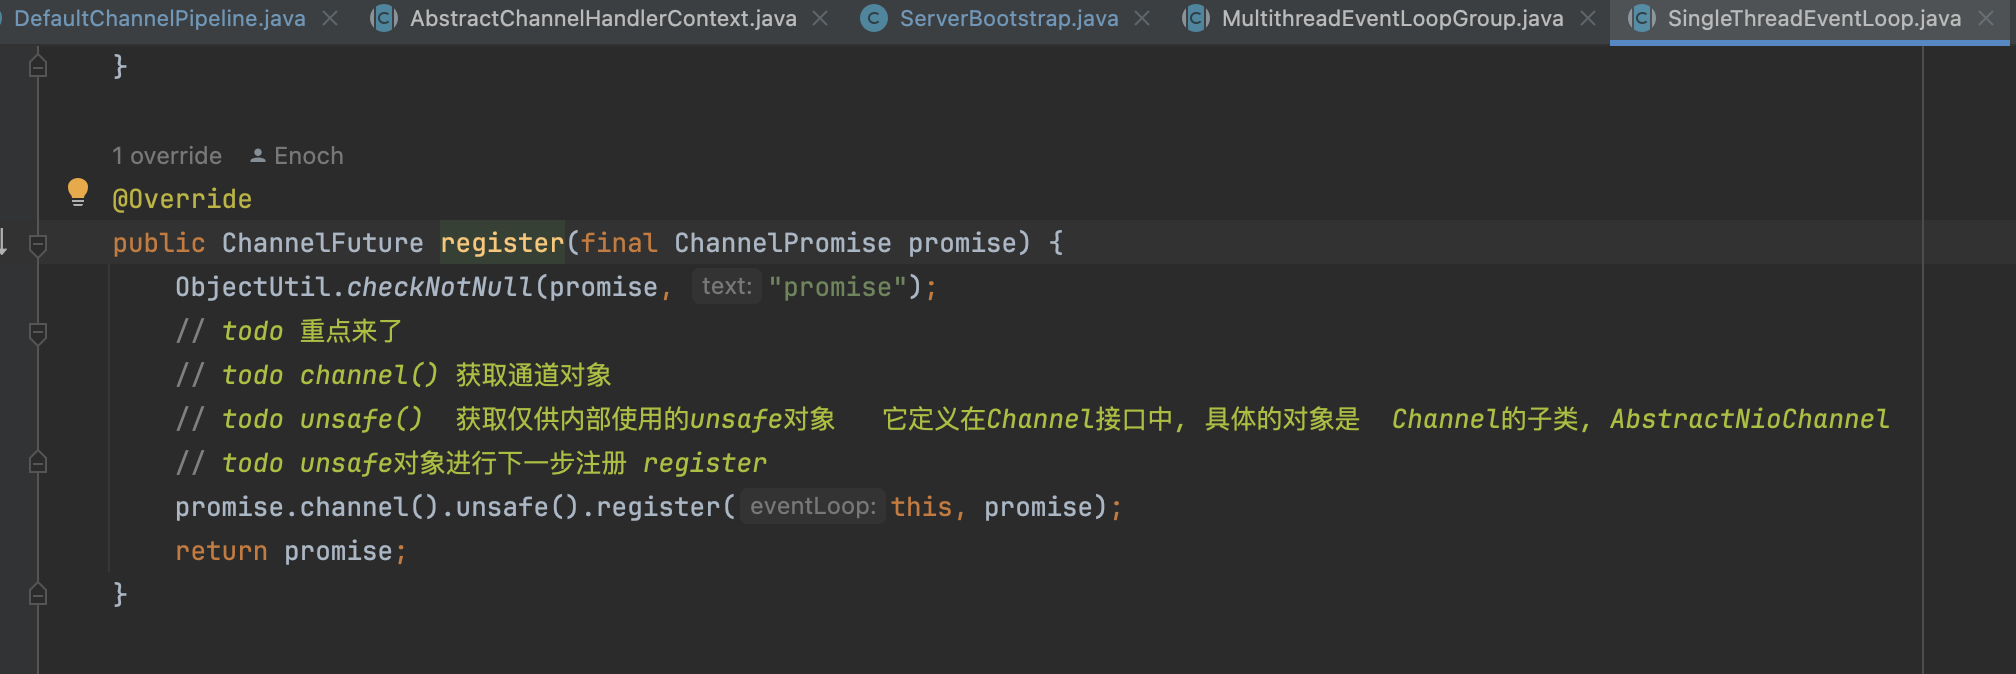
- 使用childGroup.register 来完成socketChannel到Selector的注册,这里和SocketServerChannel到Selector的注册逻辑是一样的,都是从EventLoopGroup中选一个EventLoop(里面有Selector),然后调用jdk的register(eventloop.getSelector, 0, NioSocketChannel(netty对于socketChannel的包装))
8.AbstractChannel
childGroup.register -> MultithreadEventLoopGroup.register -> SingleThreadEventLoop.register -> AbstractChannel.register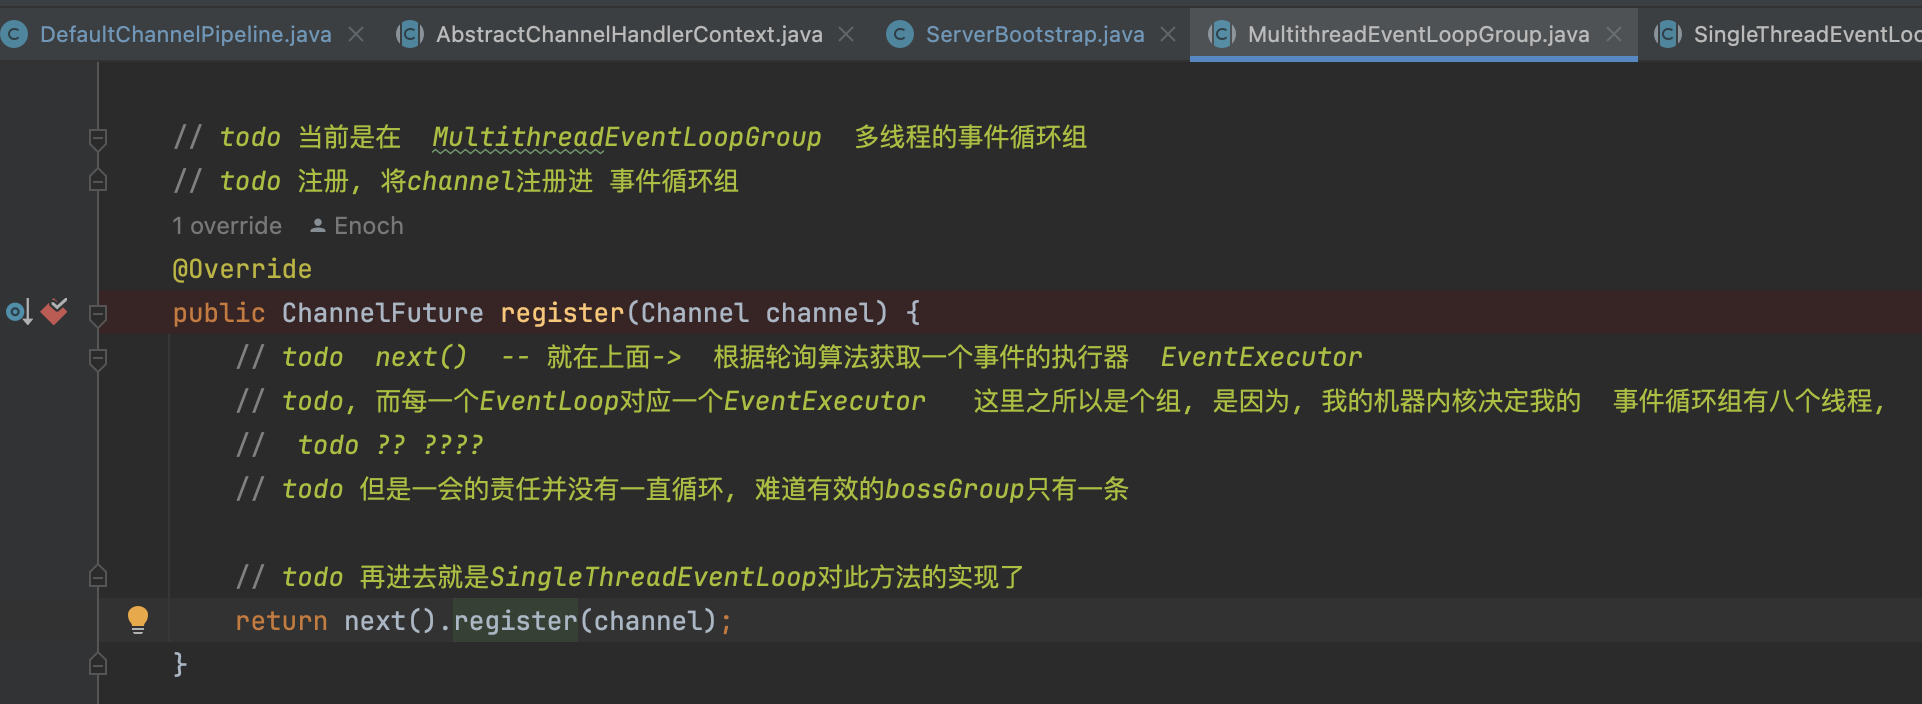
AbstractChannel.abstractUnsafe.register 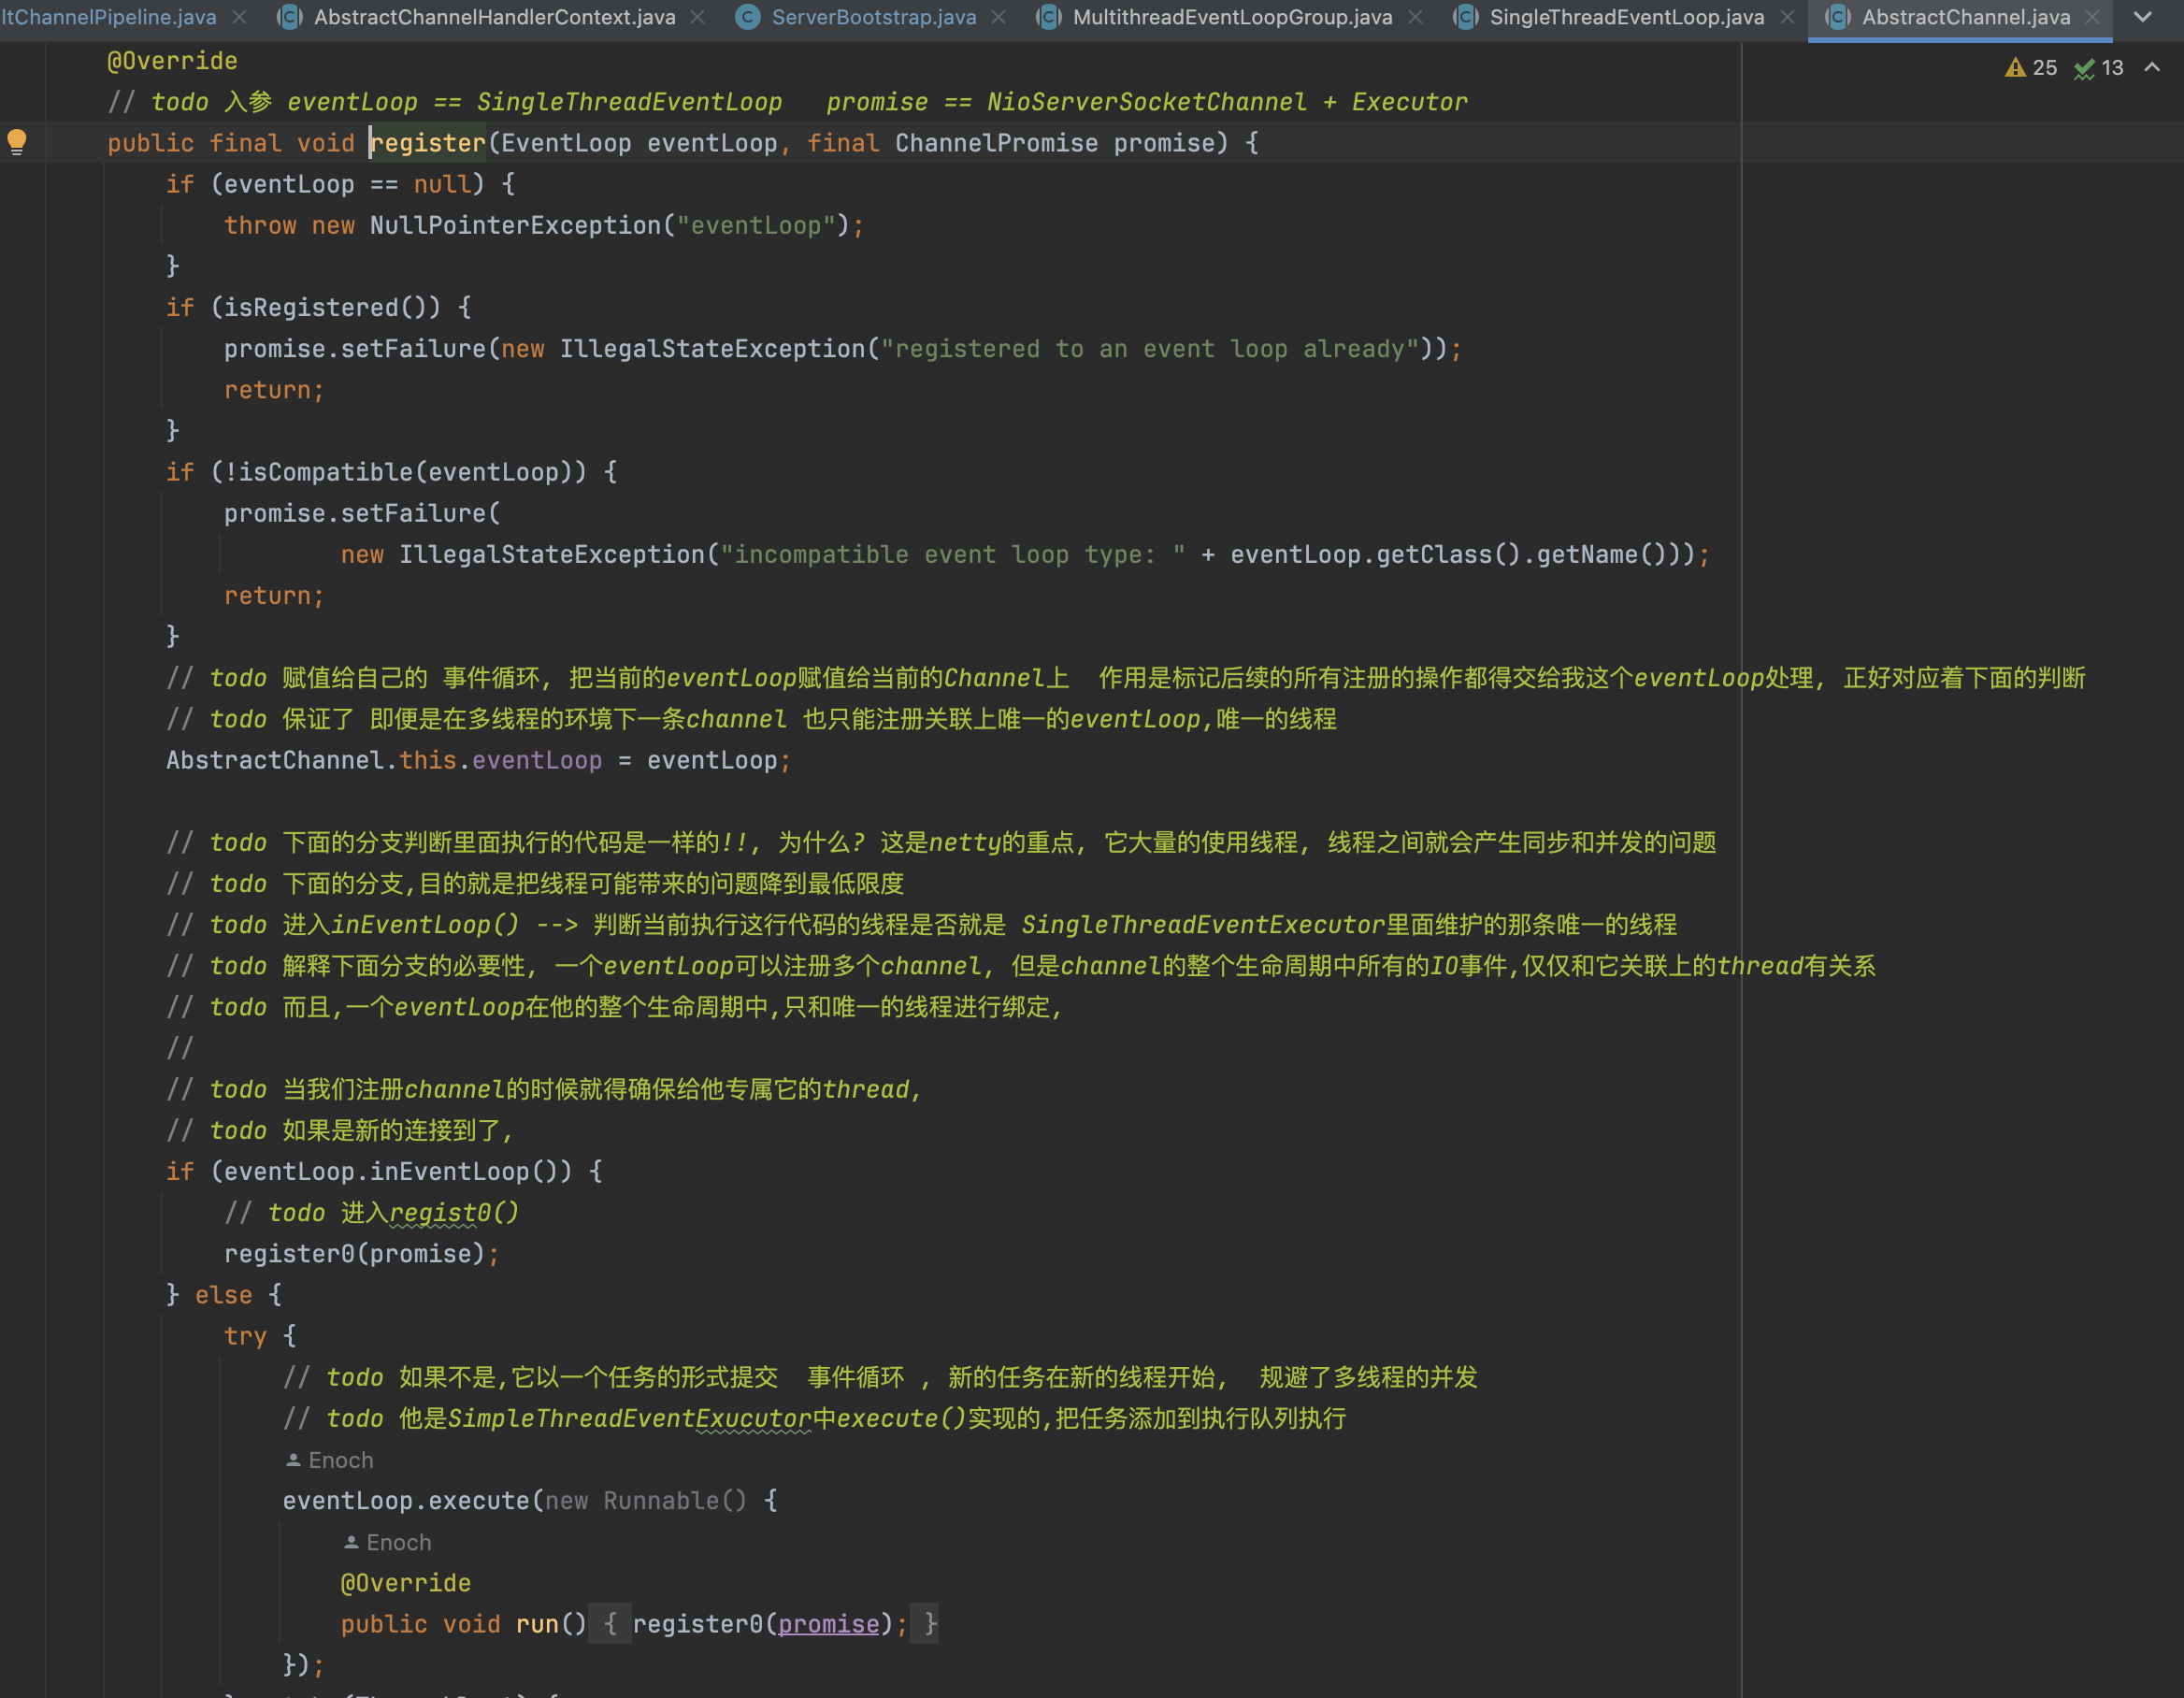
这一刻代码之前都讲过,就是把创建socketChannel注册到EventLoop上的Selector上去
AbstractChannel.register0():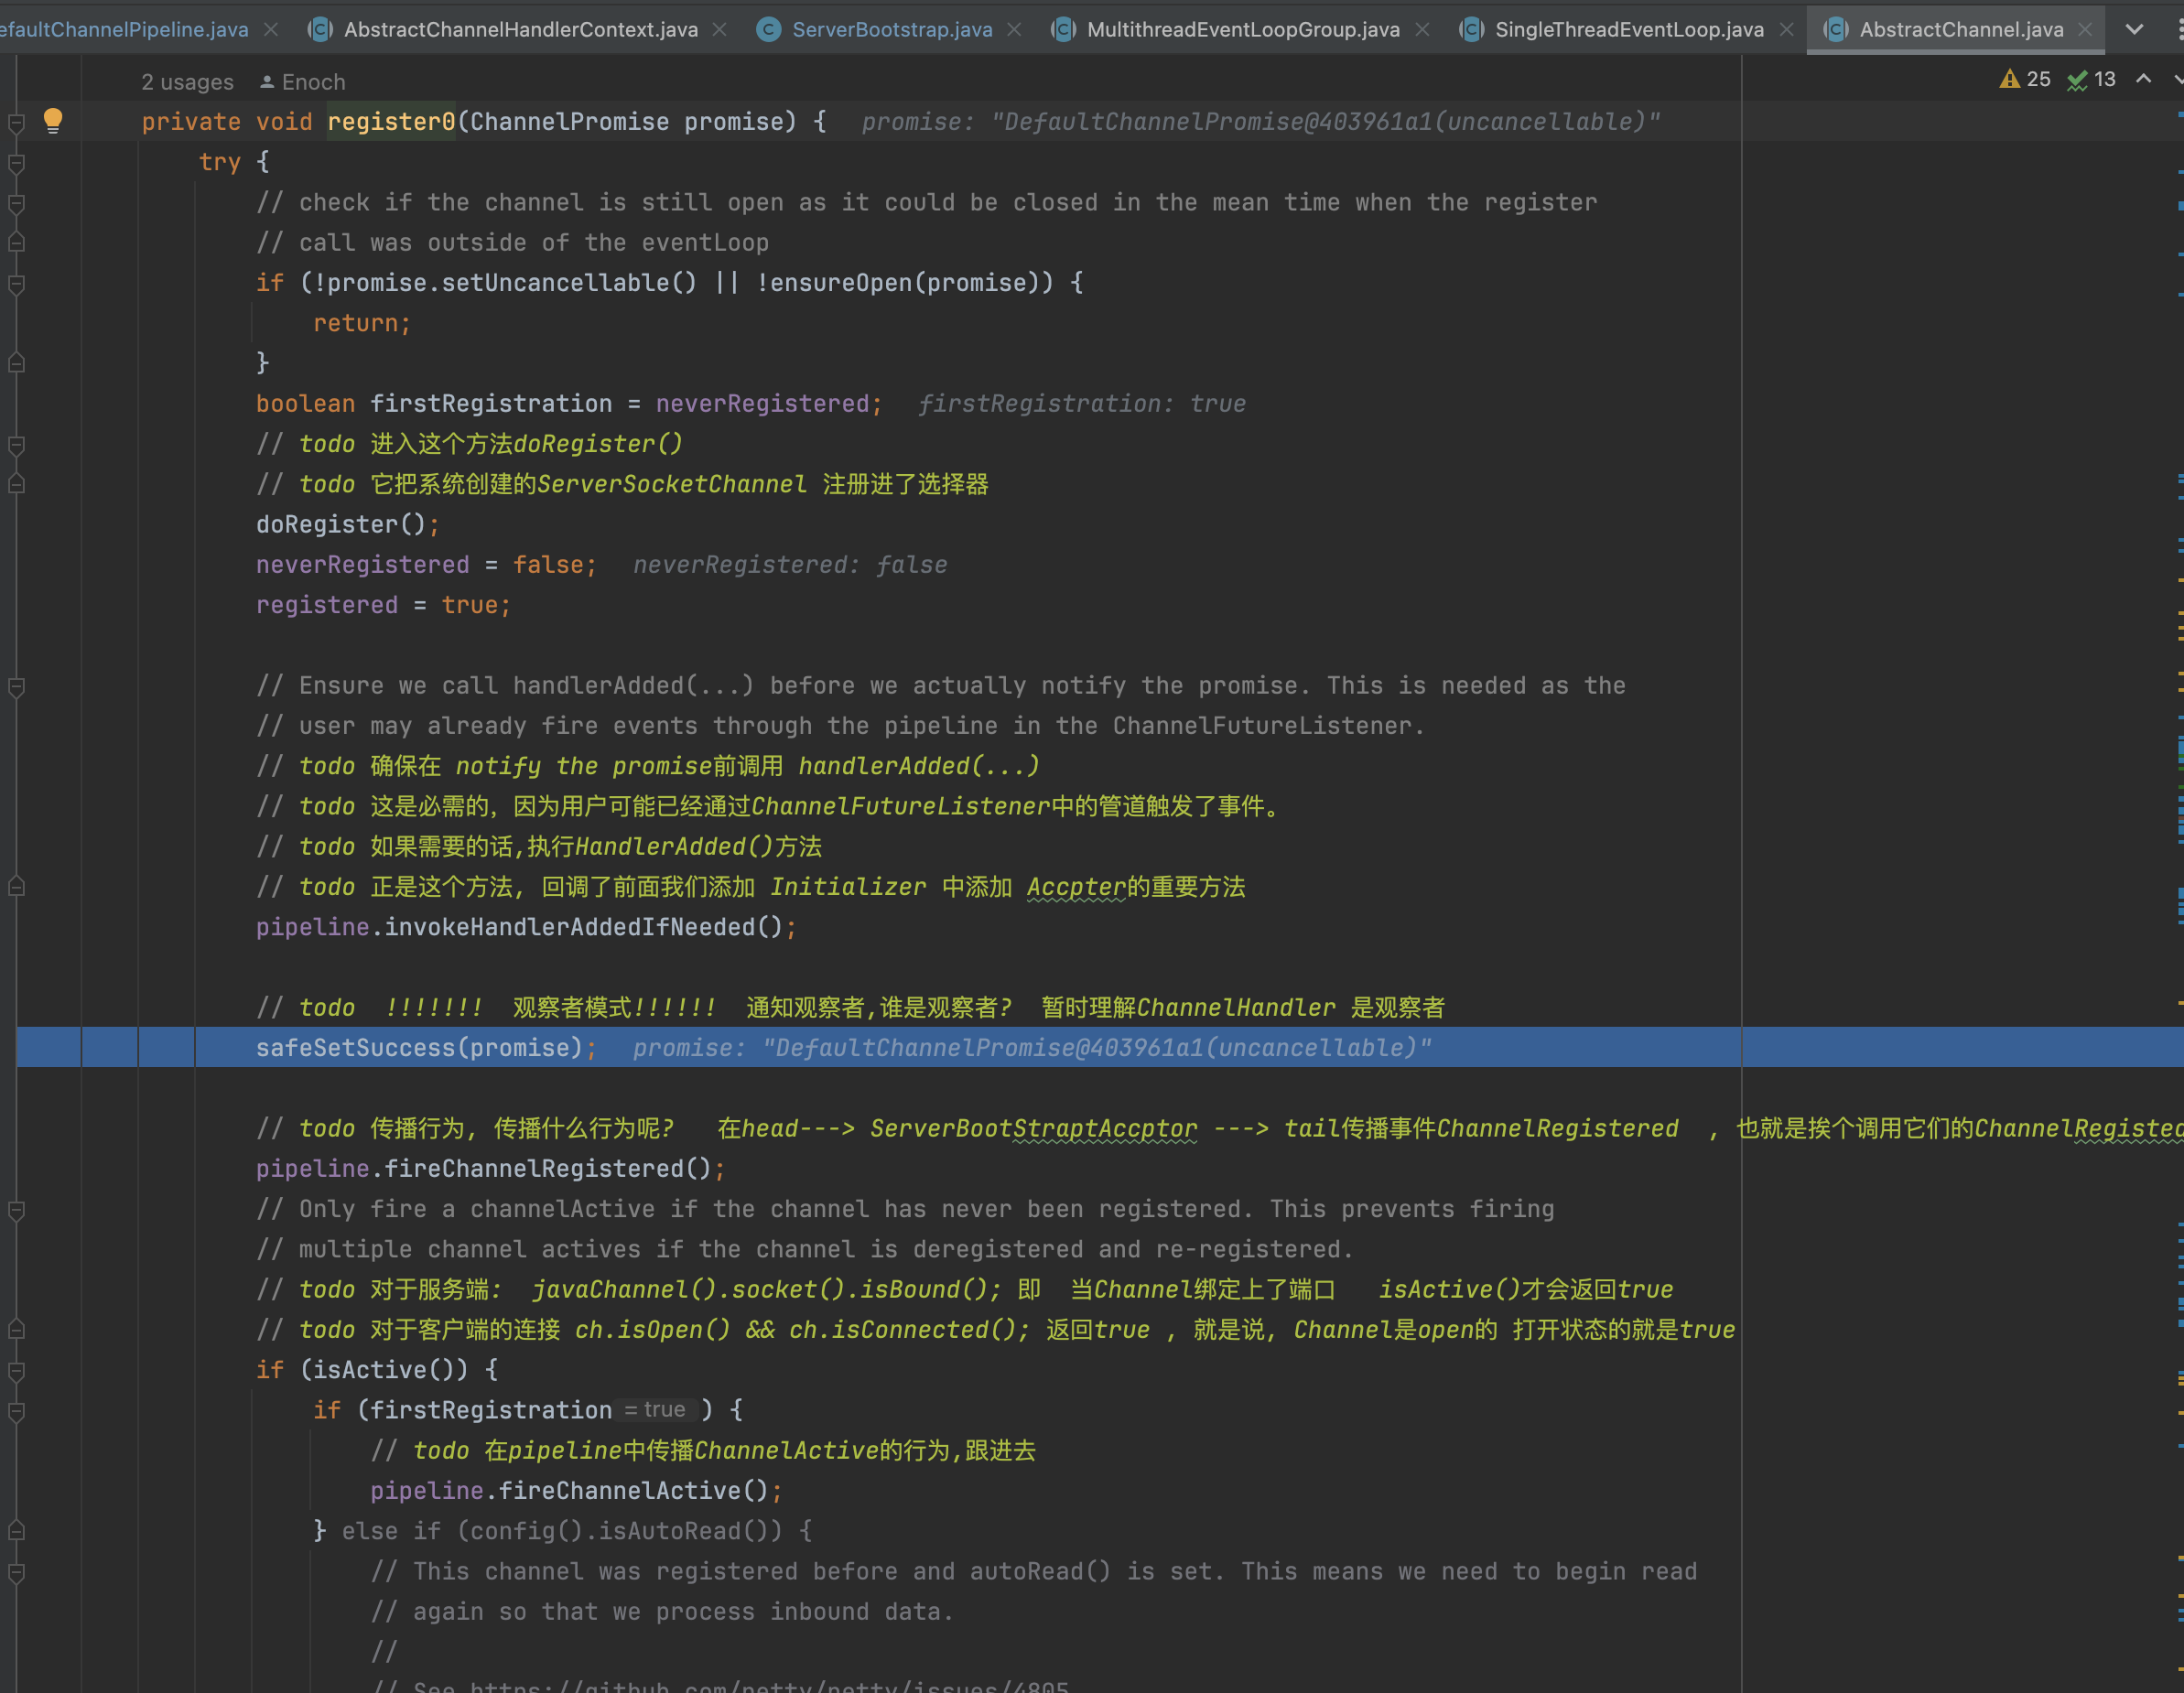
- doRegister: 完成了SocketChannel到Selector的注册
- pipeline.invokeHandlerAddedIfNeeded: 这里会调用之前我们设置MyServerInitializer.initChannel(), 会往SocketChannel的pipeline中加入一系列读写用到的Handler
�
9.总结
最后那一张图总结一下: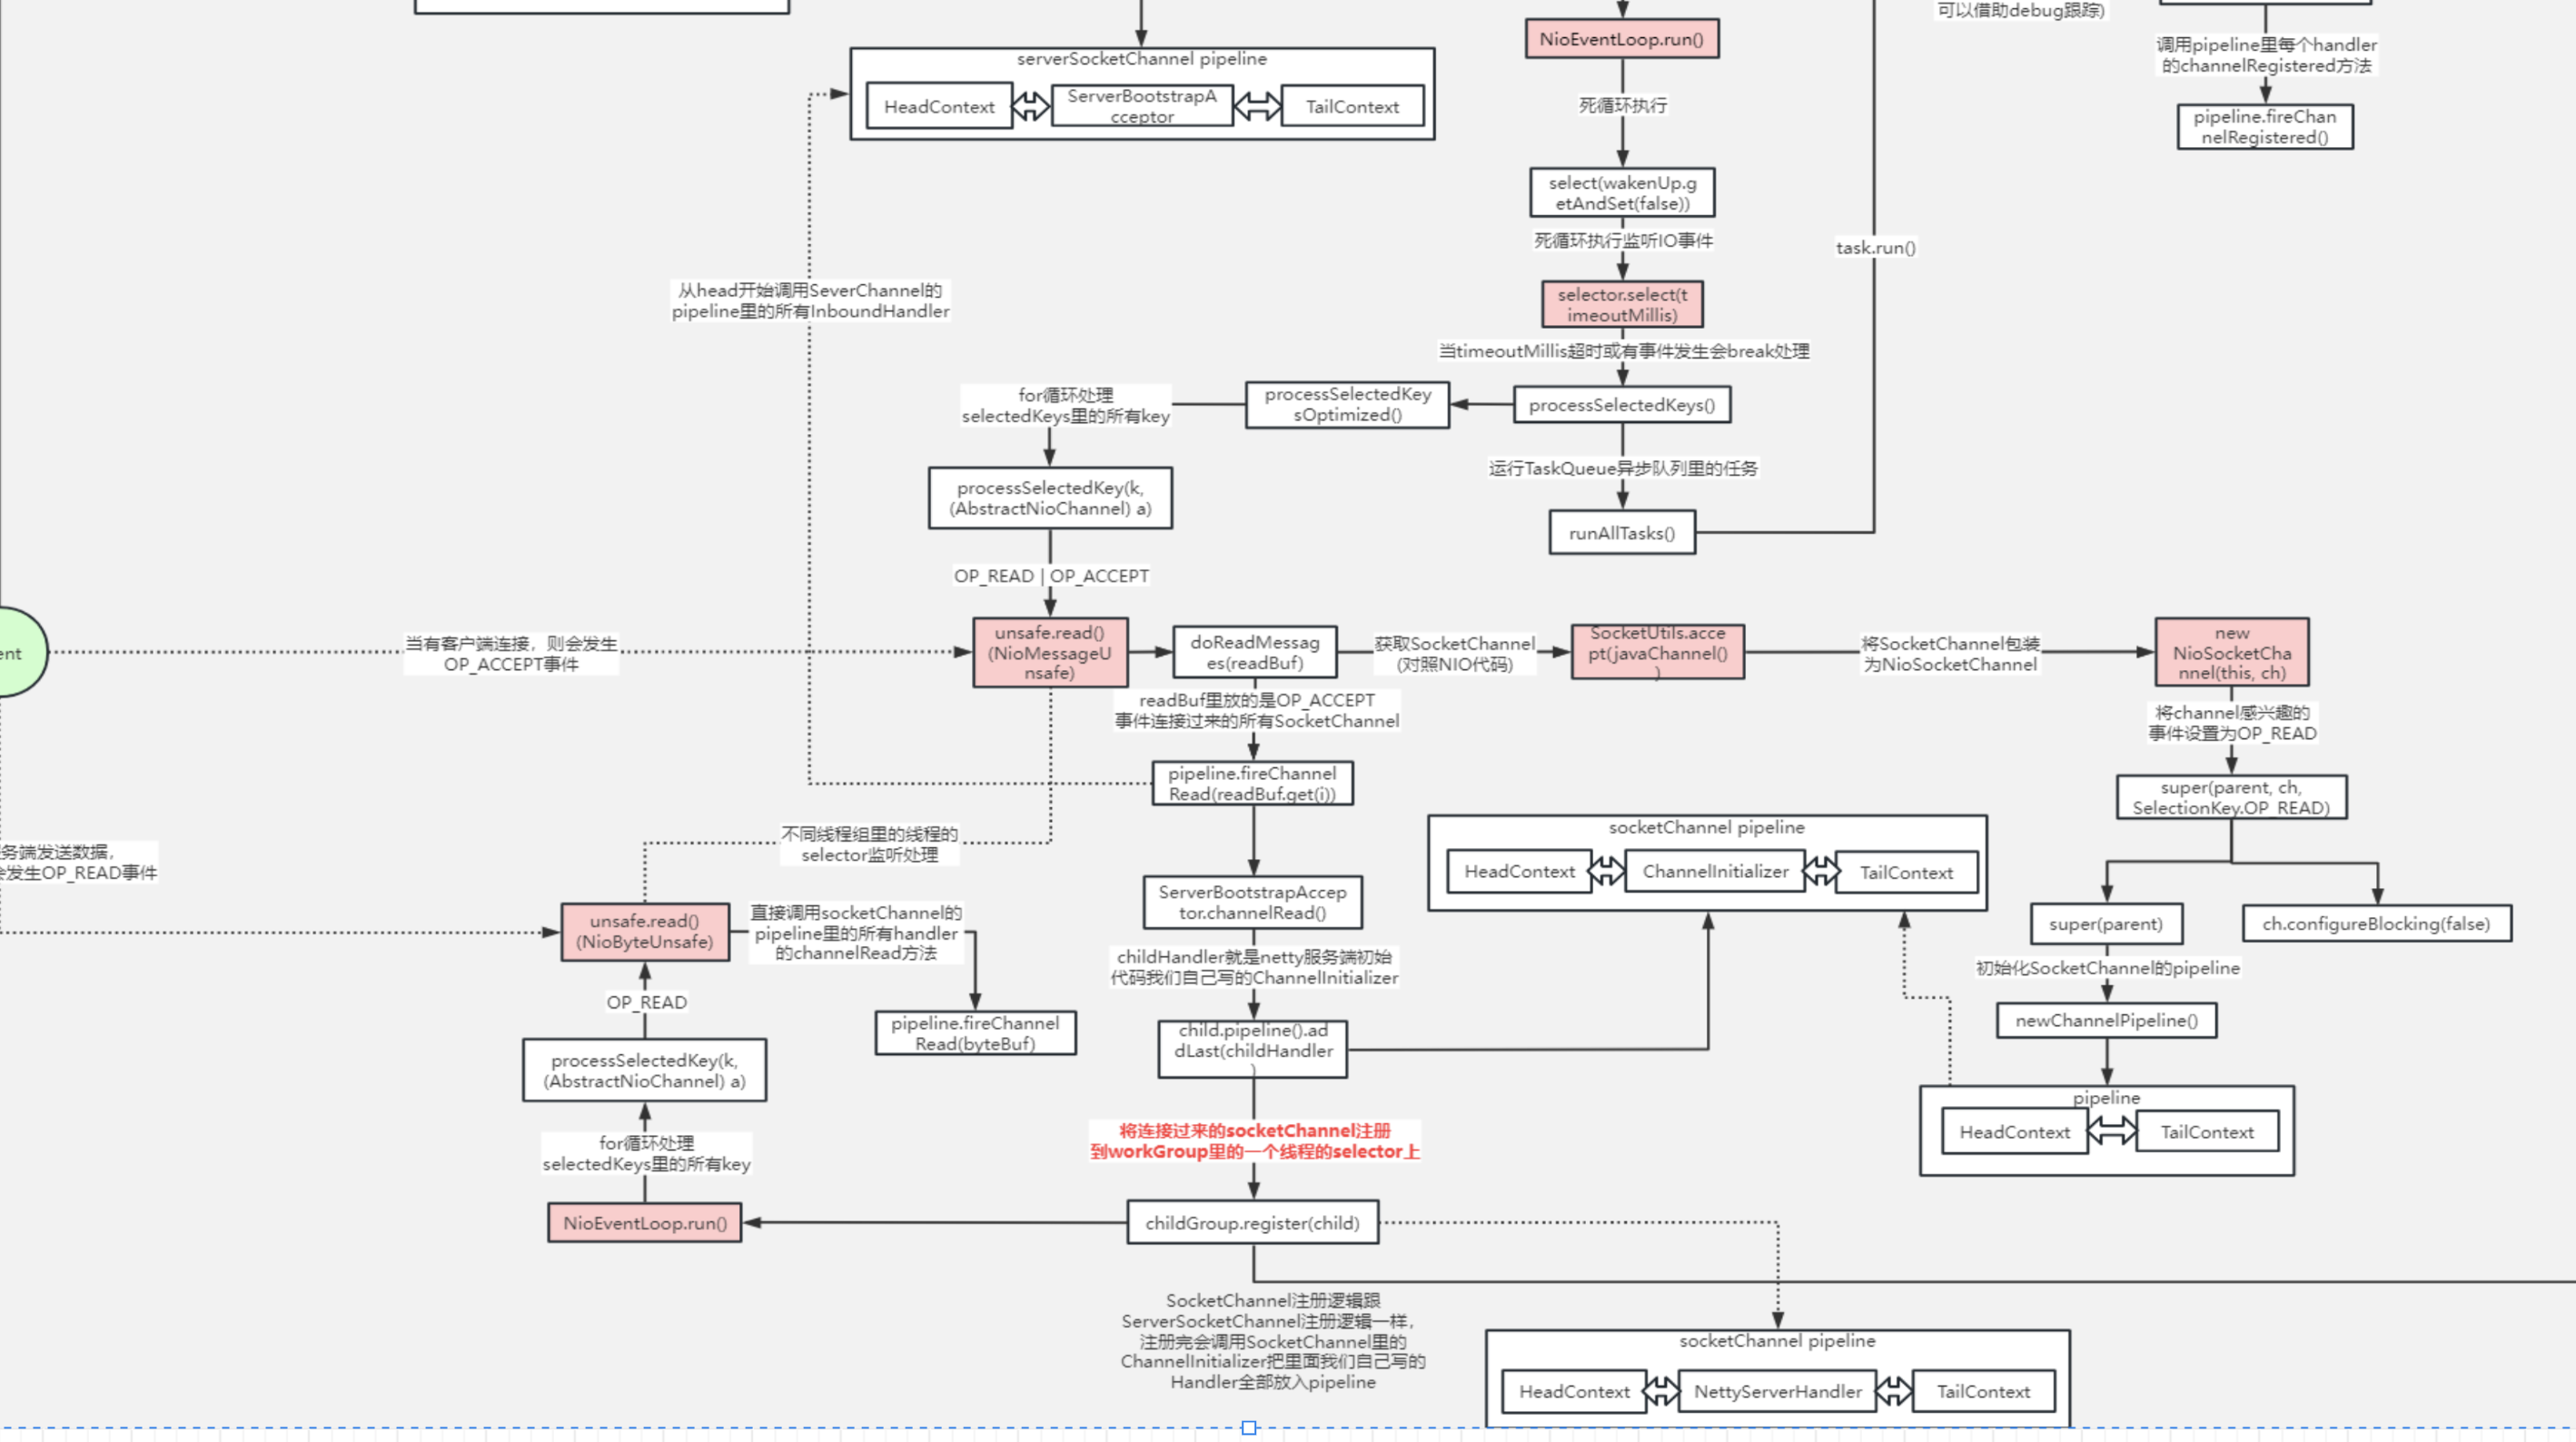
这篇关于Netty源码三:NioEventLoop创建与run方法的文章就介绍到这儿,希望我们推荐的文章对编程师们有所帮助!


