本文主要是介绍iOS10 添加本地推送(Local Notification),希望对大家解决编程问题提供一定的参考价值,需要的开发者们随着小编来一起学习吧!
转: http://blog.csdn.net/lincsdnnet/article/details/52970747
iOS10 添加本地推送(Local Notification)
新的推送注册机制
[objc] view plain copy 

- #import <UserNotifications/UserNotifications.h>
- #import "AppDelegate.h"
- @interface AppDelegate ()<UNUserNotificationCenterDelegate>
- @end
- @implementation AppDelegate
- - (BOOL)application:(UIApplication *)application didFinishLaunchingWithOptions:(NSDictionary *)launchOptions {
- // 使用 UNUserNotificationCenter 来管理通知
- UNUserNotificationCenter *center = [UNUserNotificationCenter currentNotificationCenter];
- //监听回调事件
- center.delegate = self;
- //iOS 10 使用以下方法注册,才能得到授权
- [center requestAuthorizationWithOptions:(UNAuthorizationOptionAlert + UNAuthorizationOptionSound)
- completionHandler:^(BOOL granted, NSError * _Nullable error) {
- // Enable or disable features based on authorization.
- }];
- //获取当前的通知设置,UNNotificationSettings 是只读对象,不能直接修改,只能通过以下方法获取
- [center getNotificationSettingsWithCompletionHandler:^(UNNotificationSettings * _Nonnull settings) {
- }];
- return YES;
- }
- #pragma mark - UNUserNotificationCenterDelegate
- //在展示通知前进行处理,即有机会在展示通知前再修改通知内容。
- -(void)userNotificationCenter:(UNUserNotificationCenter *)center willPresentNotification:(UNNotification *)notification withCompletionHandler:(void (^)(UNNotificationPresentationOptions))completionHandler{
- //1. 处理通知
- //2. 处理完成后条用 completionHandler ,用于指示在前台显示通知的形式
- completionHandler(UNNotificationPresentationOptionAlert);
- }
- @end
推送本地通知
[objc] view plain copy
- //使用 UNNotification 本地通知
- +(void)registerNotification:(NSInteger )alerTime{
- // 使用 UNUserNotificationCenter 来管理通知
- UNUserNotificationCenter* center = [UNUserNotificationCenter currentNotificationCenter];
- //需创建一个包含待通知内容的 UNMutableNotificationContent 对象,注意不是 UNNotificationContent ,此对象为不可变对象。
- UNMutableNotificationContent* content = [[UNMutableNotificationContent alloc] init];
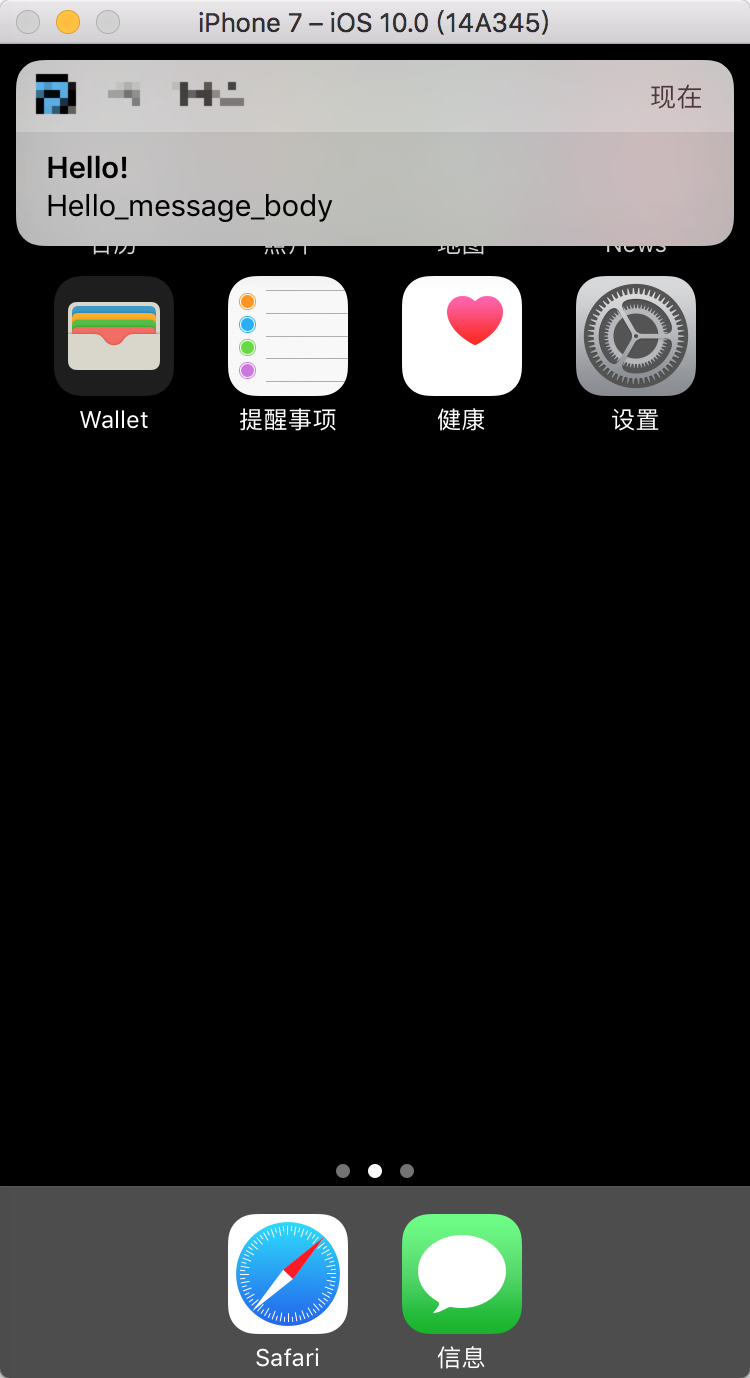
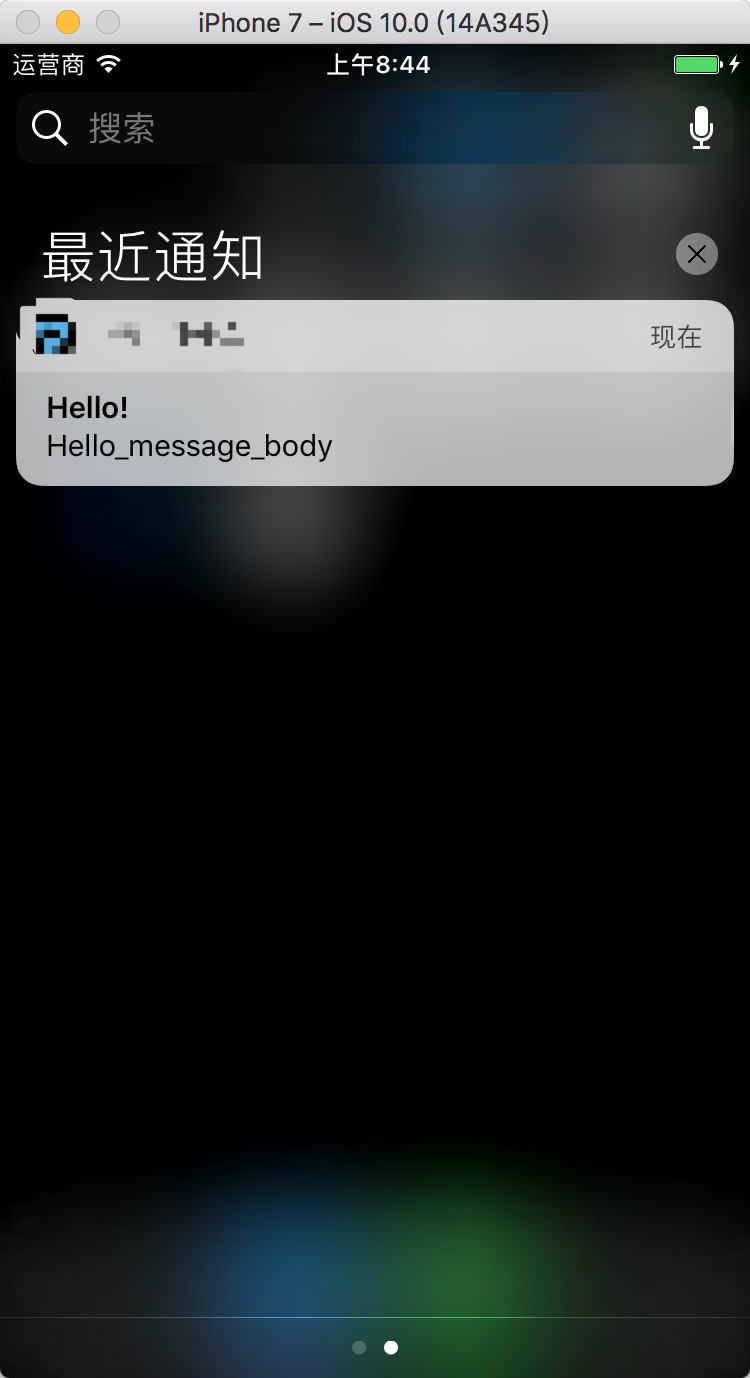
- content.title = [NSString localizedUserNotificationStringForKey:@"Hello!" arguments:nil];
- content.body = [NSString localizedUserNotificationStringForKey:@"Hello_message_body"
- arguments:nil];
- content.sound = [UNNotificationSound defaultSound];
- // 在 alertTime 后推送本地推送
- UNTimeIntervalNotificationTrigger* trigger = [UNTimeIntervalNotificationTrigger
- triggerWithTimeInterval:alerTime repeats:NO];
- UNNotificationRequest* request = [UNNotificationRequest requestWithIdentifier:@"FiveSecond"
- content:content trigger:trigger];
- //添加推送成功后的处理!
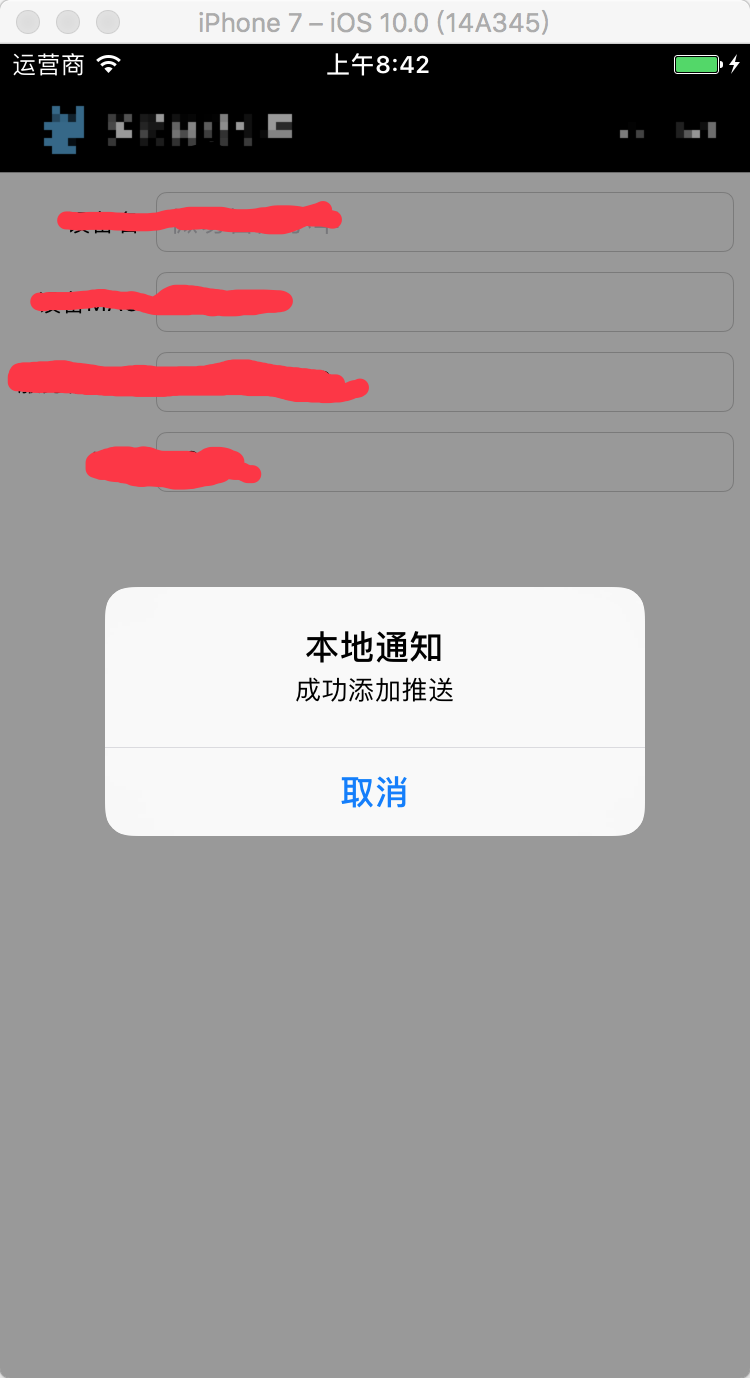
- [center addNotificationRequest:request withCompletionHandler:^(NSError * _Nullable error) {
- UIAlertController *alert = [UIAlertController alertControllerWithTitle:@"本地通知" message:@"成功添加推送" preferredStyle:UIAlertControllerStyleAlert];
- UIAlertAction *cancelAction = [UIAlertAction actionWithTitle:@"取消" style:UIAlertActionStyleCancel handler:nil];
- [alert addAction:cancelAction];
- [[UIApplication sharedApplication].keyWindow.rootViewController presentViewController:alert animated:YES completion:nil];
- }];
- }
iOS 10 以前本地推送通知:
[objc] view plain copy
- + (void)registerLocalNotificationInOldWay:(NSInteger)alertTime {
- // ios8后,需要添加这个注册,才能得到授权
- // if ([[UIApplication sharedApplication] respondsToSelector:@selector(registerUserNotificationSettings:)]) {
- // UIUserNotificationType type = UIUserNotificationTypeAlert | UIUserNotificationTypeBadge | UIUserNotificationTypeSound;
- // UIUserNotificationSettings *settings = [UIUserNotificationSettings settingsForTypes:type
- // categories:nil];
- // [[UIApplication sharedApplication] registerUserNotificationSettings:settings];
- // // 通知重复提示的单位,可以是天、周、月
- // }
- UILocalNotification *notification = [[UILocalNotification alloc] init];
- // 设置触发通知的时间
- NSDate *fireDate = [NSDate dateWithTimeIntervalSinceNow:alertTime];
- NSLog(@"fireDate=%@",fireDate);
- notification.fireDate = fireDate;
- // 时区
- notification.timeZone = [NSTimeZone defaultTimeZone];
- // 设置重复的间隔
- notification.repeatInterval = kCFCalendarUnitSecond;
- // 通知内容
- notification.alertBody = @"该起床了...";
- notification.applicationIconBadgeNumber = 1;
- // 通知被触发时播放的声音
- notification.soundName = UILocalNotificationDefaultSoundName;
- // 通知参数
- NSDictionary *userDict = [NSDictionary dictionaryWithObject:@"开始学习iOS开发了" forKey:@"key"];
- notification.userInfo = userDict;
- // ios8后,需要添加这个注册,才能得到授权
- if ([[UIApplication sharedApplication] respondsToSelector:@selector(registerUserNotificationSettings:)]) {
- UIUserNotificationType type = UIUserNotificationTypeAlert | UIUserNotificationTypeBadge | UIUserNotificationTypeSound;
- UIUserNotificationSettings *settings = [UIUserNotificationSettings settingsForTypes:type
- categories:nil];
- [[UIApplication sharedApplication] registerUserNotificationSettings:settings];
- // 通知重复提示的单位,可以是天、周、月
- notification.repeatInterval = NSCalendarUnitDay;
- } else {
- // 通知重复提示的单位,可以是天、周、月
- notification.repeatInterval = NSDayCalendarUnit;
- }
- // 执行通知注册
- [[UIApplication sharedApplication] scheduleLocalNotification:notification];
- }
效果图
这篇关于iOS10 添加本地推送(Local Notification)的文章就介绍到这儿,希望我们推荐的文章对编程师们有所帮助!


