本文主要是介绍PVE系列教程(十四)、安装黑苹果最新系统MacOS Monterey(BigSur、Monterey通用),希望对大家解决编程问题提供一定的参考价值,需要的开发者们随着小编来一起学习吧!
PVE系列教程(十四)、安装黑苹果最新系统MacOS Monterey(BigSur、Monterey通用)
为了更好的浏览体验,欢迎光顾勤奋的凯尔森同学个人博客http://www.huerpu.cc:7000/。博客上有对应版本的镜像与引导的下载。
苹果版本说明
| 版本 | 发行时间 | 最新版本 |
|---|---|---|
| macOS Monterey | 2021 | 12.3.1 |
| macOS Big Sur | 2020 | 11.6.5 |
| macOS Catalina | 2019 | 10.15.7 |
一、制作macos镜像
这一步为非必须的,如果想省事可以直接去下载已经制作好的BigSur-recovery.img和Monterey-recovery.img,点击下载。
在Mac上需要安装xcode环境,在linux上需要安装qemu-utils环境,然后下载GitHub上的一个OSX-KVM仓库,这个仓库里有bigsur和monterey制作执行脚本。
macOS上操作
xcode-select --install
git clone https://github.com/thenickdude/OSX-KVM.git
cd OSX-KVM/scripts
# 也可以cd monterey
cd bigsur
# make Monterey-recovery.img
make BigSur-full.img
Linux上操作
apt install qemu-utils make
git clone https://github.com/thenickdude/OSX-KVM.git
cd OSX-KVM/scripts
# 也可以cd monterey
cd bigsur
# make Monterey-recovery.img
make BigSur-recovery.img
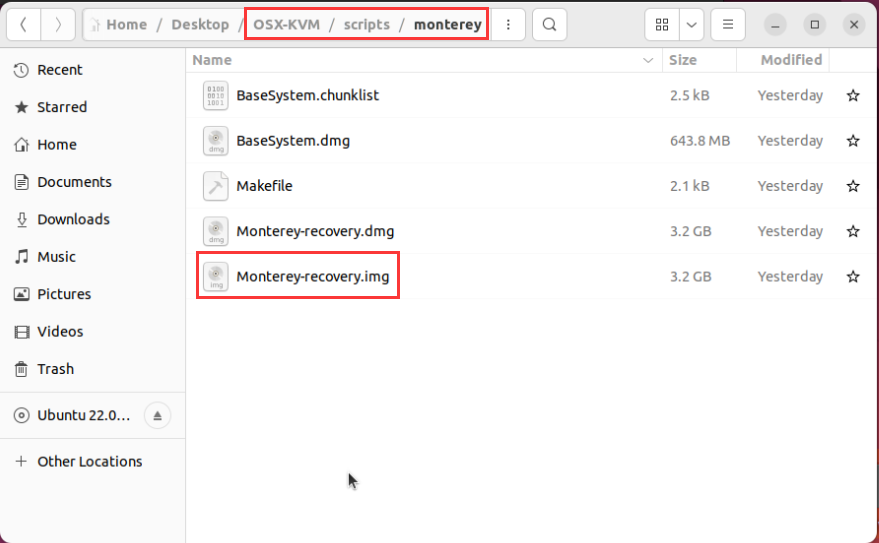
make命令执行完成之后,在OSX-KVM/scripts/bigsur或OSX-KVM/scripts/monterey的目录下,会生成对应的img文件:BigSur-recovery.img和Monterey-recovery.img。这两个文件就是我们的系统还原安装包,要上传到PVE的镜像中的。下面这个是我在Ubuntu上制作的Monterey镜像,这个版本的MacOS也比较新,下面的操作均以monterey为主。

准备OpenCore镜像
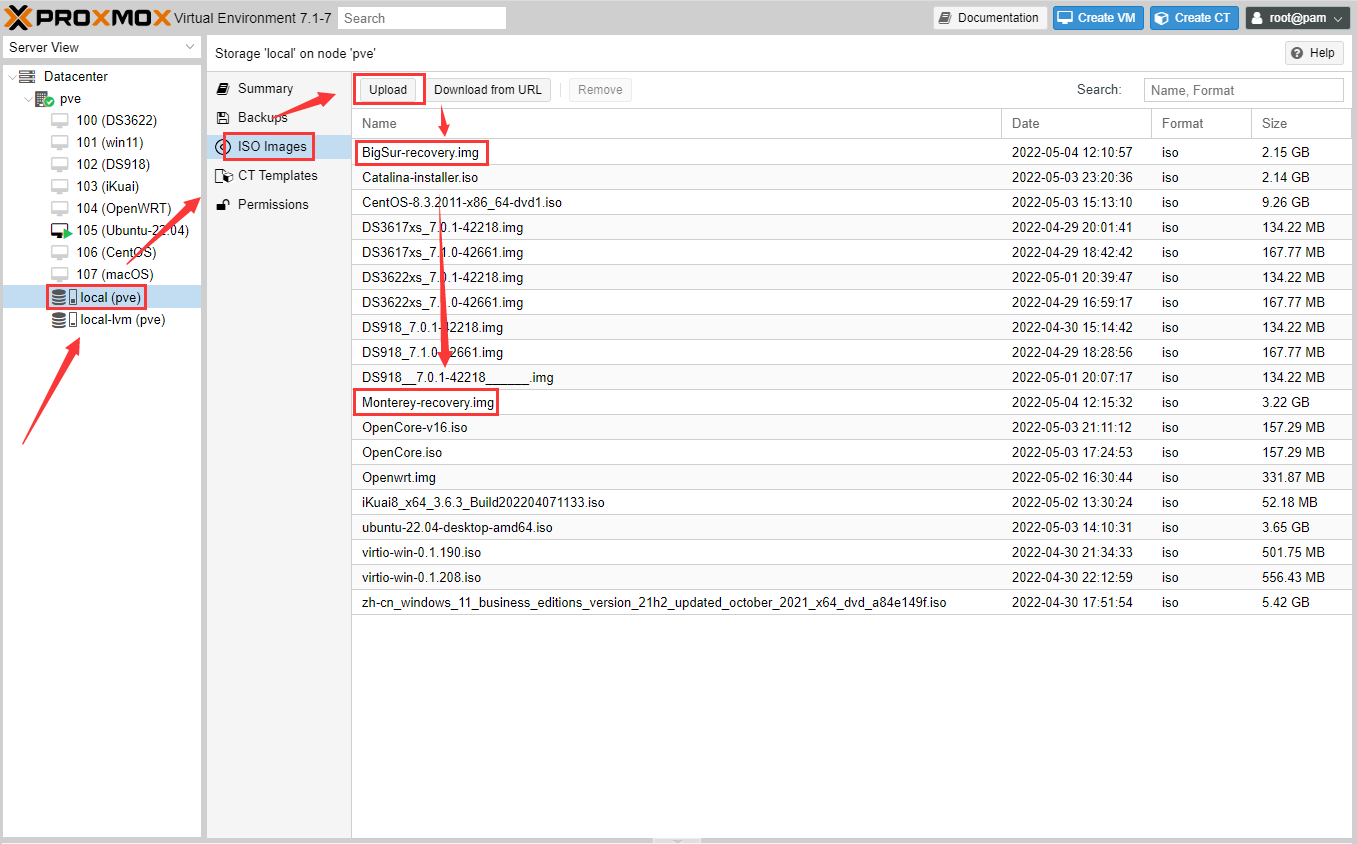
下载最新版本的OpenCore.iso.gz文件,解压后,将对应ISO文件上传至Proxmox的ISO存储目录(通常为/var/lib/vz/template/iso),目前最新版为OpenCore-v16.iso。
把BigSur-recovery.img或Monterey-recovery.img以及OpenCore-v16.iso上传到PVE的镜像中。

获取OSK身份验证密钥
macOS检查它是否在真正的Mac硬件上运行,并拒绝在第三方硬件上启动。您可以通过从真实Mac硬件中读取身份验证密钥(OSK 密钥)来解决此问题。将下面代码保存为smc_read.c,并在改文件的路径下,运行gcc -o smc_read smc_read.c -framework IOKit,前提是mac必须安装了xcode环境。
/** smc_read.c: Written for Mac OS X 10.5. Compile as follows:** gcc -Wall -o smc_read smc_read.c -framework IOKit*/#include <stdio.h>
#include <IOKit/IOKitLib.h>typedef struct {uint32_t key;uint8_t  __d0[22];uint32_t datasize;uint8_t  __d1[10];uint8_t  cmd;uint32_t __d2;
这篇关于PVE系列教程(十四)、安装黑苹果最新系统MacOS Monterey(BigSur、Monterey通用)的文章就介绍到这儿,希望我们推荐的文章对编程师们有所帮助!


