本文主要是介绍从0到1实现pdf转图片,带界面软件(含Python源码,千字长文讲解),希望对大家解决编程问题提供一定的参考价值,需要的开发者们随着小编来一起学习吧!
你好,我是kelly,今天给大家分享pdf转图片的工具开发(自己动手,从0到1)。
制作背景
来源于一位非技术同事的需求:(1)市面不少软件需要付费使用,(2)上传到免费网站又存在安全风险
最终的实现效果
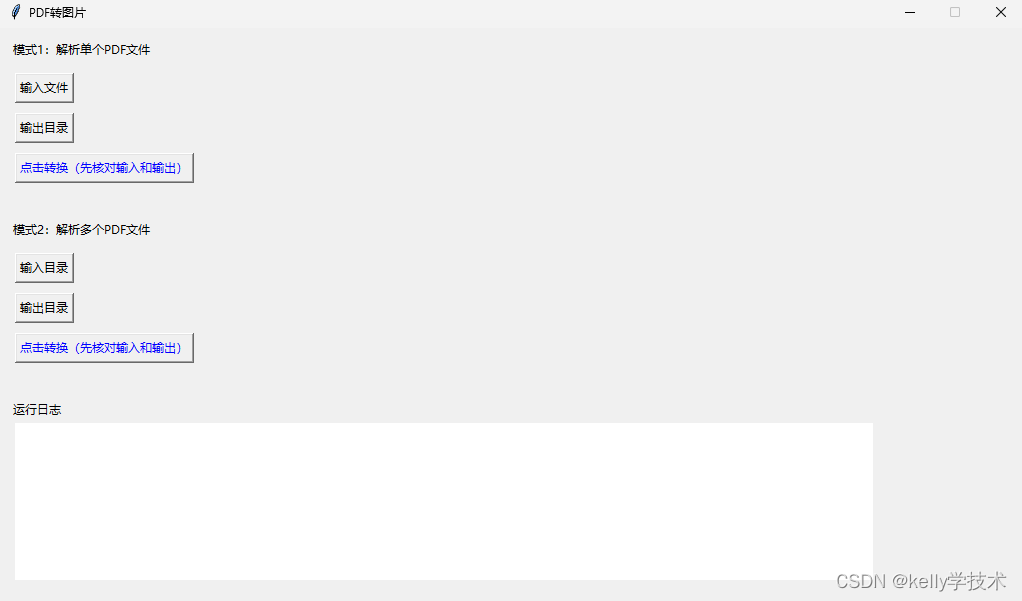
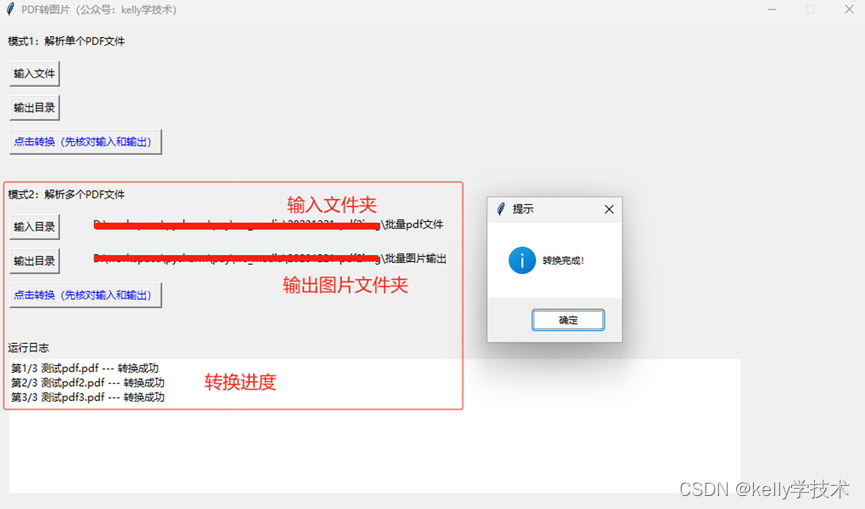
界面是粗糙了些,但支持单文件转换、多文件批量转换,两种模式。
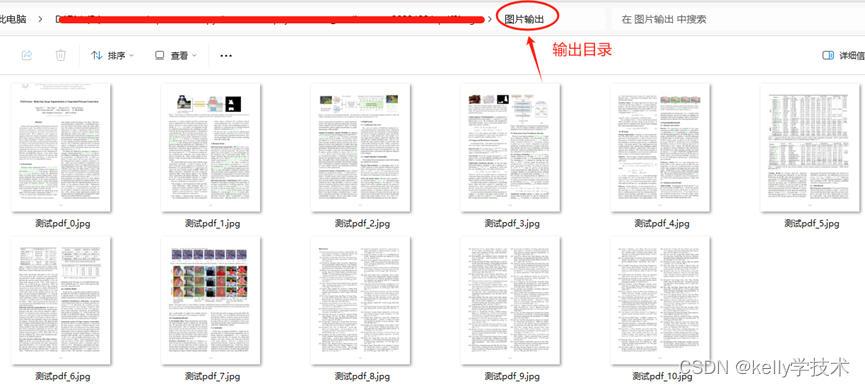
模式1:单pdf文件转换的操作截图
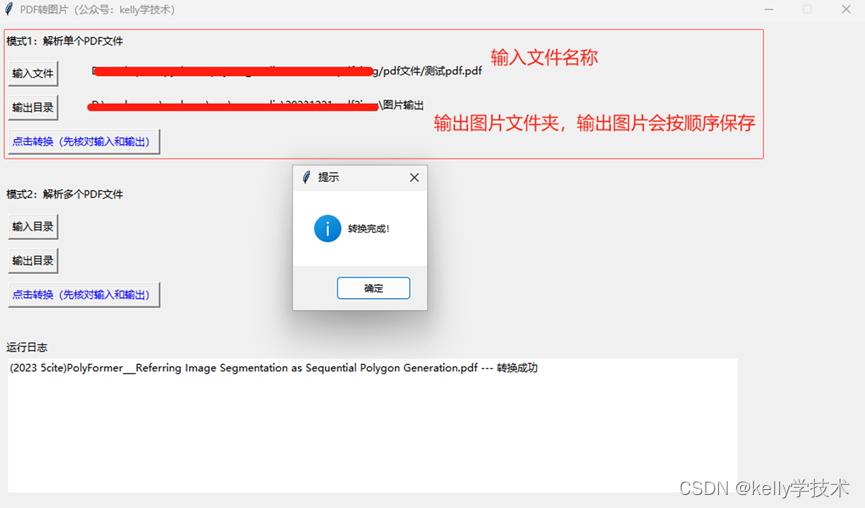
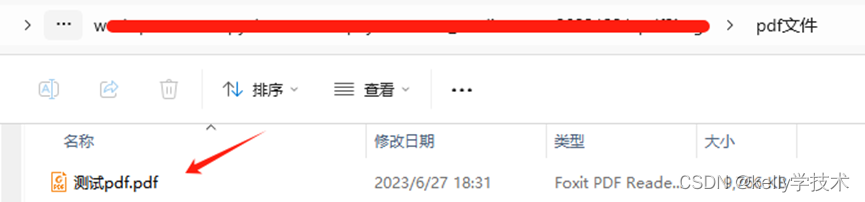
输入文件
模式2:多文件批量转换的操作截图
技术实现
一、PDF转图片相关的依赖包(Python)模块安装
涉及到pdf转图片、Python源码打包为EXE可执行文件,用到下面4个第三方Python包,其中前3个和pdf转图片有关,第4个和Python源码打包有关。
pip3 install PyMuPDF==1.21.1
pip3 install traits==6.3.2
pip3 install fitz==0.0.1.dev2
pip3 install pyinstaller
二、软件核心:pdf转图片
软件的功能是pdf转图片,如何才能转换pdf自然是核心之一。不过让大家惊讶的时,这部分功能代码实际上只有几行。
这里将转换代码单独封装为类,方便后续调用。
class PDF2Img(object):def __call__(self, path_pdf, path_output, prefix, zoom_x=2, zoom_y=2, rotation_angle=0):print("\npath_pdf={}, path_output={}".format(path_pdf, path_output))pdf = fitz.open(path_pdf)print("page_count: {}".format(pdf.page_count))name_lst = []for idx in range(0, pdf.page_count):page = pdf[idx]trans = fitz.Matrix(zoom_x, zoom_y).prerotate(rotation_angle)pm = page.get_pixmap(matrix=trans, alpha=False)pm.save(os.path.join(path_output, f"{prefix}_{idx}.png"))name_lst.append(f"{prefix}_{idx}.png")pdf.close()for name in name_lst:path_img = os.path.join(path_output, name)img = Image.open(path_img).convert("RGB")img.save(os.path.join(path_output, name[:-3] + "jpg"))os.remove(path_img)输入是pdf文件路径、转换后图片存放路径。为方便命名转换后的图片,取pdf文件名字作为图片前缀。
实际执行步骤:
-
step1:获取pdf文件对象
-
step2:获取pdf文件页数目,逐个遍历各个pdf页
-
step3:创建转换对象,包括设置缩放和旋转系数,用于对pdf页进行转换。缩放系数zoom_x、zoom_y值越大,转换图片越清晰。旋转系数rotation_angle设置为0,不旋转。
-
step4:对pdf页进行转换、提取,并得到转换后对象。
-
step5:将转换对象保存为图片,这里测试只能保存为png,jpg等其他格式会报错。
三、软件外壳:UI界面
这里使用Python内置的tkinter模块进行开发。Tkinter是Python的标准GUI库,由于是内置Python模块,只需要安装Python就能使用。
import tkinter as tk
from tkinter import filedialog, messagebox
from PIL import Image
为方便阅读,这里暂时将与控件相关的回调函数的具体内容删除,只保留UI界面相关部分。回调函数部分后续讲解。
先看下UI界面相关的完整代码:
import os, json, sys, base64, threading, time, datetime, traceback, requests, platform
import os.path
import tkinter as tk
from tkinter import filedialog, messagebox
from PIL import Image
import fitzclass UiSimulate(object):def __init__(self):self.root = tk.Tk()self.my_w, self.my_h = 0, 0self.var_single_input = tk.StringVar(value="")self.var_single_output = tk.StringVar(value="")self.var_multi_input = tk.StringVar(value="")self.var_multi_output = tk.StringVar(value="")self.var_real_log = tk.StringVar()  # 实时窗口显示的文本self.lst_real_log = []  # 实时窗口显示的文本self.start_ui()def start_ui(self):self.root.title("PDF转图片")w_screen = self.root.winfo_screenwidth()h_screen = self.root.winfo_screenheight()# 固定屏幕尺寸w_show = 1280h_show = 720self.my_w = int(w_show * 0.8)self.my_h = int(h_show * 0.8)pad_w = max((w_screen - self.my_w) // 2, 0)pad_h = max((h_screen - self.my_h) // 4, 0)s_geometry = "{}x{}+{}+{}".format(self.my_w, self.my_h, pad_w, pad_h)self.show_miscellaneous_ui()self.root.geometry(s_geometry)self.root.resizable(False, False)@staticmethoddef run_single_pdf(path_pdf, path_output_tmp):passdef run_multi_pdfs(self, path_dir_pdf, path_output):passdef f_single_input(self):passdef f_single_output(self):passdef f_single_run(self):passdef f_multi_input(self):passdef f_multi_output(self):passdef f_multi_run(self):passdef show_miscellaneous_ui(self):x_start = 10y_start = 5# 单个PDF输入lbl_title_single = tk.Label(self.root, text="模式1:解析单个PDF文件", fg="black")lbl_title_single.place(x=x_start, y=y_start + 5)self.btn_single_input = tk.Button(self.root, text="输入文件", command=lambda: thread_it(self.f_single_input))self.btn_single_output = tk.Button(self.root, text="输出目录", command=lambda: thread_it(self.f_single_output))self.btn_single_run = tk.Button(self.root, text="点击转换(先核对输入和输出)", fg="Blue", command=lambda: thread_it(self.f_single_run))self.btn_single_input.place(x=x_start + 5, y=y_start + 40)self.btn_single_output.place(x=x_start + 5, y=y_start + 80)self.btn_single_run.place(x=x_start + 5, y=y_start + 120)# 显示self.lbl_single_input = tk.Label(self.root, fg="black", textvariable=self.var_single_input)self.lbl_single_input.place(x=x_start + 100, y=y_start + 40)self.lbl_single_output = tk.Label(self.root, fg="black", textvariable=self.var_single_output)self.lbl_single_output.place(x=x_start + 100, y=y_start + 80)# ------------------------------------------------------- ## 输入多个PDFy_start = y_start + 180lbl_title_multi = tk.Label(self.root, text="模式2:解析多个PDF文件", fg="black")lbl_title_multi.place(x=x_start, y=y_start + 5)self.btn_multi_input = tk.Button(self.root, text="输入目录", command=lambda: thread_it(self.f_multi_input))self.btn_multi_output = tk.Button(self.root, text="输出目录", command=lambda: thread_it(self.f_multi_output))self.btn_multi_run = tk.Button(self.root, text="点击转换(先核对输入和输出)", fg="Blue", command=lambda: thread_it(self.f_multi_run))self.btn_multi_input.place(x=x_start + 5, y=y_start + 40)self.btn_multi_output.place(x=x_start + 5, y=y_start + 80)self.btn_multi_run.place(x=x_start + 5, y=y_start + 120)# 显示self.lbl_mult_input = tk.Label(self.root, fg="black", textvariable=self.var_multi_input)self.lbl_mult_input.place(x=x_start + 100, y=y_start + 40)self.lbl_mult_output = tk.Label(self.root, fg="black", textvariable=self.var_multi_output)self.lbl_mult_output.place(x=x_start + 100, y=y_start + 80)# 输入多个PDFy_start = y_start + 180lbl_title_log = tk.Label(self.root, text="运行日志", fg="black")lbl_title_log.place(x=x_start, y=y_start + 5)self.lbl_real_log_output = tk.Label(self.root,width=int(self.my_w * 0.12),height=9,borderwidth=1, bg="white",textvariable=self.var_real_log, justify="left", anchor="nw")self.lbl_real_log_output.place(x=15, y=y_start + 30)def main():obj = UiSimulate()obj.root.mainloop()if __name__ == "__main__":main()
逐个讲解:
首先创建一个tkinter()实例,继续设置界面的标题Title,界面的尺寸,是否支持缩放等。
设置界面的标题Title
self.root.title("PDF转图片")设置界面的尺寸
s_geometry = "{}x{}+{}+{}".format(self.my_w, self.my_h, pad_w, pad_h)
self.root.geometry(s_geometry)
设置界面是否允许缩放
self.root.resizable(False, False)这里设置为不允许缩放
开发过程中主要使用到2个控件:
1、UI的文本提示控件Label
首先实例化控件Label,控件的显示文本属性为text,文字前景色属性为fg。
lbl_title_single = tk.Label(self.root, text="模式1:解析单个PDF文件", fg="black")实例化后,再使用place函数在界面上选择在哪个位置摆放控件。
lbl_title_single.place(x=x_start, y=y_start + 5)2、UI的按钮点击控件Button
实例化按钮按钮控件Button,显示文本属性为text,点击事件的回调函数属性为command。
self.btn_single_input = tk.Button(self.root, text="输入文件", command=lambda: thread_it(self.f_single_input))实例化后,再确定界面摆放位置。
self.btn_single_input.place(x=x_start + 5, y=y_start + 40)整个界面的布局思路,大体是实例化各个控件,并确定各个控件的摆放位置。
界面的显示需要调用消息循环函数:
obj.root.mainloop()四、软件核心和外壳的联动
UI布局确定后,各个按钮的点击效果如何实现呢?答案是使用回调函数
以单pdf文件转换为例:
选择单个文件的按钮为
tk.Button(self.root, text="输入文件", command=lambda: thread_it(self.f_single_input))点击该按钮后,会触发回调函数f_single_input。
回调函数的使用有2个注意点:
1、回调函数使用lanbda创建匿名函数
2、需要将真正的回调函数封装在线程中运行,否则回调函数运行一长,界面会卡死。
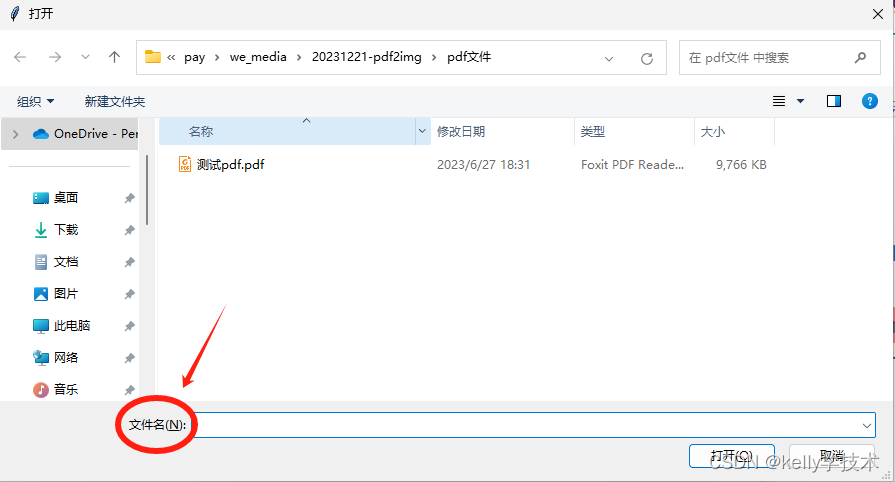
def thread_it(func, *args):t = threading.Thread(target=func, args=args)t.setDaemon(True)t.start()点击按钮后,会弹出文件选择框,以输入单个pdf文件为例:
def f_single_input(self):# 导入文件ask_open_file = tk.filedialog.askopenfile()if ask_open_file:path_file = ask_open_file.nameself.var_single_input.set(path_file)调用tkinter的filedialog.askopenfile函数,可弹出文件选择框,
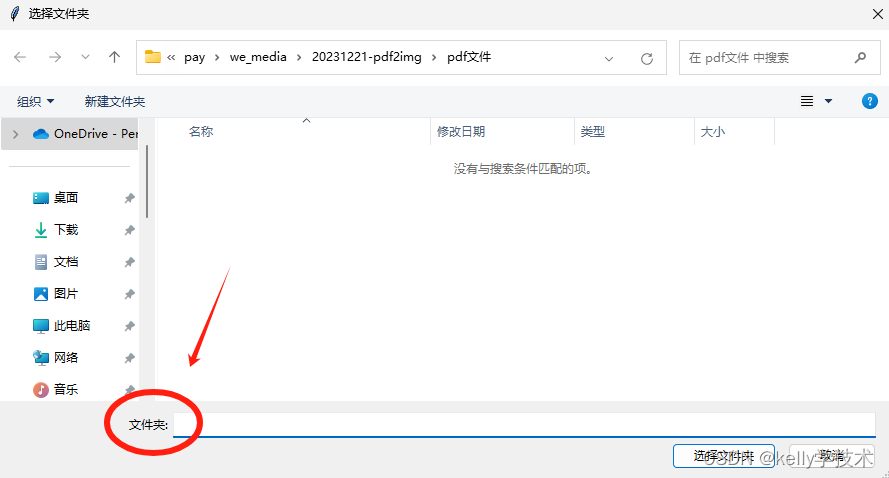
调用filedialog.askdirectory函数,可弹出文件夹选择框,
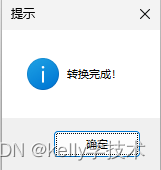
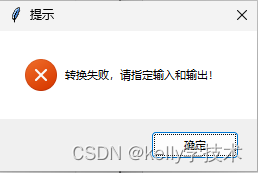
平时使用软件时,当输入不满足条件时,通常会有提示框,这里使用tkinter的messagebox子模块:
messagebox.showinfo("提示", "转换完成!")
messagebox.showerror("提示", "转换失败,请指定输入和输出!")
shoinfo是一般消息
showerror是错误消息
五、软件打包为EXE可执行文件
将.py文件打包为EXE文件,需要使用pyinstaller模块。
pyinstaller为第三方库,它能够在Windows、Linux、 Mac OS X 等系统下将Python源文件打包,通过对源文件打包,独立软件可以在没有安装Python的环境中运行。
打包时,建议先生成spec文件,再基于spec文件打包,打包命令:
首先cd进入到spec所在的文件夹,再执行,
pyinstaller pdf2img.spec
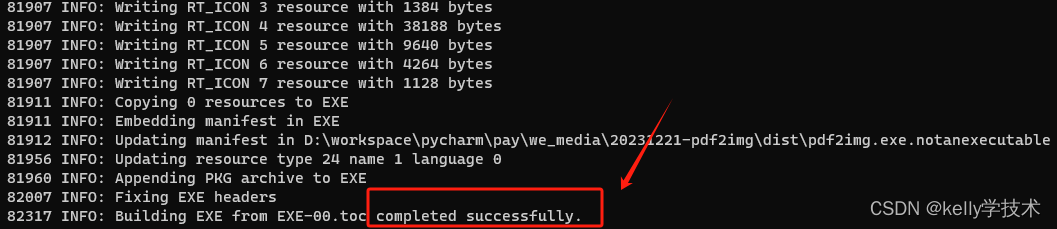
打包成功,在dist文件夹下能看到所生成的exe文件。
六、完整源码(前述一~五)
1、Python源码
# -*- coding: utf-8 -*-
import os, json, sys, base64, threading, time, datetime, traceback, requests, platform
import os.path
import tkinter as tk
from tkinter import filedialog, messagebox
from PIL import Image
import fitz"""
pip3 install PyMuPDF==1.21.1
pip3 install traits==6.3.2
pip3 install fitz==0.0.1.dev2
pip3 install pyinstaller
"""def thread_it(func, *args):t = threading.Thread(target=func, args=args)t.setDaemon(True)t.start()class PDF2Img(object):def __call__(self, path_pdf, path_output, prefix, zoom_x=2, zoom_y=2, rotation_angle=0):print("\npath_pdf={}, path_output={}".format(path_pdf, path_output))pdf = fitz.open(path_pdf)print("page_count: {}".format(pdf.page_count))name_lst = []for idx in range(0, pdf.page_count):page = pdf[idx]trans = fitz.Matrix(zoom_x, zoom_y).prerotate(rotation_angle)pm = page.get_pixmap(matrix=trans, alpha=False)pm.save(os.path.join(path_output, f"{prefix}_{idx}.png"))name_lst.append(f"{prefix}_{idx}.png")pdf.close()for name in name_lst:path_img = os.path.join(path_output, name)img = Image.open(path_img).convert("RGB")img.save(os.path.join(path_output, name[:-3] + "jpg"))os.remove(path_img)class UiSimulate(object):def __init__(self):self.root = tk.Tk()self.my_w, self.my_h = 0, 0self.var_single_input = tk.StringVar(value="")self.var_single_output = tk.StringVar(value="")self.var_multi_input = tk.StringVar(value="")self.var_multi_output = tk.StringVar(value="")self.var_real_log = tk.StringVar()  # 实时窗口显示的文本self.lst_real_log = []  # 实时窗口显示的文本self.start_ui()def start_ui(self):self.root.title("PDF转图片")w_screen = self.root.winfo_screenwidth()h_screen = self.root.winfo_screenheight()# 固定屏幕尺寸w_show = 1280h_show = 720self.my_w = int(w_show * 0.8)self.my_h = int(h_show * 0.8)pad_w = max((w_screen - self.my_w) // 2, 0)pad_h = max((h_screen - self.my_h) // 4, 0)s_geometry = "{}x{}+{}+{}".format(self.my_w, self.my_h, pad_w, pad_h)self.show_miscellaneous_ui()self.root.geometry(s_geometry)self.root.resizable(False, False)@staticmethoddef run_single_pdf(path_pdf, path_output_tmp):if path_pdf:name_pdf = os.path.basename(path_pdf)prefix = name_pdf[:-4]PDF2Img().__call__(path_pdf, path_output_tmp, prefix)def run_multi_pdfs(self, path_dir_pdf, path_output):if path_dir_pdf:# 遍历读取多个pdf文件name_lst = []for name in os.listdir(path_dir_pdf):suffix = name.lower().split(".")[-1]# if suffix in ["ppt", "pptx", "pdf"]:if suffix in ["pdf"]:name_lst.append(name)if name_lst:for index, name in enumerate(name_lst):# noinspection PyBroadExceptiontry:path_pdf = os.path.join(path_dir_pdf, name)act_len = len(name.split(".")[-1])prefix = name[: - (act_len + 1)]path_output_tmp = os.path.join(path_output, prefix)if not os.path.exists(path_output_tmp):os.makedirs(path_output_tmp)PDF2Img().__call__(path_pdf, path_output_tmp, prefix)self.lst_real_log.append("第{}/{} {} --- 转换成功".format(index + 1, len(name_lst), name))except:self.lst_real_log.append("第{}/{} {} --- 转换失败".format(index + 1, len(name_lst), name))self.lst_real_log.append(traceback.format_exc())self.var_real_log.set("\n".join(self.lst_real_log[-18:]))else:messagebox.showerror("提示", "转换失败,不存在pdf文件!")def f_single_input(self):# 导入文件ask_open_file = tk.filedialog.askopenfile()if ask_open_file:path_file = ask_open_file.nameself.var_single_input.set(path_file)def f_single_output(self):# 导入目录ask_dir = tk.filedialog.askdirectory()if ask_dir:path_dir = ask_dir.replace("/", "\\")self.var_single_output.set(path_dir)def f_single_run(self):# noinspection PyBroadExceptiontry:path_pdf = self.var_single_input.get()path_output = self.var_single_output.get()if path_pdf and path_output:self.run_single_pdf(path_pdf, path_output)messagebox.showinfo("提示", "转换完成!")else:messagebox.showerror("提示", "转换失败,请指定输入和输出!")msg = "{} --- 转换成功".format(os.path.basename(path_pdf))except:msg = traceback.format_exc()self.lst_real_log.append(msg)self.var_real_log.set("\n".join(self.lst_real_log[-18:]))def f_multi_input(self):# 导入目录ask_dir = tk.filedialog.askdirectory()if ask_dir:path_dir = ask_dir.replace("/", "\\")self.var_multi_input.set(path_dir)def f_multi_output(self):ask_dir = tk.filedialog.askdirectory()if ask_dir:path_dir = ask_dir.replace("/", "\\")self.var_multi_output.set(path_dir)def f_multi_run(self):# noinspection PyBroadExceptiontry:path_dir_pdf = self.var_multi_input.get()path_output = self.var_multi_output.get()if path_dir_pdf and path_output:self.run_multi_pdfs(path_dir_pdf, path_output)messagebox.showinfo("提示", "转换完成!")else:messagebox.showerror("提示", "转换失败,请指定输入和输出!")except:self.lst_real_log.append(traceback.format_exc())self.var_real_log.set("\n".join(self.lst_real_log[-18:]))def show_miscellaneous_ui(self):x_start = 10y_start = 5# 单个PDF输入lbl_title_single = tk.Label(self.root, text="模式1:解析单个PDF文件", fg="black")lbl_title_single.place(x=x_start, y=y_start + 5)self.btn_single_input = tk.Button(self.root, text="输入文件", command=lambda: thread_it(self.f_single_input))self.btn_single_output = tk.Button(self.root, text="输出目录", command=lambda: thread_it(self.f_single_output))self.btn_single_run = tk.Button(self.root, text="点击转换(先核对输入和输出)", fg="Blue", command=lambda: thread_it(self.f_single_run))self.btn_single_input.place(x=x_start + 5, y=y_start + 40)self.btn_single_output.place(x=x_start + 5, y=y_start + 80)self.btn_single_run.place(x=x_start + 5, y=y_start + 120)# 显示self.lbl_single_input = tk.Label(self.root, fg="black", textvariable=self.var_single_input)self.lbl_single_input.place(x=x_start + 100, y=y_start + 40)self.lbl_single_output = tk.Label(self.root, fg="black", textvariable=self.var_single_output)self.lbl_single_output.place(x=x_start + 100, y=y_start + 80)# ------------------------------------------------------- ## 输入多个PDFy_start = y_start + 180lbl_title_multi = tk.Label(self.root, text="模式2:解析多个PDF文件", fg="black")lbl_title_multi.place(x=x_start, y=y_start + 5)self.btn_multi_input = tk.Button(self.root, text="输入目录", command=lambda: thread_it(self.f_multi_input))self.btn_multi_output = tk.Button(self.root, text="输出目录", command=lambda: thread_it(self.f_multi_output))self.btn_multi_run = tk.Button(self.root, text="点击转换(先核对输入和输出)", fg="Blue", command=lambda: thread_it(self.f_multi_run))self.btn_multi_input.place(x=x_start + 5, y=y_start + 40)self.btn_multi_output.place(x=x_start + 5, y=y_start + 80)self.btn_multi_run.place(x=x_start + 5, y=y_start + 120)# 显示self.lbl_mult_input = tk.Label(self.root, fg="black", textvariable=self.var_multi_input)self.lbl_mult_input.place(x=x_start + 100, y=y_start + 40)self.lbl_mult_output = tk.Label(self.root, fg="black", textvariable=self.var_multi_output)self.lbl_mult_output.place(x=x_start + 100, y=y_start + 80)# 输入多个PDFy_start = y_start + 180lbl_title_log = tk.Label(self.root, text="运行日志", fg="black")lbl_title_log.place(x=x_start, y=y_start + 5)self.lbl_real_log_output = tk.Label(self.root,width=int(self.my_w * 0.12),height=9,borderwidth=1, bg="white",textvariable=self.var_real_log, justify="left", anchor="nw")self.lbl_real_log_output.place(x=15, y=y_start + 30)def main():obj = UiSimulate()obj.root.mainloop()if __name__ == "__main__":main()
2、打包所用的spec文件
注意:pathex属性需要修改为自己电脑上源码所在目录(文件夹)。
# -*- mode: python ; coding: utf-8 -*-block_cipher = Nonea = Analysis(['pdf2img.py'],pathex=["D:\\workspace\\pycharm\\20231221-pdf2img"],binaries=[],datas=[],hiddenimports=[],hookspath=[],hooksconfig={},runtime_hooks=[],excludes=[],win_no_prefer_redirects=False,win_private_assemblies=False,cipher=block_cipher,noarchive=False,
)
pyz = PYZ(a.pure, a.zipped_data, cipher=block_cipher)exe = EXE(pyz,a.scripts,a.binaries,a.zipfiles,a.datas,[],name='pdf2img',debug=False,bootloader_ignore_signals=False,strip=False,upx=True,upx_exclude=[],runtime_tmpdir=None,console=False,disable_windowed_traceback=False,argv_emulation=False,target_arch=None,codesign_identity=None,entitlements_file=None,
)
七、后记
文中已提供全部源码,按照文中讲解即可生成可用的EXE文件。为方便部分读者,额外将全部文件(包括EXE文件和软件使用说明等)打包,下载地址:
链接:
https://pan.baidu.com/s/11hYqgU3R2YTGoJum-HWffA?pwd=084p
提取码:084p
本文原始版本发表链接:
https://mp.weixin.qq.com/s?__biz=MzI2Mjg3NTY5MQ==&mid=2247484610&idx=1&sn=42baf1b4f664d93dfe69971a2e1d66ff&chksm=ea453b86dd32b290684c97ddb023bad6a44e50f6890bebe1827b662beef46e9359d4ee2249bb#rd
kelly会在公众号「kelly学技术」不定期更新文章,感兴趣的朋友可以关注一下,期待与您交流。
--over--
这篇关于从0到1实现pdf转图片,带界面软件(含Python源码,千字长文讲解)的文章就介绍到这儿,希望我们推荐的文章对编程师们有所帮助!


