本文主要是介绍单元测试Unit5,希望对大家解决编程问题提供一定的参考价值,需要的开发者们随着小编来一起学习吧!
学习自
一般一个service对应一个servicetest,一个service里面的接口的方法对应一个或多个test接口。


创建一个springboot项目


main目录红框里的是springboot的主类,我们测试用test目录下。
@Test注解
用来测试方法的注解。
assertions是断言,assertequals可以判断是不是期望值,assertTrue的期望值是不是true。

例子:
import org.junit.jupiter.api.Assertions;
import org.junit.jupiter.api.Test;/*** assertions是断言,assertequals可以判断是不是期望值* assertTrue的期望值是不是true*/
public class Test1 {@Testvoid fun1(){int res=1+1;//Assertions.assertEquals(2,res);Assertions.assertTrue(2==res);}}
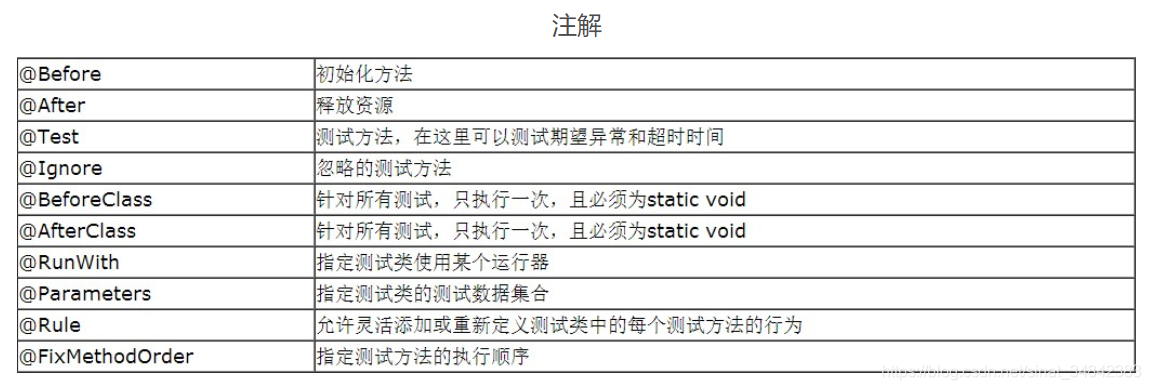
@BeforeAll,只初始化一次,注解的方法必须为静态方法。
@AfterAll,结尾中运行一次,注解的方法必须为静态方法。
@BeforeEach,在运行每次有test注解的方法之前都运行一遍beforeeach注解的方法。
@AfterEach,在运行每次有test注解的方法之后都运行一遍aftereach注解的方法。
例子:
import org.junit.jupiter.api.AfterEach;
import org.junit.jupiter.api.BeforeAll;
import org.junit.jupiter.api.BeforeEach;
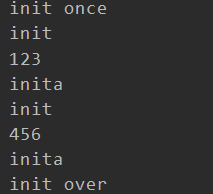
import org.junit.jupiter.api.Test;public class Test2 {@BeforeAll//只初始化一次,注解的方法必须为静态方法static void init(){System.out.println("init once");}@AfterAll//只结果运行一次,注解的方法必须为静态方法static void eacho(){System.out.println("init over");}@BeforeEach//在运行每次有test注解的方法之前都运行一遍beforeeach注解的方法void each(){System.out.println("init");}@AfterEach//在运行每次有test注解的方法之后都运行一遍aftereach注解的方法void eacha() {System.out.println("inita");}@Testpublic  void t1(){System.out.println(123);}@Testpublic void t2(){System.out.println(456);}}
结果

@SpringBoot
测试spring项目里的Svc1类,如果不用new一个svc1对象来测试,但是如果scv1又依赖于其他的bean,那new的svc1对象里面的bean的属性就是null*,所以要用SpringBootTest注解,**它会初始化一个spring的上下文。*如果是用junit4,还需要一个@runwith注解。
@Autowired //Spring容器中所有了类型匹配的bean都被注入进来。
Svc1类,用@service。
package com.yl.unittestdemo;import org.springframework.stereotype.Service;@Service//和autowried联用
public class Svc1 {public int add(int a,int b){return a+b;}
}
test类,
package com.yl.unittestdemo;import org.junit.jupiter.api.Assertions;
import org.junit.jupiter.api.Test;
import org.springframework.beans.factory.annotation.Autowired;
import org.springframework.boot.test.context.SpringBootTest;//测试Svc1类,如果不用new一个svc1对象来测试
// 可以用SpringBootTest,它会初始化一个spring的上下文,
@SpringBootTest
public class Test3 {@Autowired      //Spring容器中所有了类型匹配的bean都被注入进来Svc1 svc1;     //注入svc1@Testvoid t1(){//  int res=new Svc1().add(1,2);int res = svc1.add(1,2);Assertions.assertEquals(3,res);}
}
@mockbean
@mockbean修饰的bean,它替换了这个Bean,并且如果用when配置了规则,就按规则运行,否则会返回默认值(int返回0,对象返回null)。如果用mockbean注解svc1,得到的res的结果是0,因为scv1这个bean已经被mock替换了。
同样的,如果svc2类写了加法方法,svc1再调用了svc2,mockbean了svc2以后, 把when改为when(svc2.add(1,2)).thenReturn(2);后,结果任然成立。
      @MockBeanSvc1 svc1;     //注入svc1@Testvoid t1(){when(svc1.add(1,2)).thenReturn(2);//  int res=new Svc1().add(1,2);int res = svc1.add(1,2);int res2 = svc1.jian(2,1);Assertions.assertEquals(3,res);Assertions.assertEquals(1,res2);}
}
@spybean更好用
bebug后是res=2,res2=0。如果只想让when修饰的svc1生效mock,svc2还保持原来的方法,可以使用@spybean,
@spybean介于mock和autowired的一种方式,只模拟配置的规则的类,其他还按原来的规则。
    @SpyBean//只模拟配置的规则的类,其他还按原来的规则。Svc1 svc1;     //注入svc1@Testvoid t1(){when(svc1.add(1,2)).thenReturn(2);//  int res=new Svc1().add(1,2);int res = svc1.add(1,2);int res2 = svc1.jian(2,1);Assertions.assertEquals(2,res);Assertions.assertEquals(1,res2);}
}
这篇关于单元测试Unit5的文章就介绍到这儿,希望我们推荐的文章对编程师们有所帮助!


