本文主要是介绍速读原著-Android应用开发入门教程(基本的绘制),希望对大家解决编程问题提供一定的参考价值,需要的开发者们随着小编来一起学习吧!
10.2 基本的绘制
参考示例程序:Touch Rotate(Graphics=>OpenGL ES=>Touch Rotate)
源代码:android/apis/graphics/TouchRotateActivity.java
Touch Rotate 程序的运行结果如图所示:
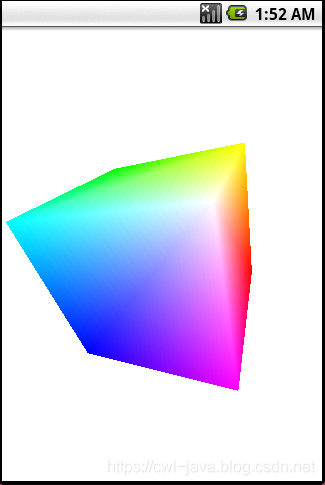
本程序显示了一个可以旋转的立方体,TouchRotate Activity 类的结构如下所示:
public class TouchRotateActivity extends Activity {@Overrideprotected void onCreate(Bundle savedInstanceState) {super.onCreate(savedInstanceState);mGLSurfaceView = new TouchSurfaceView(this); // 建立 GLSurfaceView setContentView(mGLSurfaceView); // 设置 View 到活动中mGLSurfaceView.requestFocus(); // 配置 GLSurfaceView mGLSurfaceView.setFocusableInTouchMode(true);}//......Resume()和 onPause()方法调用 GLSurfaceView 的对应方法private GLSurfaceView mGLSurfaceView; // 配置 GLSurfaceView }
TouchSurfaceView 是一个扩展 GLSurfaceView 类的实现,其中的 CubeRenderer 是扩展了
GLSurfaceView::Renderer 接口的实现,其主要内容如下所示:
class TouchSurfaceView extends GLSurfaceView {public TouchSurfaceView(Context context) {super(context);mRenderer = new CubeRenderer(); // 建立渲染器setRenderer(mRenderer); // 设置渲染器setRenderMode(GLSurfaceView.RENDERMODE_WHEN_DIRTY);}private class CubeRenderer implements GLSurfaceView.Renderer {// 实现渲染器接口public void onDrawFrame(GL10 gl) {// 调用 OpenGL 的标准接口进行操作gl.glClear(GL10.GL_COLOR_BUFFER_BIT | GL10.GL_DEPTH_BUFFER_BIT);gl.glMatrixMode(GL10.GL_MODELVIEW);gl.glLoadIdentity();gl.glTranslatef(0, 0, -3.0f);gl.glRotatef(mAngleX, 0, 1, 0); // 对绘制的图形进行旋转gl.glRotatef(mAngleY, 1, 0, 0);gl.glEnableClientState(GL10.GL_VERTEX_ARRAY);gl.glEnableClientState(GL10.GL_COLOR_ARRAY);mCube.draw(gl); // 调用 draw()进行绘制}}}
CubeRenderer渲染器中的onSurfaceChanged()和onSurfaceCreated()两个函数进行了 Surface变化及创建时的操作。
public void onSurfaceChanged(GL10 gl, int width, int height) {gl.glViewport(0, 0, width, height);float ratio = (float) width / height;gl.glMatrixMode(GL10.GL_PROJECTION);gl.glLoadIdentity();gl.glFrustumf(-ratio, ratio, -1, 1, 1, 10);}public void onSurfaceCreated(GL10 gl, EGLConfig config){gl.glDisable(GL10.GL_DITHER);gl.glHint(GL10.GL_PERSPECTIVE_CORRECTION_HINT,GL10.GL_FASTEST);gl.glClearColor(1,1,1,1);gl.glEnable(GL10.GL_CULL_FACE);gl.glShadeModel(GL10.GL_SMOOTH);gl.glEnable(GL10.GL_DEPTH_TEST);}
移动的效果:
@Override public boolean onTrackballEvent(MotionEvent e) {mRenderer.mAngleX += e.getX() * TRACKBALL_SCALE_FACTOR;mRenderer.mAngleY += e.getY() * TRACKBALL_SCALE_FACTOR;requestRender();return true;}@Override public boolean onTouchEvent(MotionEvent e) {float x = e.getX();float y = e.getY();switch (e.getAction()) {case MotionEvent.ACTION_MOVE:float dx = x - mPreviousX;float dy = y - mPreviousY;mRenderer.mAngleX += dx * TOUCH_SCALE_FACTOR;mRenderer.mAngleY += dy * TOUCH_SCALE_FACTOR;requestRender();}mPreviousX = x;mPreviousY = y;return true;}
这篇关于速读原著-Android应用开发入门教程(基本的绘制)的文章就介绍到这儿,希望我们推荐的文章对编程师们有所帮助!


