本文主要是介绍Qt 自绘温度计,希望对大家解决编程问题提供一定的参考价值,需要的开发者们随着小编来一起学习吧!
使用Qt 自绘一个温度计,代码如下
1、头文件
#ifndef THERMOMETREDLG_H
#define THERMOMETREDLG_H#include <QWidget>
#include <QPropertyAnimation>
#include <QPainter>
#include <QTimer>class thermometreDlg : public QWidget
{Q_OBJECTQ_PROPERTY(qreal value READ getValue WRITE setValue)  //声明属性public:explicit thermometreDlg(QWidget *parent = nullptr);qreal getValue();void setValue(qreal value);void changeValue(qreal value);protected:void paintEvent(QPaintEvent *e);public slots:void startAnimation();signals:private:qreal m_value;qreal curValue;int m_width;QRectF m_rect;int maxValue, minValue;qreal m_radius;QPropertyAnimation *m_valueAnimation;void updateRect();};#endif // THERMOMETREDLG_H
2、源文件
#include "thermometredlg.h"
#include <QDebug>thermometreDlg::thermometreDlg(QWidget *parent) : QWidget(parent)
{m_width = 20;maxValue = 30;minValue = -30;m_radius = 1.05;m_value = -25;curValue = m_value;QTimer *at = new QTimer(this);at->start(1000);m_valueAnimation = new QPropertyAnimation(this, "value");m_valueAnimation->setDuration(1000);m_valueAnimation->setEasingCurve(QEasingCurve::OutCubic);m_valueAnimation->setLoopCount(1);connect(at, SIGNAL(timeout()), this, SLOT(startAnimation()));}void thermometreDlg::updateRect()
{m_rect.setX(0);m_rect.setY(20 - height()/2);m_rect.setWidth(m_width);m_rect.setHeight(height() - 40 - m_width* m_radius);
}void thermometreDlg::setValue(qreal value)
{m_value = value;update();
}void thermometreDlg::changeValue(qreal value)
{if(value > maxValue)value = maxValue;if(value < minValue)value = minValue;curValue = value;
}qreal thermometreDlg::getValue()
{return m_value;
}void thermometreDlg::paintEvent(QPaintEvent *e)
{updateRect();QPainter painter(this);QPen pen(Qt::black);painter.translate(this->width()/2, this->height()/2);  //坐标轴移动到中心点painter.setRenderHints(QPainter::TextAntialiasing | QPainter::Antialiasing);  // 启用反锯齿painter.save();//绘制上方的柱状painter.fillRect(m_rect, QColor(168,200, 225));//绘制底部的圆QRectF tmpRect = QRectF(m_rect.bottomLeft(), QPointF(m_width, height()/2- m_width*m_radius));painter.fillRect(tmpRect, QColor(255, 0, 0));painter.setPen(Qt::NoPen);painter.setBrush(QColor(255, 0, 0));painter.drawEllipse(tmpRect.bottomLeft()+QPointF(tmpRect.width()/2, 0),m_width*m_radius, m_width*m_radius);painter.restore();//绘制刻度以及刻度值painter.save();painter.setPen(QColor(Qt::black));int nYCount = (maxValue - minValue)/10+1;qreal perHeight = (m_rect.height())/nYCount;for (int i=0; i<nYCount; ++i) {QPointF basePoint = m_rect.bottomLeft() - QPointF(0, perHeight/2) - QPointF(0, perHeight*i);//左侧大刻度painter.drawLine(basePoint, basePoint+QPointF(-10, 0));for (int j=1; j<10; ++j) {if(i == nYCount -1)continue;painter.drawLine(basePoint-QPointF(0, perHeight/10*j),basePoint-QPointF(5, perHeight/10*j));}painter.drawText(basePoint+QPointF(-28, 4), QString("%1").arg(minValue+i*10));//右侧大刻度basePoint = m_rect.bottomRight() - QPointF(0, perHeight/2) - QPointF(0, perHeight*i);painter.drawLine(basePoint, basePoint+QPointF(10, 0));for (int j=1; j<10; ++j) {if(i == nYCount -1)continue;painter.drawLine(basePoint-QPointF(0, perHeight/10*j),basePoint-QPointF(-5, perHeight/10*j));}}painter.restore();//根据值填充m_rectqreal h = (m_value-minValue)/(maxValue-minValue)*(m_rect.height()-perHeight);if(h<0)h = 0;if(h > m_rect.height())h = m_rect.height();painter.fillRect(m_rect.adjusted(0, m_rect.height()-h-perHeight/2-1 , 0, 0), QColor(255, 0, 0));QWidget::paintEvent(e);
}void thermometreDlg::startAnimation()
{qreal startValue = getValue();m_valueAnimation->setKeyValueAt(0, startValue-1);m_valueAnimation->setKeyValueAt(0.5, curValue+1);m_valueAnimation->setKeyValueAt(1, curValue);m_valueAnimation->setStartValue(startValue-2);m_valueAnimation->start();
}
使用时在Qt ui 设计师中拖拽一个QWidget,然后将该QWidget提升为这个温度计类 thermometreDlg
需要改变当前显示的值,只需要调用代码中的函数
void changeValue(qreal value);
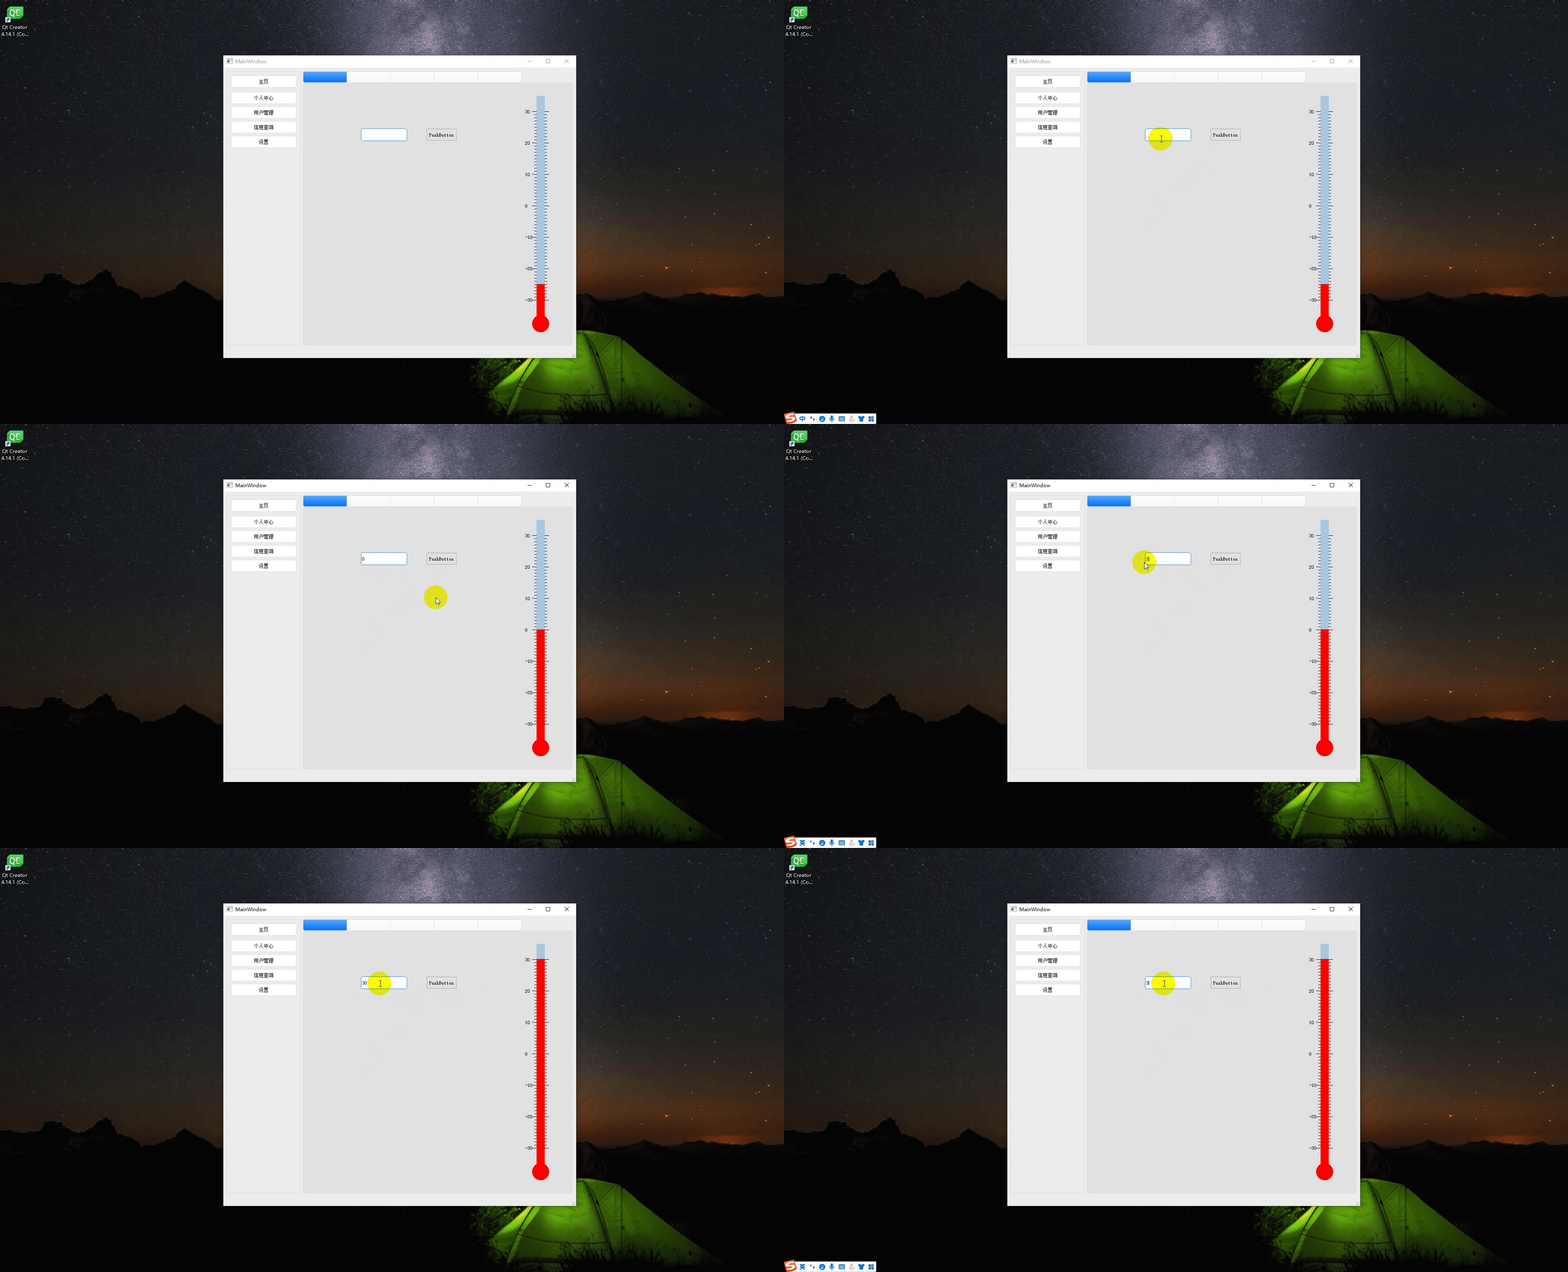
3、效果图如下:

麻烦各位大佬给小弟点个赞!thanks
鉴于大家都想要源码,每次都需要我来单独发,有时候太忙了根本没有时间看,所有现在把源码下载链接放到这里,0积分免费下载,希望路过的大佬们能够留下你们的小心心 https://download.csdn.net/download/weixin_46068528/88062905
这篇关于Qt 自绘温度计的文章就介绍到这儿,希望我们推荐的文章对编程师们有所帮助!


