本文主要是介绍Spring cloud - 断路器 Resilience4J,希望对大家解决编程问题提供一定的参考价值,需要的开发者们随着小编来一起学习吧!
其实文章的标题应该叫 Resilience4J,而不是Spring Cloud Resilience4J,不过由于正在对Spring cloud的一系列组件进行学习,为了统一,就这样吧。
概念区分
首先区分几个概念
-
Spring cloud 断路器:Spring Cloud的官网对Spring Cloud Circuit Breaker的描述:
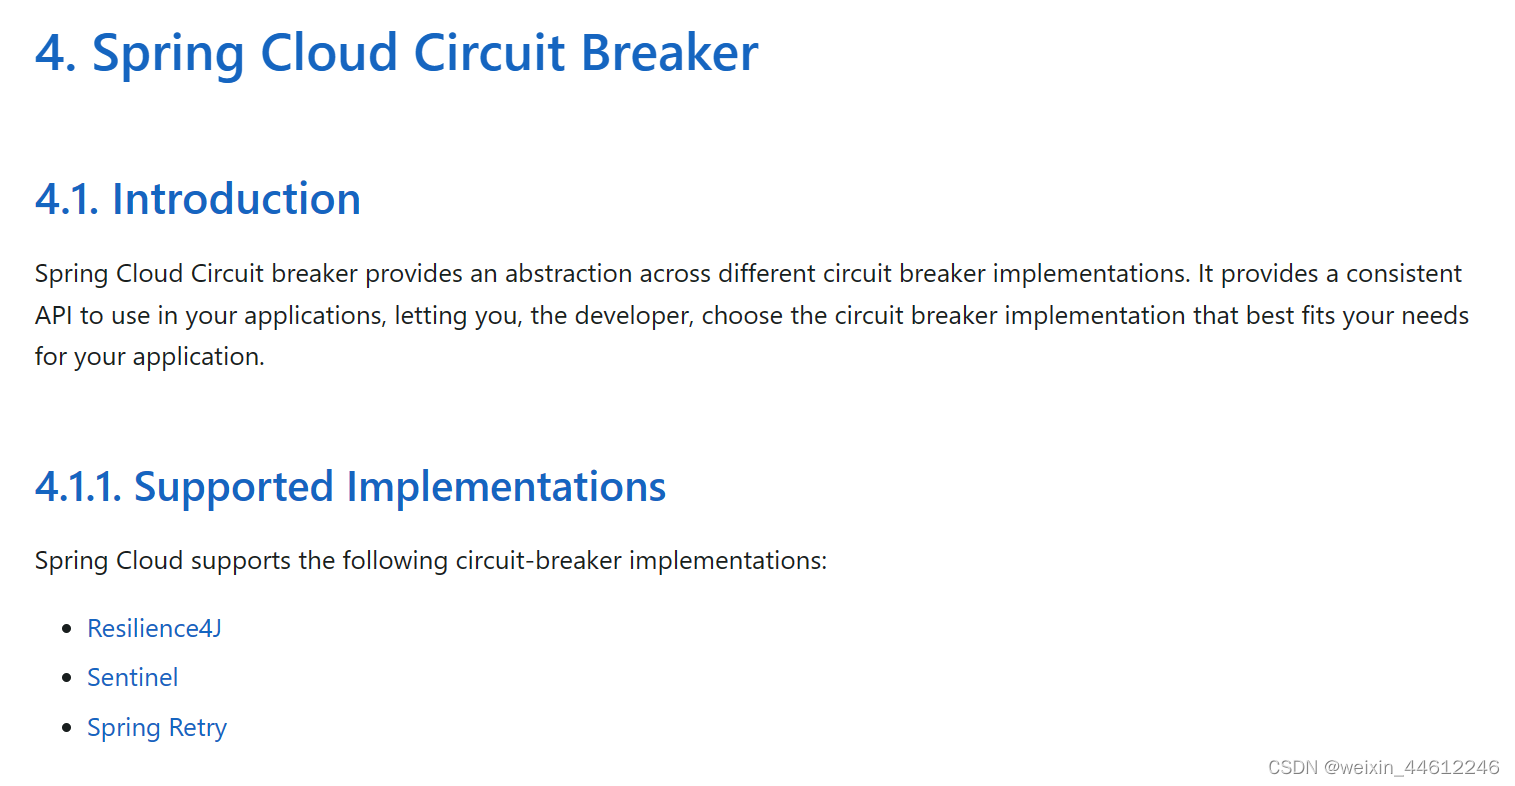
Spring Cloud支持的几种断路器实现,其中就包含Resilience4J。 -
Spring gateway 断路器过滤器:前面一篇文章学习过,Spring Cloud Gateway提供的过滤器中就包括断路器过滤器,断路器过滤器的默认实现也是Resilience4J。
-
Resilience4J:轻量级的断路器实现,Spring Cloud抛弃Hystrix之后(不知道算不算是抛弃…)的替代品。
今天的文章以学习Resilience4J为主。
Resilience4j 介绍
Resilience4j is a lightweight fault tolerance library designed for functional programming. Resilience4j provides higher-order functions (decorators) to enhance any functional interface, lambda expression or method reference with a Circuit Breaker, Rate Limiter, Retry or Bulkhead. You can stack more than one decorator on any functional interface, lambda expression or method reference. The advantage is that you have the choice to select the decorators you need and nothing else.
Resilience4j 是一个轻量级的容错处理库,提供一些列高阶功能(装饰器)以增强任意的功能接口,以lambda 表达式或方法引用的方式提供Circuit Breaker, Rate Limiter, Retry或Bulkhead。你可以通过表达式或者方法引用启用一个或多个装饰器。
以上内容来自于Resilience4j 官网,内容很容易看得懂但是翻译起来感觉却有些费劲…
Resilience4j 运行在java17上,在spring项目上或springboot、springcloud项目上都可以用,所以他不是spring cloud专有的技术,只不过spring cloud对Resilience4j 做了很好的集成(比如通过spring cloud gateway)。
核心模块
Resilience4j 包含如下核心模块:
- resilience4j-circuitbreaker: Circuit breaking 断路器
- resilience4j-ratelimiter: Rate limiting 限流
- resilience4j-bulkhead: Bulkheading 舱壁,或者叫隔板
- resilience4j-retry: Automatic retrying (sync and async) 重试
- resilience4j-timelimiter: Timeout handling 超时控制器
- resilience4j-cache: Result caching缓存
There are also add-on modules for metrics, Feign, Kotlin, Spring, Ratpack, Vertx, RxJava2 and more.
除此之外还提供了一些其他的附加模块,主要是用来将Resilience4j 集成到其他知名框架中的。
Resilience patterns
官网提供了一张表格,说明Resilience 包含的各模块的工作方式及功能描述。
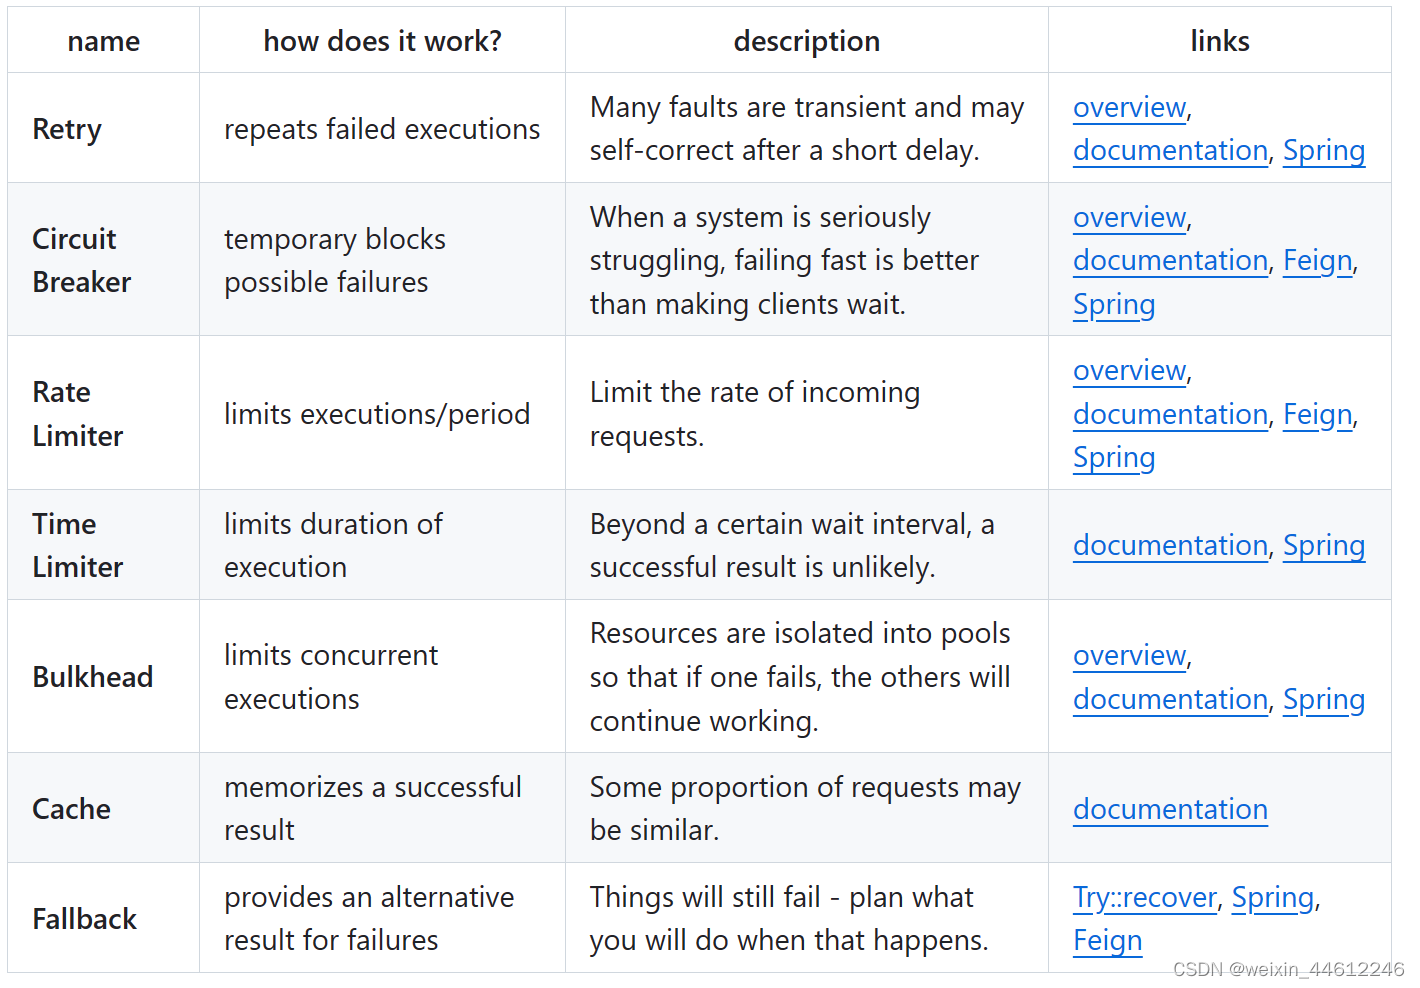
Retry: 被调用服务出现异常后的重试功能,Resilience 的设计思路是认为好多服务出现异常之后其实都有可能在短时间内自我修复,所以Retry模块在这种场景下就会发挥作用。
Circuit Breaker: 暂时阻止可能发生错误的调用,避免雪崩效应。
Rate Limiter: 限流,限制一定时间范围内对某一服务的调用次数。
Time Limiter: timeout超时控制功能。
Bulkhead: 舱壁/调用隔离,限制并发数。
Cache: 缓存功能。
Fallback: 也就是所谓的降级服务。
Resilience 的核心功能中,不太容易理解的可能是这个Bulkhead,字面意思是舱壁或隔板的意思,他要实现的功能其实就是限制并发,有两种方式:信号量或线程池。目的也是为了限流,防止某一时刻突然出现的请求井喷从而导致服务异常。
应用
本文采用Spring cloud项目案例来简单说明Resilience核心组件的用法。
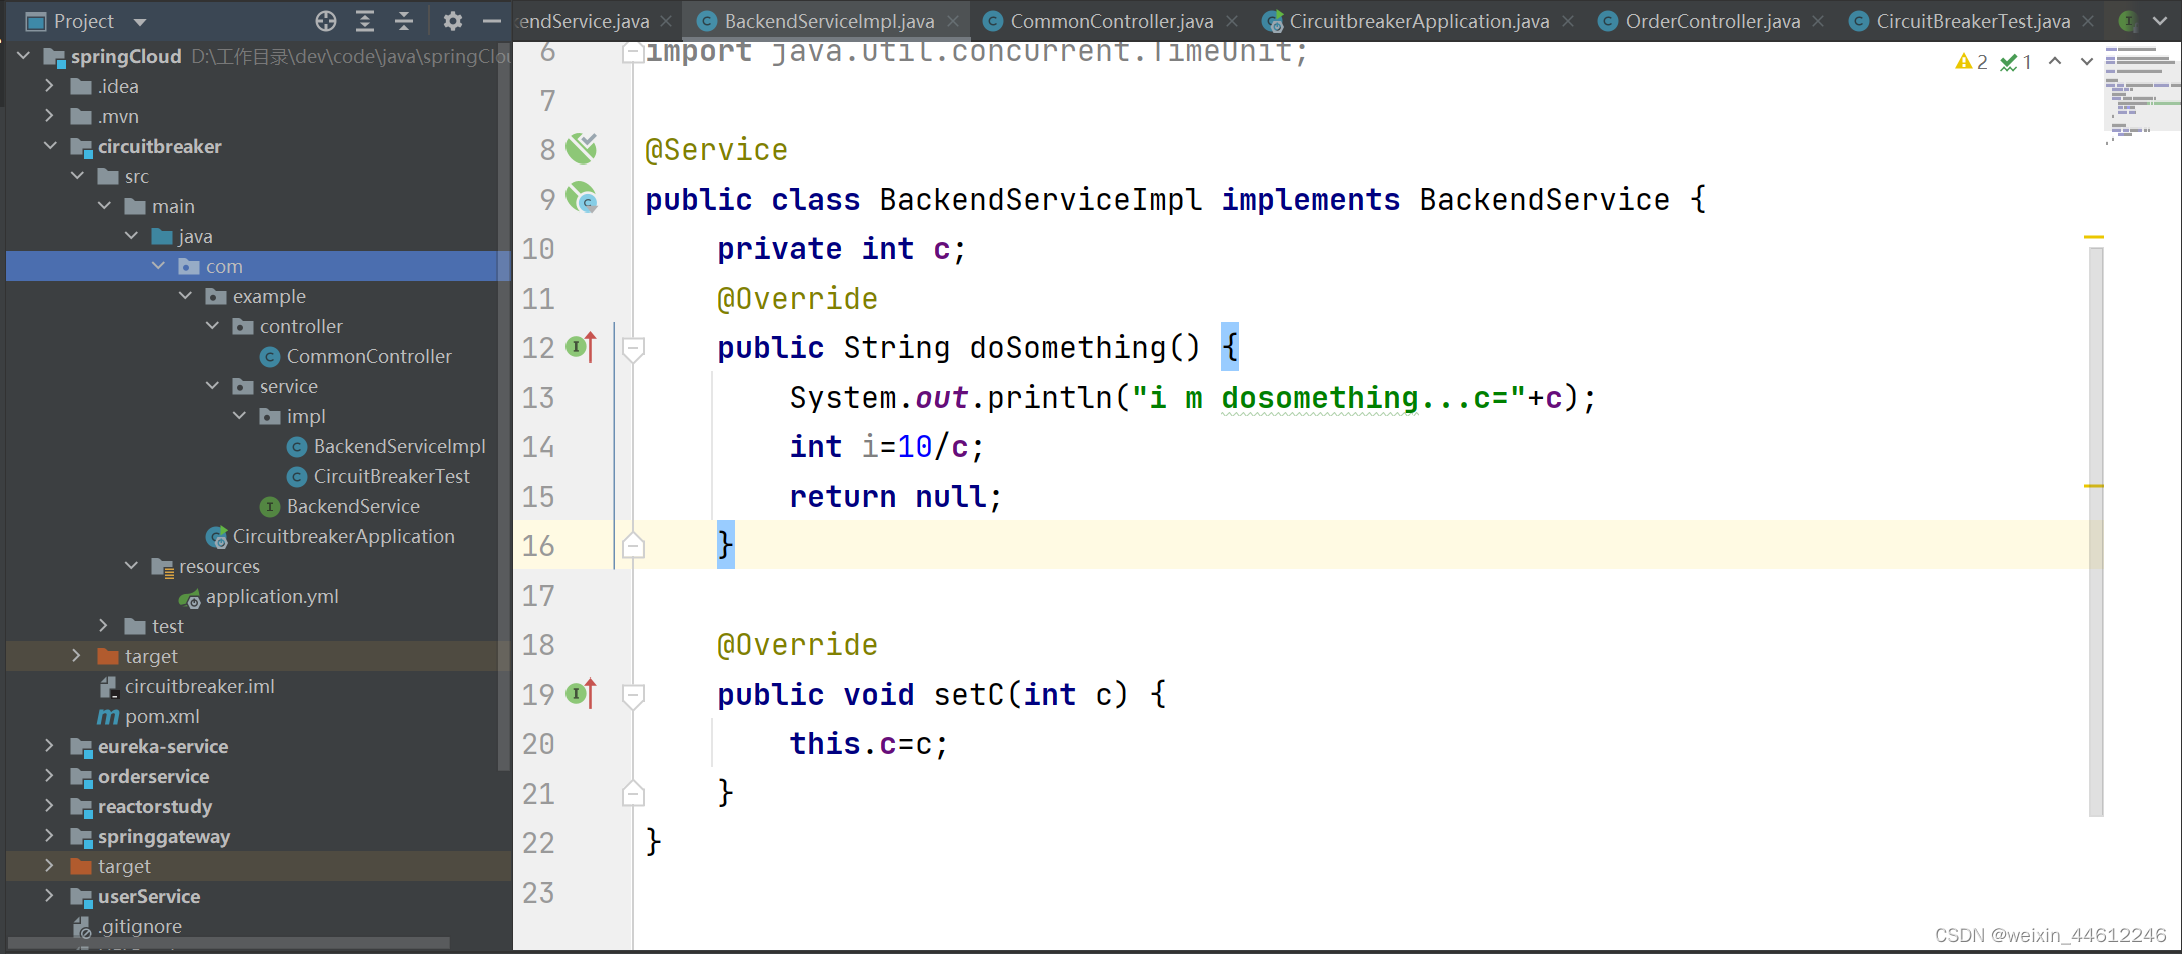
在以往springcloud项目的基础上,新建一个circuitbreaker模块,项目结构如下:
pom引用
pom文件引入Resilience4j :
<?xml version="1.0" encoding="UTF-8"?>
<project xmlns="http://maven.apache.org/POM/4.0.0"xmlns:xsi="http://www.w3.org/2001/XMLSchema-instance"xsi:schemaLocation="http://maven.apache.org/POM/4.0.0 http://maven.apache.org/xsd/maven-4.0.0.xsd"><parent><artifactId>springCloud</artifactId><groupId>com.example</groupId><version>0.0.1-SNAPSHOT</version></parent><modelVersion>4.0.0</modelVersion><artifactId>circuitbreaker</artifactId><dependencies><dependency><groupId>org.springframework.cloud</groupId><artifactId>spring-cloud-starter-netflix-eureka-client</artifactId></dependency><dependency><groupId>org.springframework.boot</groupId><artifactId>spring-boot-starter-web</artifactId></dependency><dependency><groupId>org.springframework.cloud</groupId><artifactId>spring-cloud-starter-circuitbreaker-resilience4j</artifactId></dependency></dependencies><properties><maven.compiler.source>17</maven.compiler.source><maven.compiler.target>17</maven.compiler.target></properties></project>
创建BackendService接口及实现类
创建一个特别简单的BackendService接口及实现类,模仿被调用的后台服务,BackendService的目的就是为了测试服务出现问题的时候Resilience4j 各核心模块的具体表现,所以我们把BackendService的逻辑设计的非常的简单:
一个接口:
@Service
public interface BackendService {String doSomething();public void setC(int c);
}
一个实现类:
package com.example.service.impl;import com.example.service.BackendService;
import org.springframework.stereotype.Service;import java.util.concurrent.TimeUnit;@Service
public class BackendServiceImpl implements BackendService {private int c;@Overridepublic String doSomething() {System.out.println("i m dosomething...c="+c);int i=10/c;return "do something...c="+c;}@Overridepublic void setC(int c) {this.c=c;}
}
只有一个doSomething方法,方法打印一句话,用方法属性c做了一个除法运算,目的是为了一会儿在测试的时候可以灵活控制其抛出异常。
CircuitBreaker, Retry and Fallback应用
创建一个CircuitBreakerTest类,CircuitBreakerTest是启用CircuitBreaker的关键,我们设置一个test方法,该方法为将BackendService的测试方法doSomething进行包装,也就是增加CircuitBreaker的装饰器,使其具有CircuitBreaker的各种特性:
@Service
public class CircuitBreakerTest {@AutowiredBackendService backendService;public String test(int c){backendService.setC(c);// Create a CircuitBreaker (use default configuration)CircuitBreaker circuitBreaker = CircuitBreaker.ofDefaults("backendName");// Create a Retry with at most 3 retries and a fixed time interval between retries of 500msRetry retry = Retry.ofDefaults("backendName");// Decorate your call to BackendService.doSomething() with a CircuitBreakerSupplier<String> decoratedSupplier = CircuitBreaker.decorateSupplier(circuitBreaker, backendService::doSomething);// Decorate your call with automatic retrydecoratedSupplier = Retry.decorateSupplier(retry, decoratedSupplier);// Use of Vavr's Try to// execute the decorated supplier and recover from any exceptionString result = Try.ofSupplier(decoratedSupplier).recover(throwable -> "Hello from Recovery").get();return result==null?"hello resi":result;}}
test方法首先使用默认配置创建一个CircuitBreaker,之后再用默认配置增加Retry装饰器,Retry的默认配置会指定:如果目标方法调用失败,会以500ms的时间间隔、最多调用3次目标方法,每次调用都失败的话,才认为是最终的调用失败。
之后将装饰器绑定到目标方法BackendService的doSomething方法上。
最后,调用目标方法,并且绑定fallback:方法返回throwable异常的话,返回"Hello from Recovery"作为降级服务(而不是将异常直接返回给调用方)。
新增测试用Controller
新增一个controller:
@RestController
@RequestMapping("/hello")
public class CommonController {@AutowiredCircuitBreakerTest circuitBreakerTest;@GetMapping("/resi/{c}")public String resi(@PathVariable(value="c",required = false) int c){return circuitBreakerTest.test(c);}
}
代码准备好了,可以测试验证了。
测试验证
启动circuitbreaker模块服务,因为我们是将该模块创建在我们之前的springcloud项目框架下了,所以最好也把eureka的配置加进来,否则会有报错:
application.yml:
spring:application:name: circuitbreakercloud:loadbalancer:enabled: true
eureka:client:service-url: # eureka ?????defaultZone: http://127.0.0.1:10086/eureka/
server:port: 9098
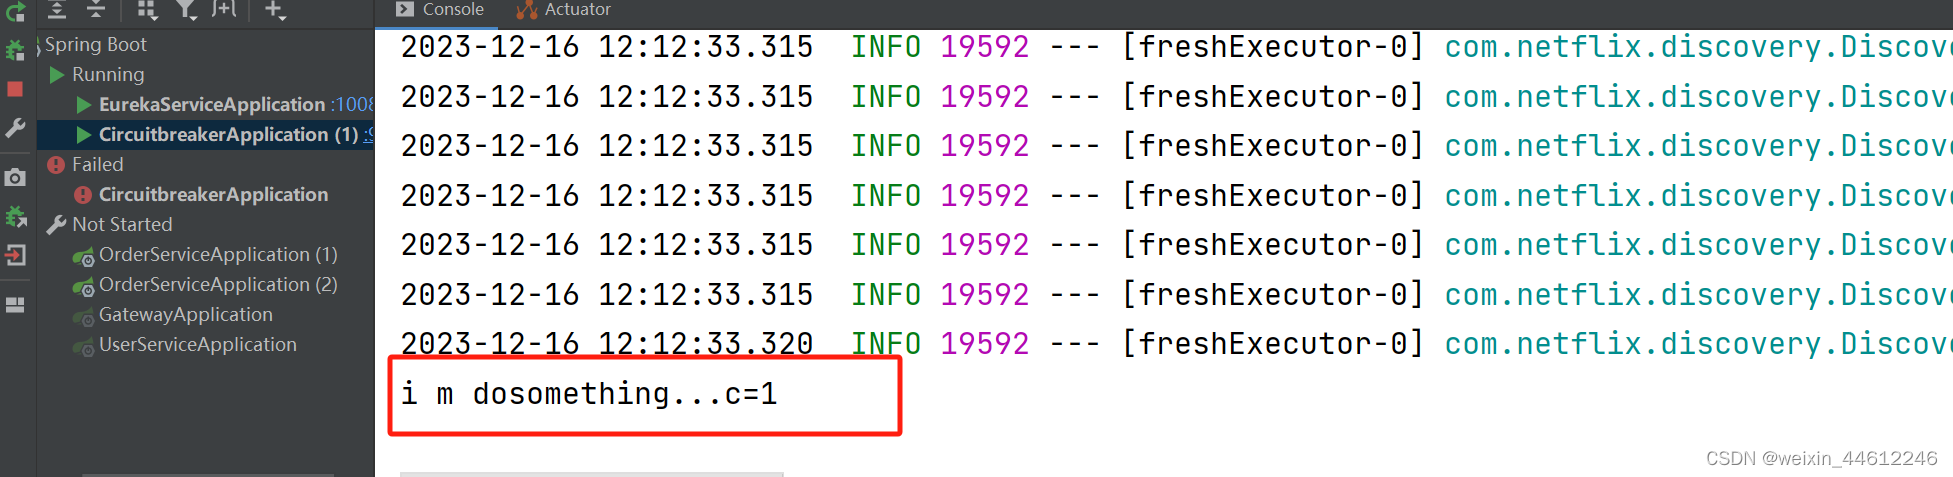
之后,启动注册中心,启动circuitbreaker。

后台log:
异常测试
输入异常参数,让BackendService的test方法抛出异常,前台得到了降级的fallback返回:
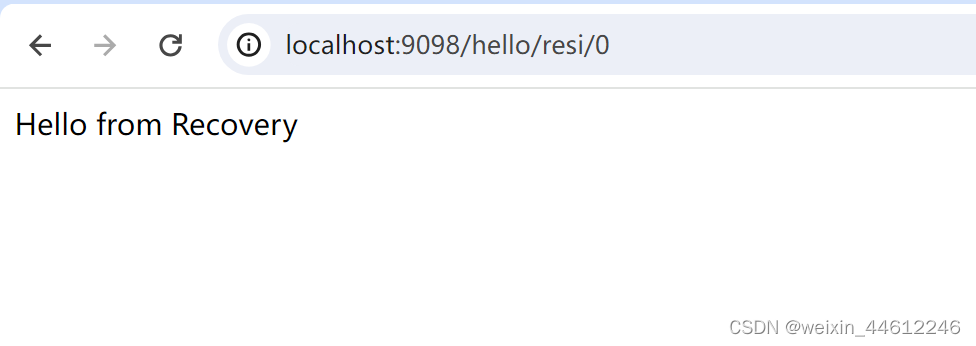
后台:
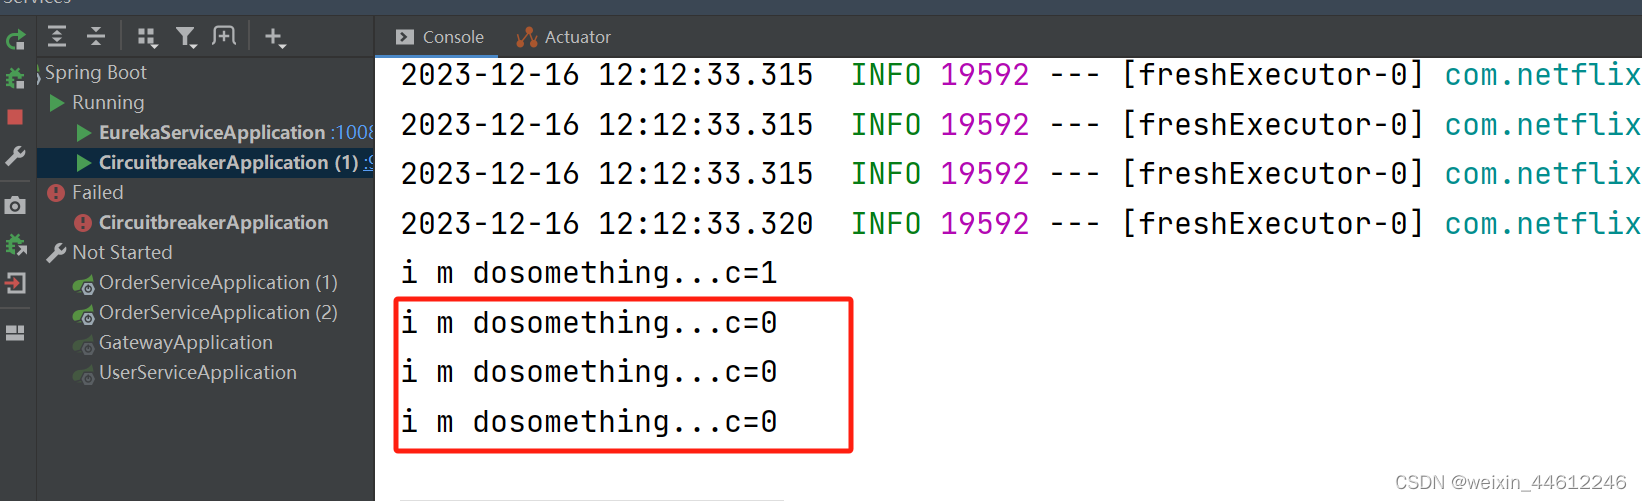
参数为0的时候,前端提交1次,后台Retry工作、重试了3次之后,仍然得到异常返回,最后fallback生效。
RateLimiter应用
RateLimiter是Resilience4j用于限流的组件,为了验证RateLimiter应用,我们前面的案例代码不太使用,需要稍作调整。
CircuitBreakerTest类修改为:
public class CircuitBreakerTest {private Supplier<String> decoratedSupplier;public void init(){if(decoratedSupplier != null) return;log.info("start to create circuitbreaker...");// Create a CircuitBreaker (use default configuration)CircuitBreaker circuitBreaker = CircuitBreaker.ofDefaults("backendName");// Create a Retry with at most 3 retries and a fixed time interval between retries of 500msRetry retry = Retry.ofDefaults("backendName");// Decorate your call to BackendService.doSomething() with a CircuitBreakerdecoratedSupplier = CircuitBreaker.decorateSupplier(circuitBreaker, backendService::doSomething);// Decorate your call with automatic retrydecoratedSupplier = Retry.decorateSupplier(retry, decoratedSupplier);// Create a custom RateLimiter configurationRateLimiterConfig config = RateLimiterConfig.custom().timeoutDuration(Duration.ofMillis(100)).limitRefreshPeriod(Duration.ofMinutes(1)).limitForPeriod(10).build();// Create a RateLimiterRateLimiter rateLimiter = RateLimiter.of("backendName", config);decoratedSupplier = RateLimiter.decorateSupplier(rateLimiter,decoratedSupplier);}@AutowiredBackendService backendService;private int counter=0;public String test(int c){init();backendService.setC(c);log.info("in test counter:"+ ++counter);// Use of Vavr's Try to// execute the decorated supplier and recover from any exceptionString result = Try.ofSupplier(decoratedSupplier).recover(throwable -> "Hello from Recovery").get();return result==null?"hello resi":result;}
}
由于限流装饰器需要统计一定时间范围内的请求次数,所以初始化circuitbreaker的代码不能放在请求内,需要独立出去。
限流器配置为1分钟之内的请求不超过10次,超过10次则限流限制生效、触发降级服务fallback。加了一个调用计数器,调用的时候在log中打印。
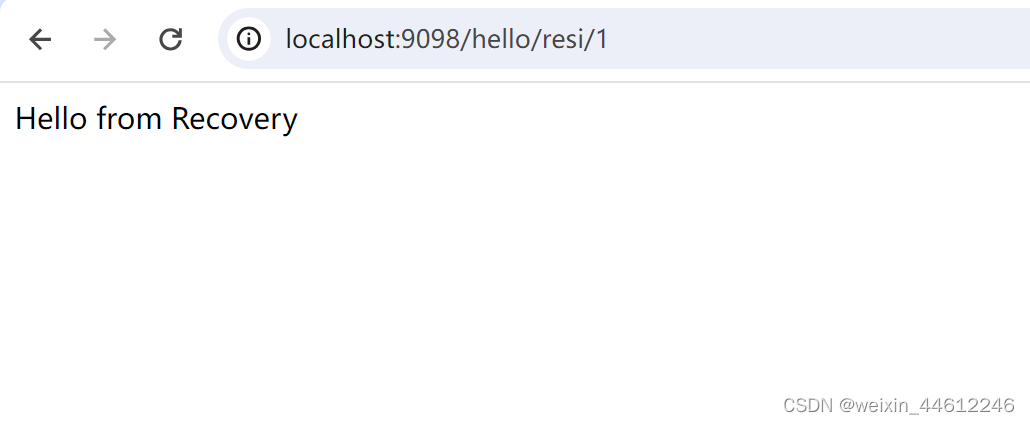
启动服务,测试。前端不断刷新,可以发现前10次能够正常获得返回,第11次开始获取不到正常返回了,返回的是fallback:
查看后台log:
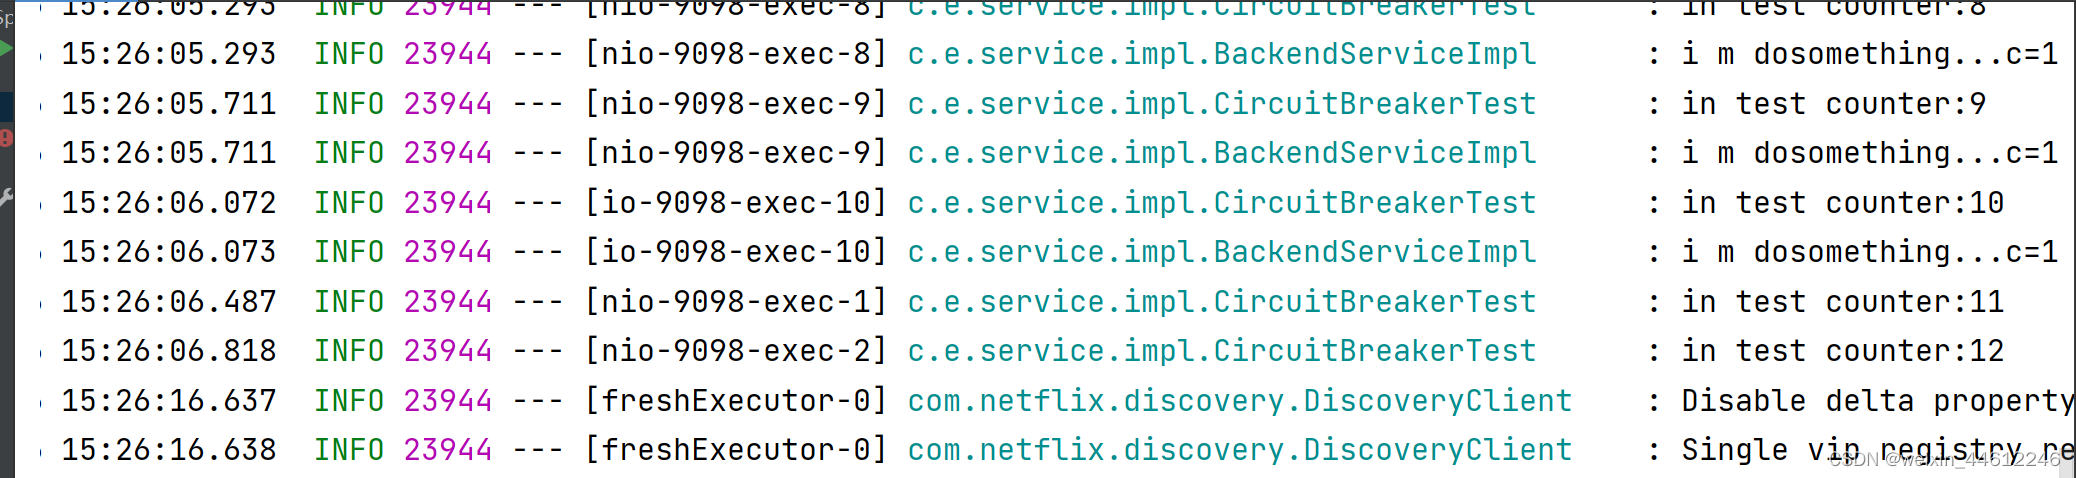
由于请求都发生在15:26这一分钟之内,所以,前10次请求都能正常调用到BackendService的doSomething方法中,第11次请求之后,就被RateLimiter限流了,请求不能到达调用服务中了,这种情况下前端的反馈是fallback降级服务。
Bulkhead应用
Resilience4j提供了两种Bulkhead隔离策略:SemaphoreBulkhead和ThreadPoolBulkhead。
SemaphoreBulkhead
在上面的CircuitBreakerTest类的init方法尾部加入:
// Create a custom Bulkhead configurationBulkheadConfig bulkheadConfig = BulkheadConfig.custom().maxConcurrentCalls(150).maxWaitDuration(Duration.ofSeconds(1)).build();Bulkhead bulkhead = Bulkhead.of("backendName", bulkheadConfig);decoratedSupplier =Bulkhead.decorateSupplier(bulkhead,decoratedSupplier);
不过项目引入的:
<dependency><groupId>org.springframework.cloud</groupId><artifactId>spring-cloud-starter-circuitbreaker-resilience4j</artifactId></dependency>
并不能包含Bulkhead 所在的包,暂时还没有搞清楚spring cloud集成的resilience4j,其Bulkhead 在哪个依赖中。所以临时加入了:
<dependency><groupId>io.github.resilience4j</groupId><artifactId>resilience4j-spring-boot2</artifactId><version>1.7.0</version></dependency>
resilience4j针对springboot2的依赖包,引入依赖之后编译能通过了。
上面代码对Bulkhead 配置为:1秒钟时间范围内的并发线程数不能超过150个。
ThreadPoolBulkhead
ThreadPoolBulkhead配置:
ThreadPoolBulkheadConfig tpconfig = ThreadPoolBulkheadConfig.custom().maxThreadPoolSize(10).coreThreadPoolSize(2).queueCapacity(20).build();
使用线程池进行限流,最大线程数10,核心线程数2,队列容量20。这种情况下,最大并发线程为10,超过并发线程数的请求将进入队列排队等待,队列满之后,请求将被拒绝。
多组件共同作用的顺序
多个组件共同作用的话,先后顺序如下:
Retry ( CircuitBreaker ( RateLimiter ( TimeLimiter ( Bulkhead ( Function ) ) ) ) )
第一个起作用的是Bulkhead ,最后一个起作用的是Retry。
事件机制
CircuitBreaker, RateLimiter, Cache, Bulkhead, TimeLimiter and Retry components emit a stream of events. It can be consumed for logging, assertions and any other purpose.
Resilience4J的各组件支持发布事件,时间可以被其他任何应用消费(比如日志应用、断言等)。
比如:
circuitBreaker.getEventPublisher().onSuccess(event -> logger.info(...)).onError(event -> logger.info(...)).onIgnoredError(event -> logger.info(...)).onReset(event -> logger.info(...)).onStateTransition(event -> logger.info(...));
// Or if you want to register a consumer listening to all events, you can do:
circuitBreaker.getEventPublisher().onEvent(event -> logger.info(...));
应用可捕获(消费)成功、失败、重置等事件,针对事件进行进一步处理。
OK,此致!
这篇关于Spring cloud - 断路器 Resilience4J的文章就介绍到这儿,希望我们推荐的文章对编程师们有所帮助!


