本文主要是介绍iOS 自定义TabBarController,希望对大家解决编程问题提供一定的参考价值,需要的开发者们随着小编来一起学习吧!
一、自定义的思路
iOS中的TabBarController确实已经很强大了,大部分主流iOS应用都会采用。但是往往也不能满足全部的需求,因此需要自定义TabBar,自定义需要对系统的TabBar工作方式有很好的理解,自定义需要勇气。
自定义TabBar的原则:尽量利用系统自带TabBar,只改需要改的地方。
二、自定义TabBar的总体过程
1. 先把自带的 TabBar 条给取消了
2. 自己做一个 view, 上面放几个按钮 , 设定按钮的点击事件 . 并设置 selectIndex。
3.关联各个子viewController,覆盖相关事件。
三、细节很重要
1. 让自己创建的按钮关联到 viewController:
•用 tabbar 的 selectedIndex 属性 . 设置这个属性就行了 .
2. 取消系统的高亮 :
• 可以自定义一个按钮 . 重写里面的 setHighhighted 方法 , 什么也不做就行了 .( 如果调用 super 就相当于没写 )
3. 关于几个按钮只选中一个的方法 :
• 设置一个属性 , 记录上一个选中的按钮 .
• 点击当前按钮时 , 把上一个按钮设置为未选中 , 并把当前按钮设置为选中 , 最后把当前按钮赋值给上一个按钮 .
四、初步自定义
直接上代码,详见注释。
[objc] view plain copy 

- #import <UIKit/UIKit.h>
- @interface XNTabBarController : UITabBarController
- @end
XNTabBarController.m
[objc] view plain copy
- //
- // XNTabBarController.m
- //
- //
- // Created by neng on 14-6-19.
- // Copyright (c) 2014年 neng. All rights reserved.
- //
- #import "XNTabBarController.h"
- #import "Common.h"
- #import "XNTabBarButton.h"
- @interface XNTabBarController ()
- /**
- * 设置之前选中的按钮
- */
- @property (nonatomic, weak) UIButton *selectedBtn;
- @end
- @implementation XNTabBarController
- - (void)viewDidLoad {
- [super viewDidLoad];
- //下面两个方法在开发中是经常会用到的
- // NSLog(@"%s",__func__);
- // NSLog(@"%@",self.view.subviews); //能打印出所有子视图,和其frame
- LogFun;
- LogSubviews(self.view);
- //删除现有的tabBar
- CGRect rect = self.tabBar.frame;
- [self.tabBar removeFromSuperview]; //移除TabBarController自带的下部的条
- //测试添加自己的视图
- UIView *myView = [[UIView alloc] init];
- myView.frame = rect;
- myView.backgroundColor = [UIColor redColor];
- [self.view addSubview:myView];
- for (int i = 0; i < 5; i++) {
- //UIButton *btn = [[UIButton alloc] init];
- XNTabBarButton *btn = [[XNTabBarButton alloc] init];
- NSString *imageName = [NSString stringWithFormat:@"TabBar%d", i + 1];
- NSString *imageNameSel = [NSString stringWithFormat:@"TabBar%dSel", i + 1];
- [btn setImage:[UIImage imageNamed:imageName] forState:UIControlStateNormal];
- [btn setImage:[UIImage imageNamed:imageNameSel] forState:UIControlStateSelected];
- CGFloat x = i * myView.frame.size.width / 5;
- btn.frame = CGRectMake(x, 0, myView.frame.size.width / 5, myView.frame.size.height);
- [myView addSubview:btn];
- btn.tag = i;//设置按钮的标记, 方便来索引当前的按钮,并跳转到相应的视图
- //带参数的监听方法记得加"冒号"
- [btn addTarget:self action:@selector(clickBtn:) forControlEvents:UIControlEventTouchUpInside];
- //设置刚进入时,第一个按钮为选中状态
- if (0 == i) {
- btn.selected = YES;
- self.selectedBtn = btn; //设置该按钮为选中的按钮
- }
- }
- }
- /**
- * 自定义TabBar的按钮点击事件
- */
- - (void)clickBtn:(UIButton *)button {
- //1.先将之前选中的按钮设置为未选中
- self.selectedBtn.selected = NO;
- //2.再将当前按钮设置为选中
- button.selected = YES;
- //3.最后把当前按钮赋值为之前选中的按钮
- self.selectedBtn = button;
- //4.跳转到相应的视图控制器. (通过selectIndex参数来设置选中了那个控制器)
- self.selectedIndex = button.tag;
- }
- @end
XNTabBarButton.h
[objc] view plain copy
- #import <UIKit/UIKit.h>
- @interface XNTabBarButton : UIButton
- @end
XNTabBarButton.m
[objc] view plain copy
- #import "XNTabBarButton.h"
- @implementation XNTabBarButton
- /**什么也不做就可以取消系统按钮的高亮状态*/
- - (void)setHighlighted:(BOOL)highlighted{
- // [super setHighlighted:highlighted];
- }
- @end
五、代码重构
重构 的目的是把代码放到他最该到的地方去 . 提高可读写与可拓展性。
对控件的重构要 保证可重用性 . 做到封装做其他应用时 , 可以直接拿过去用的地步 .
tips :
1、 关于 init 与 initWithFrame :
• 在对象初始化调用 init 时 , 会调用 initWithFrame 方法 .
• Init 与 initWithFrame 都会被调用 .
• 建议自定义控件不要重 写 init 方法 , 需要 初始化 时 重写 initWithFrame 方法 .
• 好处 : 其他人调用无论是调用 init, 还是调用 initWithFrame 都会调用 initWithFrame 方法 .
2、 关于控件的 布局代码 :
• 建议写在 layoutSubviews 方法中 .
• 不要忘记写 super 方法
• 将设置 x,y,frame 等写在这里面 .
3、将 自定义的Tabbar 添加为系统 TabBar 的子视图,这样TabBar的切换自动隐藏/滑动功能就不用自己做了. (hidebottombaronpush)
重构后的代码如下:
将自定义的TabBar单独建立,并将代码移过去。
设置代理方法,工具栏按钮被选中,记录从哪里跳转到哪里.
[objc] view plain copy
- #import <UIKit/UIKit.h>
- @class XNTabBar;
- @protocol XNTabBarDelegate <NSObject>
- /**
- * 工具栏按钮被选中, 记录从哪里跳转到哪里. (方便以后做相应特效)
- */
- - (void) tabBar:(XNTabBar *)tabBar selectedFrom:(NSInteger) from to:(NSInteger)to;
- @end
- @interface XNTabBar : UIView
- @property(nonatomic,weak) id<XNTabBarDelegate> delegate;
- /**
- * 使用特定图片来创建按钮, 这样做的好处就是可扩展性. 拿到别的项目里面去也能换图片直接用
- *
- * @param image 普通状态下的图片
- * @param selectedImage 选中状态下的图片
- */
- -(void)addButtonWithImage:(UIImage *)image selectedImage:(UIImage *) selectedImage;
- @end
[objc] view plain copy
- //
- // XNTabBar.m
- //
- // Created by neng on 14-6-19.
- // Copyright (c) 2014年 neng. All rights reserved.
- //
- #import "XNTabBar.h"
- #import "XNTabBarButton.h"
- @interface XNTabBar ()
- /**
- * 设置之前选中的按钮
- */
- @property (nonatomic, weak) UIButton *selectedBtn;
- @end
- @implementation XNTabBar
- /**
- * 在这个方法里写控件初始化的东西, 调用init方法时会调用
- */
- //- (id)initWithFrame:(CGRect)frame {
- // if (self = [super initWithFrame:frame]) {
- // //添加按钮
- // for (int i = 0; i < 5; i++) { //取消掉特定的数字
- // //UIButton *btn = [[UIButton alloc] init];
- // XNTabBarButton *btn = [[XNTabBarButton alloc] init];
- //
- // NSString *imageName = [NSString stringWithFormat:@"TabBar%d", i + 1];
- // NSString *imageNameSel = [NSString stringWithFormat:@"TabBar%dSel", i + 1];
- //
- // [btn setImage:[UIImage imageNamed:imageName] forState:UIControlStateNormal];
- // [btn setImage:[UIImage imageNamed:imageNameSel] forState:UIControlStateSelected];
- //
- // [self addSubview:btn];
- //
- // btn.tag = i; //设置按钮的标记, 方便来索引当前的按钮,并跳转到相应的视图
- //
- // //带参数的监听方法记得加"冒号"
- // [btn addTarget:self action:@selector(clickBtn:) forControlEvents:UIControlEventTouchUpInside];
- //
- // if (0 == i) {
- // [self clickBtn:btn];
- // }
- // }
- // }
- // return self;
- //}
- - (void)addButtonWithImage:(UIImage *)image selectedImage:(UIImage *)selectedImage {
- UIButton *btn = [[UIButton alloc] init];
- [btn setImage:image forState:UIControlStateNormal];
- [btn setImage:selectedImage forState:UIControlStateSelected];
- [self addSubview:btn];
- //带参数的监听方法记得加"冒号"
- [btn addTarget:self action:@selector(clickBtn:) forControlEvents:UIControlEventTouchUpInside];
- //如果是第一个按钮, 则选中(按顺序一个个添加)
- if (self.subviews.count == 1) {
- [self clickBtn:btn];
- }
- }
- /**专门用来布局子视图, 别忘了调用super方法*/
- - (void)layoutSubviews {
- [super layoutSubviews];
- int count = self.subviews.count;
- for (int i = 0; i < count; i++) {
- //取得按钮
- UIButton *btn = self.subviews[i];
- btn.tag = i; //设置按钮的标记, 方便来索引当前的按钮,并跳转到相应的视图
- CGFloat x = i * self.bounds.size.width / count;
- CGFloat y = 0;
- CGFloat width = self.bounds.size.width / count;
- CGFloat height = self.bounds.size.height;
- btn.frame = CGRectMake(x, y, width, height);
- }
- }
- /**
- * 自定义TabBar的按钮点击事件
- */
- - (void)clickBtn:(UIButton *)button {
- //1.先将之前选中的按钮设置为未选中
- self.selectedBtn.selected = NO;
- //2.再将当前按钮设置为选中
- button.selected = YES;
- //3.最后把当前按钮赋值为之前选中的按钮
- self.selectedBtn = button;
- //却换视图控制器的事情,应该交给controller来做
- //最好这样写, 先判断该代理方法是否实现
- if ([self.delegate respondsToSelector:@selector(tabBar:selectedFrom:to:)]) {
- [self.delegate tabBar:self selectedFrom:self.selectedBtn.tag to:button.tag];
- }
- //4.跳转到相应的视图控制器. (通过selectIndex参数来设置选中了那个控制器)
- //self.selectedIndex = button.tag;
- }
- @end
原先的 XNTabBarController.m 经过修改后,注释了原先的代码。
[objc] view plain copy
- //
- // XNTabBarController.m
- //
- // Created by neng on 14-6-19.
- // Copyright (c) 2014年 neng. All rights reserved.
- //
- #import "XNTabBarController.h"
- #import "XNTabBarButton.h"
- #import "XNTabBar.h"
- @interface XNTabBarController () <XNTabBarDelegate>
- /**
- * 设置之前选中的按钮
- */
- @property (nonatomic, weak) UIButton *selectedBtn;
- @end
- @implementation XNTabBarController
- - (void)viewDidLoad {
- [super viewDidLoad];
- //下面两个方法在开发中是经常会用到的
- // NSLog(@"%s",__func__);
- // NSLog(@"%@",self.view.subviews); //能打印出所有子视图,和其frame
- // LogFun;
- // LogSubviews(self.view);
- //Hell
- //删除现有的tabBar
- CGRect rect = self.tabBar.bounds; //这里要用bounds来加, 否则会加到下面去.看不见
- LogFrame(self.tabBar);
- //[self.tabBar removeFromSuperview]; //移除TabBarController自带的下部的条
- //测试添加自己的视图
- XNTabBar *myView = [[XNTabBar alloc] init]; //设置代理必须改掉前面的类型,不能用UIView
- myView.delegate = self; //设置代理
- myView.frame = rect;
- [self.tabBar addSubview:myView]; //添加到系统自带的tabBar上, 这样可以用的的事件方法. 而不必自己去写
- //为控制器添加按钮
- for (int i=0; i<self.viewControllers.count; i++) { //根据有多少个子视图控制器来进行添加按钮
- NSString *imageName = [NSString stringWithFormat:@"TabBar%d", i + 1];
- NSString *imageNameSel = [NSString stringWithFormat:@"TabBar%dSel", i + 1];
- UIImage *image = [UIImage imageNamed:imageName];
- UIImage *imageSel = [UIImage imageNamed:imageNameSel];
- [myView addButtonWithImage:image selectedImage:imageSel];
- }
- // //添加按钮
- // for (int i = 0; i < 5; i++) {
- // //UIButton *btn = [[UIButton alloc] init];
- // XNTabBarButton *btn = [[XNTabBarButton alloc] init];
- //
- // NSString *imageName = [NSString stringWithFormat:@"TabBar%d", i + 1];
- // NSString *imageNameSel = [NSString stringWithFormat:@"TabBar%dSel", i + 1];
- //
- // [btn setImage:[UIImage imageNamed:imageName] forState:UIControlStateNormal];
- // [btn setImage:[UIImage imageNamed:imageNameSel] forState:UIControlStateSelected];
- //
- // CGFloat x = i * myView.frame.size.width / 5;
- // btn.frame = CGRectMake(x, 0, myView.frame.size.width / 5, myView.frame.size.height);
- //
- // [myView addSubview:btn];
- //
- // btn.tag = i;//设置按钮的标记, 方便来索引当前的按钮,并跳转到相应的视图
- //
- // //带参数的监听方法记得加"冒号"
- // [btn addTarget:self action:@selector(clickBtn:) forControlEvents:UIControlEventTouchUpInside];
- //
- // //设置刚进入时,第一个按钮为选中状态
- // if (0 == i) {
- // btn.selected = YES;
- // self.selectedBtn = btn; //设置该按钮为选中的按钮
- // }
- // }
- }
- /**永远别忘记设置代理*/
- - (void)tabBar:(XNTabBar *)tabBar selectedFrom:(NSInteger)from to:(NSInteger)to {
- self.selectedIndex = to;
- }
- /**
- * 自定义TabBar的按钮点击事件
- */
- //- (void)clickBtn:(UIButton *)button {
- // //1.先将之前选中的按钮设置为未选中
- // self.selectedBtn.selected = NO;
- // //2.再将当前按钮设置为选中
- // button.selected = YES;
- // //3.最后把当前按钮赋值为之前选中的按钮
- // self.selectedBtn = button;
- //
- // //4.跳转到相应的视图控制器. (通过selectIndex参数来设置选中了那个控制器)
- // self.selectedIndex = button.tag;
- //}
- @end
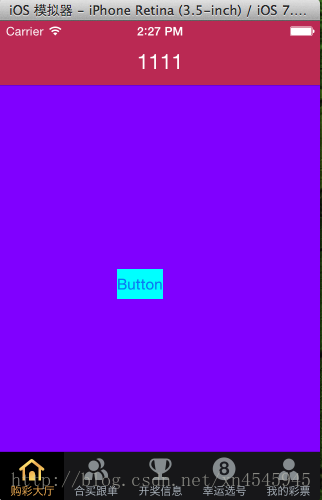
自定义后的效果图:
例子源码下载 : http://download.csdn.net/detail/xn4545945/7572263
这篇关于iOS 自定义TabBarController的文章就介绍到这儿,希望我们推荐的文章对编程师们有所帮助!


