本文主要是介绍关于 mapboxgl 的常用方法及效果,希望对大家解决编程问题提供一定的参考价值,需要的开发者们随着小编来一起学习吧!
给地图标记点
实现效果
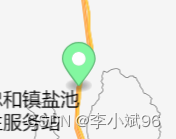
/*** 在地图上添加标记点* point: [lng, lat]* color: '#83f7a0'*/addMarkerOnMap(point, color = '#83f7a0') {const marker = new mapboxgl.Marker({draggable: false,color: color,}).setLngLat(point).addTo(this.map);this.markersList.push(marker);},
给地图添加气泡展示地点详情
实现效果:
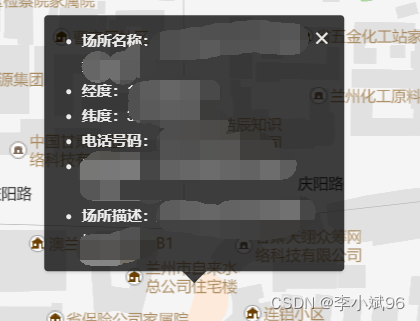
/*** 在地图上添加气泡展示* point: [lng, lat]*/addPopupOnMap(point) {// 将所选点设置为地图中心this.map.setCenter(point);// Zoom to the zoom level 8 with an animated transitionthis.map.zoomTo(16, {duration: 2000});// 自行赋值const html = `<div class="dt-popup"><i class="ivu-icon ivu-icon-md-close" id="closePop"></i><ul><li><span class="label">事件名称:</span>${eventName}</li><li><span class="label">经度:</span>${longitude}</li><li><span class="label">纬度:</span>${latitude}</li></ul></div>`const popup = new mapboxgl.Popup({ closeOnClick: false }).setLngLat(point).setHTML(html).addTo(this.map);// this.popup = popupPopup = popup},
给地图划线
实现效果
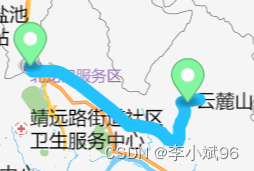
我的写法估计是有点问题,每条小线段都增加了一个资源和图层,但是还是实现了此功能
map.addSource(`route${routesI}`, {type: 'geojson',data: {type: 'Feature',properties: {},geometry: {type: 'LineString',coordinates: routesNew,},},});map.addLayer({id: `route${routesI}`,type: 'line',source: `route${routesI}`,layout: {'line-join': 'round','line-cap': 'round',},paint: {'line-color': '#24C1FF','line-width': 10,},});
给地图添加缓冲区画圆
实现效果:(颜色自行修改)
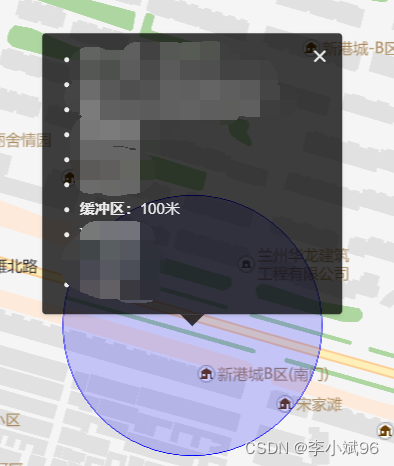
参考地址:https://blog.csdn.net/qq_33950912/article/details/127428093
思路:画圆,其实就是连接n个近似于圆的点位。
经过验证,上述文章中选取了方法三,自定义去切割圆。方法一未曾实现。方法二可能有问题,没有尝试。
/*** 计算以中心点、半径 缓冲区* center: [lng, lat]* radiusInKm */createGeoJSONCircle(center, radiusInM, points = 64) {var coords = {latitude: center[1],longitude: center[0]};var miles = radiusInM;var ret = [];var distanceX = miles/1000/(111.320*Math.cos(coords.latitude*Math.PI/180));var distanceY = miles/1000/110.574;var theta, x, y;for(var i=0; i<points; i++) {theta = (i/points)*(2*Math.PI);x = distanceX*Math.cos(theta);y = distanceY*Math.sin(theta);ret.push([coords.longitude+x, coords.latitude+y]);}ret.push(ret[0]);return {"type": "geojson","data": {"type": "FeatureCollection","features": [{"type": "Feature","geometry": {"type": "Polygon","coordinates": [ret]}}]}};},/**调用 - 请自行赋值
*/
map.addSource("polygon", createGeoJSONCircle([-93.6248586, 41.58527859], 0.5));
map.addLayer({"id": "polygon","type": "fill","source": "polygon","layout": {},"paint": {"fill-color": "blue","fill-opacity": 0.6}
});
给地图添加其他图片资源
实现效果

添加卡车图片资源:
/*** 引入图片* img obj : src, name*/addImage = function(img) {map.loadImage(img.src, (error, image) => {if (error) throw error;if (!map.hasImage(img.name)) map.addImage(img.name, image, {sdf: img.sdf || false});})}// 加载 truck let truck_img = {src: 'img/truck_mapboxgl.png',name: 'truck_img'}addImage(truck_img)给地图添加图上gif中 1-2-3标记点并且实现鼠标滑过显示popup效果
实现效果:同上图
/*** 添加坐标点及鼠标以上效果*/
addPoints = function (featuresList) {map.addSource('places', {'type': 'geojson','data': {'type': 'FeatureCollection','features': featuresList}})// 加载 circle 定位圆let img = {src: 'img/circle.png',name: 'circle_img',sdf: true}addImage(img)map.addLayer({'id': 'places','type': 'symbol','source': 'places','layout': {'icon-image': img.name, // 图标ID'icon-size': 0.15, // 图标的大小'icon-anchor': 'center', // 图标的位置'text-field': ['get', 'num'],},'paint': {'text-color': '#fff','icon-color': ['get', 'color']},});// Create a popup, but don't add it to the map yet.const popup = new mapboxgl.Popup({closeButton: false,closeOnClick: false});map.on('mouseenter', 'places', (e) => {// Change the cursor style as a UI indicator.map.getCanvas().style.cursor = 'pointer';// Copy coordinates array.const coordinates = e.features[0].geometry.coordinates.slice();const description = e.features[0].properties.description;// Ensure that if the map is zoomed out such that multiple// copies of the feature are visible, the popup appears// over the copy being pointed to.while (Math.abs(e.lngLat.lng - coordinates[0]) > 180) {coordinates[0] += e.lngLat.lng > coordinates[0] ? 360 : -360;}// Populate the popup and set its coordinates// based on the feature found.popup.setLngLat(coordinates).setHTML(description).addTo(map);});map.on('mouseleave', 'places', () => {map.getCanvas().style.cursor = '';popup.remove();});
}
在地图中图标动态移动
实现效果:如上图
此方法用于卡车图标动态移动
/*** 添加路径 - 卡车图标动态效果*/
addTruckRoutes = function (coordinatesList) {// 起点const origin = coordinatesList[0]const route = {'type': 'FeatureCollection','features': [{'type': 'Feature','geometry': {'type': 'LineString','coordinates': coordinatesList}}]};const point = {'type': 'FeatureCollection','features': [{'type': 'Feature','properties': {},'geometry': {'type': 'Point','coordinates': origin}}]}const lineDistance = turf.length(route.features[0]);const arc = [];const steps = 200;for (let i = 0; i < lineDistance; i += lineDistance / steps) {const segment = turf.along(route.features[0], i);arc.push(segment.geometry.coordinates);}route.features[0].geometry.coordinates = arc;let counter = 0;map.addSource('route', {'type': 'geojson','data': route});map.addSource('point', {'type': 'geojson','data': point});map.addLayer({'id': `route`,'source': 'route','type': 'line','paint': {'line-width': 20,'line-color': '#2d8cf0','line-opacity': 0.4}})// 加载 truck 定位圆let truck_img = {src: 'img/truck_mapboxgl.png',name: 'truck_img'}addImage(truck_img)map.addLayer({'id': `point`,'source': 'point','type': 'symbol','layout': {'icon-image': truck_img.name,'icon-size': 0.2,'icon-rotate': ['get', 'bearing'],'icon-rotation-alignment': 'map','icon-allow-overlap': true,'icon-ignore-placement': true}});animate = function () {running = true;const start =route.features[0].geometry.coordinates[counter >= steps ? counter - 1 : counter];const end =route.features[0].geometry.coordinates[counter >= steps ? counter : counter + 1];point.features[0].geometry.coordinates =route.features[0].geometry.coordinates[counter];point.features[0].properties.bearing = turf.bearing(turf.point(start),turf.point(end))+90; // 此处控制图标的头部指向问题,可以加减角度,使卡车头部一直朝着目的地// Update the source with this new datamap.getSource('point').setData(point);// Request the next frame of animation as long as the end has not been reachedif (counter < steps) {requestAnimationFrame(animate);counter = counter + 1;} else {counter = 0animate()}      }animate(counter);
}
地图路线持续闪动特效
实现效果
此方法官网有示例
代码如下:
/*** 添加路径 - 路径虚线变化效果*/
addDashedRoutes = function (coordinatesList) {map.addSource('route', {'type': 'geojson','data': {'type': 'Feature','properties': {},'geometry': {'type': 'LineString','coordinates': coordinatesList}}});map.addLayer({'id': 'route','type': 'line','source': 'route','layout': {'line-join': 'round','line-cap': 'round'},'paint': {// 'line-color': '#2b85e4',// 'line-width': 10'line-color': '#2d8cf0','line-width': 8,'line-opacity': 0.4}});map.addLayer({id: 'line-dashed',type: 'line',source: 'route',paint: {'line-color': '#2db7f5','line-width': 8,'line-dasharray': [0, 4, 3]}});   /*** 动态展示路径 - 路径虚线变化效果*/const dashArraySequence = [[0, 4, 3],[0.5, 4, 2.5],[1, 4, 2],[1.5, 4, 1.5],[2, 4, 1],[2.5, 4, 0.5],[3, 4, 0],[0, 0.5, 3, 3.5],[0, 1, 3, 3],[0, 1.5, 3, 2.5],[0, 2, 3, 2],[0, 2.5, 3, 1.5],[0, 3, 3, 1],[0, 3.5, 3, 0.5]];let step = 0;animateDashArray = function (timestamp) {const newStep = parseInt((timestamp / 50) % dashArraySequence.length);if (newStep !== step) {map.setPaintProperty('line-dashed','line-dasharray',dashArraySequence[step]);step = newStep;}// Request the next frame of the animation.requestAnimationFrame(animateDashArray);}// start the animationanimateDashArray(0);
}
地图正向反向地址匹配
官网有示例,可自行查阅
/*** 正向地址匹配* address: '孵化大厦'*/
addressMatchPoint(address) {// 正向匹配参数var geoCodeParam = new SuperMap.GeoCodingParameter({address: address, // 地址fromIndex:0, // 设置返回对象的起始索引值toIndex:10, // 设置返回对象的结束索引值。// prjCoordSys:{epsgcode26}, // 坐标设置maxReturn:5 // 最大返回结果数});//创建地址匹配服务var addressUrl = MAP_SERVICE + "***************"var addressMatchService = new mapboxgl.supermap.AddressMatchService(addressUrl);// 向服务端发送请求进行正向地址匹配,并获取返回的结果return addressMatchService.code(geoCodeParam, function(obj){});
},/*** 反向地址匹配* point: [lng, lat]*/
pointMatchAddress(point) {// 反向匹配参数var geoDecodeParam = new SuperMap.GeoDecodingParameter({x: point[0], // 横坐标y: point[1], // 纵坐标fromIndex: 0, // 设置返回对象的起始索引值。toIndex: 10, // 设置返回对象的结束索引值。// filters: "", // 过滤字段// prjCoordSys: {epsgcode26}, // 坐标设置maxReturn: 3, // 最大结果数geoDecodingRadius: -1 // 查询半径});// 创建地址匹配服务var addressUrl = MAP_SERVICE +  "***************"var addressMatchService = new mapboxgl.supermap.AddressMatchService(addressUrl);// 向服务端发送请求进行反向地址匹配,并获取返回的结果return addressMatchService.decode(geoDecodeParam, function(obj){});
},
两点之间路径规划
参照官网示例
let serviceUrl = MAP_SERVICE + '******';
let findPathService = new mapboxgl.supermap.NetworkAnalystService(serviceUrl);
//向服务器发送请求,并对返回的结果进行分析处理,展示在客户端上
const result = findPathService.findPath(findPathParams, function(serviceResult) {})
// ...不完整代码
遇到问题
- 在vue组件中,添加上了maker或者popup,使用data中定义变量会造成地图空白问题,暂时没有解决,后面改用在全局声明marker或者popup,layer好像也存在类似问题,可以参考解决。
- 调用以上方法包裹在
map.on('load', () => { })的方法中。 - 以上代码均为不完整代码,有些在vue中使用,有些在原生中使用,请仔细阅读,以免出错。
这篇关于关于 mapboxgl 的常用方法及效果的文章就介绍到这儿,希望我们推荐的文章对编程师们有所帮助!


