本文主要是介绍Jira Software最新版本(9.11.2)安装,希望对大家解决编程问题提供一定的参考价值,需要的开发者们随着小编来一起学习吧!
软件获取
Jira Software
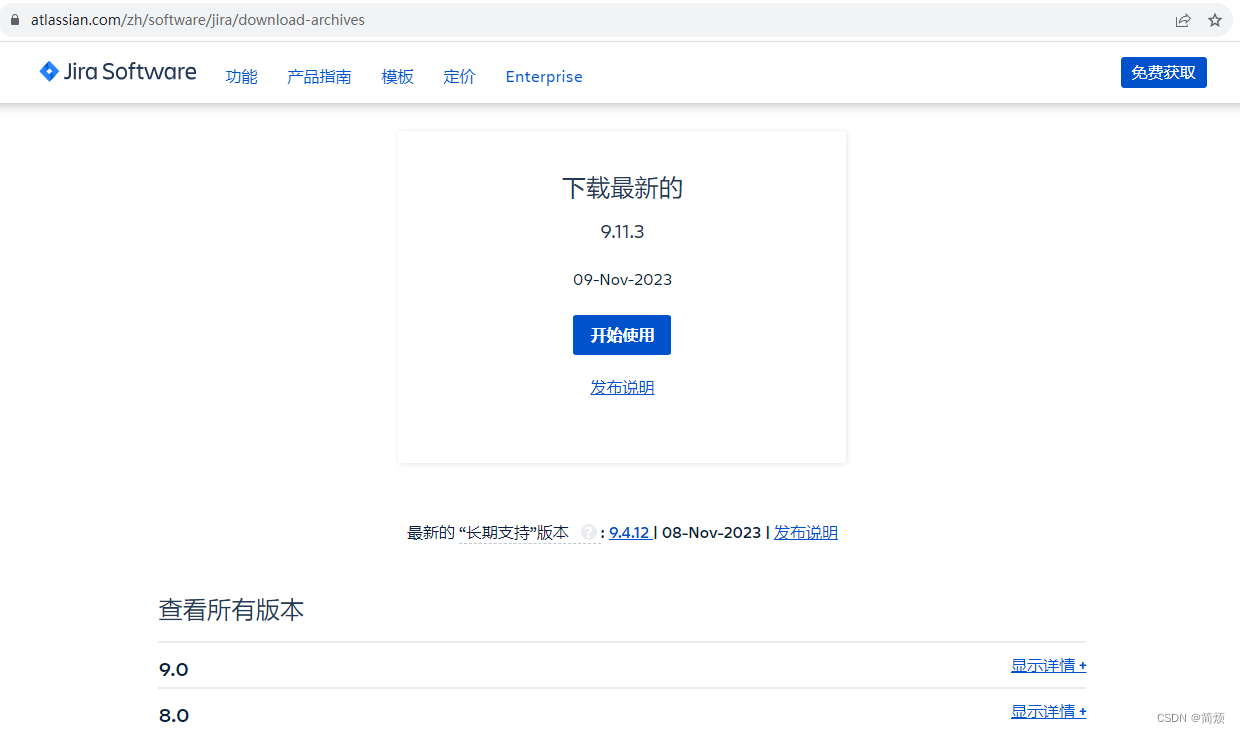
历史版本下载地址:Jira Server 下载存档 | Atlassian
Atlassian-agent.jar
https://github.com/haxqer/confluence/releases/download/v1.3.3/atlassian-agent.jar
MySQL 驱动包
MySQL :: Download MySQL Connector/J (Archived Versions)
整合备份下载地址(Atlassian-agent.jar、MySQL 驱动包)
mysql驱动是5.1.42,我的是mysql5.7.42
https://download.csdn.net/download/baidu_35751704/88450016
软件安装
Jira
安装bin文件
cd xxxx  #cd到bin文件所处文件夹
sudo chmod +x XXXXXXXX.bin     #授权文件
sudo ./XXXXXXXX.bin   #执行安装
安装过程 依次输入 o - 1 - i - y
[root@ps-fdcnops-01 confluence]# chmod +x atlassian-confluence-8.6.0-x64.bin
[root@ps-fdcnops-01 confluence]# ./atlassian-confluence-8.6.0-x64.bin
Installing fontconfig and fonts
已加载插件:fastestmirror, langpacks
Loading mirror speeds from cached hostfile
已加载插件:fastestmirror, langpacks
Loading mirror speeds from cached hostfile
软件包 fontconfig-2.13.0-4.3.el7.x86_64 已安装并且是最新版本
无须任何处理
已加载插件:fastestmirror, langpacks
Loading mirror speeds from cached hostfile
软件包 dejavu-sans-fonts-2.33-6.el7.noarch 已安装并且是最新版本
无须任何处理
已加载插件:fastestmirror, langpacks
没有安装组信息文件
Maybe run: yum groups mark convert (see man yum)
Loading mirror speeds from cached hostfile
警告:分组 fonts 不包含任何可安装软件包。
Maybe run: yum groups mark install (see man yum)
指定组中没有可安装或升级的软件包
已加载插件:fastestmirror, langpacks
Loading mirror speeds from cached hostfile
软件包 google-noto-sans-cjk-fonts-20141117-5.el7.noarch 已安装并且是最新版本
无须任何处理
已加载插件:fastestmirror, langpacks
Loading mirror speeds from cached hostfile
没有可用软件包 google-noto-serif-cjk-fonts。
错误:无须任何处理
Regenerating the font cache
Fonts and fontconfig have been installed
Unpacking JRE ...
Starting Installer ...This will install Confluence 8.6.0 on your computer.
OK [o, Enter], Cancel [c]
o
Click Next to continue, or Cancel to exit Setup.Choose the appropriate installation or upgrade option.
Please choose one of the following:
Express Install (uses default settings) [1],
Custom Install (recommended for advanced users) [2, Enter],
Upgrade an existing Confluence installation [3]
1See where Confluence will be installed and the settings that will be used.
Installation Directory: /opt/atlassian/confluence
Home Directory: /var/atlassian/application-data/confluence
HTTP Port: 8090
RMI Port: 8000
Install as service: Yes
Install [i, Enter], Exit [e]
iExtracting files ...Please wait a few moments while we configure Confluence.Start Confluence now?
Yes [y, Enter], No [n]
yPlease wait a few moments while Confluence starts up.
Launching Confluence ...Your installation of Confluence 8.6.0 is now ready and can be accessed via
your browser.
Confluence 8.6.0 can be accessed at http://localhost:8090
SLF4J: No SLF4J providers were found.
SLF4J: Defaulting to no-operation (NOP) logger implementation
SLF4J: See https://www.slf4j.org/codes.html#noProviders for further details.
Finishing installation ...
停止服务
[root@ps-fdcnops-01 confluence]# cd /opt/atlassian/confluence/bin/
[root@ps-fdcnops-01 bin]# ./stop-confluence.sh将atlassian-agent.jar放入一个不会删除的文件夹,以及mysql驱动
我的 atlassian-agent.jar 的路径是 /opt/atlassian/confluence下
我的 mysql驱动包 的路径是 /opt/atlassian/confluence/confluence/WEB-INF/lib下
修改配置文件setenv.sh
vim setenv.sh在最后面追加
export JAVA_OPTS="-javaagent:/opt/atlassian/confluence/atlassian-agent.jar${JAVA_OPTS}"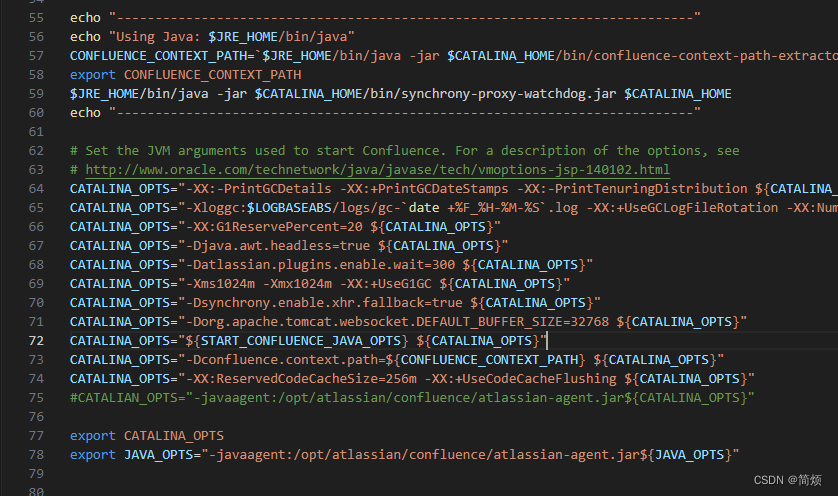
启动confluence
cd /opt/atlassian/confluence/bin  #打开安装的bin文件夹
./start-confluence.sh
验证是否成功
ps aux | grep javaagent # 出现-javaagent

java -jar /opt/atlassian/atlassian-agent.jar #出现参数提示
[root@ps-fdcnops-01 confluence]# java -jar atlassian-agent.jar====================================================
=======     Atlassian Crack Agent v1.3.1     =======
=======           https://zhile.io           =======
=======          QQ Group: 30347511          =======
====================================================KeyGen usage: java -jar /opt/atlassian/confluence/atlassian-agent.jar [-d] [-h]-m <arg> [-n <arg>] -o <arg> -p <arg> -s <arg>-d,--datacenter           Data center license[default: false]-h,--help                 Print help message-m,--mail <arg>           License email-n,--name <arg>           License name[default: <license email>]-o,--organisation <arg>   License organisation-p,--product <arg>        License product, support:[crowd: Crowd][jsm: JIRA Service Management][questions: Questions plugin for Confluence][crucible: Crucible][capture: Capture plugin for JIRA][conf: Confluence][training: Training plugin for JIRA][*: Third party plugin key, looks like:com.foo.bar][bitbucket: Bitbucket][tc: Team Calendars plugin for Confluence][bamboo: Bamboo][fisheye: FishEye][portfolio: Portfolio plugin for JIRA][jc: JIRA Core][jsd: JIRA Service Desk][jira: JIRA Software(common jira)]-s,--serverid <arg>       License server ID================================================================================# Crack agent usage: append -javaagent arg to system environment: JAVA_OPTS.
# Example(execute this command or append it to setenv.sh/setenv.bat file): export JAVA_OPTS="-javaagent:/opt/atlassian/confluence/atlassian-agent.jar ${JAVA_OPTS}"# Then start your confluence/jira server.
获取授权码
使用下面的命令可以查看附加参数如何写
如果安装的confluence是data center 则需要加上 -d true
java -jar /opt/atlassian/atlassian-agent.jar例子:-s 的值,在下一步配置confluence中获取
java -jar atlassian-agent.jar -d true -p conf -m aaa@bbb.com -n my_name -o https://zhile.io -s XXXX-CCCC-QQQQ-DDDD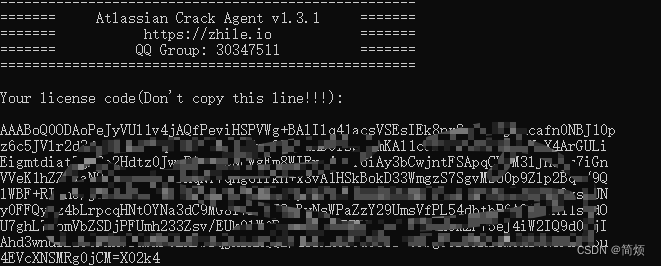
创建数据库与设定编码集
CREATE DATABASE confluencedb CHARACTER SET utf8mb4 COLLATE utf8mb4_bin;SET GLOBAL TRANSACTION ISOLATION LEVEL READ COMMITTED;[root@ps-fdcnops-01 /]# cat /etc/my.cnf
[mysqld]
basedir=/usr/local/mysql/mysql5.7.42
datadir=/usr/local/mysql/mysql5.7.42/data
port = 3306
sql_mode=NO_ENGINE_SUBSTITUTION,STRICT_TRANS_TABLES
symbolic-links=0
max_connections=400
innodb_file_per_table=1
lower_case_table_names=1
innodb_log_file_size=256M
innodb_buffer_pool_size=128M
key_buffer_size = 64M
max_allowed_packet = 256M
table_open_cache = 256
sort_buffer_size = 1M
net_buffer_length = 8K
read_buffer_size = 1M
read_rnd_buffer_size = 512K
myisam_sort_buffer_size = 16M
thread_cache_size = 32
query_cache_size = 32M
tmp_table_size = 64character-set-server=utf8
collation-server=utf8_general_ci配置confluence
浏览器打开 http://localhost:8090
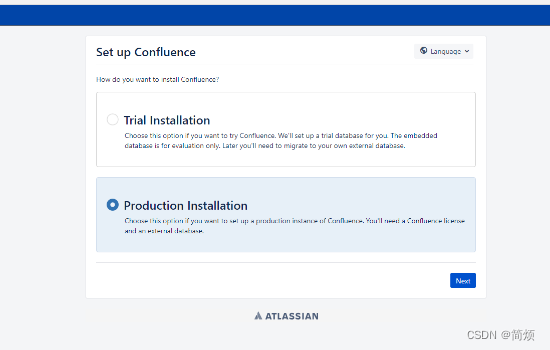
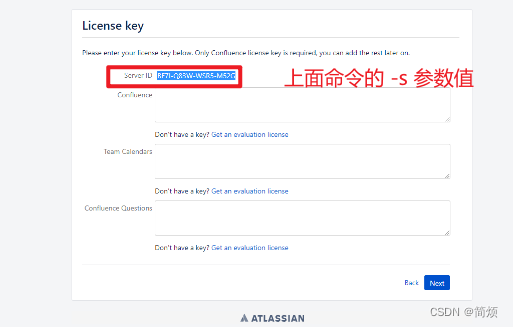
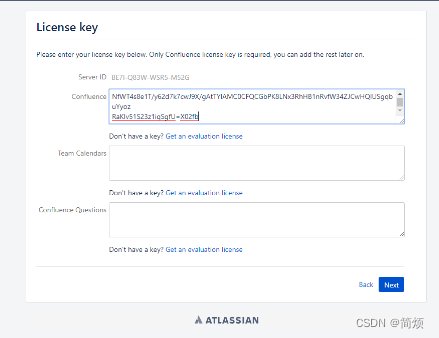
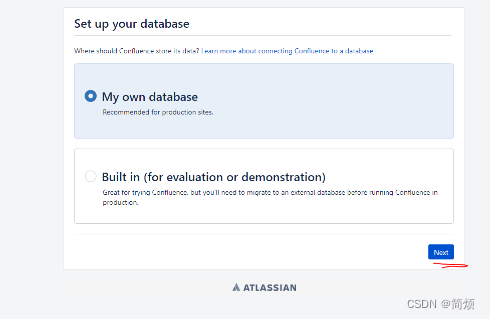
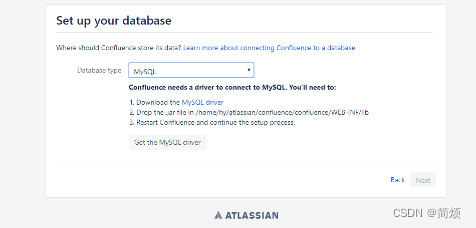
使用简单模式连接,但是如果没有授权指定数据库远程权限,会报错
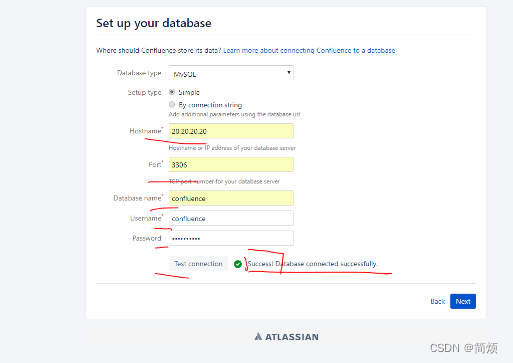

推荐使用第二种方式
jdbc:mysql://127.0.0.1/confluencedb?useSSL=false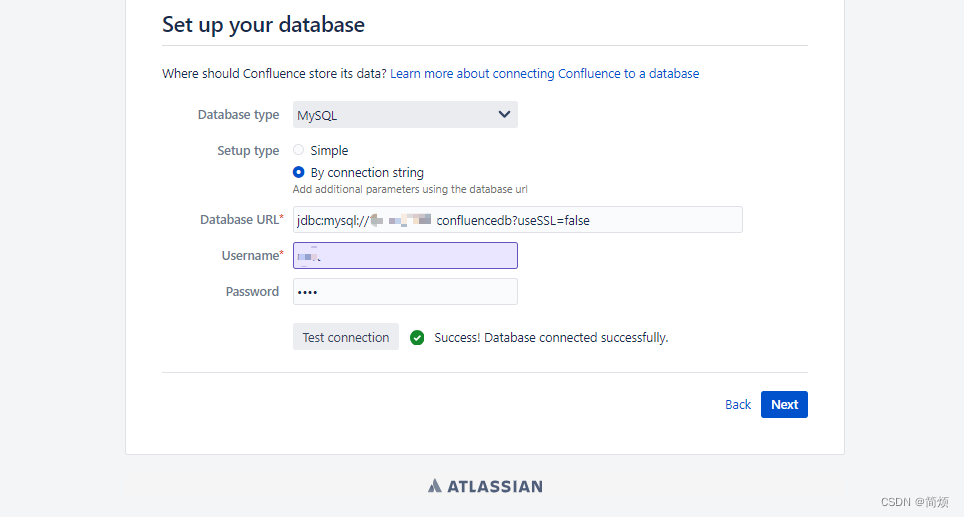
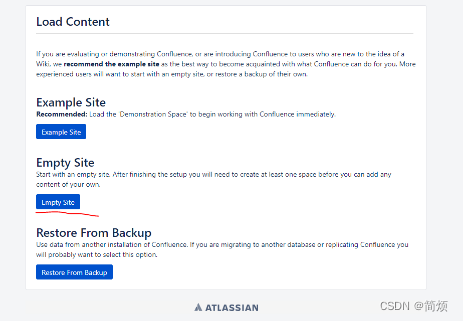
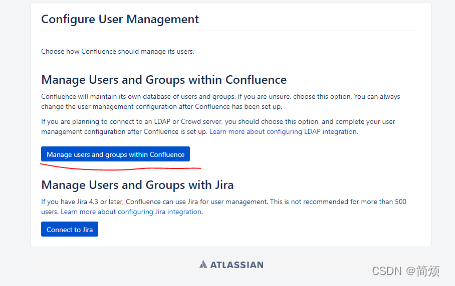
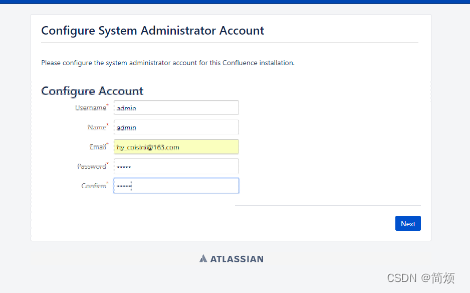
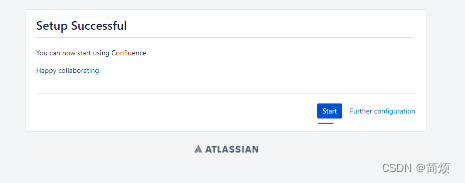
插件安装
下载地址: atlassain插件下载地址
获取插件授权码
执行命令和上面的一样,只是把 -p 参数值换成应用密钥,例如
java -jar atlassian-agent.jar -d true -p com.mxgraph.confluence.plugins.diagramly -m aaa@bbb.com -n my_name -o https://zhile.io -s XXX-YYYY-DDDD-SSSS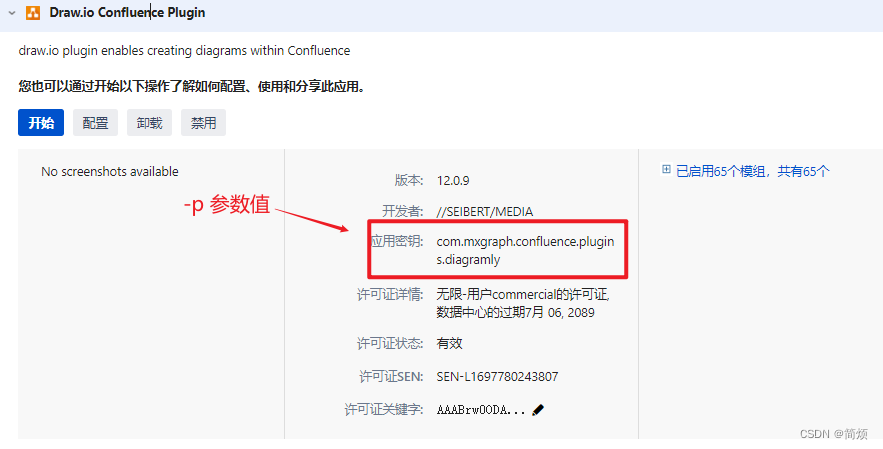
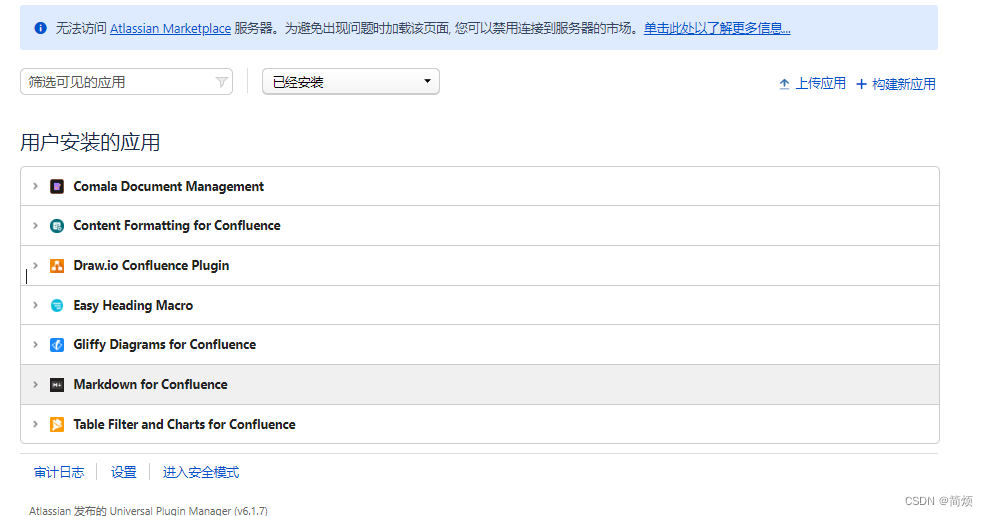
效果
这篇关于Jira Software最新版本(9.11.2)安装的文章就介绍到这儿,希望我们推荐的文章对编程师们有所帮助!


