本文主要是介绍uniapp---app端人脸识别组件(宽屏版1280*800组件,需手动截屏拍人脸识别,踩坑,成长),希望对大家解决编程问题提供一定的参考价值,需要的开发者们随着小编来一起学习吧!

一、首先记录下踩到的坑
我这边做的是一个挂在门口的门牌机,可以用于扫脸签到,扫码签到,扫脸实现用的是live-pusher组件(代码很长,放在最下面,不能直接用,需要根据实际情况修改)去做的人脸识别,在测试安卓机上一切正常,在安卓宽屏设备(akuvox牌子的门禁机)上出现各种问题,最主要是不能用usb调试!!!只能打包调试太折磨了
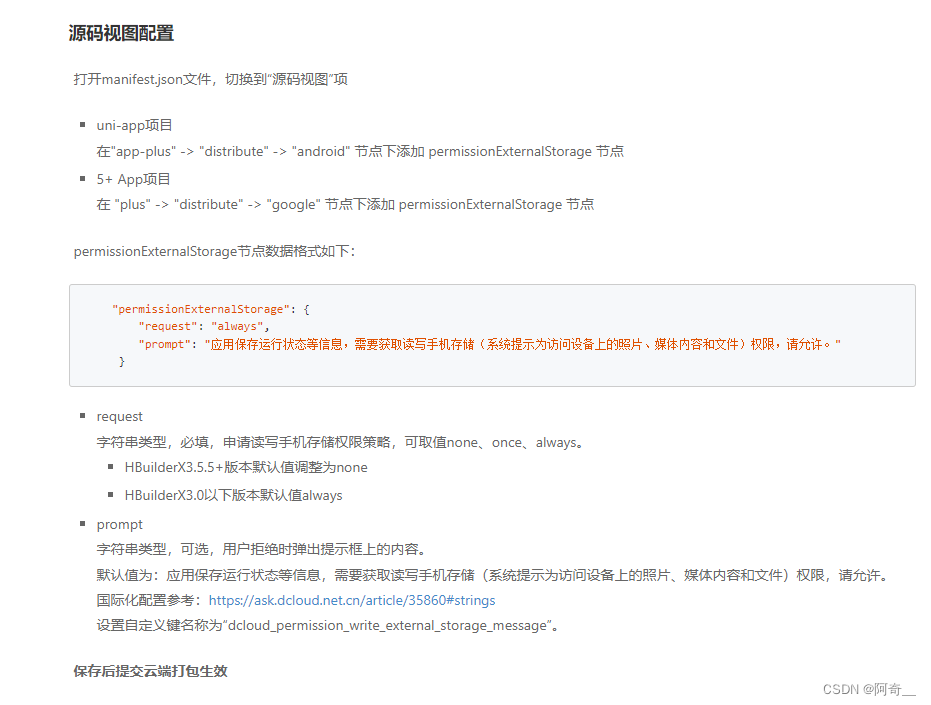
坑1:官方live-pusher组件的snapshot方法没有触发回调,原因是该设备不会主动询问是否开启存储权限,需要手动设置如果遇到点击快门没反应,请检查是否主动开启了设备的存储权限,没有的话点击这里,按照这个地址(Dcloud社区)方法去操作
给懒得跳链接的朋友放个传送门,主要就是下面附带的代码,用于申请设备权限
图片中的代码:
"permissionExternalStorage": { "request": "always", "prompt": "应用保存运行状态等信息,需要获取读写手机存储(系统提示为访问设备上的照片、媒体内容和文件)权限,请允许。" }坑2:获取设备的mac地址 这个真的是几经波折,最后在插件市场找到了救命稻草,mt-device-info - DCloud 插件市场
云插件官方使用指南:uni-app官网
除了踩坑,也有获取到在uniapp在特殊(宽屏)设备上开发app的经验
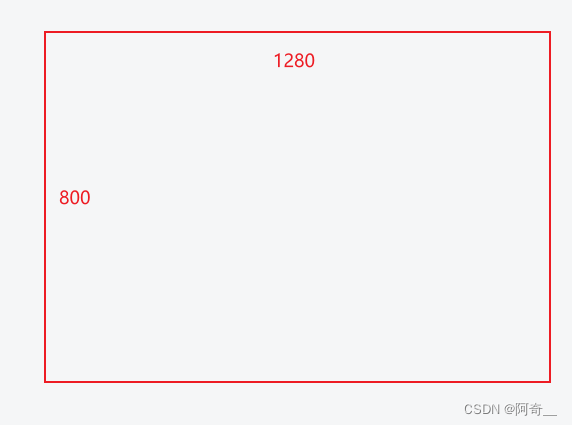
1、首先设备尺寸是1280*800,我们打算用rpx来画页面,这边还有个需要注意的地方就是,uniapp官方秉承最大程度上保持界面不失真的策略,“限定了可适配的最大屏幕宽度为960px,在这个范围内,rpx可以根据屏幕宽度缩放。一旦超过960,rpx再根据屏幕宽度缩放就变的没有意义了”(也就是设计稿上的图像会失真)
当然也可以自己去手动设置来调整这个“可适配的最大屏幕宽度”,在page.json文件中加入以下属性,这边以我用到的这个设备为例
page.json文件:

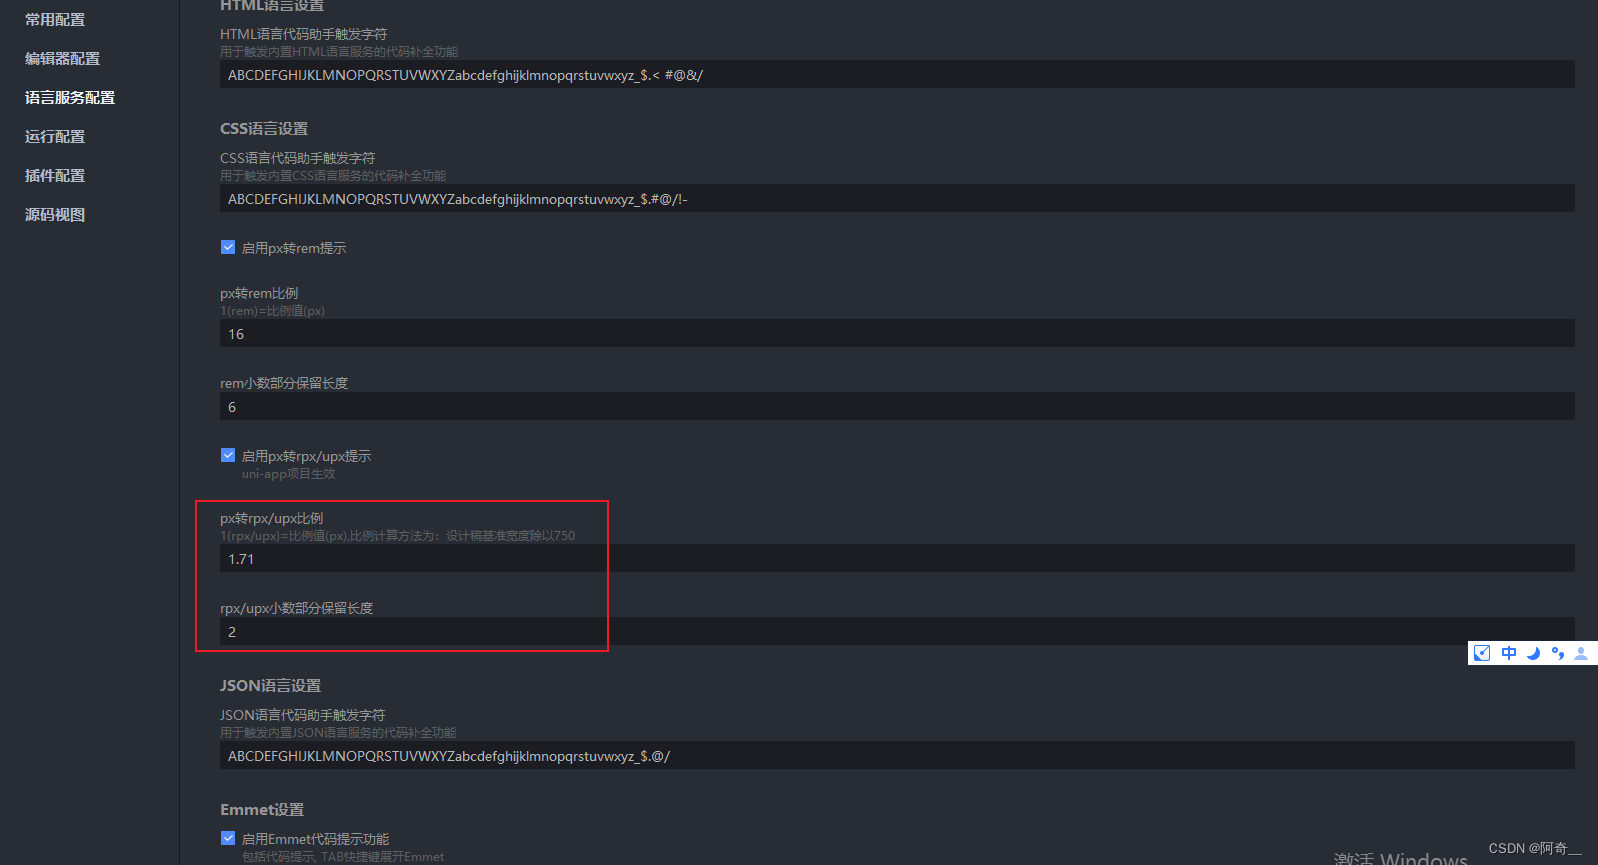
2、 HBuilder开发的话 可以去设置px转rpx提示,这个也很方便,具体设置步骤如下


这边根据设计稿去配比就好了,最后设置成功效果如下:

最后附上代码,截屏页组件代码如下:
<template><view class="live-camera" :style="{ width: windowWidth, height: windowHeight }"><view class="preview" :style="{ width: windowWidth, height: windowHeight - 10 }"><live-pusher id="livePusher" ref="livePusher" class="livePusher" mode="FHD" beauty="1" whiteness="0":aspect="aspect" min-bitrate="1000" audio-quality="16KHz" device-position="back" :auto-focus="true":muted="true" :enable-camera="true" :enable-mic="false" :zoom="false" @statechange="statechange":style="{ width: cameraWidth, height: cameraHeight }"></live-pusher><live-pusher />< <!--提示语--><cover-view class="remind"><text class="remind-text" style="">{{ message }}</text></cover-view><!--辅助线--><!-- <cover-view class="outline-box" :style="{ width: windowWidth, height: windowHeight - 80 }"><cover-image class="outline-img" src="/static/live-camera/outline/idphoto.png" style=""></cover-image></cover-view> --></view><view class="menu"><!--底部菜单区域背景--><cover-image class="menu-mask" src="/static/live-camera/bar.png"></cover-image><!--返回键--><cover-image class="menu-back" @tap="back" src="/static/live-camera/back.png"></cover-image><!--快门键--><cover-image class="menu-snapshot" @tap="snapshot" src="/static/live-camera/shutter.png"></cover-image><!--反转键--><!-- <cover-image class="menu-flip" @tap="flip" src="/static/live-camera/flip.png"></cover-image> --></view></view>
</template><script>import config from "@/utils/config.js"let _this = null;export default {data() {return {// actions: config.VUE_APP_BASE_API + '/jeecg-boot/fjxhx/file/upload/file',actions: 'http://172.30.1.132:10038/arcface/user/face/get',dotype: 'idphoto', //操作类型message: '', //提示aspect: '2:3', //比例cameraWidth: '', //相机画面宽度cameraHeight: '', //相机画面宽度windowWidth: '', //屏幕可用宽度windowHeight: '', //屏幕可用高度camerastate: false, //相机准备好了livePusher: null, //流视频对象snapshotsrc: null, //快照isStopPreview: false // 关闭视频流,轮询不开启。};},onLoad(e) {_this = this;if (e.dotype != undefined) this.dotype = e.dotype;this.initCamera();},onReady() {this.livePusher = uni.createLivePusherContext('livePusher', this);// this.startPreview(); //开启预览并设置摄像头this.poenCarme();},methods: {//轮询打开poenCarme() {//#ifdef APP-PLUSif (plus.os.name == 'Android') {this.poenCarmeInterval = setInterval(function() {// console.log(_this.camerastate);if (!_this.camerastate) _this.startPreview();}, 2500);}//#endif},//初始化相机initCamera() {uni.getSystemInfo({success: function(res) {_this.windowWidth = res.windowWidth;_this.windowHeight = res.windowHeight;_this.cameraWidth = res.windowWidth;_this.cameraHeight = res.windowWidth / 1.5;}});},//开始预览startPreview() {if (_this.isStopPreview) {return}this.livePusher.startPreview({success: a => {console.log(a);}});},//停止预览stopPreview() {this.livePusher.stopPreview({success: a => {_this.camerastate = false; //标记相机未启动}});},//状态statechange(e) {//状态改变console.log(e);if (e.detail.code == 1007) {_this.camerastate = true;} else if (e.detail.code == -1301) {_this.camerastate = false;}},//返回back() {uni.navigateBack();},//抓拍snapshot() {this.livePusher.snapshot({success: e => {console.log('snapshot123', e)_this.isStopPreview = trueuni.showLoading({title: '上传图片中',mask: true})_this.snapshotsrc = e.message.tempImagePath;_this.stopPreview();const fileInfo = {'fileName': 'wxImg.jpg','fileHash': '1111'}const formData = {// 'file': e,'ct': JSON.stringify(fileInfo)}// this.uploadImg(formData)// returnuni.compressImage({ // 压缩图片src: e.message.tempImagePath,quality: 20,success: res => {console.log('res.tempFilePath', res.tempFilePath)_this.snapshotsrc = res.tempFilePath;this.uploadImg(formData)},fail: res => {console.log(1112)_this.uploadFail()},computed: res => {console.log('res.tempFilePath', res.tempFilePath)// _this.snapshotsrc = res.tempFilePath;// this.uploadImg(formData)}})},error: e => {}});},// 上传图片uploadImg(formData) {console.log('_this.actions11133', _this.actions, _this.snapshotsrc)uni.uploadFile({// url: _this.actions, url: _this.actions,// filePath: _this.snapshotsrc,files: [{uri: _this.snapshotsrc}],name: 'file',formData: formData,success: (uploadFileRes) => {console.log(uploadFileRes, typeof uploadFileRes.data);if (JSON.parse(uploadFileRes.data).code === 200) {let data = JSON.parse(uploadFileRes.data).resultconsole.log('========uploadFileRes', JSON.parse(uploadFileRes.data).result, JSON.parse(uploadFileRes.data).code);_this.setImage(JSON.parse(uploadFileRes.data));_this.isStopPreview = falseuni.hideLoading();// _this.$utils.nnToast('图片上传成功')uni.navigateBack();} else {_this.uploadFail(JSON.parse(uploadFileRes.data).message)}},fail: () => {console.log(1112)_this.uploadFail(JSON.parse(uploadFileRes.data).message)},})},uploadFail(msg) {uni.showLoading({title: msg,mask: true})// _this.$utils.nnToast('图片上传失败')setTimeout(function() {_this.isStopPreview = falseuni.hideLoading();uni.navigateBack();}, 2000);},//反转flip() {this.livePusher.switchCamera();},//如果人脸识别成功 则带参数返回上一页进行签到setImage(data) {console.log('------------------setImage(data) ', data, );uni.$emit('setImage', {// path: _this.snapshotsrc,// dotype: this.dotype,userId: data.result.userId})//直接调用上一个页面的setImage()方法,把数据存到上一个页面中去// let pages = getCurrentPages();// let prevPage = pages[pages.length - 2]; //上一个页面// prevPage.setImage({// 	path: _this.snapshotsrc,// 	dotype: this.dotype,// 	imgId: imgId// });}}};
</script><style scoped lang="scss">.live-camera {.preview {justify-content: center;align-items: center;.outline-box {position: absolute;top: 0;left: 0;bottom: 0;z-index: 99;align-items: center;justify-content: center;.outline-img {width: 750px;// height: 1125rpx;}}.remind {position: absolute;top: 880rpx;width: 750rpx;z-index: 100;align-items: center;justify-content: center;.remind-text {color: #dddddd;font-weight: bold;}}}.menu {position: absolute;left: 0;bottom: 0;width: 750rpx;height: 60rpx;z-index: 98;align-items: center;justify-content: center;.menu-mask {position: absolute;left: 0;bottom: 0;width: 750rpx;height: 80rpx;z-index: 98;}.menu-back {position: absolute;left: 30rpx;bottom: 0rpx;width: 60rpx;height: 60rpx;z-index: 99;align-items: center;justify-content: center;}.menu-snapshot {width: 60rpx;height: 60rpx;z-index: 999999;position: absolute;bottom: 0rpx;}.menu-flip {position: absolute;right: 30rpx;bottom: 0rpx;width: 80rpx;height: 80rpx;z-index: 99;align-items: center;justify-content: center;}}}
</style>
这篇关于uniapp---app端人脸识别组件(宽屏版1280*800组件,需手动截屏拍人脸识别,踩坑,成长)的文章就介绍到这儿,希望我们推荐的文章对编程师们有所帮助!


