本文主要是介绍学习Linux的第六十七天,希望对大家解决编程问题提供一定的参考价值,需要的开发者们随着小编来一起学习吧!
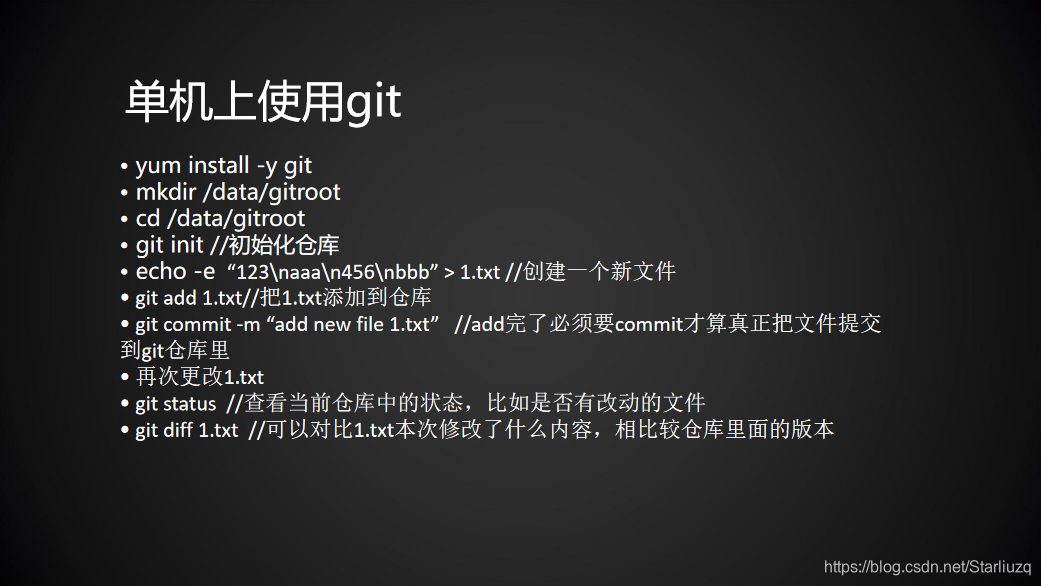
单机上使用git


安装git:
[root@KXLZQ myproject]# yum install -y git
初始化一个仓库:
[root@KXLZQ myproject]# mkdir /data/gitroot
[root@KXLZQ myproject]# cd /data/gitroot/
[root@KXLZQ gitroot]# ls
[root@KXLZQ gitroot]# git init
初始化空的 Git 版本库于 /data/gitroot/.git/
[root@KXLZQ gitroot]# ls -l
总用量 0
在库里面创建一个新的文件:
[root@KXLZQ gitroot]# vim 1.txt
将文件添加到仓库中去:
[root@KXLZQ gitroot]# git add 1.txt
[root@KXLZQ gitroot]# git commit -m “add 1.txt”
这里是先添加到仓库,然后commit才算真正把文件提交到仓库中去。-m是一个解释说明选项。
查看状态:
[root@KXLZQ gitroot]# git status
位于分支 master
无文件要提交,干净的工作区
你修改后没有提交,和这个显示不同
[root@KXLZQ gitroot]# vim 1.txt
[root@KXLZQ gitroot]# git status
位于分支 master
尚未暂存以备提交的变更:
(使用 “git add …” 更新要提交的内容)
(使用 “git checkout – …” 丢弃工作区的改动)
修改: 1.txt
修改尚未加入提交(使用 “git add” 和/或 “git commit -a”)
git diff 1.txt //可以对比1.txt本次修改了什么内容,相比较仓库里面的版本
add 1.txt
回退版本:
[root@KXLZQ gitroot]# git log --pretty=oneline
a4ccf44007092a2f02081b37aeaafe0eb18d6574 ch 1.txt agin
812e4500da4ef192fc7c90a003eaf09000a61058 ch 1.txt
4b8bc0a6d22dee34db8a9f59f7841fe8e1c05e99 add 1.txt
0730acca5fe7f5ac9bd8eb6c9273e12d10387f6d add 1.txt
[root@KXLZQ gitroot]# git reset --hard 4b8bc0a6d
[root@KXLZQ gitroot]# git log --pretty=oneline
4b8bc0a6d22dee34db8a9f59f7841fe8e1c05e99 add 1.txt
0730acca5fe7f5ac9bd8eb6c9273e12d10387f6d add 1.txt
再回到最后一次变更的版本:
查看所有的版本对应的字符
[root@KXLZQ gitroot]# git reflog
4b8bc0a HEAD@{0}: reset: moving to 4b8bc0a6d
a4ccf44 HEAD@{1}: commit: ch 1.txt agin
812e450 HEAD@{2}: commit: ch 1.txt
4b8bc0a HEAD@{3}: commit: add 1.txt
0730acc HEAD@{4}: commit (initial): add 1.txt
[root@KXLZQ gitroot]# git reset --hard a4ccf44
HEAD 现在位于 a4ccf44 ch 1.txt agin
一部小心删掉1.txt
[root@KXLZQ gitroot]# rm -f 1.txt
[root@KXLZQ gitroot]# git checkout – 1.txt
虽然删除了,但文件还存在库里面
删除文件:
[root@KXLZQ gitroot]# git rm 1.txt
rm ‘1.txt’
[root@KXLZQ gitroot]# git commit -m “delete 1.txt”
[master 5985f5b] delete 1.txt
1 file changed, 10 deletions(-)
delete mode 100644 1.txt
[root@KXLZQ gitroot]# git checkout – 1.txt
error: pathspec ‘1.txt’ did not match any file(s) known to git.
首先git删除,然后在提交一遍,这时仓库里的也已经删了。
这个时候要是还想再恢复,只能通过日志
[root@KXLZQ gitroot]# git log --pretty=oneline
5985f5bfcf5330582bbafb04bda71721e90b0397 delete 1.txt
a4ccf44007092a2f02081b37aeaafe0eb18d6574 ch 1.txt agin
812e4500da4ef192fc7c90a003eaf09000a61058 ch 1.txt
4b8bc0a6d22dee34db8a9f59f7841fe8e1c05e99 add 1.txt
0730acca5fe7f5ac9bd8eb6c9273e12d10387f6d add 1.txt
[root@KXLZQ gitroot]# git reset --hard a4ccf44007
HEAD 现在位于 a4ccf44 ch 1.txt agin
建立远程仓库

首先在github.com上新建一个仓库。

使用者选择ssh方式与仓库传输,可以为用户设一个公钥

将你在客户端得到的公钥放到里面。
客户端得到公钥:
[root@KXLZQ ~]# ssh-keygen
[root@KXLZQ ~]# cat .ssh/id_rsa.pub
在客户端做第一次提交:
[root@KXLZQ tmp]# mkdir apelearn
[root@KXLZQ tmp]# cd apelearn/
[root@KXLZQ apelearn]# echo “# apelearn” >> README.md
[root@KXLZQ apelearn]# git init
初始化空的 Git 版本库于 /tmp/apelearn/.git/
[root@KXLZQ apelearn]# ls -la
总用量 4
drwxr-xr-x. 3 root root 35 9月 28 10:52 .
drwxrwxrwt. 10 root root 278 9月 28 10:51 …
drwxr-xr-x. 7 root root 119 9月 28 10:52 .git
-rw-r–r--. 1 root root 11 9月 28 10:52 README.md
[root@KXLZQ apelearn]# git add README.md
[root@KXLZQ apelearn]# git commit -m “first commit”
[master(根提交) 8eb4b1f] first commit
1 file changed, 1 insertion(+)
create mode 100644 README.md
[root@KXLZQ apelearn]# git remote add origin git@github.com:aolishuai/apelearn.git
[root@KXLZQ apelearn]# git push -u origin master
The authenticity of host ‘github.com (192.30.253.112)’ can’t be established.
RSA key fingerprint is 16:27:ac:a5:76:28:2d:36:63:1b:56:4d:eb:df:a6:48.
Are you sure you want to continue connecting (yes/no)? yes
Warning: Permanently added ‘github.com,192.30.253.112’ (RSA) to the list of known hosts.
Counting objects: 3, done.
Writing objects: 100% (3/3), 217 bytes | 0 bytes/s, done.
Total 3 (delta 0), reused 0 (delta 0)
To git@github.com:aolishuai/apelearn.git
- [new branch] master -> master
分支 master 设置为跟踪来自 origin 的远程分支 master。

克隆远程仓库
 从一个仓库中克隆到本地
[root@KXLZQ home]# git clone git@github.com:aminglinux/lanmp.git
会在当前目录下初始化一个仓库,并创建一个.git的目录
[root@KXLZQ apelearn]# ls -la !$
ls -la /home/lanmp/
总用量 20
drwxr-xr-x. 3 root root 51 12月 23 11:07 .
drwxr-xr-x. 14 root root 172 12月 23 11:07 …
drwxr-xr-x. 8 root root 16312月 23 11:07 .git
-rw-r–r--. 1 root root 14871 12月 23 11:07 lanmp.sh
-rw-r–r--. 1 root root 88 12月 23 11:07 README.md
如果你要上传,远程一定要有仓库。
推到远程:
git push
从远程拉下来:
git pull
分支管理

 本地使用git分支管理:
查看分支:git branch
创建分支:git branch KXLZQ
切换分支:git checkout KXLZQ
分支之间是隔离开的,你在KXLZQ分支下创建的分支在master中是不予显示的。
[root@KXLZQ lanmp]# cd /data/gitroot/
[root@KXLZQ gitroot]# git branch
- master
[root@KXLZQ gitroot]# git branch KXLZQ
[root@KXLZQ gitroot]# git branch - master
KXLZQ
[root@KXLZQ gitroot]# git checkout KXLZQ
切换到分支 ‘KXLZQ’
[root@KXLZQ gitroot]# git branch
master - KXLZQ
[root@KXLZQ gitroot]# ls
1.txt
[root@KXLZQ gitroot]# vim 2.txt
[root@KXLZQ gitroot]# git add .
[root@KXLZQ gitroot]# git commit -m “add 2.txt”
[KXLZQ 783f868] add 2.txt
1 file changed, 3 insertions(+)
create mode 100644 2.txt
[root@KXLZQ gitroot]# ls
1.txt 2.txt
[root@KXLZQ gitroot]# git checkout master
切换到分支 ‘master’
[root@KXLZQ gitroot]# ls
1.txt
分支的合并:
分支合并之前,要先切换到目标分支。
把KXLZQ分支合并到master,先切换到master下
[root@KXLZQ gitroot]# git branch - master
KXLZQ
[root@KXLZQ gitroot]# ls
1.txt
[root@KXLZQ gitroot]# git merge KXLZQ
更新 a4ccf44…783f868
Fast-forward
2.txt | 3 +++
1 file changed, 3 insertions(+)
create mode 100644 2.txt
[root@KXLZQ gitroot]# ls
1.txt 2.txt
分支合并中冲突问题:
合并冲突是两分支都对2.txt进行编辑,这时将KXLZQ分支合并到master分支下,就会有合并冲突。
master分支下,先给2.txt加几行内容:
[root@KXLZQ gitroot]# git branch - master
KXLZQ
[root@KXLZQ gitroot]# echo “KXLZQ” >> 2.txt
[root@KXLZQ gitroot]# git add 2.txt
[root@KXLZQ gitroot]# git commit -m “ch 2.txt”
[master 2c4b417] ch 2.txt
1 file changed, 1 insertion(+)
KXLZQ分支下,给2.txt编辑内容:
[root@KXLZQ gitroot]# git checkout KXLZQ
M 2.txt
切换到分支 ‘KXLZQ’
[root@KXLZQ gitroot]# echo “aoli” >2.txt
[root@KXLZQ gitroot]# git add 2.txt
[root@KXLZQ gitroot]# git commit -m “ch 2.txt”
[KXLZQ 3ae15a0] ch 2.txt
1 file changed, 1 insertion(+), 3 deletions(-)
切换到master分支下进行合并:
[root@KXLZQ gitroot]# git merge KXLZQ
自动合并 2.txt
冲突(内容):合并冲突于 2.txt
自动合并失败,修正冲突然后提交修正的结果。
解决冲突的方法是在master分支下,编辑2.txt,改为aming分支里面2.txt的内容。 然后提交2.txt,再合并aming分支。
但是这样有一个问题,万一master分支更改的内容是我们想要的呢? 可以编辑2.txt内容,改为想要的,然后提交。切换到aming分支,然后合并master分支到aming分支即可(倒着合并)。合并分支有一个原则,那就是要把最新的分支合并到旧的分支。也就是说merge后面跟的分支名字一定是最新的分支。
git branch -d aming //删除分支
如果分支没有合并,删除之前会提示,那就不合并,强制删除
git branch -D aming
这篇关于学习Linux的第六十七天的文章就介绍到这儿,希望我们推荐的文章对编程师们有所帮助!


