本文主要是介绍tensorflow1.X学习(一)MNIST机器学习入门:问题多多与激情满满,希望对大家解决编程问题提供一定的参考价值,需要的开发者们随着小编来一起学习吧!
随口说说
本文为《21个项目玩转深度学习》学习笔记。
第一章学习时间:断断续续的三天!
第一章开篇第一句“MNIST手写字符识别”是机器学习里的“Hello World”,学完了这一章后,表示确实跟只学会打印“Hello World”一样,保持在只会抄一下,而且那句机器学习入门,让我又看了一眼书的标题是深度学习,一定是作者有深意吧,待我学完此书,快乐回顾的时候再看这个问题。
环境介绍
先介绍自己的环境:
- Anaconda3 5.2.0,其中python版本3.6.5。
- pycharm,用了几分钟jupyter放弃了,毕竟习惯用pycharm了。
- tensorflow用的是tensorflow-1.13.1-cp36-cp36m-win_amd64.whl,有需要,可私聊。
我爱分享,当然不止分享自己的“鱼”,还得分享自己的“渔”。然后保姆式介绍来啦!
具体下载方法
有问题,找百度
-
anaconda下载:
利用清华镜像就能下载啦!https://mirrors.tuna.tsinghua.edu.cn/anaconda/archive/ 然后点你想下载的,现在都是用64.whl结尾哦。会遇到报错是因为你选择的下载路径文件夹不为空新建一个或换一个都是OK的,建议放在一个路径简单的路径下,比如D:\Anaconda\,需要找它的时候也很容易。 -
tensorflow的下载:
一般我们下载都是用pip,然后我的桌面上长期右上角摆着一个txt文件,分享一下内容只有一行:pip install -i https://pypi.tuna.tsinghua.edu.cn/simple
是的,又是清华镜像,每次都觉得清华的学生一定很幸福吧,很多资源都能改口叫“校内镜像”。但是这里不是清华镜像啦,使用whl下载:
下面是学长发在QQ群里的消息,比较口语化:
安装tensorflow的过程中如果出现DLL load failed:动态链接库(DLL)初始化例程失败错误时,可能是cpu版本过低的问题,换一个版本更低的tensorflow即可一般1.5左右,然后是https://pypi.org/project/tensorflow/1.0.1/#history这个网址可以找到不同的版本,可以使用迅雷下载速度没有什么限制。
代码学习
下载数据->认识数据->照着书打代码->运行->报错->解决错误->运行成功
很简单暴力,代码、遇到的问题、解决方法如下:
下载数据包
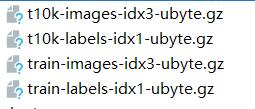
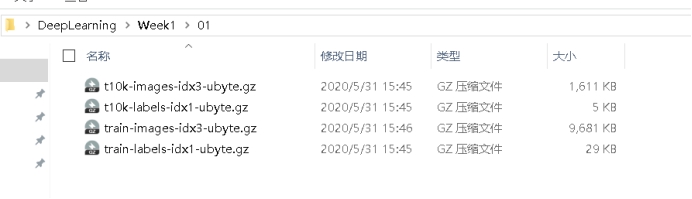
先看一眼数据包是啥,就是放在MNIST_data包下的这四个.gz文件,从上到下分别是
- 测试图像数据集
- 测试图像的标签(与1中图像对应标出是哪个数字)
- 训练图像数据
- 训练图像的标签(同样对应)
书上说是测试有6000张,训练有10000张。
# coding:utf-8
# 引入模块
from tensorflow.examples.tutorials.mnist import  input_data
mnist = input_data.read_data_sets("MNIST_data/",one_hot=True)
理论上,作者说运行后,如果当前目录下没有会自己下载,结果报错啦!
解决方法1(我未能使用这个方法解决问题):https://blog.csdn.net/bysjlwdx/article/details/83858438


解决方法2:
最终选择去官网上直接下载数据集http://yann.lecun.com/exdb/mnist/
点击红色的部分即可下载!

下载很快,但是版本会出现问题,后面会提到“每次都会遇到的警告”。
完成了第一步:下载数据包
认识数据包
已经提前展示过它们的名字了,下面是进一步认识。
# coding:utf-8
# 引入模块
from tensorflow.examples.tutorials.mnist import input_data
mnist = input_data.read_data_sets("MNIST_data/",one_hot=True)
# 训练数据大小
print(mnist.train.images.shape)
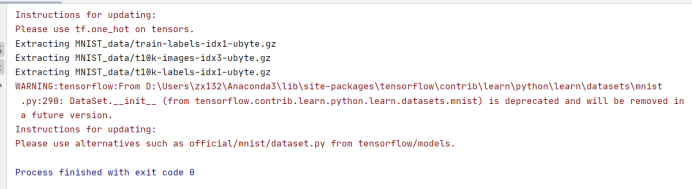
print(mnist.train.labels.shape)运行成功,还是挺开心的,就是大片的警告看着不舒服,但是随着时间的推移,每次都看见它,就慢慢无视它了。

翻译一下,是数据集不对,明明是来自官网的,非说不是…我猜是数据集也进行了更新。数据集的版本太高的原因。

# coding:utf-8
# 引入模块
from tensorflow.examples.tutorials.mnist import  input_data
mnist = input_data.read_data_sets("MNIST_data/",one_hot=True)
# 训练数据大小
print(mnist.train.images.shape)
print(mnist.train.labels.shape)
# 验证数据大小
print(mnist.validation.images.shape)
print(mnist.validation.labels.shape)
# 测试数据大小
print(mnist.test.images.shape)
print(mnist.test.labels.shape)
# 打印出第0张图片的向量表达式
print(mnist.train.images[0,:])
效果不错
下面这个就有趣一点了,会生成图片
# coding:utf-8
from tensorflow.examples.tutorials.mnist import input_data
import numpy as npmnist = input_data.read_data_sets("MNIST_data/", one_hot=True)
for i in range(20):# 得到独热表示,形如(0,1,0,0,0,0,0,0,0,0,0)one_hot_label = mnist.train.labels[i, :]# 通过np.argmax,可以直接获得原始的label# 因为只有1位为1,其他都是0label = np.argmax(one_hot_label)print('mnist_train_%d.jpg label: %d' %(i,label))
有新警告了!翻译一下

结果相当good

手写体识别代码(完整版)1
结果为两个的正确率,感觉跟文中的不符。
按照书中说的,应该是用Softmax回归,什么是Softmax回归呢?看学习理论部分:
# 导入Tensorflow
import tensorflow as tf
# 导入mnist模块
from tensorflow.examples.tutorials.mnist import input_datamnist = input_data.read_data_sets("MNIST_data/", one_hot=True)# 创建x, x是一个占位符(placeholder)代表识别图片
x = tf.placeholder(tf.float32, [None, 784])# W是Softmax模型的参数,将一个784维的输入转化为一个10维的输出
# 在TensorFlow中,模型的参数用tf.Variable表示
W = tf.Variable(tf.zeros([784, 10]))# b是又一个Softmax模型的参数,一般叫做‘偏置顶’(bias)
b = tf.Variable(tf.zeros([10]))# y表示模型的输出
y = tf.nn.softmax(tf.matmul(x, W) + b)
# y_是实际的图像标签,同样以占位符表示
y_ = tf.placeholder(tf.float32, [None, 10])# 得到两个tensor:y和y_
# y为模型的输出
# y_为实际图像
# 构造损失如下:
cross_entropy = \tf.reduce_mean(-tf.reduce_sum(y_ * tf.log(y)))# 有了损失,就可以用梯度下降法针对模型的参数(W和b)进行优化
# 参数优化如下:
train_step = tf.train.GradientDescentOptimizer(0.01) \.minimize(cross_entropy)
# tensorflow默认会对所有变量计算梯度
# 程序将使用梯度下降法对W、b计算梯度并更新它们的值
# Learning Rate学习率即为:tf.train.GtadientDEcentOptimizer(0.01)中的0.01# 创建一个对话:Session,并在对话中对变量进行初始化操作
# 创建Session,在Session中才能优化步骤train_step
sess = tf.InteractiveSession()
# 初始化(初始化变量,分配内存)
tf.global_variables_initializer().run()
# 会话是Tensorflow的核心概念:变量的值会被保存在会话中,对变量操作前必须对变量进行初始化# 对变量W、b进行优化
# 进行1000步梯度下降
for _ in range(1000):# 在minist.train中取100个训练数据# batch_xs是形状为(100,784)的图像数据,batch_ys是形如(100,10)的实际标签# batch_xs,batch_ys对应着两个占位符x和y_batch_xs, batch_ys = mnist.train.next_batch(100)# 在Session中运行train_step,运行时要传入占位符的值sess.run(train_step, feed_dict={x: batch_xs, y_: batch_ys})# 每次不是全部训练、而是每次提取100个数据进行训练,共1000次# 在训练时,需要把它们放入对应的标签# 正确的预测结果
correct_prediction = tf.equal(tf.argmax(y, 1), tf.argmax(y_, 1))
# 计算预测准确率
accuracy = tf.reduce_mean(tf.cast(correct_prediction, tf.float32))
# 在Session中运行Tensor可以得到Tensor的值
# 最终获得模型的准确率
print(sess.run(accuracy, feed_dict={x: mnist.test.images, y_: mnist.test.labels}))
结果每次运行都不一样运行了很多次,结果基本为90.1%-93.5%

手写体代码(完整版)2
是两层卷积网络,什么是卷积网络,我现在只能是一知半解,后面会进行认真讲解。
# coding:utf-8
import tensorflow as tf
from tensorflow.examples.tutorials.mnist import input_data# 读入
mnist = input_data.read_data_sets("MNIST_data/", one_hot=True)
# x为训练图像的占位符、y_为训练图像标签的占位符
x = tf.placeholder(tf.float32, [None, 784])
y_ = tf.placeholder(tf.float32, [None, 10])# 将图像还原为28x28的图象
x_image = tf.reshape(x, [-1, 28, 28, 1])# 第一层卷积如下:
def weight_variable(shape):initial = tf.truncated_normal(shape, stddev=0.1)return tf.Variable(initial)def bias_variable(shape):initial = tf.constant(0.1)return tf.Variable(initial)def conv2d(x, W):return tf.nn.conv2d(x, W, strides=[1, 1, 1, 1], padding='SAME')def max_pool_2x2(x):return tf.nn.max_pool(x, ksize=[1, 2, 2, 1],strides=[1, 2, 2, 1], padding="SAME")# 第一层卷积层:
W_conv1 = weight_variable([5, 5, 1, 32])
b_conv1 = bias_variable([32])
h_conv1 = tf.nn.relu(conv2d(x_image, W_conv1) + b_conv1)
h_pool1 = max_pool_2x2(h_conv1)# 第二层卷积
W_conv2 = weight_variable([5, 5, 32, 64])
b_conv2 = bias_variable([32])
h_conv2 = tf.nn.relu(conv2d(h_pool1, W_conv2) + b_conv2)
h_pool2 = max_pool_2x2(h_conv2)# 全连接层
W_fcl = weight_variable([7 * 7 * 64, 1024])
b_fcl = bias_variable([1024])
h_pool2_flat = tf.reshape(h_pool2, [-1, 7 * 7 * 64])
h_fcl = tf.nn.relu(tf.matmul(h_pool2_flat, W_fcl) + b_fcl)
# 使用Dropout,keep_prob是一个占位符,训练时为0.5,测试为1
keep_prob = tf.placeholder(tf.float32)
h_fcl_drop = tf.nn.dropout(h_fcl, keep_prob)
# 加入Dropout是防止神经网络过拟合的一种手段# 全连接:转化为10个打分
W_fc2 = weight_variable([1024, 10])
b_fc2 = bias_variable([10])
y_conv = tf.matmul(h_fcl_drop, W_fc2) + b_fc2# y_conv相当于Softmax中的Logit
# 其实tensorflow中有tf.nn.softmax_cross_entropy_with_logits
# 可以直接对Logit定义交叉熵损失# 不采用Softmax算法
cross_entropy = tf.reduce_mean(tf.nn.softmax_cross_entropy_with_logits(labels=y_, logits=y_conv))
# 同样的方法,定义train_step
train_step = tf.train.AdamOptimizer(1e-4).minimize(cross_entropy)# 定义测试的准确率,
correct_prediction = tf.equal(tf.argmax(y_conv, 1), tf.argmax(y_, 1))
accuracy = tf.reduce_mean(tf.cast(correct_prediction, tf.float32))# 创建session,对变量初始化
sess = tf.InteractiveSession()
sess.run(tf.global_variables_initializer())
# 训练2000步
for i in range(2000):batch = mnist.train.next_batch(50)# 每50步报告一次在验证集上的准确率if i % 50 == 0:train_accuracy = accuracy.eval(feed_dict={x: batch[0], y_: batch[1], keep_prob: 1.0})print("step%d,training accuracy%g" % (i, train_accuracy))train_step.run(feed_dict={x: batch[0], y_: batch[1], keep_prob: 0.5})# 训练结束
print("test accuracy:%g" % accuracy.eval(feed_dict={x: batch[0], y_: batch[1], keep_prob: 1.0}))
运行结果:
第一次执行:
2020-06-07 11:02:04.293106: I tensorflow/core/platform/cpu_feature_guard.cc:141] Your CPU supports instructions that this TensorFlow binary was not compiled to use: AVX2
step0,training accuracy0.08
step50,training accuracy0.1
step100,training accuracy0.06
step150,training accuracy0.06
step200,training accuracy0.12
step250,training accuracy0.26
step300,training accuracy0.18
step350,training accuracy0.12
step400,training accuracy0.26
step450,training accuracy0.2
step500,training accuracy0.26
step550,training accuracy0.2
step600,training accuracy0.24
step650,training accuracy0.34
step700,training accuracy0.34
step750,training accuracy0.32
step800,training accuracy0.34
step850,training accuracy0.52
step900,training accuracy0.36
step950,training accuracy0.42
step1000,training accuracy0.38
step1050,training accuracy0.38
step1100,training accuracy0.6
step1150,training accuracy0.48
step1200,training accuracy0.5
step1250,training accuracy0.56
step1300,training accuracy0.62
step1350,training accuracy0.62
step1400,training accuracy0.6
step1450,training accuracy0.56
step1500,training accuracy0.56
step1550,training accuracy0.7
step1600,training accuracy0.66
step1650,training accuracy0.72
step1700,training accuracy0.68
step1750,training accuracy0.72
step1800,training accuracy0.6
step1850,training accuracy0.66
step1900,training accuracy0.66
step1950,training accuracy0.68
test accuracy:0.62
第二次执行:
2020-06-07 11:07:21.608145: I tensorflow/core/platform/cpu_feature_guard.cc:141] Your CPU supports instructions that this TensorFlow binary was not compiled to use: AVX2
step0,training accuracy0.08
step50,training accuracy0.02
step100,training accuracy0.06
step150,training accuracy0.1
step200,training accuracy0.1
step250,training accuracy0.1
step300,training accuracy0.14
step350,training accuracy0.26
step400,training accuracy0.18
step450,training accuracy0.28
step500,training accuracy0.22
step550,training accuracy0.22
step600,training accuracy0.08
step650,training accuracy0.24
step700,training accuracy0.16
step750,training accuracy0.3
step800,training accuracy0.14
step850,training accuracy0.34
step900,training accuracy0.28
step950,training accuracy0.36
step1000,training accuracy0.4
step1050,training accuracy0.46
step1100,training accuracy0.5
step1150,training accuracy0.52
step1200,training accuracy0.44
step1250,training accuracy0.66
step1300,training accuracy0.54
step1350,training accuracy0.52
step1400,training accuracy0.64
step1450,training accuracy0.58
step1500,training accuracy0.64
step1550,training accuracy0.64
step1600,training accuracy0.66
step1650,training accuracy0.6
step1700,training accuracy0.6
step1750,training accuracy0.56
step1800,training accuracy0.54
step1850,training accuracy0.54
step1900,training accuracy0.6
step1950,training accuracy0.74
test accuracy:0.72
第三次执行:
2020-06-07 11:07:55.984459: I tensorflow/core/platform/cpu_feature_guard.cc:141] Your CPU supports instructions that this TensorFlow binary was not compiled to use: AVX2
step0,training accuracy0.12
step50,training accuracy0.08
step100,training accuracy0.08
step150,training accuracy0.14
step200,training accuracy0.1
step250,training accuracy0.14
step300,training accuracy0.06
step350,training accuracy0.14
step400,training accuracy0.1
step450,training accuracy0.14
step500,training accuracy0.16
step550,training accuracy0.14
step600,training accuracy0.18
step650,training accuracy0.26
step700,training accuracy0.24
step750,training accuracy0.14
step800,training accuracy0.32
step850,training accuracy0.28
step900,training accuracy0.3
step950,training accuracy0.32
step1000,training accuracy0.2
step1050,training accuracy0.4
step1100,training accuracy0.48
step1150,training accuracy0.52
step1200,training accuracy0.38
step1250,training accuracy0.42
step1300,training accuracy0.5
step1350,training accuracy0.58
step1400,training accuracy0.42
step1450,training accuracy0.48
step1500,training accuracy0.56
step1550,training accuracy0.52
step1600,training accuracy0.58
step1650,training accuracy0.54
step1700,training accuracy0.62
step1750,training accuracy0.66
step1800,training accuracy0.54
step1850,training accuracy0.58
step1900,training accuracy0.7
step1950,training accuracy0.56
test accuracy:0.58
结果很不尽人意,每次测试结果也是不一样,运行多次正确率在50%-75%,让我产生怀疑了。求教!求教!求教!
理论学习
Softmax回归
用WPS写的笔记,公式不能直接写进来,所以截图来凑。

后面语法比较多tf.???没太理解。
总结
万事开头难,但更难的是坚持下去。我在写到第一层卷积的时候,内心是超级激动,因为从知道卷积神经网络到第一次敲代码碰到已经是7个月过去了,知道卷积、激活函数、池化、全连接的各个功能,也算是素未谋面的老朋友相遇吧,希望自己也能继续加油!
周末时间多一些,所以多写了一点,这样一写,也发现自己的很多不足,书本还没吃透,很多代码还没理解,而且过度依赖pycharm代码自动补全功能,现在也记不得代码中提到的东西。
这篇关于tensorflow1.X学习(一)MNIST机器学习入门:问题多多与激情满满的文章就介绍到这儿,希望我们推荐的文章对编程师们有所帮助!


