本文主要是介绍用Python开发了一个一建、一造、二建等职考拍照搜题神器,希望对大家解决编程问题提供一定的参考价值,需要的开发者们随着小编来一起学习吧!
职业考试资料包括一级建造师、一级造价师、监理工程师、消防工程师、安全工程师、消防工程师等,
职业考试不是那么容易的,要认真听课,做练习题、做模拟题、做真题、做机构押题等等。
应学生要求利用国庆假期开发了一个一建、一造、消防、二建等的拍照搜题软件,方便大家学习。
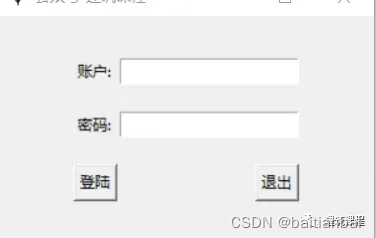
运行结果如下:

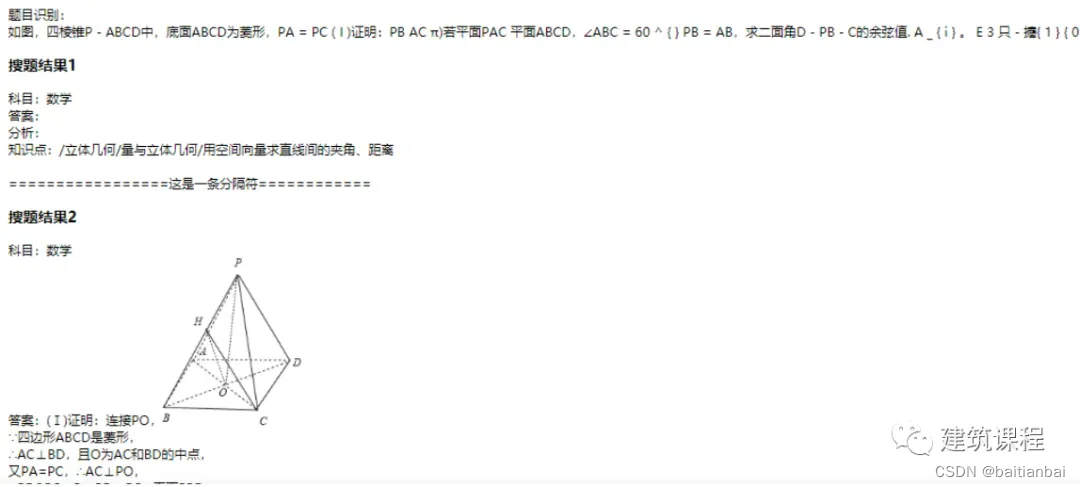
开发出来后,本以为可以识别出职考题
整题识别的开发使用有道智云拍照搜题服务的开放API,
后来打电话咨询客服,只支持k12的题库。
索性代码发出来:
登录代码:
import tkinter as tk
import tkinter.messagebox
from MainPage import MainPage
class LoginPage(object):
def __init__(self, master=None):
# master 画板对象,往画板上作画
self.root = master # 定义内部变量root
self.root.geometry('%dx%d' % (300, 180)) # 设置窗口大小
# 定义可以在页面更新数据的变量 普通字符串改变之后无法及时在页面中刷新
self.username = tk.StringVar()
self.password = tk.StringVar()
# 画 内容 需要画在纸上面
# 创建新的 布局控件 找一张新的纸作画
self.page = tk.Frame(self.root) # 创建Frame
# 将控件布局到 root 对象 (GUI 程序对象)
self.page.pack()
self.create_page()
def create_page(self):
"""
使用表格布局绘制内容
"""
#
# tk.Label 文本框 显示文字内容
# stick 控件对象方向 tk.W 西方位
# pady padding y 上下的宽度
# row 行 表格布局
tk.Label(self.page).grid(row=0, stick=tk.W)
tk.Label(self.page, text='账户: ').grid(row=1, stick=tk.W, pady=10)
# tk.Label 输入框 显示输入内容
# 输入框的文字等内容需要更新
tk.Entry(self.page, textvariable=self.username).grid(row=1, column=1, stick=tk.E)
tk.Label(self.page, text='密码: ').grid(row=2, stick=tk.W, pady=10)
tk.Entry(self.page, textvariable=self.password, show='*').grid(row=2, column=1, stick=tk.E)
tk.Button(self.page, text='登陆', command=self.login_check).grid(row=3, stick=tk.W, pady=10)
tk.Button(self.page, text='退出', command=self.page.quit).grid(row=3, column=1, stick=tk.E)
def login_check(self):
"""登录检测"""
name = self.username.get()
secret = self.password.get()
if name == '' and secret == '':
self.page.destroy()
MainPage(self.root)
else:
tkinter.messagebox.showinfo(title='错误', message='账号或密码错误!')
if __name__ == '__main__':
# root 对象 画板
root = tk.Tk()
root.title('建筑课程')
# LoginPage 画纸
LoginPage(root)
# MainPage(root)
root.mainloop()
主页界面:
import tkinter as tk
from tkinter import filedialog,messagebox,ttk
from QuestionClass import Question
import os
question = Question([], "")
class MainPage(object):
def __init__(self, master=None):
self.root = master # 定义内部变量root
self.root.geometry('%dx%d' % (500,300)) # 设置窗口大小
self.create_page()
def create_page(self):
btn_get_file = tk.Button(self.root, text='选择题目图片', command=self.get_files)
btn_get_file.grid(row=0, column=0, ipadx='3', ipady='3', padx='10', pady='20')
self.text1 = tk.Text(self.root, width='40', height='10')
self.text1.grid(row=0, column=1)
btn_get_result_path=tk.Button(self.root,text='选择搜索结果路径',command=self.set_result_path)
btn_get_result_path.grid(row=1,column=0)
self.text2=tk.Text(self.root,width='40', height='2')
self.text2.grid(row=1,column=1)
btn_sure=tk.Button(self.root,text="搜题",command=self.search_question_files)
btn_sure.grid(row=4,column=1)
def get_files(self):
files = filedialog.askopenfilenames(filetypes=[("image", "*.bmp"),("image", "*.png"),("image", "*.jpg"),])
question.file_paths=files
if files:
for file in files:
self.text1.insert(tk.END, file + '\n')
self.text1.update()
else:
print('')
def set_result_path(self):
result_path=filedialog.askdirectory()
question.result_path=result_path
self.text2.insert(tk.END,result_path)
def search_question_files(self):
question.start_ocr()
os.system('start '+question.result_path)
if __name__ == '__main__':
root=tk.Tk()
root.title("建筑课程")
MainPage(root)
root.mainloop()
api代码1:
from OcrQuestion import *
import os
class Question():
def __init__(self,file_paths,result_path):
self.file_paths=file_paths
self.result_path=result_path
def start_ocr(self):
for file_path in self.file_paths:
result=connect(file_path)
print(file_path)
self.save_result_format(file_path,result)
#self.save_result(file_path,result)
def save_result(self,file_path,result):
result_file_name=os.path.basename(file_path).split('.')[0]+'_result.txt'
f=open(self.result_path+'/'+result_file_name,'w',encoding='utf-8')
f.write(str(result))
f.close()
def save_result_format(self,file_path,result):
result_file_name=os.path.basename(file_path).split('.')[0]+'_result.html'
f=open(self.result_path+'/'+result_file_name,'w',encoding='utf-8')
result_json= json.loads(result)
if result_json['errorCode'] == '0':
data=result_json['data']
questions=data["questions"]
text=data["text"]
f.write("题目识别:<br/>"+text)
i=0
for answers in questions:
i=i+1
subject="科目:"+answers["subject"]+"<br>"
answer="答案:" +answers["answer"]+"<br>"
analysis="分析:"+answers["analysis"]+"<br>"
knowledge="知识点:"+answers["knowledge"]+"<br>"
print(subject+answer+analysis+knowledge)
result_each="<h3>搜题结果"+str(i)+"<br></h3>"
result_each=result_each+subject+answer+analysis+knowledge+"<br>=================这是一条分隔符============<br>"
f.write(result_each)
else:
f.write("result error code:"+result_json['errorCode'])
api代码2:
import sys
import uuid
import requests
import base64
import hashlib
import json
from imp import reload
import time
reload(sys)
YOUDAO_URL = 'https://openapi.youdao.com/ocrquestionapi'
APP_KEY = 'your id'
APP_SECRET = 'your secret'
def truncate(q):
if q is None:
return None
size = len(q)
return q if size <= 20 else q[0:10] + str(size) + q[size - 10:size]
def encrypt(signStr):
hash_algorithm = hashlib.sha256()
hash_algorithm.update(signStr.encode('utf-8'))
return hash_algorithm.hexdigest()
def do_request(data):
headers = {'Content-Type': 'application/x-www-form-urlencoded'}
return requests.post(YOUDAO_URL, data=data, headers=headers)
def connect(pic_path):
f = open(pic_path, 'rb') # 二进制方式打开图文件
q = base64.b64encode(f.read()).decode('utf-8') # 读取文件内容,转换为base64编码
f.close()
data = {}
data['q'] = q
data['signType'] = 'v2'
curtime = str(int(time.time()))
data['curtime'] = curtime
salt = str(uuid.uuid1())
signStr = APP_KEY + truncate(q) + salt + curtime + APP_SECRET
sign = encrypt(signStr)
data['appKey'] = APP_KEY
data['salt'] = salt
data['sign'] = sign
response = do_request(data)
result=response.content.decode('utf-8')
print(result)
return result
这篇关于用Python开发了一个一建、一造、二建等职考拍照搜题神器的文章就介绍到这儿,希望我们推荐的文章对编程师们有所帮助!


