本文主要是介绍QT学习笔记-QT5.15编译及安装谷歌拼音输入法(QtInputMethod_GooglePinyin),希望对大家解决编程问题提供一定的参考价值,需要的开发者们随着小编来一起学习吧!
QT学习笔记-QT5.15编译及安装谷歌拼音输入法(QtInputMethod_GooglePinyin)
- 0、背景
- 1、环境
- 2、下载QtInputMethod_GooglePinyin源码
- 3、使用MinGW64构建套件编译
- 3.1 编译QtInputMethod_GooglePinyin源码
- 3.2、部署tgtsmlInputContextPlugin输入法插件
- 3.3、运行测试程序
- 4、使用MSVC2019_64构建套件编译
- 4.1 编译QtInputMethod_GooglePinyin源码
- 4.2、部署tgtsmlInputContextPlugin输入法插件
- 4.3、运行测试程序,与步骤3.3相同。
- 5、修改QtInputMethod_GooglePinyin源码解决在分屏情况下虚拟键盘显示越界及不能跨屏显示的问题
- 6、修改QtInputMethod_GooglePinyin源码解决在Linux Arm环境下部分应用资源冲突导致无法加载qss和ota字体的问题
- 7、完整源码下载
0、背景
在使用QT进行嵌入式应用开发时,往往程序最终的运行设备是有触屏的设备。因此,不可避免的会遇到虚拟键盘和中文输入的问题。QT自带一个虚拟键盘,可以在构建套件/plugins/platforminputcontexts目录下看到2个文件:
- qtvirtualkeyboardplugin.dll
- qtvirtualkeyboardplugin.dll.debug
QT自带的虚拟键盘屏幕占比较大,而且很容易挡住输入框,默认不能拖动,不太完美。本就介绍一种替代方式,就是在QT程序中使用GooglePinyin输入法实现虚拟键盘和中文录入。
1、环境
操作系统:windows10专业版
QT版本:5.15.2
QT安装目录:D:\Qt
QT编译套件1:MinGW64
QT编译套件2:MSVC2019_64
2、下载QtInputMethod_GooglePinyin源码
1、下载地址:
https://gitee.com/tgtsml/QtInputMethod_GooglePinyin

2、下载后可以看到压缩包如下图:

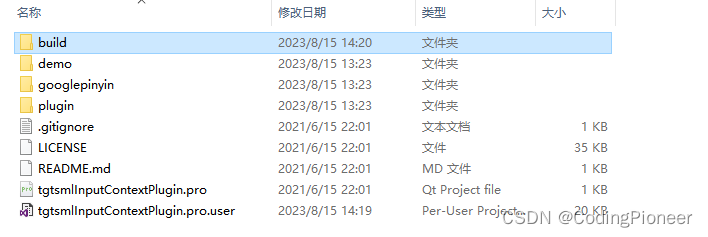
3、解压缩后如下图:
4、文件夹的内容如下:

3、使用MinGW64构建套件编译
3.1 编译QtInputMethod_GooglePinyin源码
1、通过qtcreator打开tgtsmlInputContextPlugin.pro工程,本例采用的MinGW64构建套件。如下图:

2、然后分别以debug模式和release模式对tgtsmlInputContextPlugin进行重新构建,会在tgtsmlInputContextPlugin.pro同级目录下生成一个build目录,如下图:
3.2、部署tgtsmlInputContextPlugin输入法插件
1、把上一步编译生成的build/bin/platforminputcontexts目录下的
- tgtsmlInputContextPlugin.dll
- tgtsmlInputContextPlugind.dll
如下图:
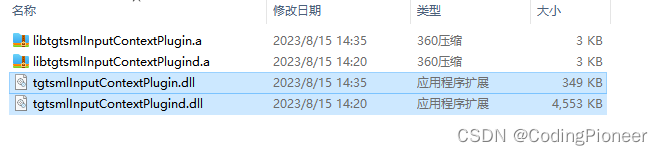
复制到D:\Qt\5.15.2\mingw81_64\plugins\platforminputcontexts目录下。
3.3、运行测试程序
1、可以看到下载的源码中包括一个测试程序demo,关键引入输入法虚拟键盘的代码如下:
qputenv("QT_IM_MODULE", QByteArray("tgtsml"));
如下图:

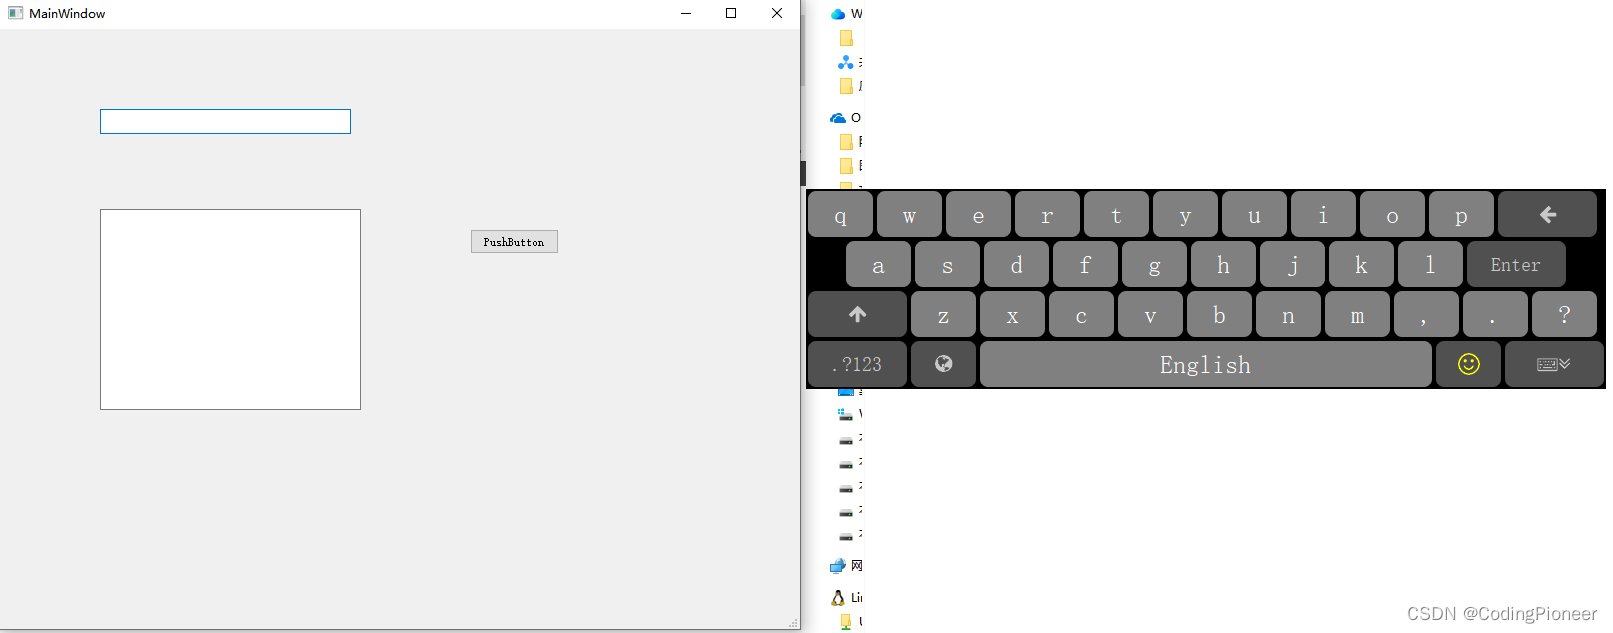
这样当光标聚焦在输入文本框时,会自动弹出虚拟键盘。
运行效果如下:

4、使用MSVC2019_64构建套件编译
4.1 编译QtInputMethod_GooglePinyin源码
1、在项目选项卡中对当前项目的构建套件切换至MSVC2019_64构建套件上,然后对项目进行重新构建,然后这时出现了很多错误,如下图:

2、解决这些问题需要做2个方面的修改。
2.2.1 第1是把所有pro的换行符由Unix(LF)改为Windows(CRLF)
如下,原来是这样:
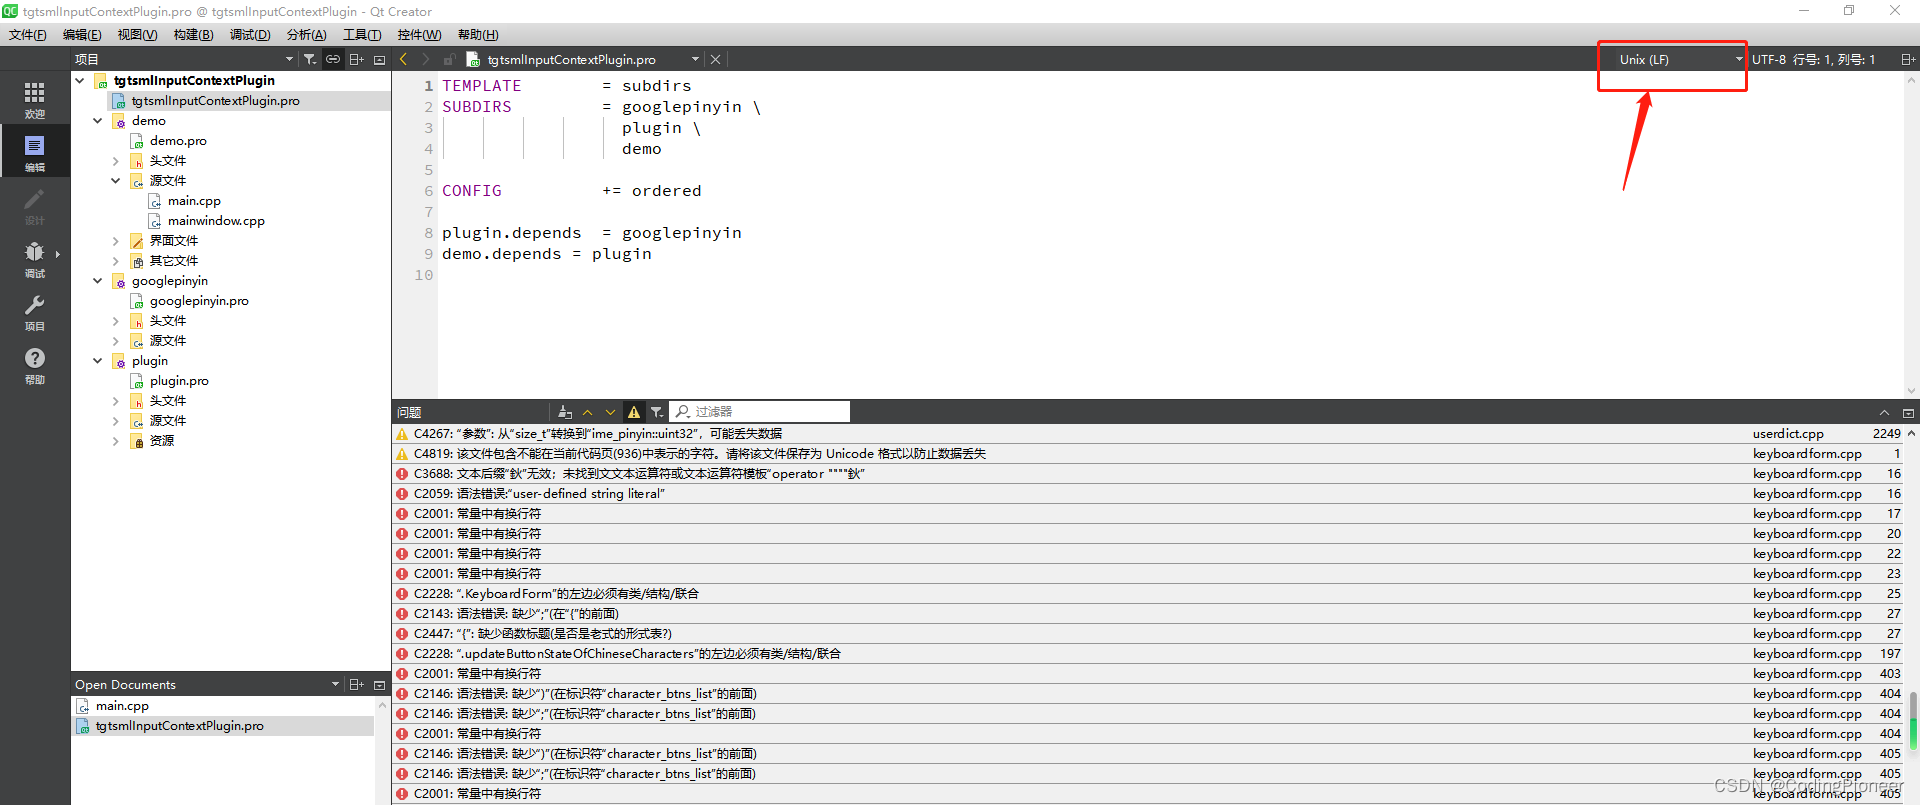
改成下面这样:

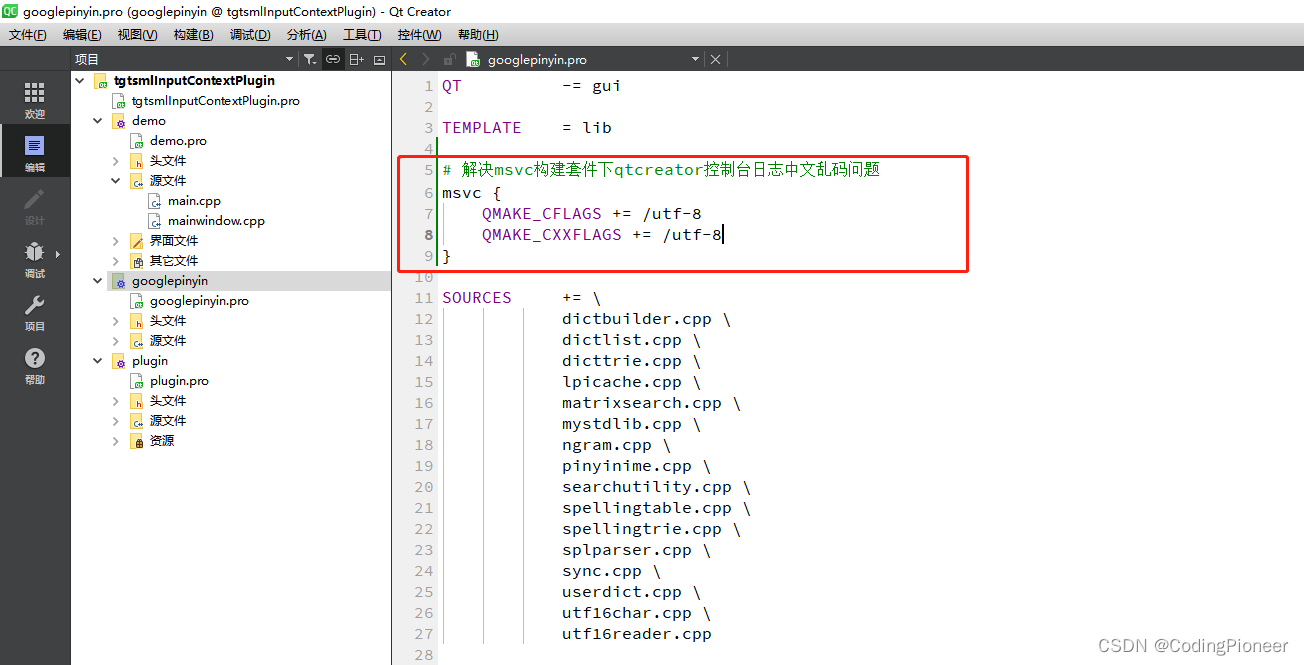
2.2.2 第2是在demo.pro、googlepinyin.pro、plugin.pro 3个文件中增加中文处理的配置,如下:
# 解决msvc构建套件下qtcreator控制台日志中文乱码问题
msvc {QMAKE_CFLAGS += /utf-8QMAKE_CXXFLAGS += /utf-8
}
如下图所示:


3、然后再重新构建,就能正常编译过去了。同样使用debug模式和release模式编译完毕后会在会在tgtsmlInputContextPlugin.pro同级目录下生成一个build目录,如果之前在MinGW64构建套件下已生成了,建议先删除,或者在pro文件中指定使用不同构建套件时生成的库放到不同位置,如下:
# 指定输出目录
!msvc {DESTDIR = ../../wongoing_plugin_bin
}
msvc {DESTDIR = ../../wongoing_plugin_bin_msvc
}
4.2、部署tgtsmlInputContextPlugin输入法插件
1、把上一步编译生成的build/bin/platforminputcontexts目录下的
- tgtsmlInputContextPlugin.dll
- tgtsmlInputContextPlugind.dll
- tgtsmlInputContextPlugind.pdb
如下图:
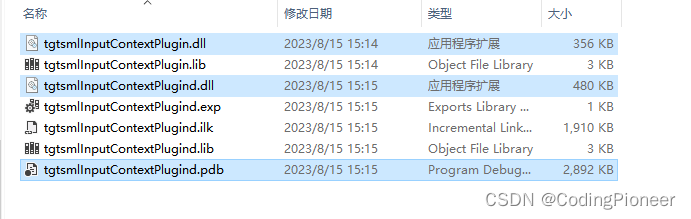
复制到D:\Qt\5.15.2\msvc2019_64\plugins\platforminputcontexts目录下。
4.3、运行测试程序,与步骤3.3相同。
5、修改QtInputMethod_GooglePinyin源码解决在分屏情况下虚拟键盘显示越界及不能跨屏显示的问题
1、当我的笔记本电脑有外接了一个显示时(扩展模式)使用时会出现2个问题,第1个问题是虚拟键盘不能显示到扩展屏幕上,虽然我的demo窗口显示在扩展屏幕。第2个问题,就是当demo窗口(输入框窗口)在主屏幕最右测时,虚拟键盘会有一部分显示不出来,就是显示越界。具体如下图:
上图是虚拟键盘不能跨屏幕显示,只能显示在主屏上。
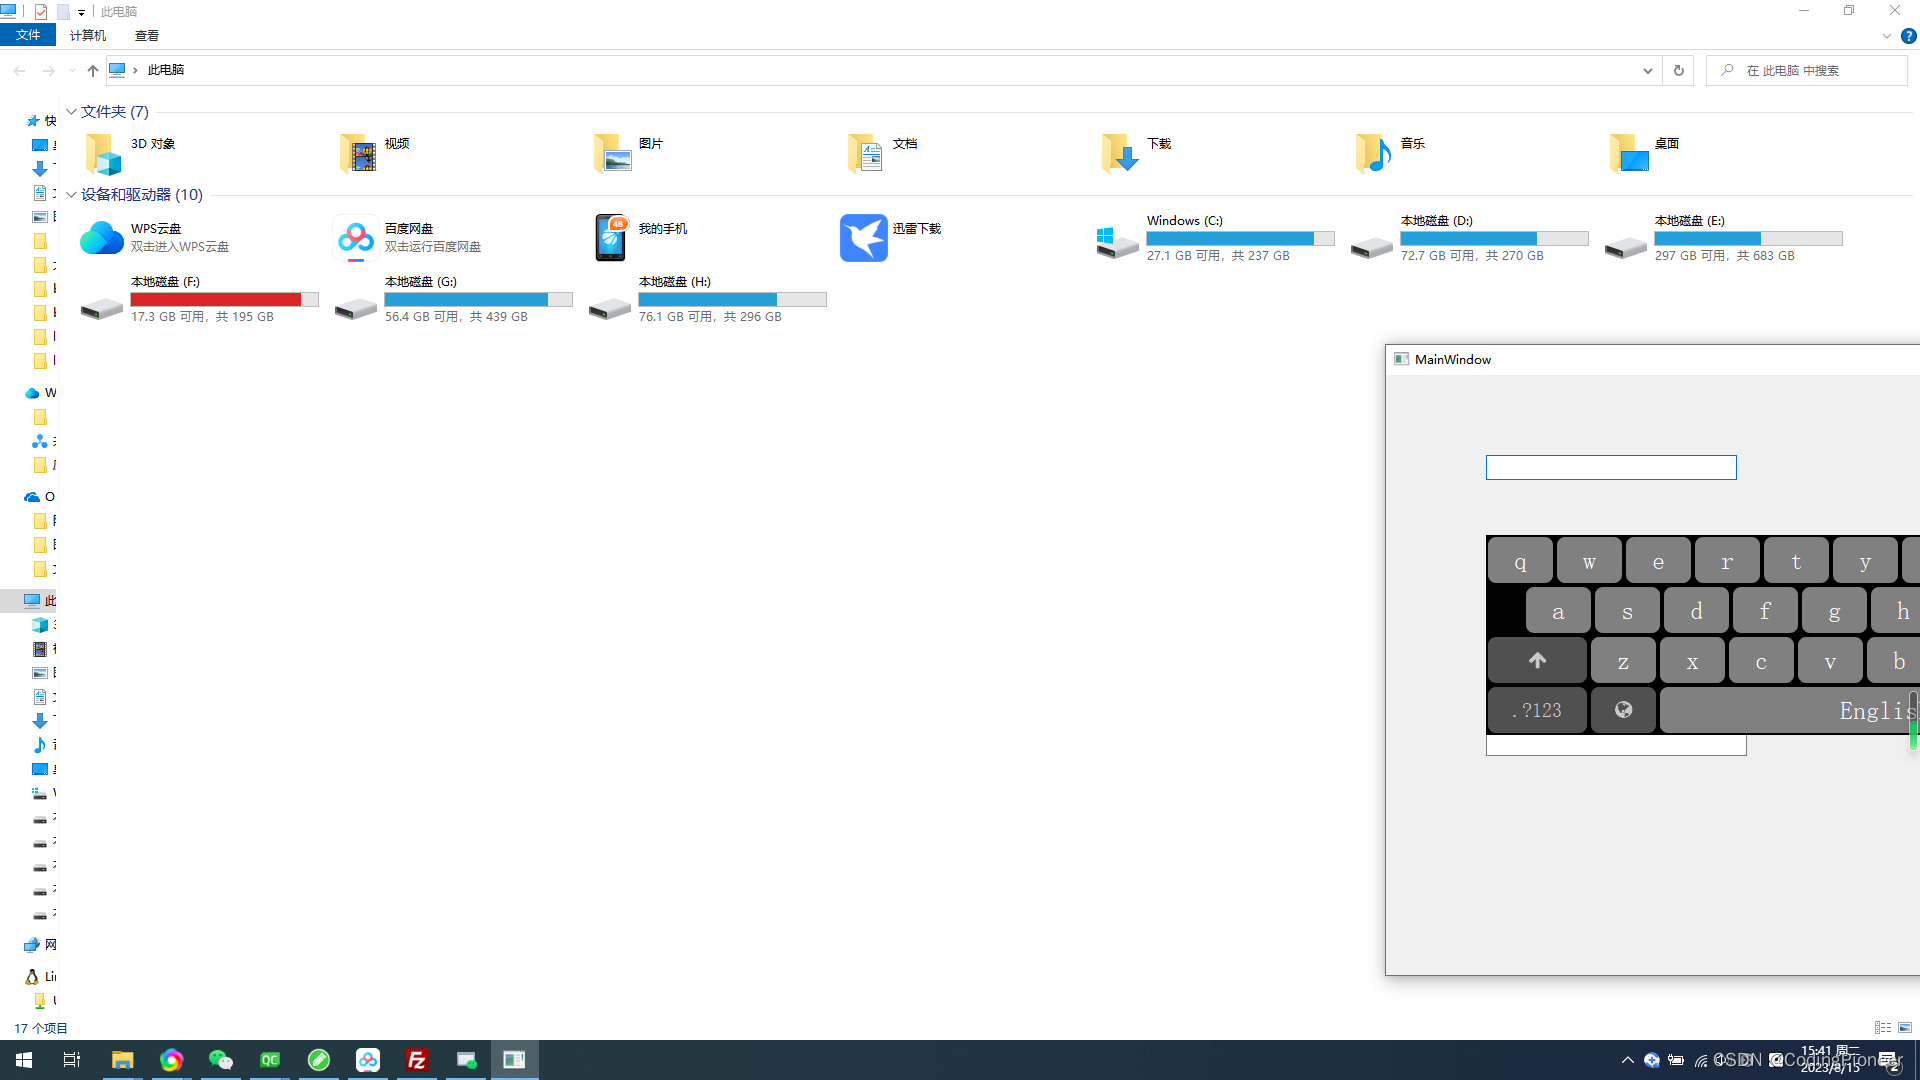
上图是右侧显示不完整的情况。
2、修改plugin项目中的tgtsmlplatforminputcontext.cpp文件中的void TgtsmlPlatformInputContext::showInputPanel()中的代码,如下:
void TgtsmlPlatformInputContext::showInputPanel()
{if(!m_keyboard){m_keyboard = new KeyboardForm;connect(m_keyboard, &KeyboardForm::sendKeyToFocusItem, this, &TgtsmlPlatformInputContext::sendKeyToFocusItem);}if(m_keyboard->isHidden())m_keyboard->show();QWidget *widgetTmp = qobject_cast<QWidget*>(m_focusitem);if(widgetTmp){        //注释以下代码,因为没有考虑扩展屏幕的坐标问题
//        QPoint widgetGlobalPos = widgetTmp->mapToGlobal(QPoint(0, 0));
//        if(widgetGlobalPos.x() < 0){
//            widgetGlobalPos.setX(0);
//        }
//        if(widgetGlobalPos.y() < 0){
//            widgetGlobalPos.setY(0);
//        }
//        if(qApp->desktop()->width() - widgetGlobalPos.x() < m_keyboard->width()){
//            widgetGlobalPos.setX(qApp->desktop()->width() - m_keyboard->width());
//        }
//        if(qApp->desktop()->height() - widgetGlobalPos.y() - 30 < m_keyboard->height()){
//            widgetGlobalPos.setY(widgetGlobalPos.y() - m_keyboard->height() - 10);
//        }
//        else{
//             widgetGlobalPos = widgetGlobalPos + QPoint(0,30);
//        }
//        m_keyboard->move(widgetGlobalPos);//改为以下代码,增加考虑扩展屏幕的代码//获取当前屏幕及屏幕几何矩形坐标int currentScreen = qApp->desktop()->screenNumber(widgetTmp);if (currentScreen <  0){currentScreen = 0;}QScreen *screen = QGuiApplication::screens().at(currentScreen);QRect rect = screen->geometry();QPoint widgetGlobalPos = widgetTmp->mapToGlobal(QPoint(0, 0));if(widgetGlobalPos.x() < rect.x()) {widgetGlobalPos.setX(rect.x());}if (widgetGlobalPos.y() < rect.y()){widgetGlobalPos.setY(rect.y());}if(rect.width() - widgetGlobalPos.x() < m_keyboard->width()) {widgetGlobalPos.setX(rect.width() - m_keyboard->width());}if(rect.height() - widgetGlobalPos.y() - 30 < m_keyboard->height()) {widgetGlobalPos.setY(widgetGlobalPos.y() - m_keyboard->height() - 10);}else {widgetGlobalPos = widgetGlobalPos + QPoint(0,30);}m_keyboard->move(widgetGlobalPos);}
}
3、修改后重新编译、重新部署,再运行demo程序就正常了。
6、修改QtInputMethod_GooglePinyin源码解决在Linux Arm环境下部分应用资源冲突导致无法加载qss和ota字体的问题
1、当在嵌入式Linu Arm环境中使用GooglePinyin虚拟键盘时,如果某个Qt应用使用了资源文件可能会导致GooglePinyin虚拟键盘无法加载:/res/stylesheet.qss和:res/FontAwesome.otf从而无法显示虚拟键盘进而导致程序崩溃。
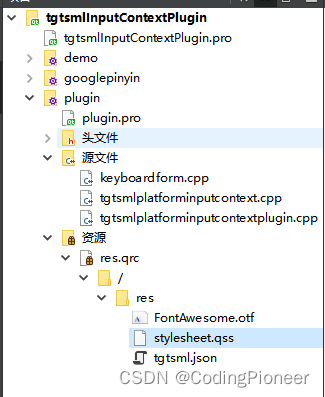
2、要解决这个问题,需要修改plugin项目中的keyboardform.cpp文件中的KeyboardForm::KeyboardForm(QWidget *parent)
: QWidget(parent)中的代码,如下:
KeyboardForm::KeyboardForm(QWidget *parent): QWidget(parent)
{character_btns_list.clear();current_mode = InputMode::en;upper_mode = false;m_symbol_page = 0;this->setFixedSize(800,250);int keyboard_btn_width = this->width()/11.5;int keyboard_btn_height = this->height()/5.0;//设置主窗体样式this->setAttribute(Qt::WA_TranslucentBackground);this->setWindowFlags(Qt::Tool | \Qt::FramelessWindowHint | \Qt::WindowStaysOnTopHint | \Qt::WindowDoesNotAcceptFocus);//加载QSS样式表
//    QFile qss(":/res/stylesheet.qss");
//    if(false == qss.open(QFile::ReadOnly))return;
//    this->setStyleSheet(qss.readAll());
//    qss.close();//以上代码在窗体及容器控件的多层嵌套情况下会导致qss样式资源无法加载,改为以下代码QFile qss(":/res/stylesheet.qss");if (qss.exists() && qss.open(QFile::ReadOnly)){this->setStyleSheet(qss.readAll());qss.close();}else{QString strcss = "" \"QWidget{background-color:black;}" \"QPushButton{font:25px;background-color:gray;color:white;border:2px solid black;border-radius:10px;}" \"QPushButton#function_button{background-color:rgb(80,80,80);color:rgb(200,200,200);font:20px;}" \"QPushButton:hover{background-color:green;color:white;}" \"QPushButton:pressed,QPushButton#function_button::pressed{background-color:red;color:white;}" \"QPushButton#function_button:checked{background-color:rgb(200,100,50);color:yellow;}" \"QPushButton#hanzichangepage,QPushButton#hanzicandidates{background-color:transparent;color:white;}" \"QPushButton#hanzichangepage:pressed{color:red;}" \"QPushButton#hanzichangepage:disabled{color:gray;}" \"QPushButton#emoji{background-color:rgb(80,80,80);color:yellow;}" \"QPushButton#emoji:hover{color:red;}" \"QPushButton#emoji:pressed{color:blue;}" \"QLabel{background-color:rgba(255,255,255,80);border-radius:2px;color:white;font:15px;margin-left: 5px;}";this->setStyleSheet(strcss);}//图标字体
//    int fontId = QFontDatabase::addApplicationFont(":/res/FontAwesome.otf");
//    QString fontName = QFontDatabase::applicationFontFamilies(fontId).at(0);
//    QFont btnicofont(fontName);
//    btnicofont.setPixelSize(10);//以上代码在窗体及容器控件的多层嵌套情况下会导致字体资源无法加载,改为以下方式QFont btnicofont(QString("Arial"));btnicofont.setPixelSize(10);if (QFile::exists(":res/FontAwesome.otf")){int fontId = QFontDatabase::addApplicationFont(":/res/FontAwesome.otf");QString fontName = QFontDatabase::applicationFontFamilies(fontId).at(0);btnicofont.setFamily(fontName);}
#ifdef Q_OS_LINUXelse if (QFile::exists("/usr/share/font-awesome/fonts/FontAwesome.otf")){int fontId = QFontDatabase::addApplicationFont("/usr/share/font-awesome/fonts/FontAwesome.otf");QString fontName = QFontDatabase::applicationFontFamilies(fontId).at(0);btnicofont.setFamily(fontName);}
#endifelse{qWarning() << "can not find FontAwesome.otf";}//单行布局QHBoxLayout *hb[6];for(int i=0; i<6; i++){hb[i] = new QHBoxLayout();hb[i]->setMargin(0);i == 1 ? hb[i]->setSpacing(2) : hb[i]->setSpacing(0);}widget_pinyin = new QWidget(this);widget_pinyin->setFixedHeight(keyboard_btn_height);//拼音缓存m_label_pinyin = new QLabel(this);m_label_pinyin->setFixedHeight(keyboard_btn_height*0.4);hb[0]->addWidget(m_label_pinyin);hb[0]->addStretch(1);//汉子缓存for(int i=0; i<chinesecharacters_number; i++){QPushButton *btn = new QPushButton(this);btn->setFixedHeight(keyboard_btn_height*0.6);hb[1]->addWidget(btn);if(i != chinesecharacters_number - 1) hb[1]->addStretch(1);if (i == 0 || i == chinesecharacters_number-1){change_chinese_characters_page_list.append(btn);btn->setSizePolicy(QSizePolicy::Fixed, QSizePolicy::Fixed);btn->setFont(btnicofont);btn->setText(i == 0 ? QString(QChar(0xf0d9)) : QString(QChar(0xf0da)));btn->setObjectName("hanzichangepage");i == 0 ? \connect(btn, &QPushButton::clicked, this, &KeyboardForm::chineseCharactersUpdatePrevious) :connect(btn, &QPushButton::clicked, this, &KeyboardForm::chineseCharactersUpdateNext);}else{chinese_characters_list.append(btn);btn->setObjectName("hanzicandidates");connect(btn, &QPushButton::clicked, this, &KeyboardForm::chineseCharactersSelected);}}QVBoxLayout *vb_pinyin = new QVBoxLayout(widget_pinyin);vb_pinyin->addLayout(hb[0]);vb_pinyin->addLayout(hb[1]);vb_pinyin->setMargin(0);vb_pinyin->setSpacing(0);widget_keyboard = new QWidget(this);widget_keyboard->setFixedHeight(keyboard_btn_height*4.0);//键盘for(int i=0; i<29; i++){QPushButton *btn = new QPushButton(QChar(keyboard_characters[i]),this);btn->setFixedSize(keyboard_btn_width, keyboard_btn_height);character_btns_list.append(btn);connect(btn, &QPushButton::clicked, this, &KeyboardForm::characterButtonClicked);}//第一排字母:0-9for(int i=0; i<10; i++){hb[2]->addWidget(character_btns_list.at(i));}QPushButton *btn_backspace = new QPushButton(QChar(0xf060));btn_backspace->setFont(btnicofont);btn_backspace->setFixedSize(keyboard_btn_width*1.5, keyboard_btn_height);btn_backspace->setObjectName("function_button");hb[2]->addWidget(btn_backspace);connect(btn_backspace, &QPushButton::clicked, this, &KeyboardForm::btnBackspaceClicked);//第二排字母:10-18hb[3]->addStretch(1);for(int i=10; i<19; i++){hb[3]->addWidget(character_btns_list.at(i));}QPushButton *btn_enter = new QPushButton("Enter");btn_enter->setFixedSize(keyboard_btn_width*1.5, keyboard_btn_height);btn_enter->setObjectName("function_button");hb[3]->addWidget(btn_enter);hb[3]->addStretch(1);connect(btn_enter, &QPushButton::clicked, this, &KeyboardForm::btnEnterClicked);//第三排字母:20-26QPushButton *btn_upper = new QPushButton(QChar(0xf062));btn_upper->setFixedSize(keyboard_btn_width*1.5, keyboard_btn_height);btn_upper->setFont(btnicofont);btn_upper->setObjectName("function_button");hb[4]->addWidget(btn_upper);connect(btn_upper, &QPushButton::clicked, this, &KeyboardForm::btnUpperClicked);for(int i=19; i<29; i++){hb[4]->addWidget(character_btns_list.at(i));}character_btns_list.append(btn_upper);//第四排功能键QPushButton *btn_symbols = new QPushButton(".?123");btn_symbols->setFixedSize(keyboard_btn_width*1.5, keyboard_btn_height);btn_symbols->setObjectName("function_button");hb[5]->addWidget(btn_symbols);connect(btn_symbols, &QPushButton::clicked, this, &KeyboardForm::btnSymbolsClicked);QPushButton *btn_language = new QPushButton(QChar(0xf0ac));btn_language->setFixedSize(keyboard_btn_width, keyboard_btn_height);btn_language->setFont(btnicofont);btn_language->setObjectName("function_button");hb[5]->addWidget(btn_language);connect(btn_language, &QPushButton::clicked, this, &KeyboardForm::btnLanguageClicked);QPushButton *btn_blankspace = new QPushButton("English");btn_blankspace->setFixedHeight(keyboard_btn_height);hb[5]->addWidget(btn_blankspace);character_btns_list.append(btn_blankspace);connect(btn_blankspace, &QPushButton::clicked, this, &KeyboardForm::btnBlankspaceClicked);QPushButton *btn_emoji = new QPushButton(QChar(0xf118));btn_emoji->setFixedSize(keyboard_btn_width, keyboard_btn_height);btn_emoji->setFont(btnicofont);btn_emoji->setObjectName("emoji");hb[5]->addWidget(btn_emoji);connect(btn_emoji, &QPushButton::clicked, this, &KeyboardForm::btnEmojiClicked);QPushButton *btn_hidekeyboard = new QPushButton(QString(QChar(0xf11c)).append(QChar(0xf103)));btn_hidekeyboard->setFixedSize(keyboard_btn_width*1.5, keyboard_btn_height);btn_hidekeyboard->setFont(btnicofont);btn_hidekeyboard->setObjectName("function_button");hb[5]->addWidget(btn_hidekeyboard);connect(btn_hidekeyboard, &QPushButton::clicked, this, &KeyboardForm::hideKeyboard);QVBoxLayout *vb_keyboard = new QVBoxLayout(widget_keyboard);vb_keyboard->setMargin(0);vb_keyboard->setSpacing(0);for(int i=2; i<6; i++){vb_keyboard->addLayout(hb[i]);}QVBoxLayout *vb_system = new QVBoxLayout(this);vb_system->setMargin(0);vb_system->setSpacing(0);vb_system->addStretch(1);vb_system->addWidget(widget_pinyin);vb_system->addWidget(widget_keyboard);widget_pinyin->hide();updateButtonStateOfChineseCharacters();
}
7、完整源码下载
修改后的完整源码下载地址
这篇关于QT学习笔记-QT5.15编译及安装谷歌拼音输入法(QtInputMethod_GooglePinyin)的文章就介绍到这儿,希望我们推荐的文章对编程师们有所帮助!


