本文主要是介绍SpringCloudAlibaba - 项目完整搭建(Nacos + OpenFeign + Getway + Sentinel),希望对大家解决编程问题提供一定的参考价值,需要的开发者们随着小编来一起学习吧!
目录
一、SpringCloudAlibaba 项目完整搭建
1.1、初始化项目
1.1.1、创建工程
1.1.2、配置父工程的 pom.xml
1.1.3、创建子模块
1.2、user 微服务
1.2.1、配置 pom.xml
1.2.2、创建 application.yml 配置文件
1.2.3、创建启动类
1.2.4、测试
1.3、product 微服务
1.3.1、配置 pom.xml
1.3.2、创建 application.yml 配置文件
1.3.3、创建启动类
1.3.4、测试
1.4、引入 OpenFeign,进行远程调用
1.4.1、引入依赖
1.4.2、实现远程调用
1.5、user 微服务集成 Sentinel
1.5.1、引入 sentinel 依赖
1.5.2、在 application.yml 中配置 sentinel
1.5.3、测试
1.6、网关微服务
1.6.1、配置 pom.xml
1.6.2、创建 application.yml 并配置网关
1.6.3、创建启动类
1.6.4、测试
1.7、nacos 实现配置中心
1.7.1、建议
1.7.2、引入 nacos 配置中心依赖
1.7.3、在 nacos 上创建配置
一、SpringCloudAlibaba 项目完整搭建
1.1、初始化项目
1.1.1、创建工程
a)先创建一个空项目,名字自定义.

b)在刚刚的空项目下创建整个项目的父模块

c)父工程下的 src 可以删了,没用
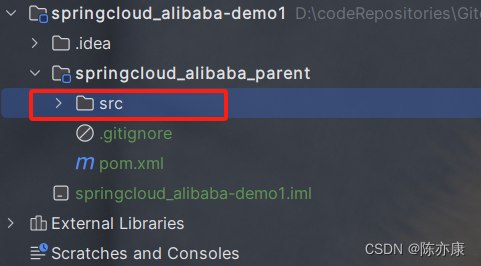
d)最后直接用 IDEA 打开空项目下的父工程(否则 Java 文件不生效)
1.1.2、配置父工程的 pom.xml
a)引入依赖如果没有语法提示,可以这样添加索引

b)配置依赖如下
<?xml version="1.0" encoding="UTF-8"?>
<project xmlns="http://maven.apache.org/POM/4.0.0"xmlns:xsi="http://www.w3.org/2001/XMLSchema-instance"xsi:schemaLocation="http://maven.apache.org/POM/4.0.0 http://maven.apache.org/xsd/maven-4.0.0.xsd"><modelVersion>4.0.0</modelVersion><groupId>org.example</groupId><artifactId>springcloud_alibaba_parent</artifactId><version>1.0-SNAPSHOT</version><!--配置版本信息--><properties><java.version>8</java.version><spring-cloud.version>Hoxton.SR8</spring-cloud.version><spring-cloud-alibaba.version>2.2.5.RELEASE</spring-cloud-alibaba.version></properties><!--parent--><parent><groupId>org.springframework.boot</groupId><artifactId>spring-boot-starter-parent</artifactId><version>2.3.9.RELEASE</version></parent><dependencies><!--基本上每个项目都需要日志--><dependency><groupId>org.projectlombok</groupId><artifactId>lombok</artifactId></dependency></dependencies><!--管理依赖规范--><dependencyManagement><dependencies><!-- springCloud --><dependency><groupId>org.springframework.cloud</groupId><artifactId>spring-cloud-dependencies</artifactId><version>${spring-cloud.version}</version><type>pom</type><scope>import</scope></dependency><!-- spring-cloud-alibaba --><dependency><groupId>com.alibaba.cloud</groupId><artifactId>spring-cloud-alibaba-dependencies</artifactId><version>${spring-cloud-alibaba.version}</version><type>pom</type><scope>import</scope></dependency></dependencies></dependencyManagement></project>
Ps:SpringCloud Alibaba 、SpringCloud、SpringBoot 各版本对应说明 如下
https://github.com/alibaba/spring-cloud-alibaba/wiki/%E7%89%88%E6%9C%AC%E8%AF%B4%E6%98%8E
1.1.3、创建子模块
在父工程下创建 4 个 module
- user:用户微服务(案例).
- product:商品微服务(案例).
- gateway:网关微服务.
- model:模组微服务,用来管理实体类的.

1.2、user 微服务
1.2.1、配置 pom.xml
用户微服务所需依赖如下(按需引入):
<dependencies><!--web--><dependency><groupId>org.springframework.boot</groupId><artifactId>spring-boot-starter-web</artifactId></dependency><!--nacos-discovery--><dependency><groupId>com.alibaba.cloud</groupId><artifactId>spring-cloud-starter-alibaba-nacos-discovery</artifactId></dependency><!--openFeign--><dependency><groupId>org.springframework.cloud</groupId><artifactId>spring-cloud-starter-openfeign</artifactId></dependency><!--sentinel--><dependency><groupId>com.alibaba.cloud</groupId><artifactId>spring-cloud-starter-alibaba-sentinel</artifactId></dependency></dependencies>
Ps:不要一开始就引入这么多,按需引入!尤其是 nacos config配置 依赖,如果引入不使用就会报错!
1.2.2、创建 application.yml 配置文件
配置端口号,以及 nacos 地址
server:port: 8090spring:application:name: usercloud:nacos:server-addr: localhost:8890
1.2.3、创建启动类
@SpringBootApplication
@EnableDiscoveryClient // nacos 服务发现(可以省略)
public class UserApplication {public static void main(String[] args) {SpringApplication.run(UserApplication.class, args);}}
启动 user 微服务,就可以看到 nacos 中存在该服务了

1.2.4、测试
创建 UserController,如下
@Slf4j
@RestController
@RequestMapping
public class UserController {@Value("${server.port}")private int port;@GetMapping("/user")public String user() {log.info("user ok!  port={}", port);return "user ok! port=" + port;}}
postman 测试结果如下:

1.3、product 微服务
1.3.1、配置 pom.xml
用户微服务所需依赖如下(按需引入):
<dependencies><!--web--><dependency><groupId>org.springframework.boot</groupId><artifactId>spring-boot-starter-web</artifactId></dependency><!--nacos-discovery--><dependency><groupId>com.alibaba.cloud</groupId><artifactId>spring-cloud-starter-alibaba-nacos-discovery</artifactId></dependency><!--openFeign--><dependency><groupId>org.springframework.cloud</groupId><artifactId>spring-cloud-starter-openfeign</artifactId></dependency><!--sentinel--><dependency><groupId>com.alibaba.cloud</groupId><artifactId>spring-cloud-starter-alibaba-sentinel</artifactId></dependency></dependencies>
Ps:不要一开始就引入这么多,按需引入!尤其是 nacos config配置 依赖,如果引入不使用就会报错!
1.3.2、创建 application.yml 配置文件
配置端口号,以及 nacos 地址
server:port: 8091spring:application:name: productcloud:nacos:server-addr: localhost:8890
1.3.3、创建启动类
@SpringBootApplication
@EnableDiscoveryClient //可省略
public class ProductApplication {public static void main(String[] args) {SpringApplication.run(ProductApplication.class, args);}}
启动 user 微服务,就可以看到 nacos 中存在该服务了

1.3.4、测试
创建 UserController,如下
@Slf4j
@RestController
@RequestMapping
public class UserController {@Value("${server.port}")private int port;@GetMapping("/user")public String user() {log.info("user ok!  port={}", port);return "user ok! port=" + port;}}
postman 测试结果如下:
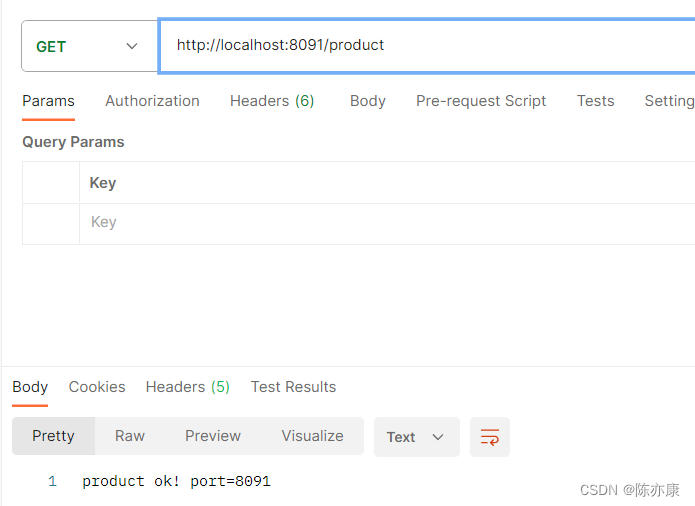
1.4、引入 OpenFeign,进行远程调用
1.4.1、引入依赖
在 user 微服务中引入 openfeign 依赖(这里只是举例,实际开发中,按需引入).
<!--openFeign--><dependency><groupId>org.springframework.cloud</groupId><artifactId>spring-cloud-starter-openfeign</artifactId></dependency>1.4.2、实现远程调用
在 user 微服务中创建一个 product 微服务 feign 接口
@FeignClient("product")
public interface ProductClient {@GetMapping("/product")String product();}
在启动类中开启 feign 客户端
@SpringBootApplication
@EnableDiscoveryClient // nacos 服务发现(可以省略)
@EnableFeignClients // 开启 openfeign 远程调用
public class UserApplication {public static void main(String[] args) {SpringApplication.run(UserApplication.class, args);}}
在 UserController 中进行远程调用.
@GetMapping("/user")public String user() {log.info("user ok! port={}", port);//远程调用 productString result = productClient.product();log.info("远程调用 result: {}", result);return "user ok! port=" + port;}
执行结果如下:

1.5、user 微服务集成 Sentinel
1.5.1、引入 sentinel 依赖
在 user 微服务中引入 sentinel 依赖
<!--sentinel--><dependency><groupId>com.alibaba.cloud</groupId><artifactId>spring-cloud-starter-alibaba-sentinel</artifactId></dependency>
1.5.2、在 application.yml 中配置 sentinel
server:port: 8090spring:application:name: usercloud:nacos:server-addr: localhost:8890sentinel:eager: true # 立即触发 sentineltransport:dashboard: localhost:8891
1.5.3、测试
a)打开 sentinel 控制台
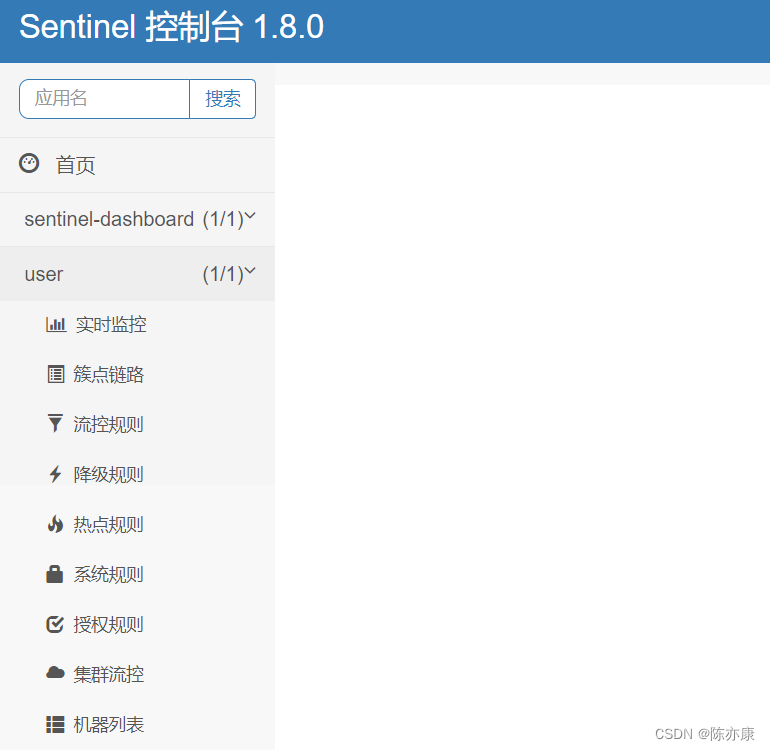
b)设置流控规则为 1秒 / 3次点击.

c)测试后限流生效
1.6、网关微服务
1.6.1、配置 pom.xml
<dependencies><!--gateway--><dependency><groupId>org.springframework.cloud</groupId><artifactId>spring-cloud-starter-gateway</artifactId></dependency><!--nacos--><dependency><groupId>com.alibaba.cloud</groupId><artifactId>spring-cloud-starter-alibaba-nacos-discovery</artifactId></dependency></dependencies>
1.6.2、创建 application.yml 并配置网关
server:port: 18080spring:application:name: gatewaycloud:nacos:server-addr: localhost:8890gateway:routes:- id: users_router# uri: http://localhost:9090 无负载均衡uri: lb://user # lb 表示负载均衡predicates:- Path=/user- id: products_router# uri: http://localhost:9091uri: lb://productpredicates:- Path=/product
另外,如果配置跨域,如下:
server:port: 18080spring:application:name: gatewaycloud:nacos:server-addr: localhost:8890gateway:routes:- id: users_router# uri: http://localhost:9090 无负载均衡uri: lb://user # lb 表示负载均衡predicates:- Path=/user- id: products_router# uri: http://localhost:9091uri: lb://productpredicates:- Path=/productglobalcors: # 全局的跨域处理add-to-simple-url-handler-mapping: true # 解决options请求被拦截问题corsConfigurations:'[/**]':allowedOrigins: # 允许哪些网站的跨域请求- "http://localhost:8090"- "http://www.cyk.com"allowedMethods: # 允许的跨域ajax/axios的请求方式- "GET"- "POST"- "DELETE"- "PUT"- "OPTIONS"allowedHeaders: "*" # 允许在请求中携带的头信息allowCredentials: true # 是否允许携带cookiemaxAge: 360000 # 这次跨域检测的有效期(为例减少性能损耗,在有效时间内,浏览器将不在发起询问,直接放行通过)
1.6.3、创建启动类
@SpringBootApplication
@EnableDiscoveryClient //(可省略)
public class GatewayApplication {public static void main(String[] args) {SpringApplication.run(GatewayApplication.class, args);}}
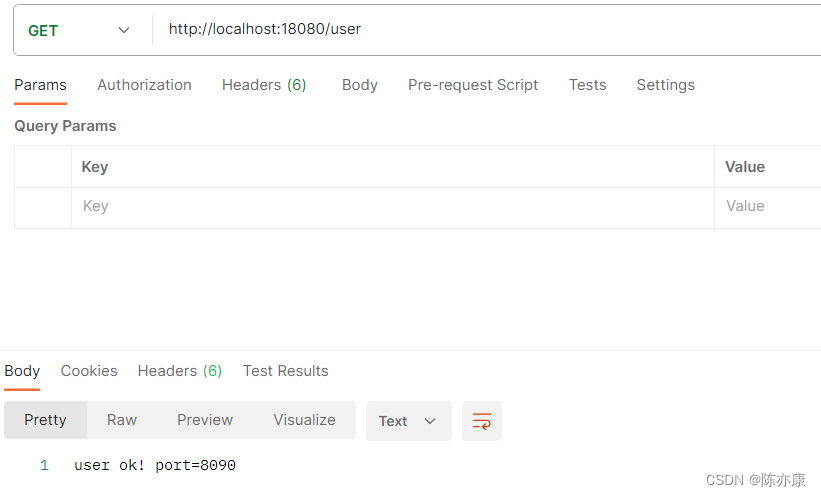
1.6.4、测试
通过网关访问 user 微服务和 product 微服务

1.7、nacos 实现配置中心
1.7.1、建议
一般来说,项目初期开发只用三个组件:nacos注册中心、gateway网关、openFeign声明式远程调用。
值得注意的是,前期项目开发完成之前,也不要使用 nacos 配置中心,原因如下:
- 因为一旦需要改什么配置,还需要打开 nacos 修改,容易分心,建议就先用项目中 application.yml 即可
- 引入依赖,但不配置,会报错.
1.7.2、引入 nacos 配置中心依赖
这里以 user 微服务为例,引入 nacos 配置中心依赖.
<!--nacos config--><dependency><groupId>com.alibaba.cloud</groupId><artifactId>spring-cloud-starter-alibaba-nacos-config</artifactId></dependency>
1.7.3、在 nacos 上创建配置
a)在 nacos 上创建一个命名空间

b)在配置管理中选择刚创建的命名空间 demo1
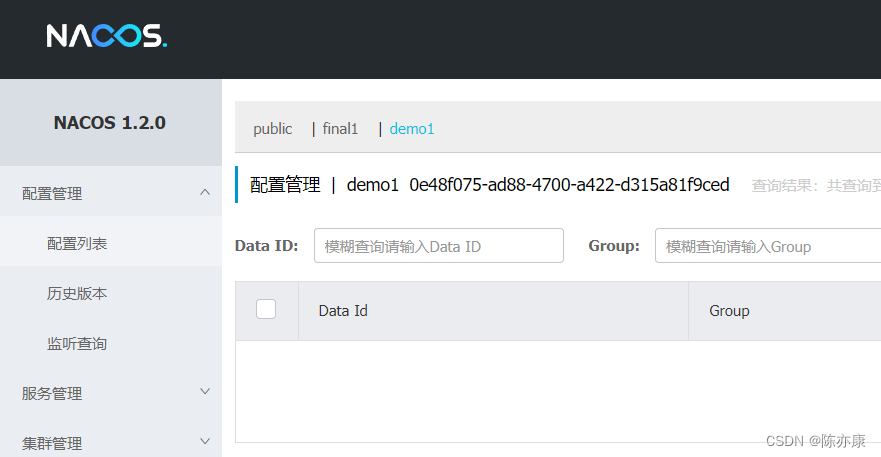
c)创建一个新的配置文件,接着就可以把 user 微服务 yml 中配置所有信息都放到 nacos 上进行统一管理,随后点击发布

Ps:配置内容不要有注释! 天坑!
d)创建 bootstrap.yml 配置文件,用来拉去 nacos 上的配置文件.
# 远端配置中心是谁
spring:cloud:nacos:server-addr: locahost:8890config:# 使用 nacos 中的哪个 namespacenamespace: 0e48f075-ad88-4700-a422-d315a81f9ced# 使用 nacos 中的哪个组group: user# 使用 nacos 中的哪个 dataId  1.name+文件后缀 2.文件名+env+后缀name: user-prodfile-extension: yml
Ps:原先的 application.yml 就可以删除了.

这篇关于SpringCloudAlibaba - 项目完整搭建(Nacos + OpenFeign + Getway + Sentinel)的文章就介绍到这儿,希望我们推荐的文章对编程师们有所帮助!


