本文主要是介绍springboot项目图片上传及图片路径分析(jar包形式),希望对大家解决编程问题提供一定的参考价值,需要的开发者们随着小编来一起学习吧!
本文仅为记录学习轨迹,如有侵权,联系删除
一、图片路径分析
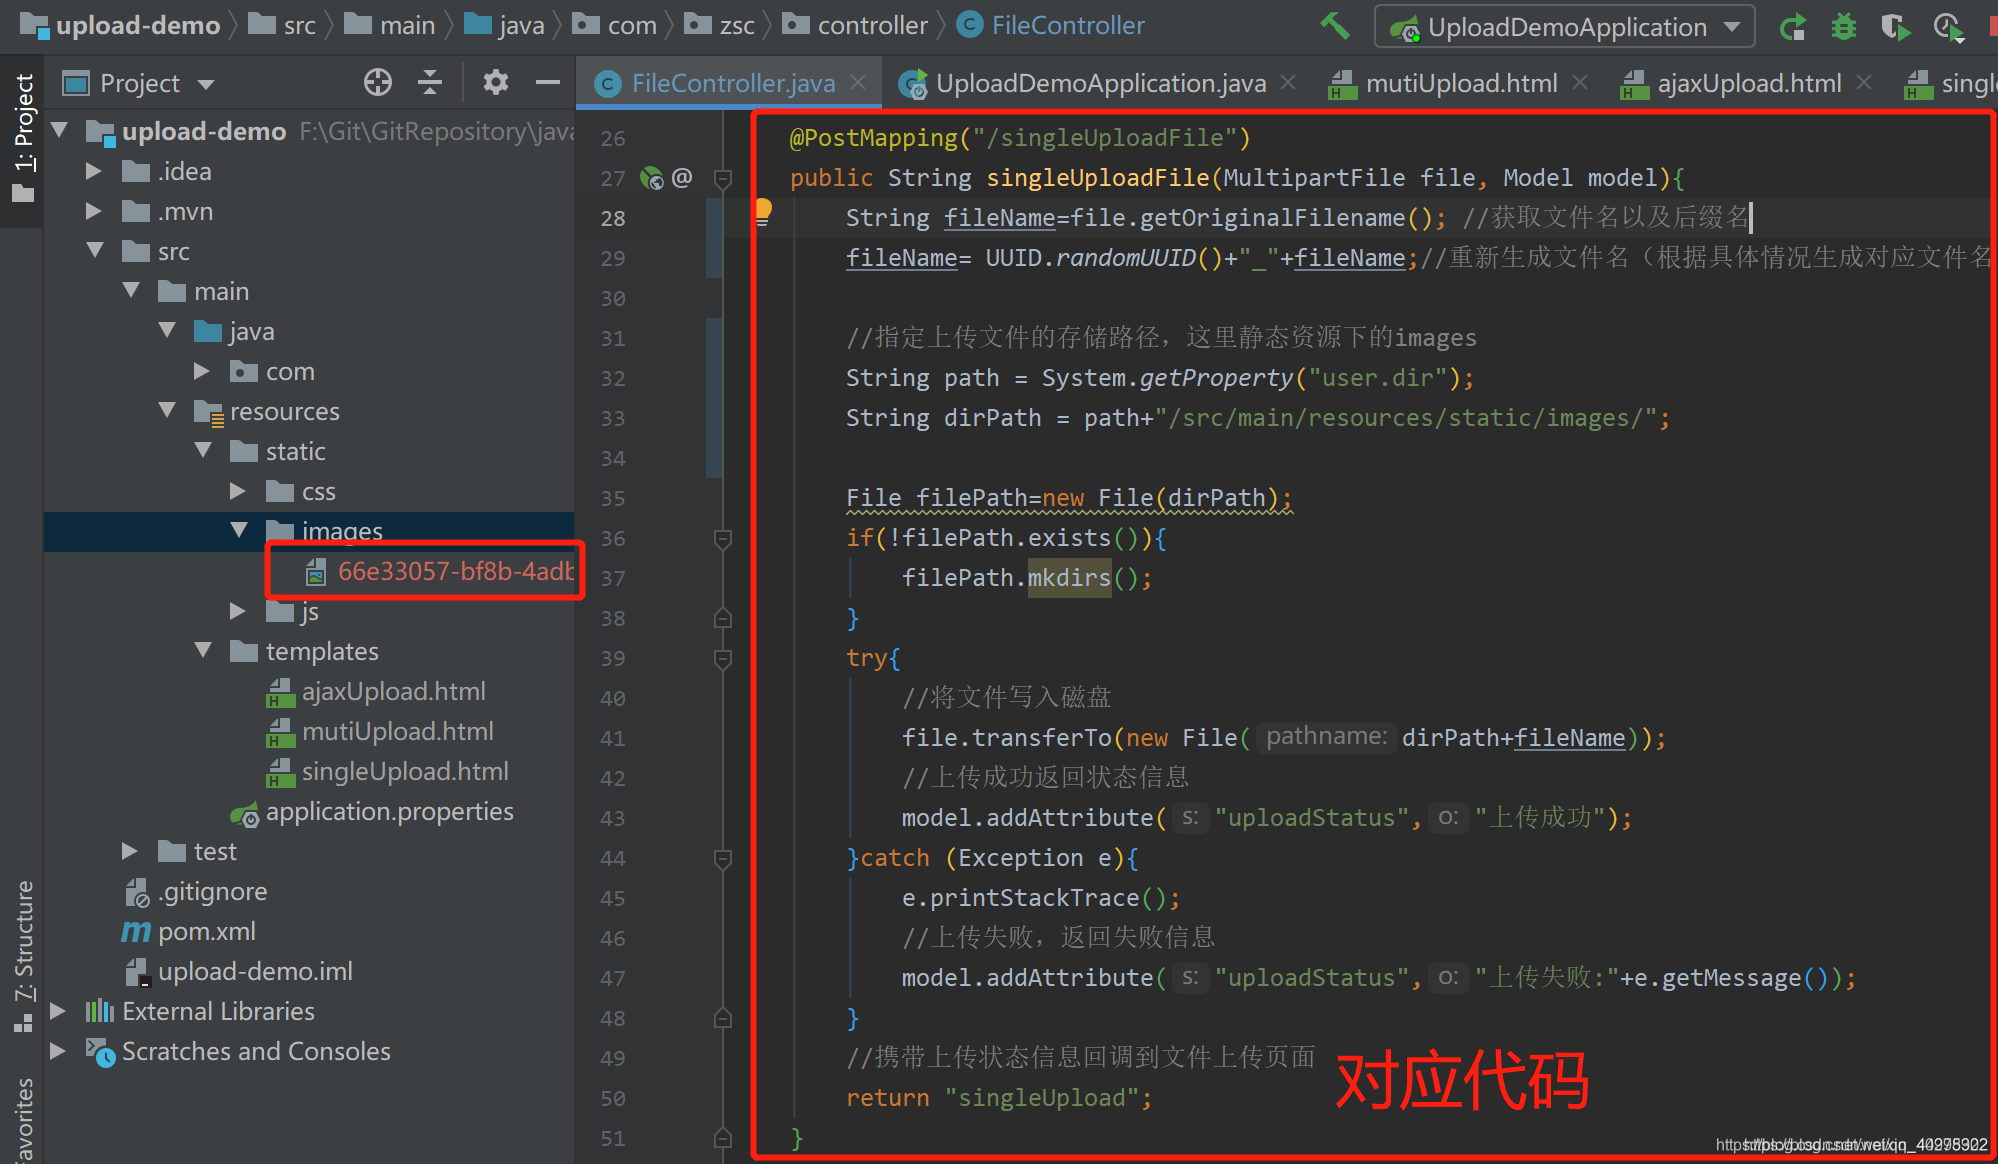
springboot项目在还没打包时,很多人喜欢把图片上传后,保存在项目的静态资源下,就像下面的图片那样

这样好像看来没问题,在还没打成jar包时,在idea启动运行正常,图片也确实存储到了静态资源下的images文件夹中,但是一旦打包成jar包后,运行jar包时,发现图片存储路径出错了,图片并不会存储到静态资源下的images文件夹中,而是到服务器的用户下的路径那里去,如果把打包后的jar包在自己电脑运行,按照上面的代码,图片就会存储到C盘下对应的电脑用户那里

这是因为打包后会生成一个jar包,这个jar可以解压,发现里面的classes就打包有静态资源,而且上面的代码String path = System.getProperty(“user.dir”);在idea启动运行时会获取到项目的根路径,所以在idea启动运行时可以将图片保存在项目下的images文件夹里面,而打包成一个jar后,用java -jar jar包名称启动时,获取的确是C盘下的用户路径,而不会获取到jar所在的目录,跟不会获取到jar里面的classes文件的路径

这种获取图片路径并存储的方式肯定不是我想要的,我想要的效果是,即使打成jar包后,可以在jar包所在目录下自动生成一个文件夹,上传的图片就保存在这个文件夹中,这样就不论你jar包部署在哪里,都可以获取到jar所在根目录,并自动生成一个文件夹保存上传的图片

这样的话部署就方便多了
二、实现图片上传
(1)单文件上传(非异步)
我们知道项目打包后的jar包都在target文件夹里面,也就是说target所在文件夹才是jar包所在的路径,所以,图片存储的位置就应该在target里面,这样在打成jar包后,就可以获取jar包所在目录,实现上面分析的功能
前端代码
<!DOCTYPE html>
<html lang="en" xmlns:th="http://www.thymeleaf.org">
<head><meta charset="UTF-8"><meta http-equiv="Content-Type" content="text/html;charset=UTF-8"><title>单文件上传</title><link th:href="@{/css/bootstrap.min.css}" rel="stylesheet"><script th:src="@{/js/jquery.min.js}"></script>
</head>
<body>
<div th:if="${uploadStatus}" style="color: red" th:text="${uploadStatus}">上传成功</div>
<form th:action="@{/singleUploadFile}" method="post" enctype="multipart/form-data"><div class="form-group"><label>单文件上传</label><input class="form-control-file" type="file" name="file" required="required" /></div><input id="submit" type="submit" value="上传" />
</form>
</body>
</html>
后端对应控制器的代码
//来到单文件上传页面(非异步)@GetMapping("/toSingleUpload")public String singleUpload() throws FileNotFoundException {return "singleUpload";}//上传图片(非异步)@PostMapping("/singleUploadFile")public String singleUploadFile(MultipartFile file, Model model){String fileName=file.getOriginalFilename(); //获取文件名以及后缀名//fileName= UUID.randomUUID()+"_"+fileName;//重新生成文件名(根据具体情况生成对应文件名)//获取jar包所在目录ApplicationHome h = new ApplicationHome(getClass());File jarF = h.getSource();//在jar包所在目录下生成一个upload文件夹用来存储上传的图片String dirPath = jarF.getParentFile().toString()+"/upload/";System.out.println(dirPath);File filePath=new File(dirPath);if(!filePath.exists()){filePath.mkdirs();}try{//将文件写入磁盘file.transferTo(new File(dirPath+fileName));//上传成功返回状态信息model.addAttribute("uploadStatus","上传成功");}catch (Exception e){e.printStackTrace();//上传失败,返回失败信息model.addAttribute("uploadStatus","上传失败:"+e.getMessage());}//携带上传状态信息回调到文件上传页面return "singleUpload";}
在idea启动运行,图片保存在target下的upload,打成jar包后运行,则会在jar所在目录下自动生成upload文件存储上传的图片


实现了图片的上传后,如何获取图片,如果没法获取那上传图片就没意思了,假设我将jar放在路径"E:\文件上传“,图片就在文件夹"E:\文件上传\upload\1.png"里面,如果用这种方式获取图片是不行的,首先是访问不了项目外的资源,其次这个路径应该是动态的,随着jar包的路径变动的,为了实现这两点就需要做个视图解析器

这样访问”/upload/“就会自动访问到jar包下的upload文件夹,也就可以访问图片了
<!DOCTYPE html>
<html lang="en" xmlns:th="http://www.thymeleaf.org">
<head><meta charset="UTF-8"><title>获取图片</title>
</head>
<body><!--这样访问”/upload/“就会自动访问到jar包下的upload文件夹,也就可以访问图片了--><img src="/upload/1.png"></body>
</html>

这样不论是在idea里运行还是打包运行,都可以完美的获取上传和获取图片
(2)单文件上传(异步)
在(1)非异步单文件上传的基础,再实现异步单文件上传
前端代码
<!DOCTYPE html>
<html lang="en" xmlns:th="http://www.thymeleaf.org">
<head><meta charset="UTF-8"><meta http-equiv="Content-Type" content="text/html;charset=UTF-8"><title>无刷文件上传</title><link th:href="@{/css/bootstrap.min.css}" rel="stylesheet"><script th:src="@{/js/jquery.min.js}"></script>
</head>
<body>
<div th:if="${msg}" style="color: red" th:text="${msg}">上传成功</div><form id="form" th:action="@{/ajaxUploadFile}" ><div class="form-group"><label>无刷文件上传</label><input type='file' style='margin: 5px;' name='files' required='required'><input id="submit" type="button" value="上传" onclick="ajaxUpload()" style="margin-top: 10px"/></div></form><script type="text/javascript">function ajaxUpload() {var form=new FormData();//获取选择的文件$.each($('input[name="files"]'),function (index,item) {form.append("files",item.files[0])});//发送异步请求$.ajax({method:'post',url:'/ajaxUploadFile',data:form,processData: false,contentType:false,success:function (res) {//成功返回触发的方法alert(res.msg);},//请求失败触发的方法error:function () {console.log("ajax请求失败");}})}</script>
</body>
</html>
后端代码
//来到单文件上传页面(异步)@GetMapping("/ajaxUpload")public String ajaxUpload(){return "ajaxUpload";}//文件上传管理(异步)@PostMapping("/ajaxUploadFile")@ResponseBodypublic Map ajaxUploadFile(MultipartFile[] files){Map<String,Object> map=new HashMap<>();for(MultipartFile file:files){//获取文件名以及后缀名String fileName=file.getOriginalFilename();//获取jar包所在目录ApplicationHome h = new ApplicationHome(getClass());File jarF = h.getSource();//在jar包所在目录下生成一个upload文件夹用来存储上传的图片String dirPath = jarF.getParentFile().toString()+"/upload/";System.out.println(dirPath);File filePath=new File(dirPath);if(!filePath.exists()){filePath.mkdirs();}try{//将文件写入磁盘file.transferTo(new File(dirPath+fileName));//文件上传成功返回状态信息map.put("msg","上传成功!");}catch (Exception e){e.printStackTrace();//上传失败,返回失败信息map.put("msg","上传失败!");}}//携带上传状态信息回调到文件上传页面return map;}


获取图片的方式参考(1)单文件上传(非异步)
三、总结
(1)图片不能存储在项目里面的静态资源里面
(2)图片存储的位置在jar包所在目录,没打jar包时是target下的目录位置,打jar包后是jar所在目录(动态)
(3)图片存储路径的获取用以下代码,获取的路径是target的目录
//获取jar包所在目录ApplicationHome h = new ApplicationHome(getClass());File jarF = h.getSource();//在jar包所在目录下生成一个upload文件夹用来存储上传的图片String dirPath = jarF.getParentFile().toString()+"/upload/";System.out.println(dirPath);
四、更新配置文件
更新了部署环境的判断,jar包部署可以有Linux环境和window环境,下面增加了环境的判断
@Configuration  //必须加上
public class MyWebMvcConfig extends WebMvcConfigurerAdapter {//将jar文件下的对应静态资源文件路径对应到磁盘的路径(根据个人的情况修改"file:static/"的static的值@Overridepublic void addResourceHandlers(ResourceHandlerRegistry registry) {ApplicationHome h = new ApplicationHome(getClass());File jarF = h.getSource();String dirPath = jarF.getParentFile().toString()+"/upload/";String os = System.getProperty("os.name");System.out.println(os);if (os.toLowerCase().startsWith("win")) {  //如果是Windows系统registry.addResourceHandler("/upload/**").addResourceLocations("file:"+dirPath);System.out.println("file:" + dirPath);} else {  //linux 和mac
//            registry.addResourceHandler("/upload/**") //虚拟路劲
//                    .addResourceLocations("file:" + System.getProperty("user.dir") + "/upload/");//jar 同级目录
//            System.out.println("file:" + System.getProperty("user.dir") + "/upload/");registry.addResourceHandler("/upload/**").addResourceLocations("file:"+dirPath);System.out.println("file:" + dirPath);}}}
转自https://blog.csdn.net/qq_40298902/article/details/106609090
这篇关于springboot项目图片上传及图片路径分析(jar包形式)的文章就介绍到这儿,希望我们推荐的文章对编程师们有所帮助!


