本文主要是介绍Vue2实现掷色子(多个色子),希望对大家解决编程问题提供一定的参考价值,需要的开发者们随着小编来一起学习吧!
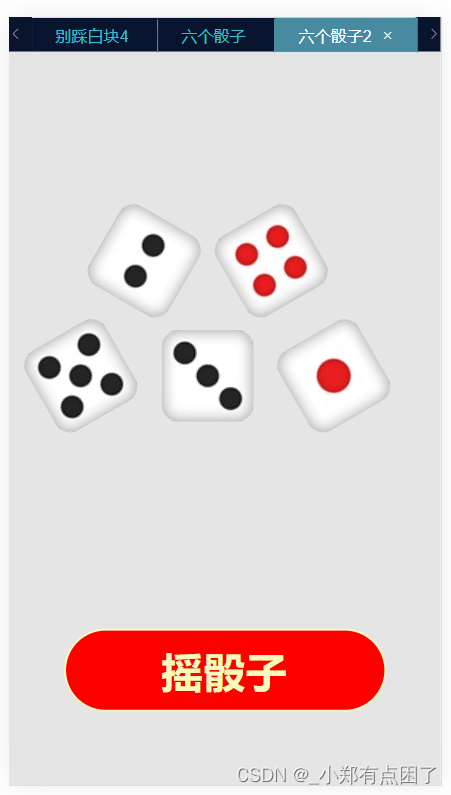
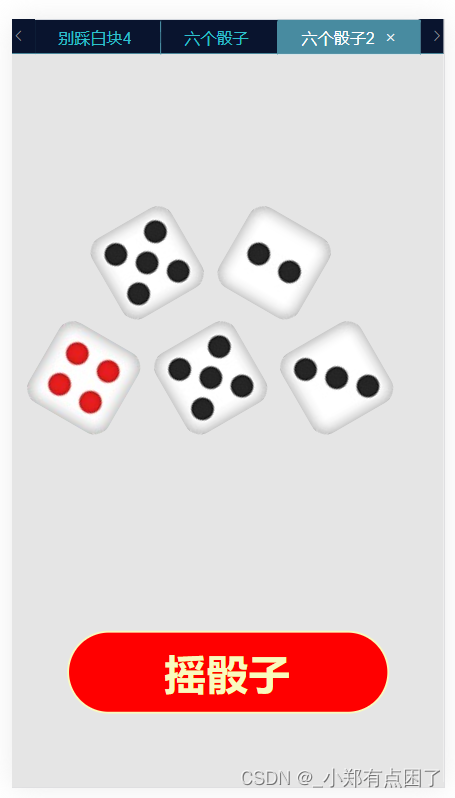
效果图:
代码实现:
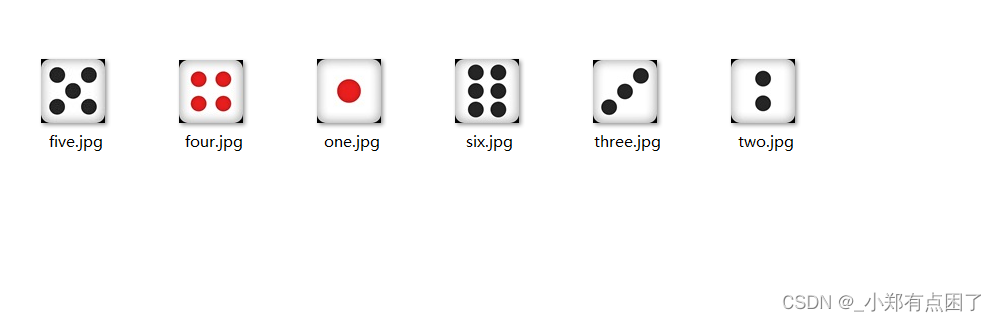
就是将每个色子独立起来,然后同时产生5个随机数,然后每个筛子取随机数对应的色子点数图片
图片文件
<template><div class="home" v-cloak><!-- 骰子区域 --><div class="dice"><div class="dice-box1"><div class="wraps"><div v-for="(ite,idx) in imgUrl" :key="idx" class="box" v-show="bannerIndex==idx"><img :src="ite.img"></div><div v-for="(ite,idx) in imgUrl" :key="idx" class="box" v-show="bannerIndex2==idx"><img  :src="ite.img"></div><!-- <div v-for="(ite,idx) in imgUrl" :key="idx" class="box" v-show="bannerIndex3==idx"><img  :src="ite.img"></div> --></div><div class="wraps"><div v-for="(ite,idx) in imgUrl" :key="idx" class="box" v-show="bannerIndex4==idx"><img  :src="ite.img"></div><div v-for="(ite,idx) in imgUrl" :key="idx" class="box" v-show="bannerIndex5==idx"><img  :src="ite.img"></div><div v-for="(ite,idx) in imgUrl" :key="idx" class="box" v-show="bannerIndex6==idx"><img  :src="ite.img"></div></div></div></div><!-- 摇骰子按钮 --><div class="dice-start" @click="handlestart"><span>摇骰子</span></div></div>
</template><script>export default {name: 'Home',components: {},data() {return {imgUrl: [ ],bannerIndex: 1,bannerIndex2: 3,bannerIndex3: 5,bannerIndex4: 4,bannerIndex5: 2,bannerIndex6: 0,setInter1: null, // 定时器mask: false,showNa: true, //防抖}},created(){this.imgUrl = []let arr = ['one','two','three','four','five','six']arr.forEach((item,index)=>{this.imgUrl.push({id:index+1,img: require(`./img/${item}.jpg`)})})console.log('夫斯基大街',this.imgUrl)},methods: {handlestart() { //开始this.showNa = false //防抖this.setInter1 = setInterval(() => {this.bannerIndex++this.bannerIndex2++this.bannerIndex3++this.bannerIndex4++this.bannerIndex5++this.bannerIndex6++if (this.bannerIndex == this.imgUrl.length) {this.bannerIndex = 0this.bannerIndex2 = 0this.bannerIndex3 = 0this.bannerIndex4 = 0this.bannerIndex5 = 0this.bannerIndex6 = 0}},100)setTimeout(() => {clearInterval(this.setInter1) // 先将已有的计时器清除//随机1-6点数this.bannerIndex = Math.round(Math.random() * 5);this.bannerIndex2 = Math.round(Math.random() * 5);this.bannerIndex3 = Math.round(Math.random() * 5);this.bannerIndex4 = Math.round(Math.random() * 5);this.bannerIndex5 = Math.round(Math.random() * 5);this.bannerIndex6 = Math.round(Math.random() * 5);setTimeout(() => {this.showNa = truethis.mask = true}, 300)}, 1000)},maskClose() { //关闭中奖信息this.mask = false}}}
</script><style lang="scss" scoped>* {margin: 0;padding: 0;}.home {position: relative;height: 100vh;overflow: hidden;background: #e5e5e5;background-size: cover;}[v-cloak] {display: none !important;}.dice {width: 100%;margin: 142px auto 0;.dice-box1 {display: flex;flex-direction: column;justify-content: center;align-items: center;.box {width: 5rem;height: 5rem;position: relative;&:nth-child(n+1){margin-right: 30px;}&:nth-child(n){transform: rotate(60deg);}&:nth-child(2n){transform: rotate(30deg);}&:nth-child(3n){transform: rotate(90deg);}&:nth-child(4n){transform: rotate(120deg);}&:nth-child(5n){transform: rotate(240deg);}&:nth-child(6n){transform: rotate(300deg);}img {width: 5rem;height: 5rem;border-radius: 15px;position: absolute;}}.wraps{width: 100%;display: flex;justify-content: center;&:first-child{margin-bottom: 20px;}}}}.dice-start {background: red;width: 280px;height: 72px;border: 2px solid #f9fabe;border-radius: 38px;margin: 180px auto 0;display: flex;justify-content: center;align-items: center;img {width: 42px;height: 42px;margin-right: 15px;}span {font-size: 36px;font-family: PingFang SC, PingFang SC-Regular;font-weight: bold;color: #f9fabe;letter-spacing: 0.6px;}}</style>
这篇关于Vue2实现掷色子(多个色子)的文章就介绍到这儿,希望我们推荐的文章对编程师们有所帮助!


