Android之测试Jave接口访问硬件服务

2023-10-31 21:32

本文主要是介绍Android之测试Jave接口访问硬件服务,希望对大家解决编程问题提供一定的参考价值,需要的开发者们随着小编来一起学习吧!

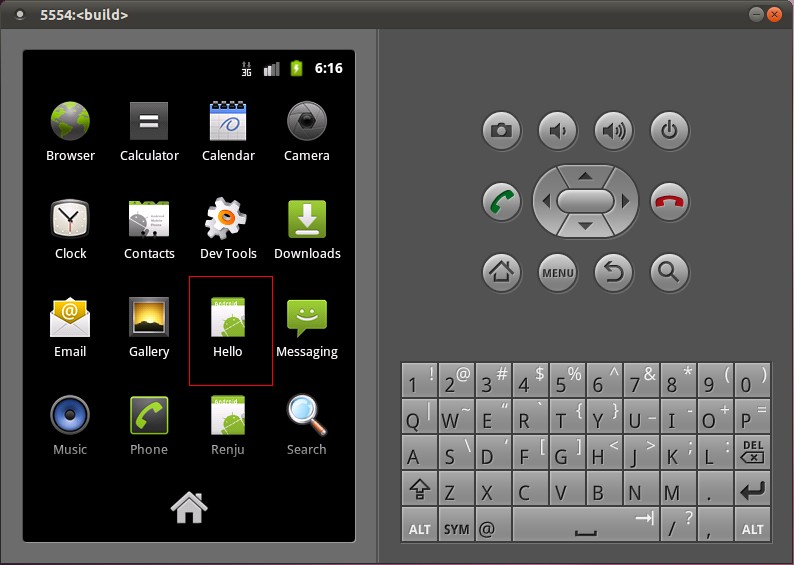
我们在Android系统增加硬件服务的目的是为了让应用层的APP能够通过Java接口来访问硬件服务。那么, APP如何通过Java接口来访问Application Frameworks层提供的硬件服务呢?在这一篇文章中,我们将在Android系统的应用层增加一个内置的应用程序,这个内置的应用程序通过ServiceManager接口获取指定的服务,然后通过这个服务来获得硬件服务。

        一. 参照在Ubuntu上为Android系统的Application Frameworks层增加硬件访问服务一文,在Application Frameworks层定义好自己的硬件服务HelloService,并提供IHelloService接口提供访问服务。

       二. 为了方便开发,我们可以在IDE环境下使用Android SDK来开发Android应用程序。开发完成后,再把程序源代码移植到Android源代码工程目录中。使用Eclipse的Android插件ADT创建Android工程很方便,这里不述,可以参考网上其它资料。工程名称为Hello,下面主例出主要文件:

    主程序是src/shy/luo/hello/Hello.java:

[java]  view plain copy 在CODE上查看代码片 派生到我的代码片
  1. package shy.luo.hello;  
  2.   
  3. import shy.luo.hello.R;  
  4. import android.app.Activity;  
  5. import android.os.ServiceManager;  
  6. import android.os.Bundle;  
  7. import android.os.IHelloService;  
  8. import android.os.RemoteException;  
  9. import android.util.Log;  
  10. import android.view.View;  
  11. import android.view.View.OnClickListener;  
  12. import android.widget.Button;  
  13. import android.widget.EditText;  
  14.   
  15. public class Hello extends Activity implements OnClickListener {  
  16.     private final static String LOG_TAG = "shy.luo.renju.Hello";  
  17.       
  18.     private IHelloService helloService = null;  
  19.   
  20.     private EditText valueText = null;  
  21.     private Button readButton = null;  
  22.     private Button writeButton = null;  
  23.     private Button clearButton = null;  
  24.       
  25.     /** Called when the activity is first created. */  
  26.     @Override  
  27.     public void onCreate(Bundle savedInstanceState) {  
  28.         super.onCreate(savedInstanceState);  
  29.         setContentView(R.layout.main);  
  30.   
  31.     helloService = IHelloService.Stub.asInterface(  
  32.         ServiceManager.getService("hello"));  
  33.           
  34.         valueText = (EditText)findViewById(R.id.edit_value);  
  35.         readButton = (Button)findViewById(R.id.button_read);  
  36.         writeButton = (Button)findViewById(R.id.button_write);  
  37.         clearButton = (Button)findViewById(R.id.button_clear);  
  38.   
  39.     readButton.setOnClickListener(this);  
  40.     writeButton.setOnClickListener(this);  
  41.     clearButton.setOnClickListener(this);  
  42.           
  43.         Log.i(LOG_TAG, "Hello Activity Created");  
  44.     }  
  45.       
  46.     @Override  
  47.     public void onClick(View v) {  
  48.         if(v.equals(readButton)) {  
  49.         try {  
  50.                 int val = helloService.getVal();  
  51.                 String text = String.valueOf(val);  
  52.                 valueText.setText(text);  
  53.         } catch (RemoteException e) {  
  54.             Log.e(LOG_TAG, "Remote Exception while reading value from device.");  
  55.         }         
  56.         }  
  57.         else if(v.equals(writeButton)) {  
  58.         try {  
  59.                 String text = valueText.getText().toString();  
  60.                 int val = Integer.parseInt(text);  
  61.             helloService.setVal(val);  
  62.         } catch (RemoteException e) {  
  63.             Log.e(LOG_TAG, "Remote Exception while writing value to device.");  
  64.         }  
  65.         }  
  66.         else if(v.equals(clearButton)) {  
  67.             String text = "";  
  68.             valueText.setText(text);  
  69.         }  
  70.     }  
  71. }  
    程序通过ServiceManager.getService("hello")来获得HelloService,接着通过IHelloService.Stub.asInterface函数转换为IHelloService接口。其中,服务名字“hello”是系统启动时加载HelloService时指定的,而IHelloService接口定义在android.os.IHelloService中,具体可以参考 在Ubuntu上为Android系统的Application Frameworks层增加硬件访问服务 一文。这个程序提供了简单的读定自定义硬件有寄存器val的值的功能,通过IHelloService.getVal和IHelloService.setVal两个接口实现。

界面布局文件res/layout/main.xml:
[html]  view plain copy 在CODE上查看代码片 派生到我的代码片
  1. <?xml version="1.0" encoding="utf-8"?>  
  2.     <LinearLayout xmlns:android="http://schemas.android.com/apk/res/android"  
  3.        android:orientation="vertical"  
  4.        android:layout_width="fill_parent"  
  5.        android:layout_height="fill_parent">  
  6.        <LinearLayout  
  7.           android:layout_width="fill_parent"  
  8.           android:layout_height="wrap_content"  
  9.           android:orientation="vertical"   
  10.           android:gravity="center">  
  11.           <TextView   
  12.              android:layout_width="wrap_content"  
  13.              android:layout_height="wrap_content"   
  14.              android:text="@string/value">  
  15.           </TextView>  
  16.           <EditText   
  17.              android:layout_width="fill_parent"  
  18.              android:layout_height="wrap_content"   
  19.              android:id="@+id/edit_value"  
  20.              android:hint="@string/hint">  
  21.           </EditText>  
  22.        </LinearLayout>  
  23.        <LinearLayout  
  24.           android:layout_width="fill_parent"  
  25.           android:layout_height="wrap_content"  
  26.           android:orientation="horizontal"   
  27.           android:gravity="center">  
  28.           <Button   
  29.              android:id="@+id/button_read"  
  30.              android:layout_width="wrap_content"  
  31.              android:layout_height="wrap_content"  
  32.              android:text="@string/read">  
  33.           </Button>  
  34.           <Button   
  35.              android:id="@+id/button_write"  
  36.              android:layout_width="wrap_content"  
  37.              android:layout_height="wrap_content"  
  38.              android:text="@string/write">  
  39.           </Button>  
  40.           <Button   
  41.              android:id="@+id/button_clear"  
  42.              android:layout_width="wrap_content"  
  43.              android:layout_height="wrap_content"  
  44.              android:text="@string/clear">  
  45.           </Button>  
  46.        </LinearLayout>  
  47.     </LinearLayout>  
字符串文件res/values/strings.xml:
[html]  view plain copy 在CODE上查看代码片 派生到我的代码片
  1. <?xml version="1.0" encoding="utf-8"?>  
  2.     <resources>  
  3.        <string name="app_name">Hello</string>  
  4.        <string name="value">Value</string>  
  5.        <string name="hint">Please input a value...</string>  
  6.        <string name="read">Read</string>  
  7.        <string name="write">Write</string>  
  8.        <string name="clear">Clear</string>  
  9.     </resources>  
程序描述文件AndroidManifest.xml:
[html]  view plain copy 在CODE上查看代码片 派生到我的代码片
  1. <?xml version="1.0" encoding="utf-8"?>  
  2.     <manifest xmlns:android="http://schemas.android.com/apk/res/android"  
  3.       package="shy.luo.hello"  
  4.       android:versionCode="1"  
  5.       android:versionName="1.0">  
  6.       <application android:icon="@drawable/icon" android:label="@string/app_name">  
  7.         <activity android:name=".Hello"  
  8.                   android:label="@string/app_name">  
  9.             <intent-filter>  
  10.                 <action android:name="android.intent.action.MAIN" />  
  11.                 <category android:name="android.intent.category.LAUNCHER" />  
  12.             </intent-filter>  
  13.         </activity>  
  14.       </application>  
  15.     </manifest>   
三. 将Hello目录拷贝至packages/experimental目录,新增Android.mk文件:
     USER-NAME@MACHINE-NAME:~/Android/packages/experimental$ vi Android.mk
Android.mk的文件内容如下:
LOCAL_PATH:= $(call my-dir)
include $(CLEAR_VARS)
LOCAL_MODULE_TAGS := optional
LOCAL_SRC_FILES := $(call all-subdir-java-files)
LOCAL_PACKAGE_NAME := Hello
include $(BUILD_PACKAGE)
四. 编译:
USER-NAME@MACHINE-NAME:~/Android$ mmm  packages/experimental/Hello
编译成功后,便可以在out/target/product/generic/system/app目录下看到Hello.apk文件了。
    五. 重新打包系统镜像文件system.img:
USER-NAME@MACHINE-NAME:~/Android$ make snod
    重新打包后的system.img文件就内置了Hello.apk文件了。
六. 运行Android模拟器:
USER-NAME@MACHINE-NAME:~/Android$ emulator -kernel kernel/common/arch/arm/boot/zImage &
在Home Screen中可以看到Hello应用程序:

打开Hello应用程序:


点击Read按钮,可以从HelloService中读取硬件寄存器val的值;点击Clear按钮,可以清空文本框的值;在文本框中输入一个数值,再点击Write按钮,便可以将这个值写入到硬件寄存器val中去,可以再次点击Read按钮来验证是否正确写入了值。
至此,我们就完整地学习了在Android的Linux内核空间添加硬件驱动程序、在Android的硬件抽象层添加硬件接口、在Android的Application Frameworks层提供硬件服务以及在Android的应用层调用硬件服务的整个过程了,希望能为读者进入Android系统提供入门帮助。重新学习整个过程,请参考 Android硬件抽象层(HAL)概要介绍和学习计划。

这篇关于Android之测试Jave接口访问硬件服务的文章就介绍到这儿,希望我们推荐的文章对编程师们有所帮助!


http://www.chinasem.cn/article/318276

相关文章

Android Mainline基础简介

《AndroidMainline基础简介》AndroidMainline是通过模块化更新Android核心组件的框架,可能提高安全性,本文给大家介绍AndroidMainline基础简介,感兴趣的朋... 目录关键要点什么是 android Mainline?Android Mainline 的工作原理关键

如何解决idea的Module:‘:app‘platform‘android-32‘not found.问题

《如何解决idea的Module:‘:app‘platform‘android-32‘notfound.问题》:本文主要介绍如何解决idea的Module:‘:app‘platform‘andr... 目录idea的Module:‘:app‘pwww.chinasem.cnlatform‘android-32

使用Node.js制作图片上传服务的详细教程

《使用Node.js制作图片上传服务的详细教程》在现代Web应用开发中,图片上传是一项常见且重要的功能,借助Node.js强大的生态系统,我们可以轻松搭建高效的图片上传服务,本文将深入探讨如何使用No... 目录准备工作搭建 Express 服务器配置 multer 进行图片上传处理图片上传请求完整代码示例

Android实现打开本地pdf文件的两种方式

《Android实现打开本地pdf文件的两种方式》在现代应用中,PDF格式因其跨平台、稳定性好、展示内容一致等特点,在Android平台上,如何高效地打开本地PDF文件,不仅关系到用户体验,也直接影响... 目录一、项目概述二、相关知识2.1 PDF文件基本概述2.2 android 文件访问与存储权限2.

Spring LDAP目录服务的使用示例

《SpringLDAP目录服务的使用示例》本文主要介绍了SpringLDAP目录服务的使用示例... 目录引言一、Spring LDAP基础二、LdapTemplate详解三、LDAP对象映射四、基本LDAP操作4.1 查询操作4.2 添加操作4.3 修改操作4.4 删除操作五、认证与授权六、高级特性与最佳

Android Studio 配置国内镜像源的实现步骤

《AndroidStudio配置国内镜像源的实现步骤》本文主要介绍了AndroidStudio配置国内镜像源的实现步骤,文中通过示例代码介绍的非常详细,对大家的学习或者工作具有一定的参考学习价值,... 目录一、修改 hosts,解决 SDK 下载失败的问题二、修改 gradle 地址,解决 gradle

在Android平台上实现消息推送功能

《在Android平台上实现消息推送功能》随着移动互联网应用的飞速发展,消息推送已成为移动应用中不可或缺的功能,在Android平台上,实现消息推送涉及到服务端的消息发送、客户端的消息接收、通知渠道(... 目录一、项目概述二、相关知识介绍2.1 消息推送的基本原理2.2 Firebase Cloud Me

Android中Dialog的使用详解

《Android中Dialog的使用详解》Dialog(对话框)是Android中常用的UI组件,用于临时显示重要信息或获取用户输入,本文给大家介绍Android中Dialog的使用,感兴趣的朋友一起... 目录android中Dialog的使用详解1. 基本Dialog类型1.1 AlertDialog(

go中空接口的具体使用

《go中空接口的具体使用》空接口是一种特殊的接口类型,它不包含任何方法,本文主要介绍了go中空接口的具体使用,具有一定的参考价值,感兴趣的可以了解一下... 目录接口-空接口1. 什么是空接口?2. 如何使用空接口?第一,第二,第三,3. 空接口几个要注意的坑坑1:坑2:坑3:接口-空接口1. 什么是空接

Android Kotlin 高阶函数详解及其在协程中的应用小结

《AndroidKotlin高阶函数详解及其在协程中的应用小结》高阶函数是Kotlin中的一个重要特性,它能够将函数作为一等公民(First-ClassCitizen),使得代码更加简洁、灵活和可... 目录1. 引言2. 什么是高阶函数?3. 高阶函数的基础用法3.1 传递函数作为参数3.2 Lambda