本文主要是介绍【运维知识进阶篇】用阿里云部署kod可道云网盘(配置Redis+MySQL+NAS+OSS),希望对大家解决编程问题提供一定的参考价值,需要的开发者们随着小编来一起学习吧!
这篇文章继续以kod可道云网盘为例,带大家熟悉阿里云产品,本篇文章介绍Redis,MySQL,NAS,OSS,话不多说,直接开始。
目录
Redis
一、购买Reids主从版
二、配置kod免秘钥连接Redis内网接口
三、申请公网访问连接
四、创建用户名密码
MySQL
一、购买msyql主从版
二、配置用户名密码
三、通过ECS主机测试和mysql的连通性
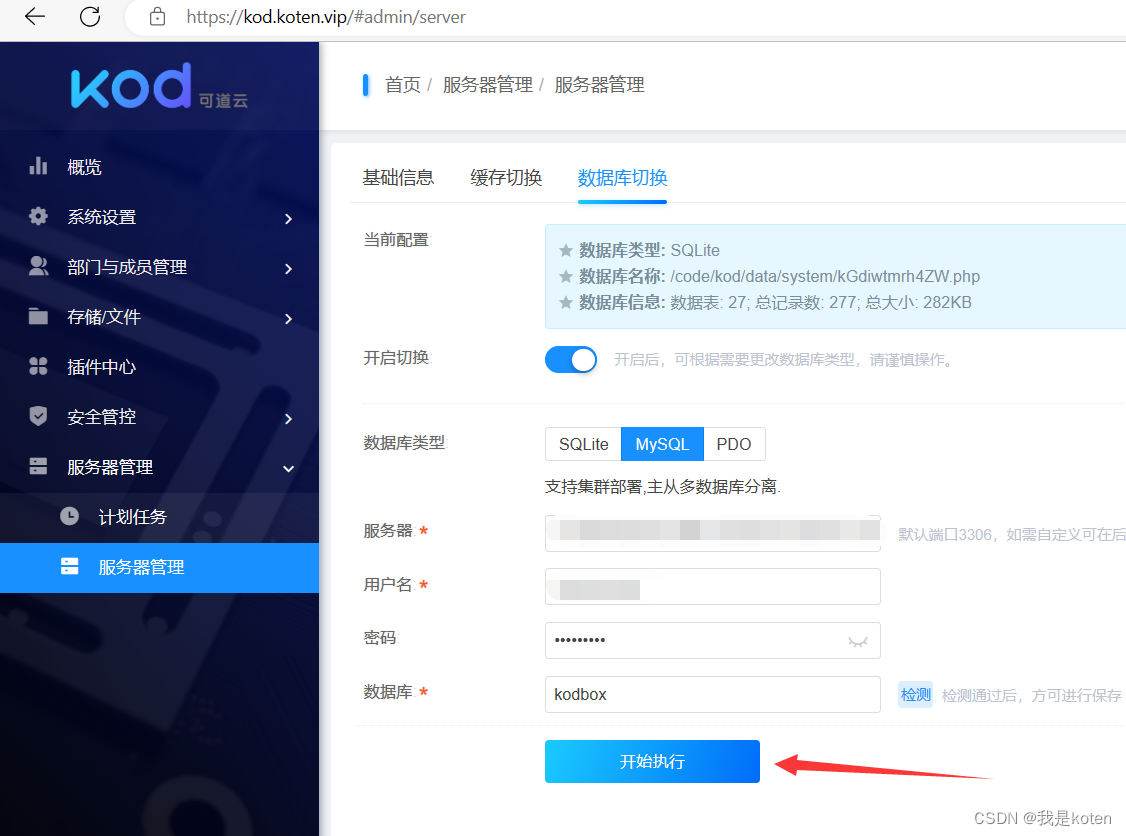
四、kod业务由内置数据库修改为mysql
五、申请公网连接访问
六、在虚拟机远程测试连接mysql公网地址
七、提升主从配置为读写分离版 获取proxy代理地址 通过ECS进行连接测试
NAS
一、购买NAS挂载到ESC的/mnt下
OSS
一、创建bucket
二、创建子账号
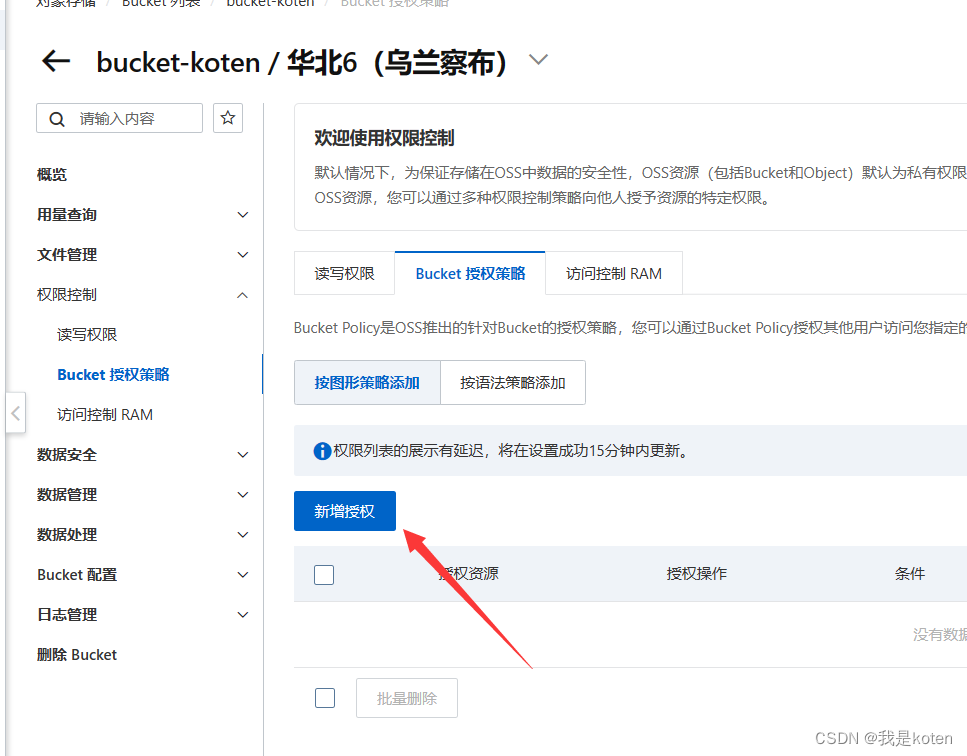
三、授权子账号管理bucket
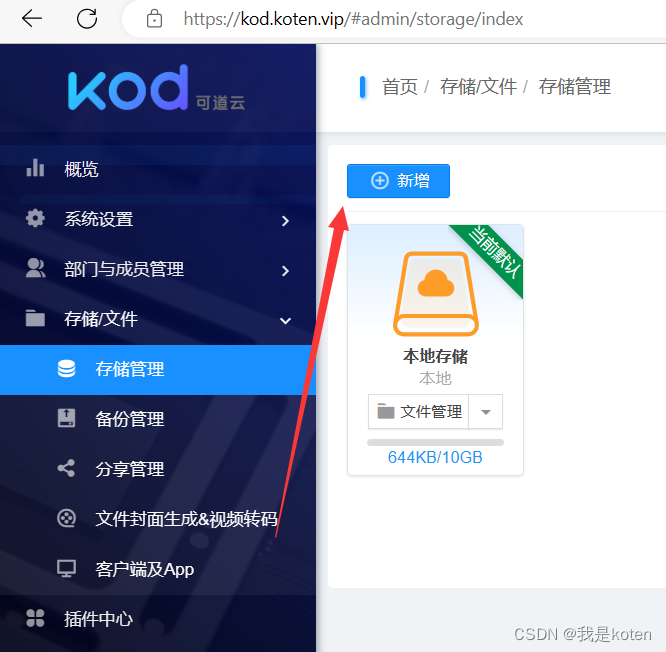
四、oss后台存储增加oss存储 上传图片测试
Redis
一、购买Reids主从版
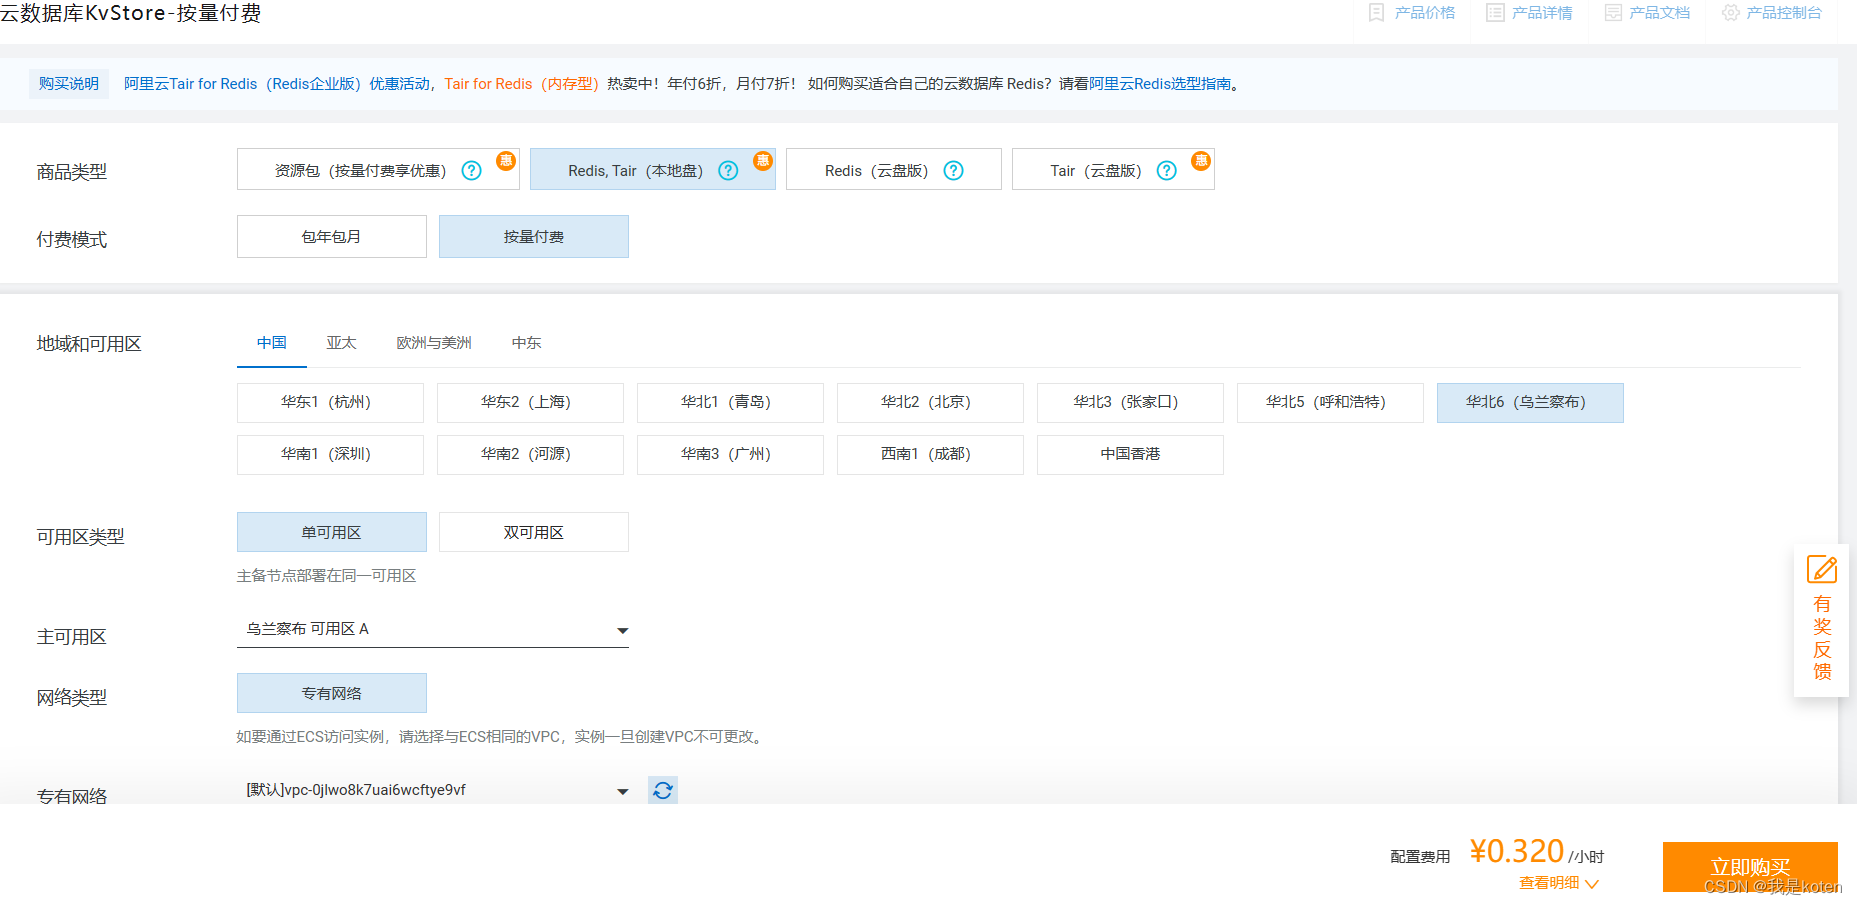
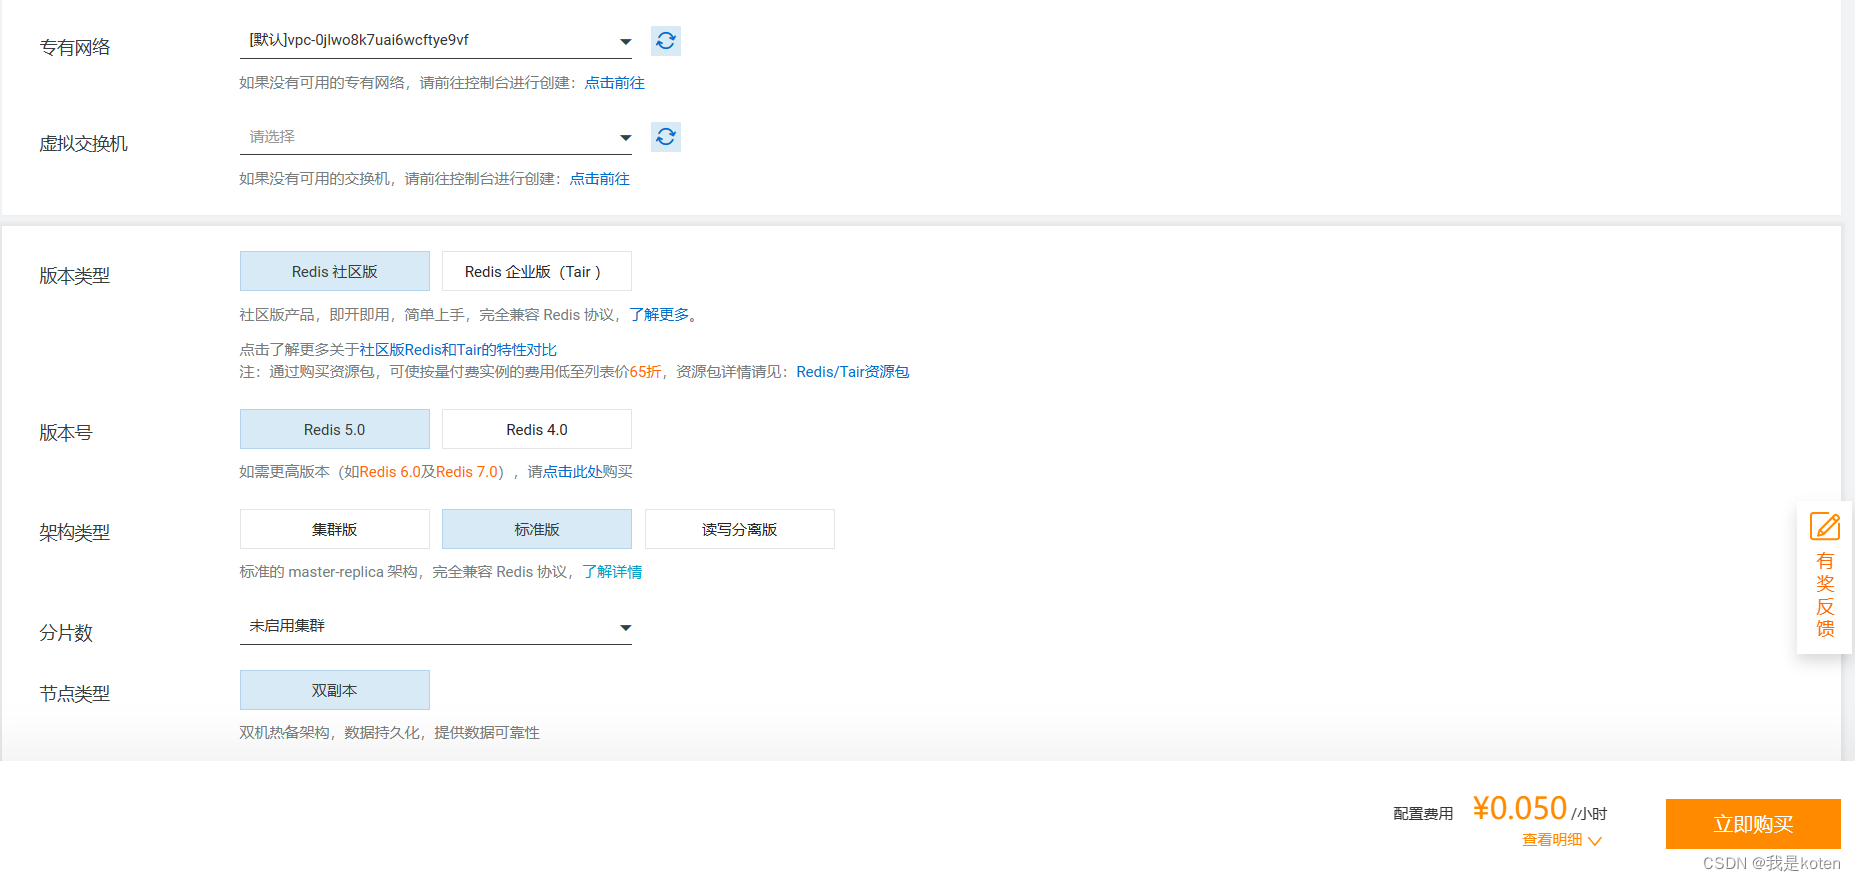
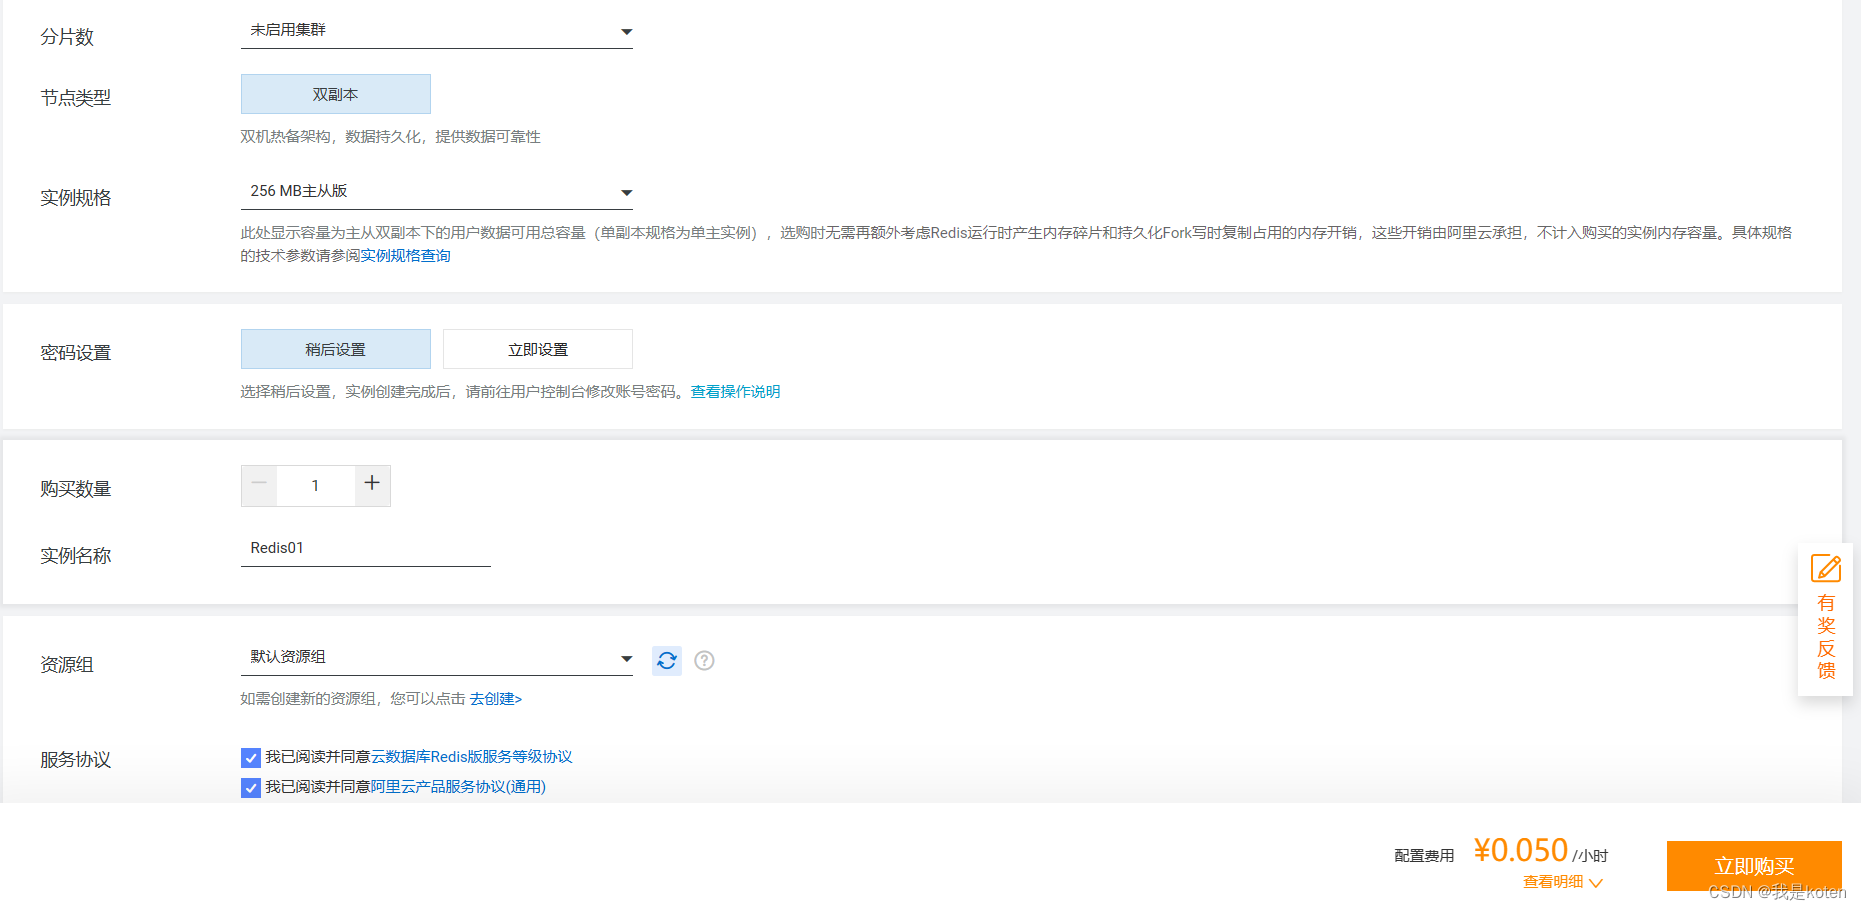
二、配置kod免秘钥连接Redis内网接口


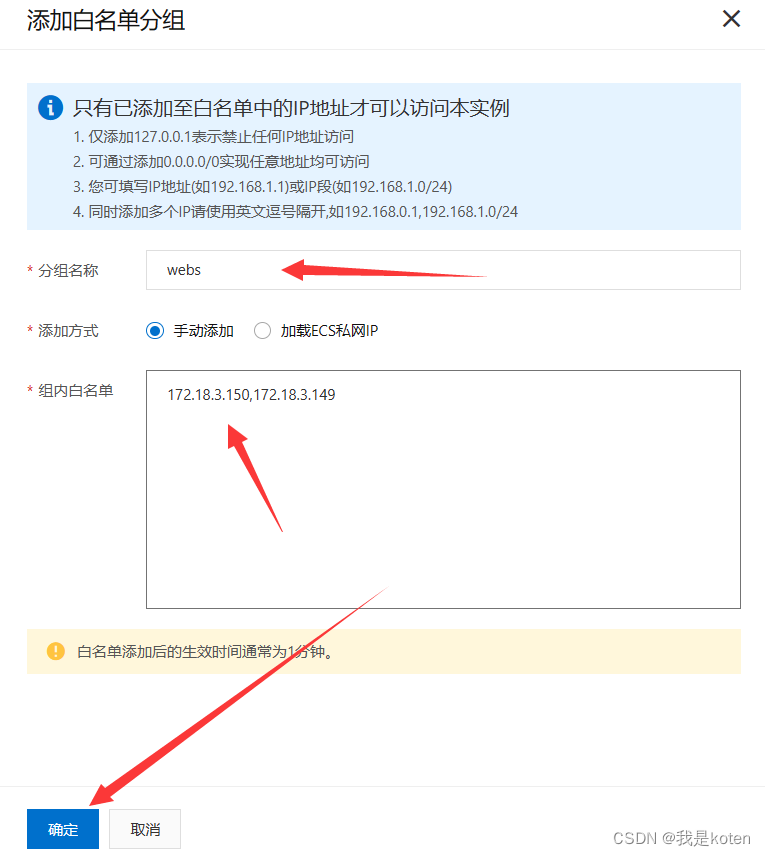

利用我们负载均衡转发的5555端口连接web01
[root@web01 ~]# yum -y install redis
[root@web01 ~]# redis-cli -h r-xxxx.redis.rds.aliyuncs.com    成功连接
r-xxxx.redis.rds.aliyuncs.com:6379> keys *
(empty list or set)

刷新该网页,因为负载均衡有俩web,所以这个操作需要执行两次,keys *查询,成功!

三、申请公网访问连接
 四、创建用户名密码
在虚拟机上远程连接公网Redis接口地址,使用keys *验证+
这里无法使用web连接公网IP了,因为我们的web无法连接网络,只能私网连接redis,所以我们在虚拟机上连接web
[root@Web01 ~]# redis-cli -h r-xxxx.redis.rds.aliyuncs.com
r-xxxx.redis.rds.aliyuncs.com:6379> keys *
(error) ERR illegal address: 123.112.17.24:9913#将本机IP加入白名单r-xxxx.redis.rds.aliyuncs.com:6379> keys *
(error) NOAUTH Authentication required.#使用密码连接[root@Web01 ~]# redis-cli -h r-xxx.redis.rds.aliyuncs.com -a 'username:password' #后面跟账号和密码
r-0jla7au49dwd2jnp2rpd.redis.rds.aliyuncs.com:6379> keys *#成功显示
MySQL
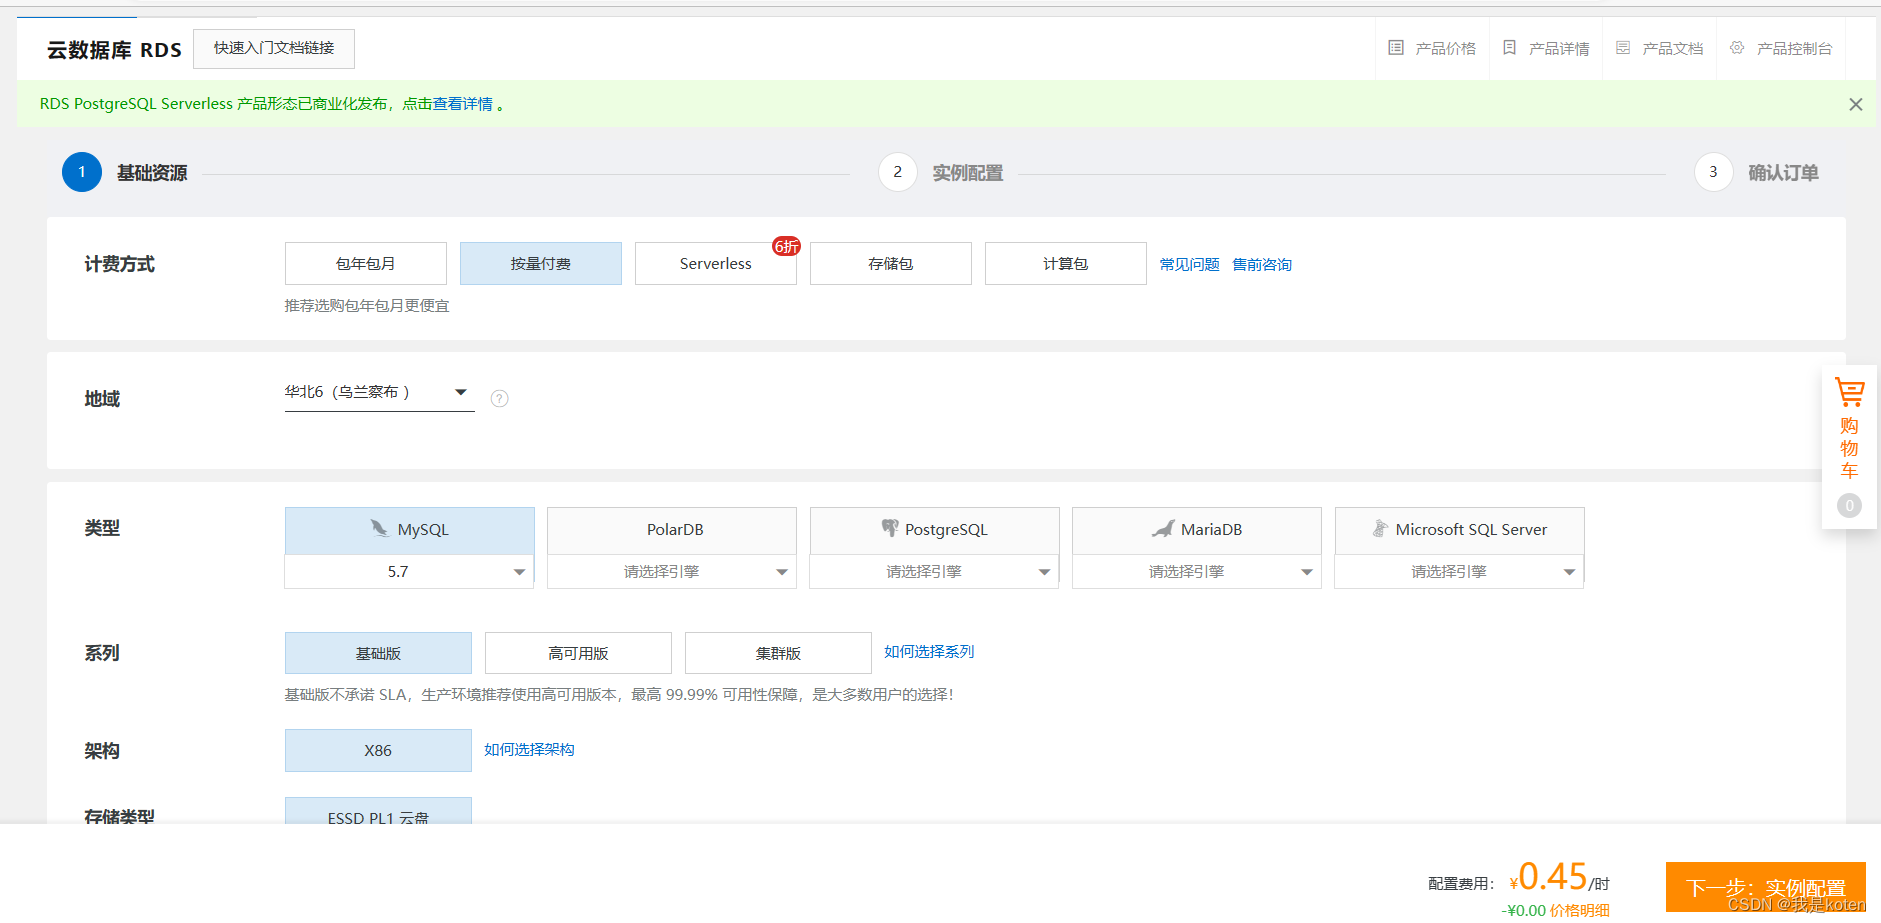
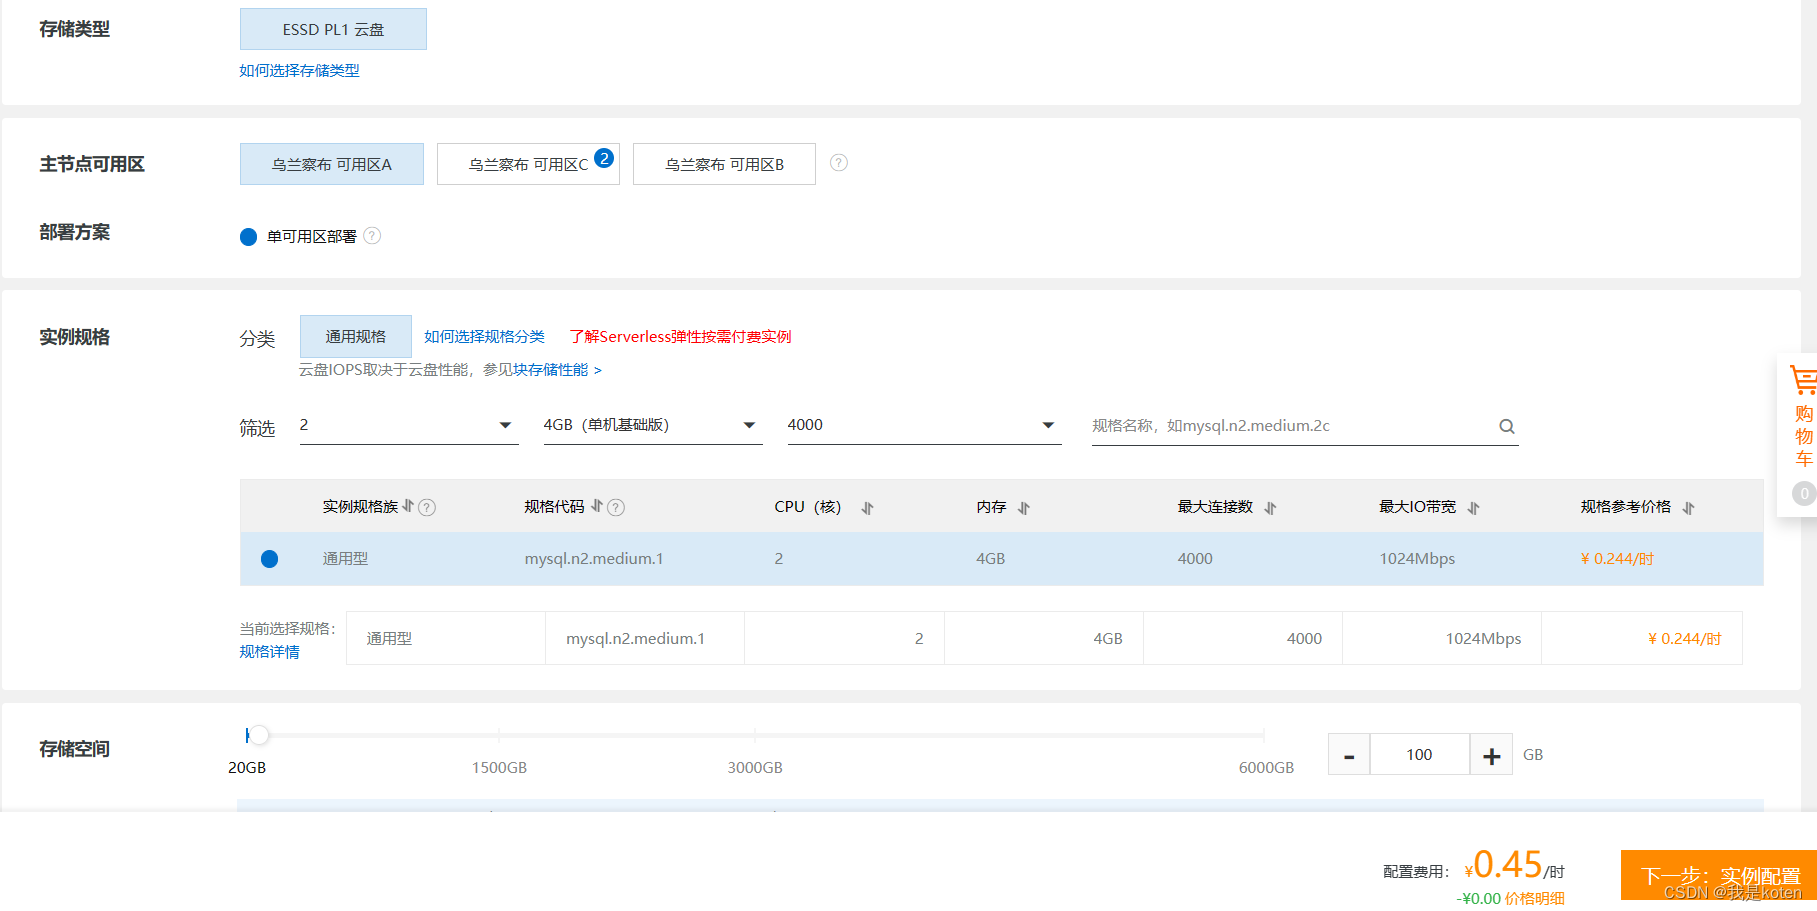
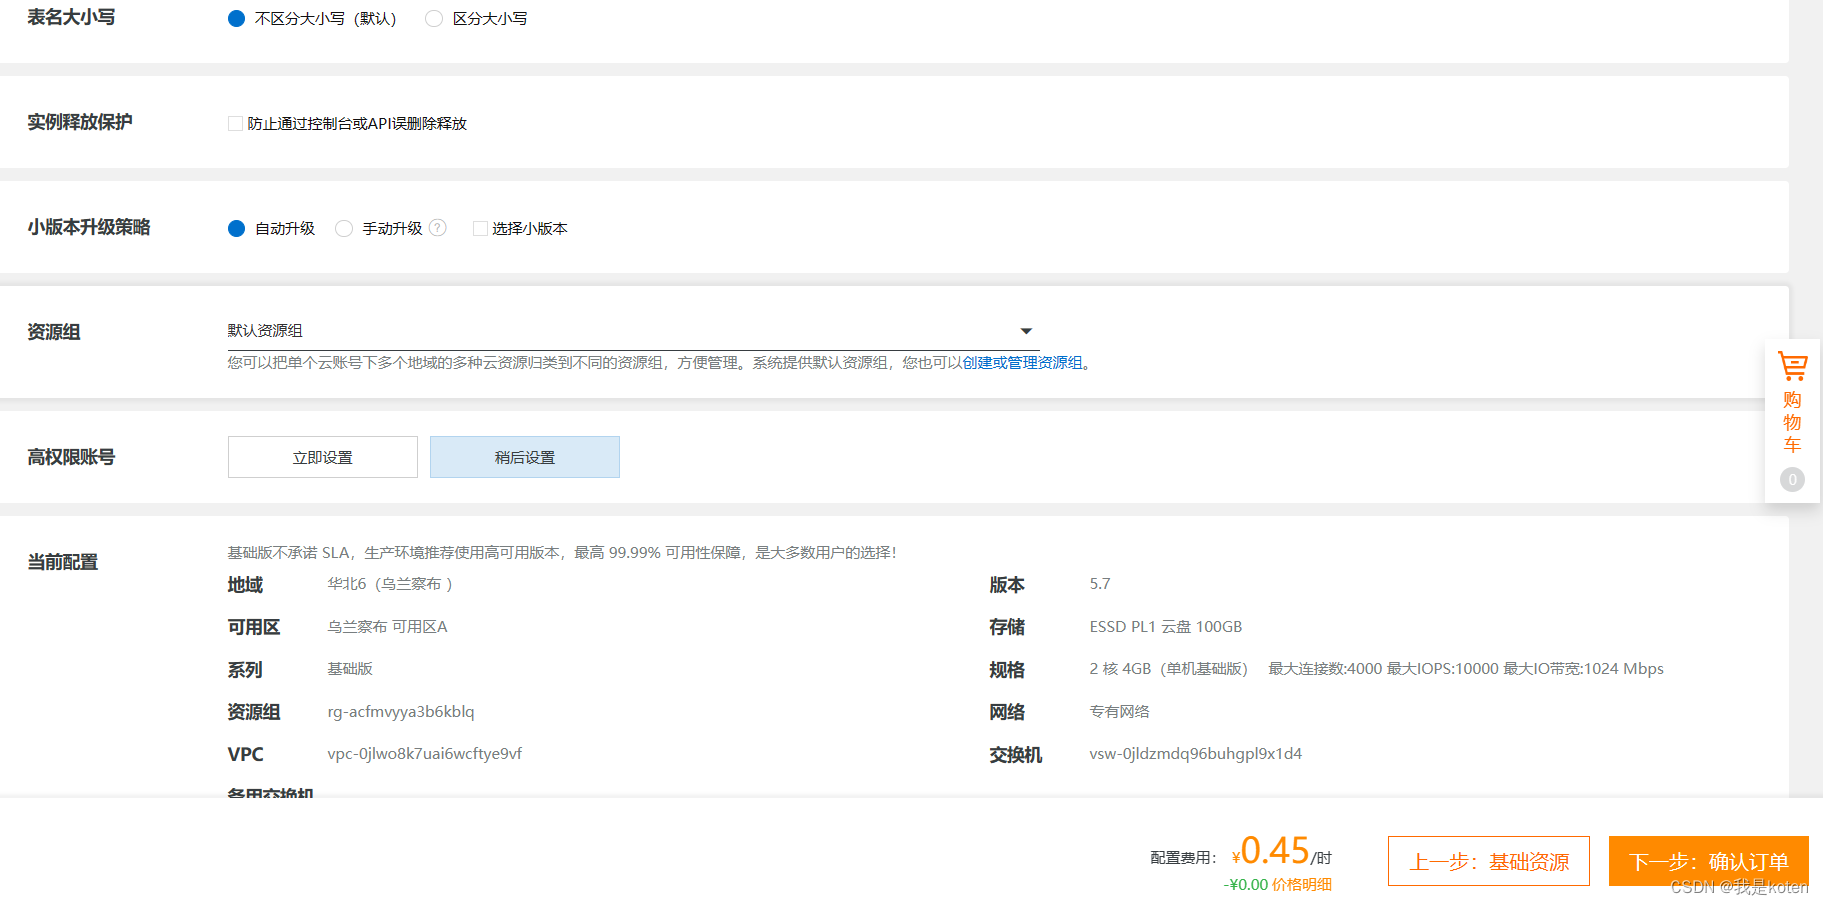
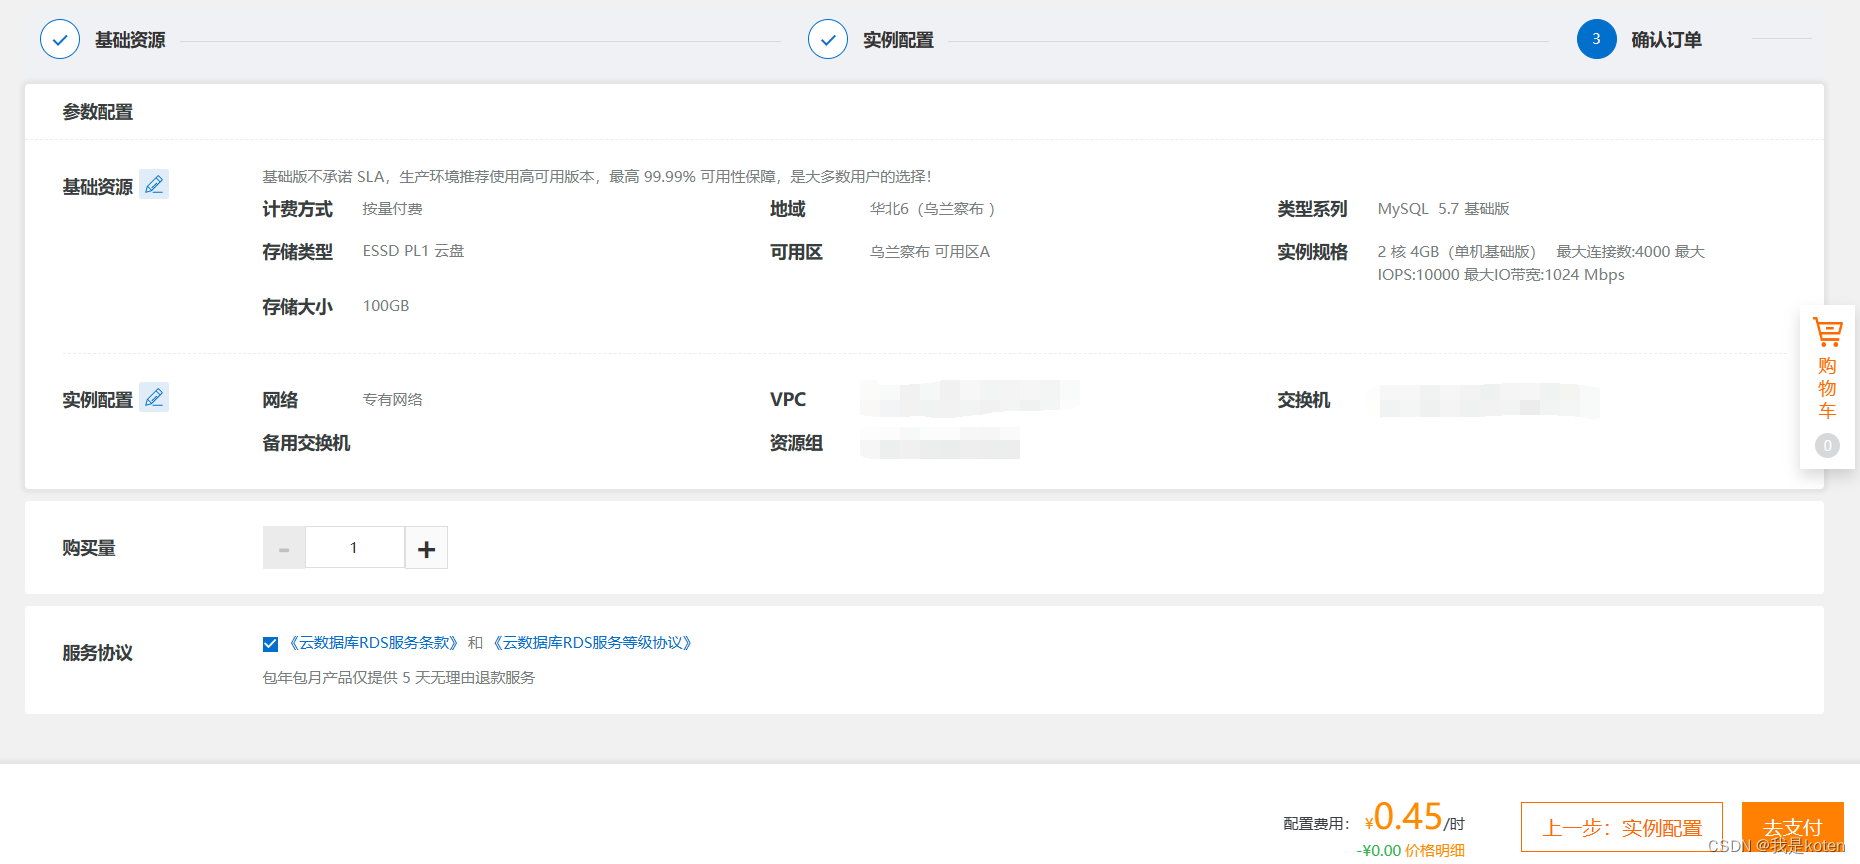
一、购买msyql主从版
这里买错了,需要直接买高可用版本
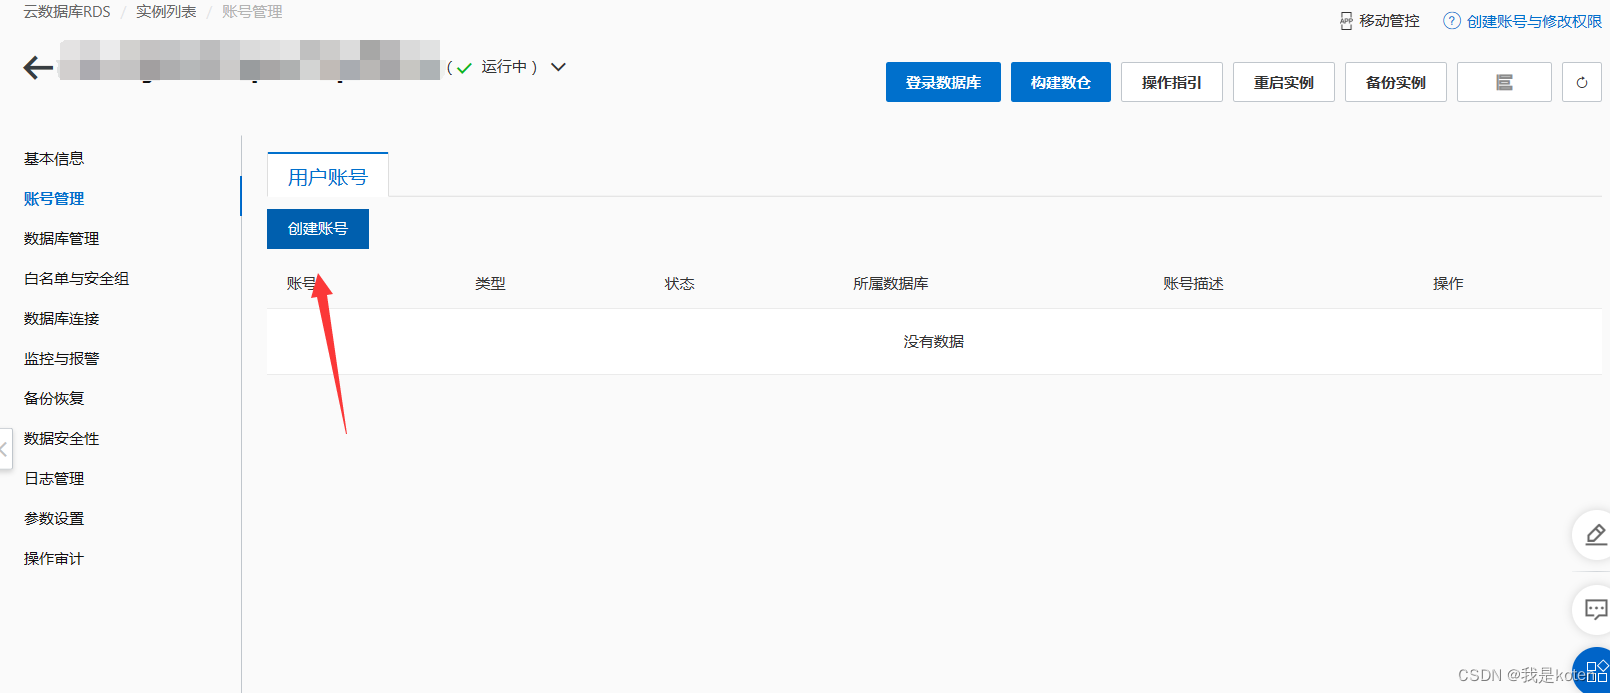
二、配置用户名密码
三、通过ECS主机测试和mysql的连通性
mysql主机列表,网络详情,复制专有网络,也就是我们局域网的域名
[root@web01 ~]# ping rm-xxxx.mysql.rds.aliyuncs.com[root@web01 ~]# yum -y install mariadb-server.x86_64[root@web01 ~]# mysql -h rm-xxxx.mysql.rds.aliyuncs.com -u'username' -p'password'
Welcome to the MariaDB monitor.  Commands end with ; or \g.
Your MySQL connection id is 59
Server version: 5.7.40-log Source distributionCopyright (c) 2000, 2018, Oracle, MariaDB Corporation Ab and others.Type 'help;' or '\h' for help. Type '\c' to clear the current input statement.MySQL [(none)]> show databases;
+--------------------+
| Database           |
+--------------------+
| information_schema |
| __recycle_bin__    |
| mysql              |
| performance_schema |
| sys                |
+--------------------+
5 rows in set (0.00 sec)MySQL [(none)]>
四、kod业务由内置数据库修改为mysql
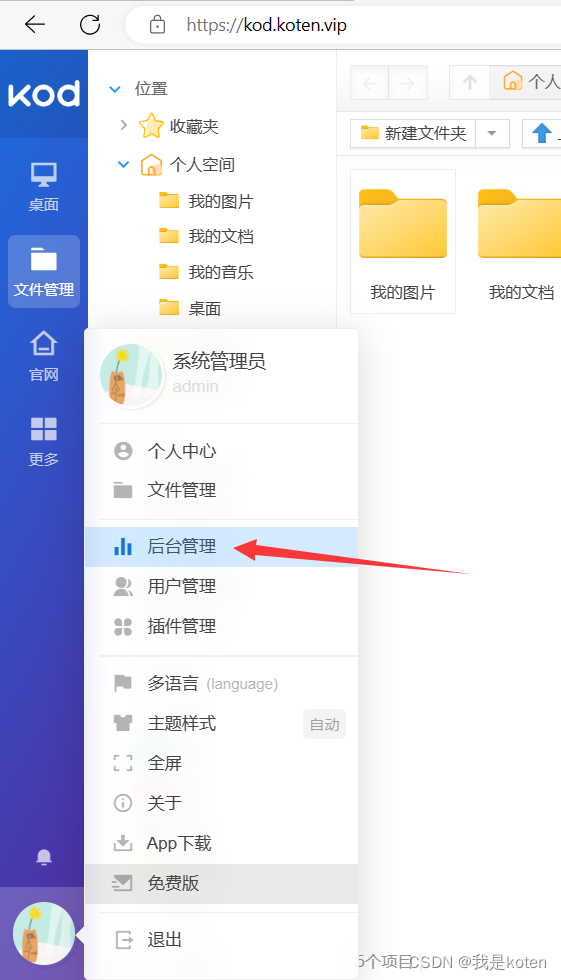
因为我刚刚在阿里云删除了redis,直接访问会报错,我们需要先删除下kod数据库的配置文件的内容
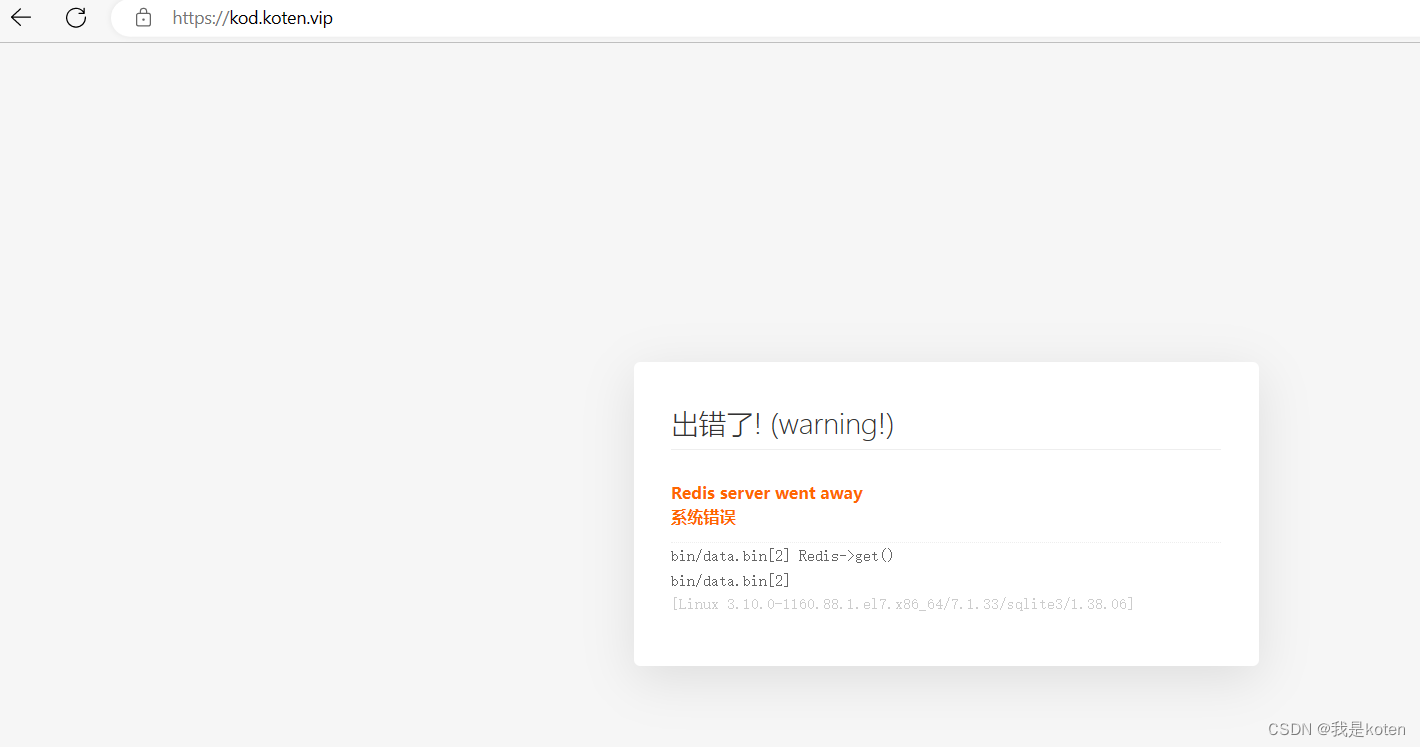
把有关redis信息删掉即可,注意web01和web02都需要删
[root@web02 ~]# cat /code/kod/config/setting_user.php
<?php
$config['database'] = array ('DB_TYPE' => 'sqlite3','DB_NAME' => USER_SYSTEM.'kGdiwtmrh4ZW.php','DB_SQL_LOG' => true,'DB_FIELDS_CACHE' => true,'DB_SQL_BUILD_CACHE' => false,
);
$config['cache']['sessionType'] = 'file';
$config['cache']['cacheType'] = 'file';
在网站上配置,与redis同理,需要做两遍,但是第二遍的时候会提示无法执行,所以我们做完一遍后scp到另一台web,注意不要目标文件与源文件搞混了,不然还需要重新搞。
[root@web01 config]# cat /code/kod/config/setting_user.php
<?php
$config['database'] = array ('DB_TYPE' => 'mysqli','DB_HOST' => 'rm-xxxx.mysql.rds.aliyuncs.com','DB_PORT' => 3306,'DB_USER' => 'username','DB_PWD' => 'password','DB_NAME' => 'kodbox','DB_SQL_LOG' => true,'DB_FIELDS_CACHE' => true,'DB_SQL_BUILD_CACHE' => false,
);$config['cache']['sessionType'] = 'file';
$config['cache']['cacheType'] = 'file';[root@web01 config]# scp setting_user.php 172.18.3.150:/code/kod/config/setting_user.php
root@172.18.3.150's password:
setting_user.php                                                      100%  399     1.2MB/s   00:00
五、申请公网连接访问
这里取消勾选
 六、在虚拟机远程测试连接mysql公网地址
[root@Web01 ~]# mysql -uusername -pPassword -h rm-xxxx.mysql.rds.aliyuncs.com
Welcome to the MariaDB monitor.  Commands end with ; or \g.
Your MySQL connection id is 3449
Server version: 5.7.40-log Source distributionCopyright (c) 2000, 2018, Oracle, MariaDB Corporation Ab and others.Type 'help;' or '\h' for help. Type '\c' to clear the current input statement.MySQL [(none)]> show databases;
+--------------------+
| Database           |
+--------------------+
| information_schema |
| __recycle_bin__    |
| kodbox             |
| mysql              |
| performance_schema |
| sys                |
+--------------------+
6 rows in set (0.01 sec)MySQL [(none)]>
七、提升主从配置为读写分离版 获取proxy代理地址 通过ECS进行连接测试
刚才买错了,咱们先变更配置到高可用版本
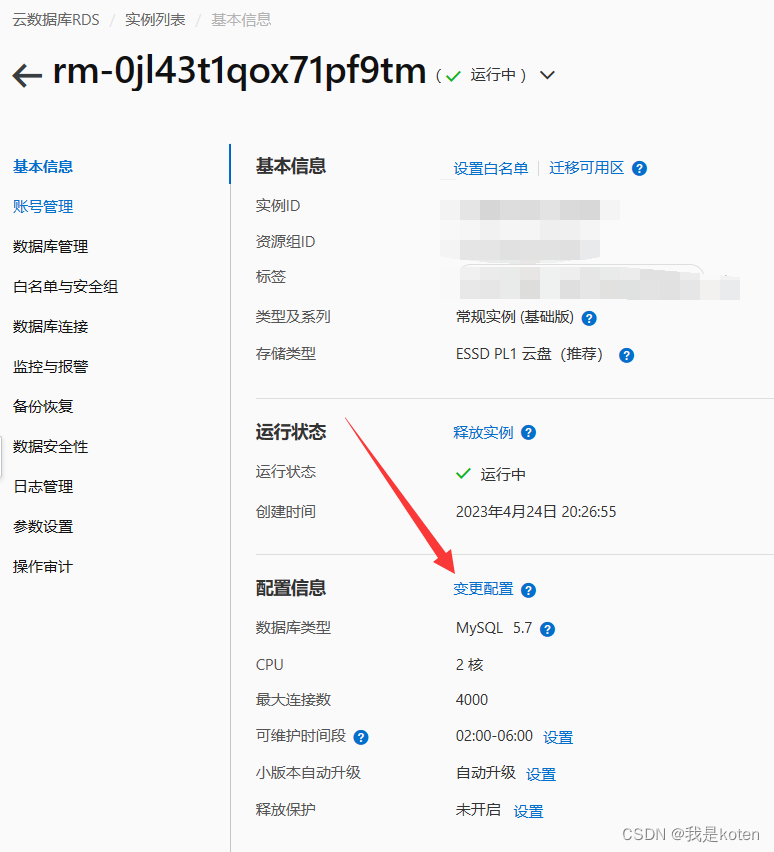
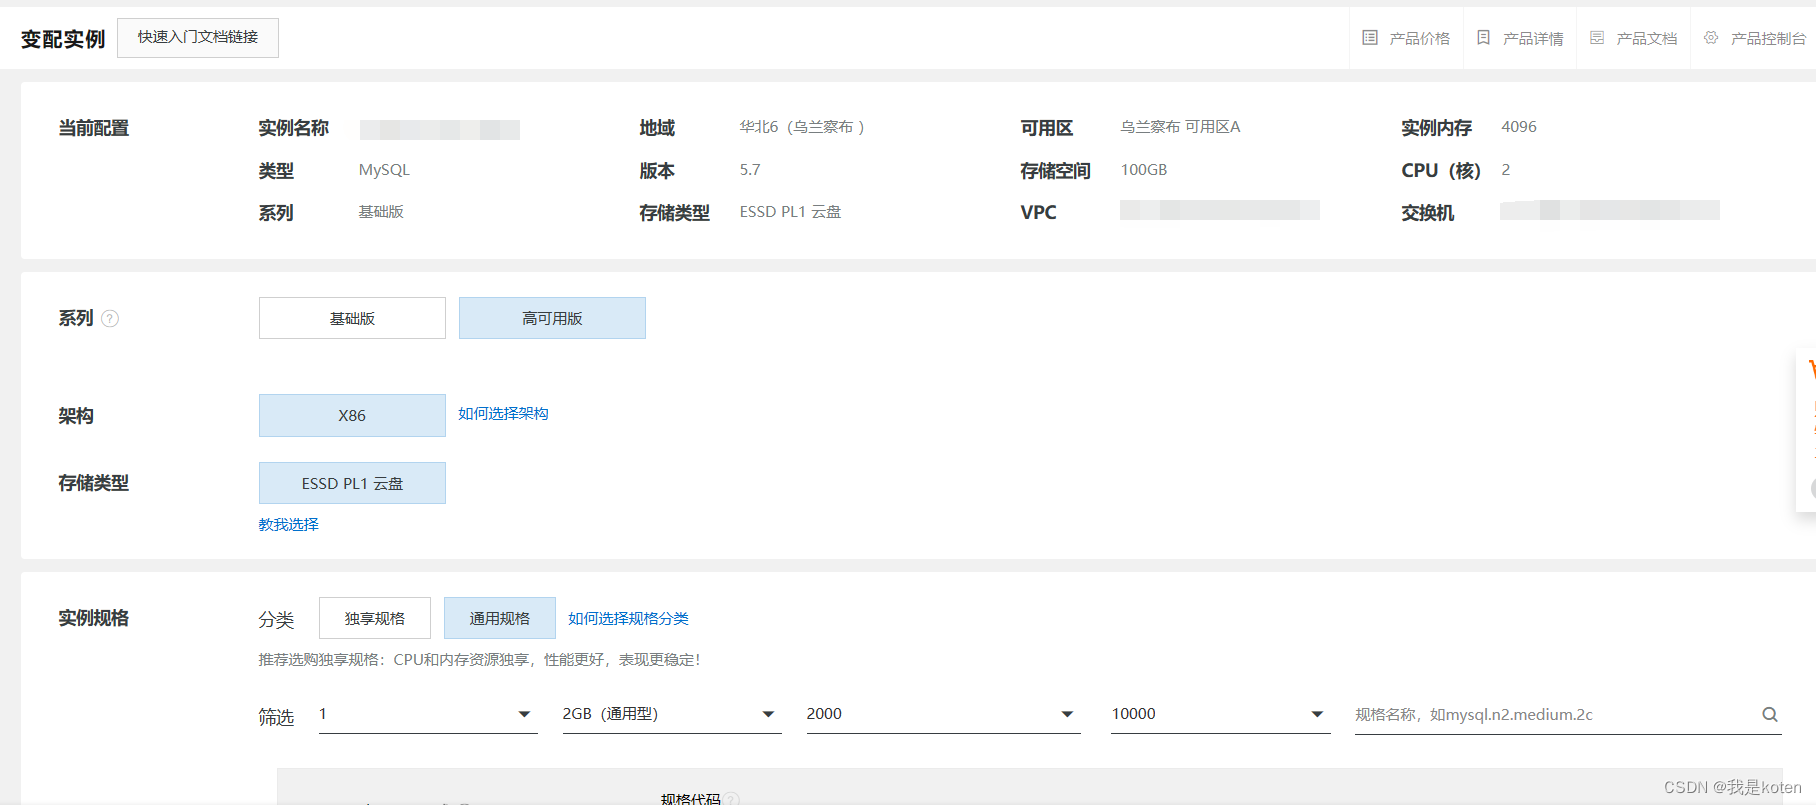
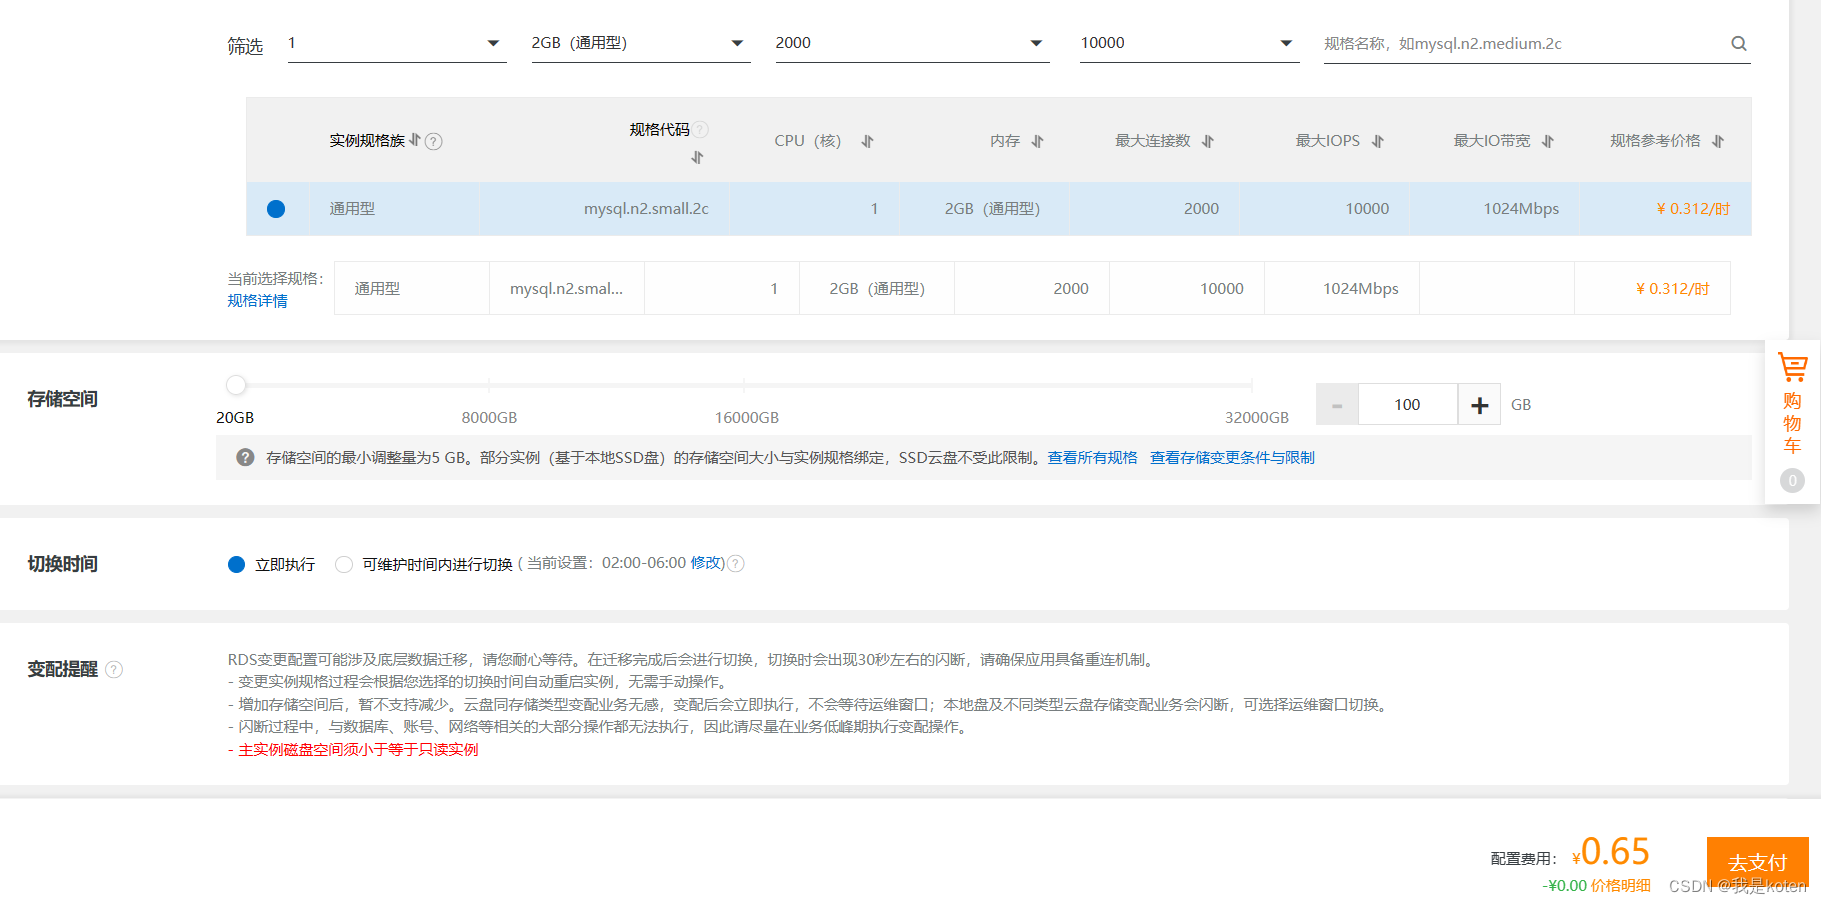
高可用配置,这里显示读写分离。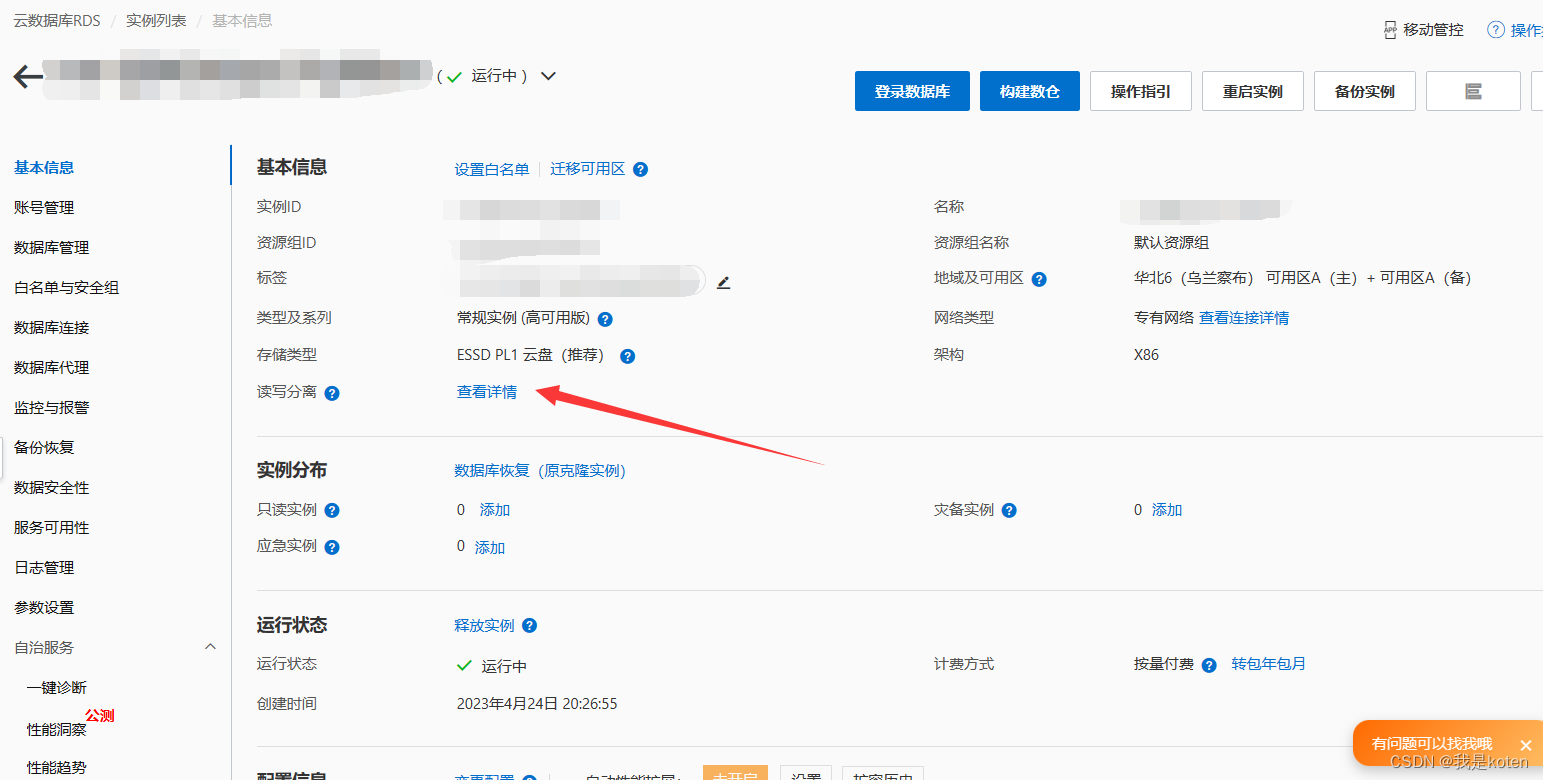
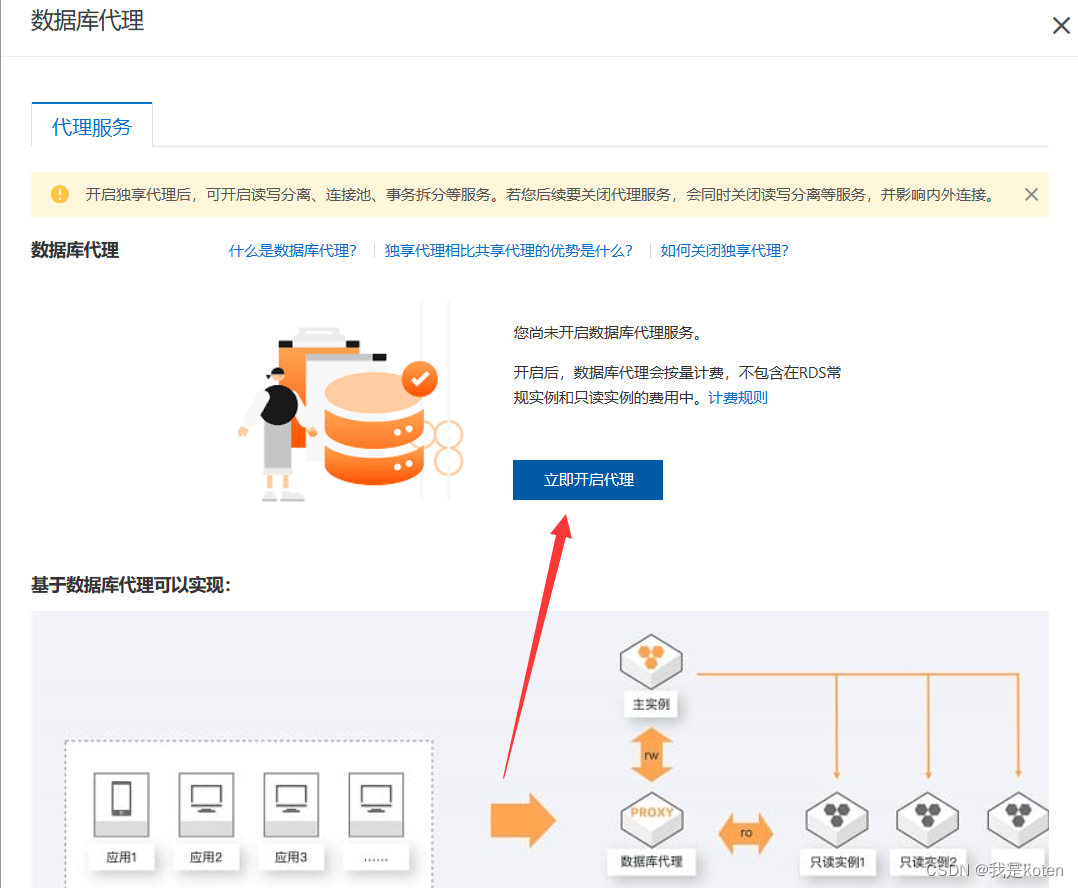
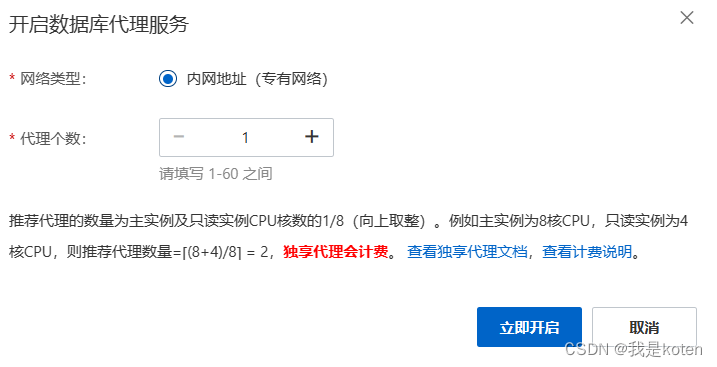
购买只读实例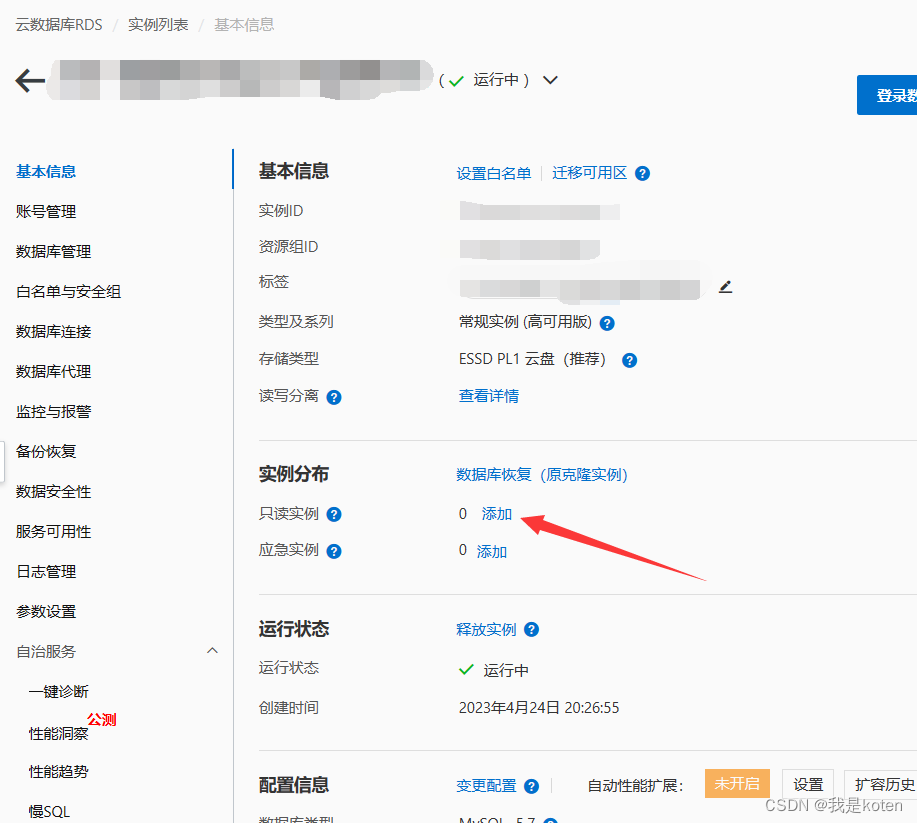
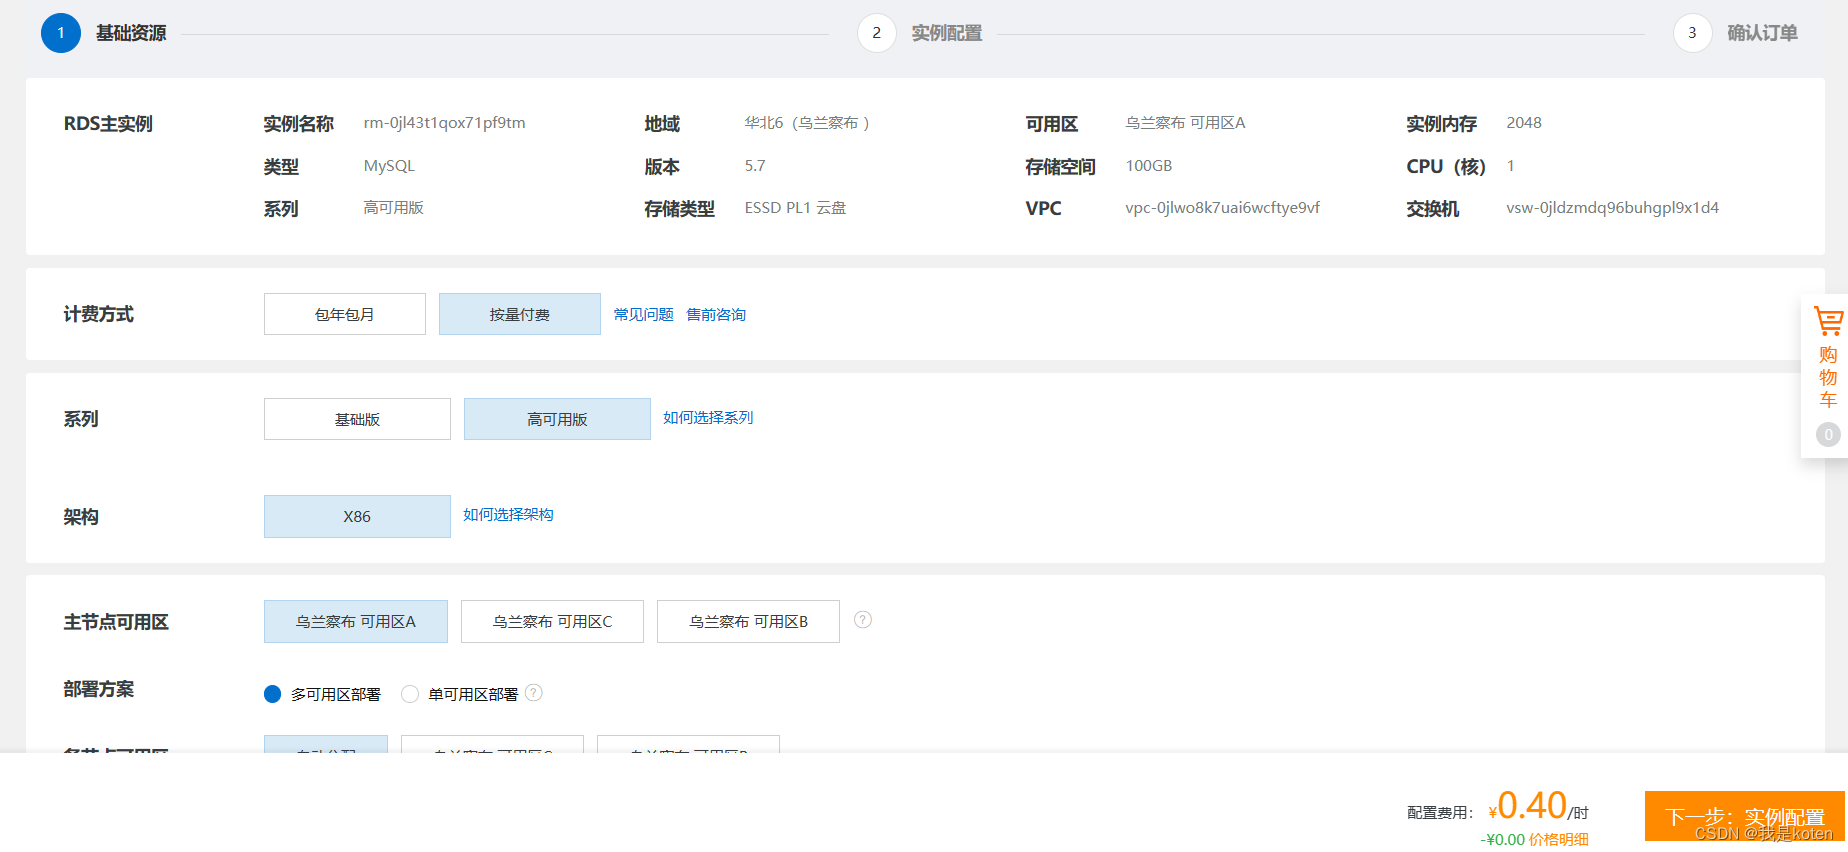
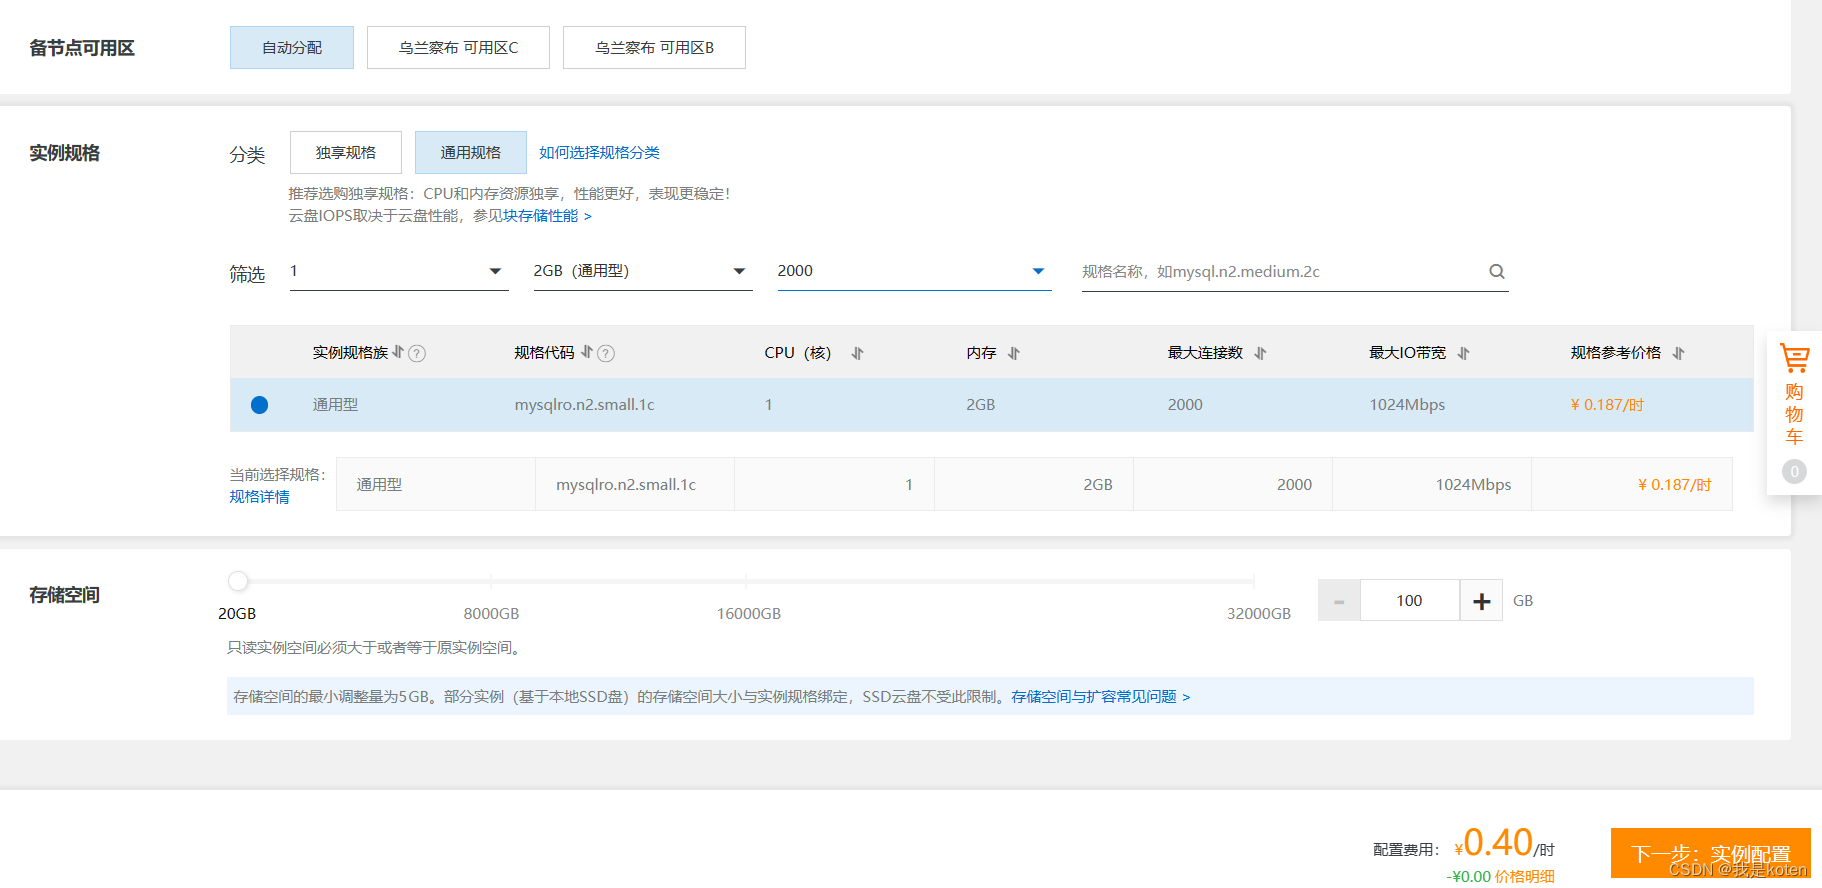
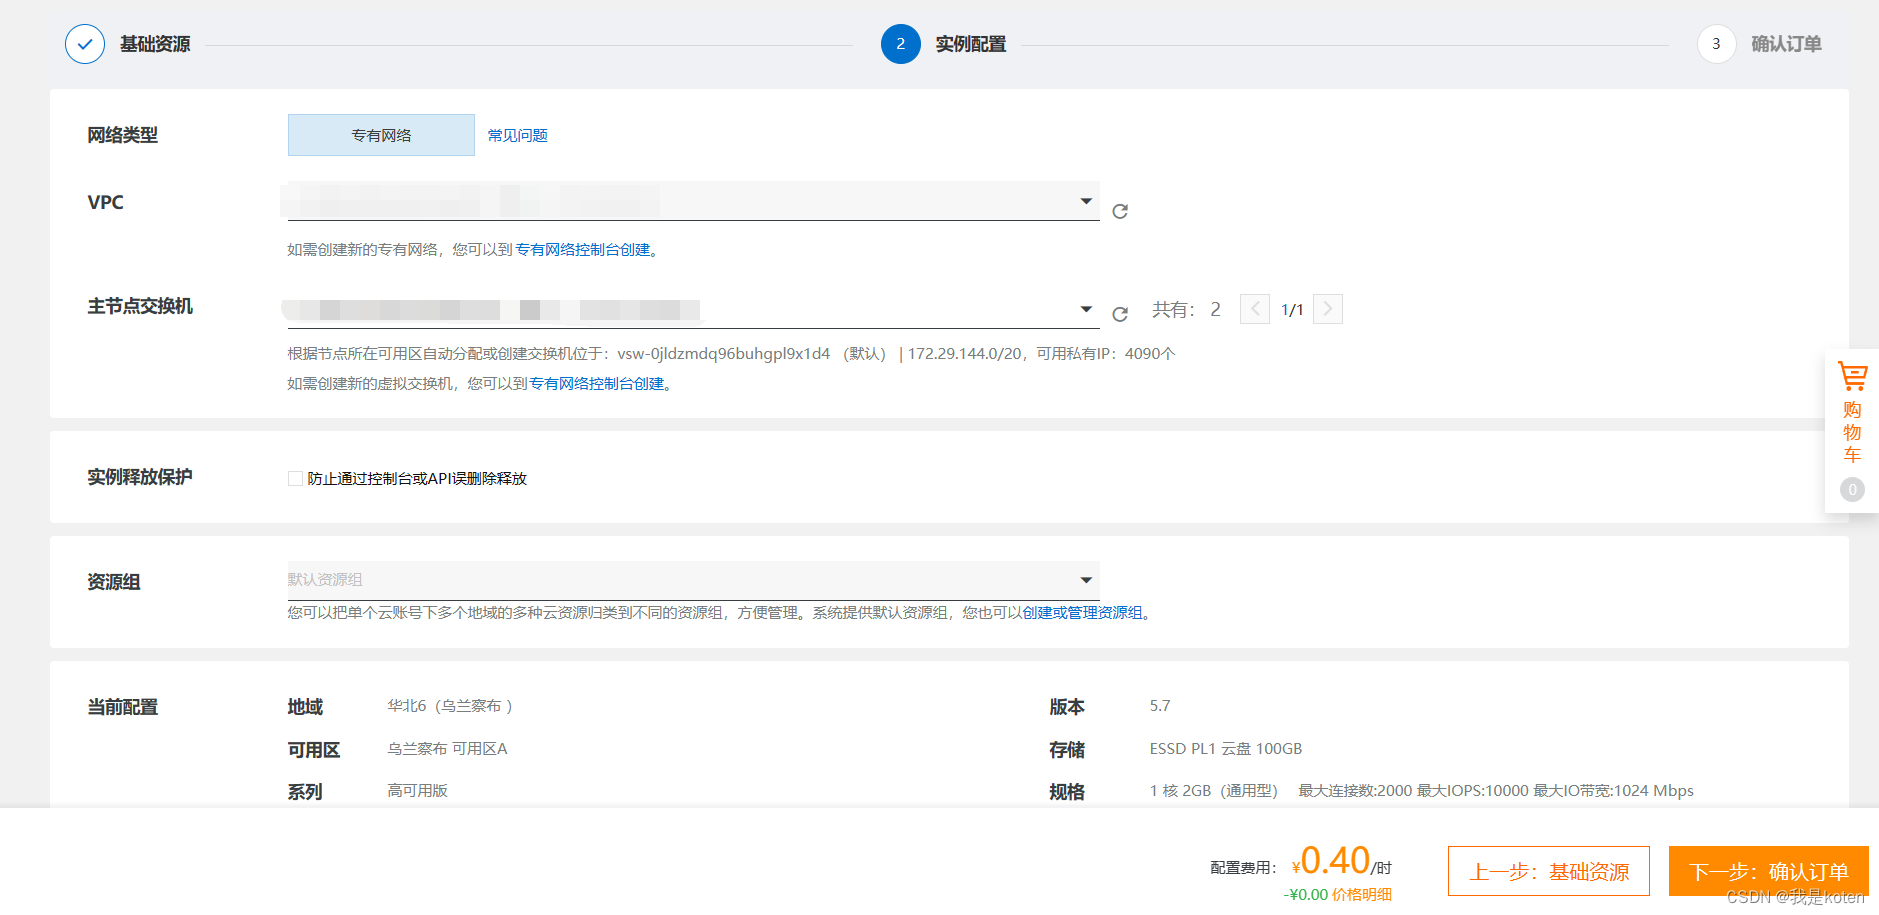
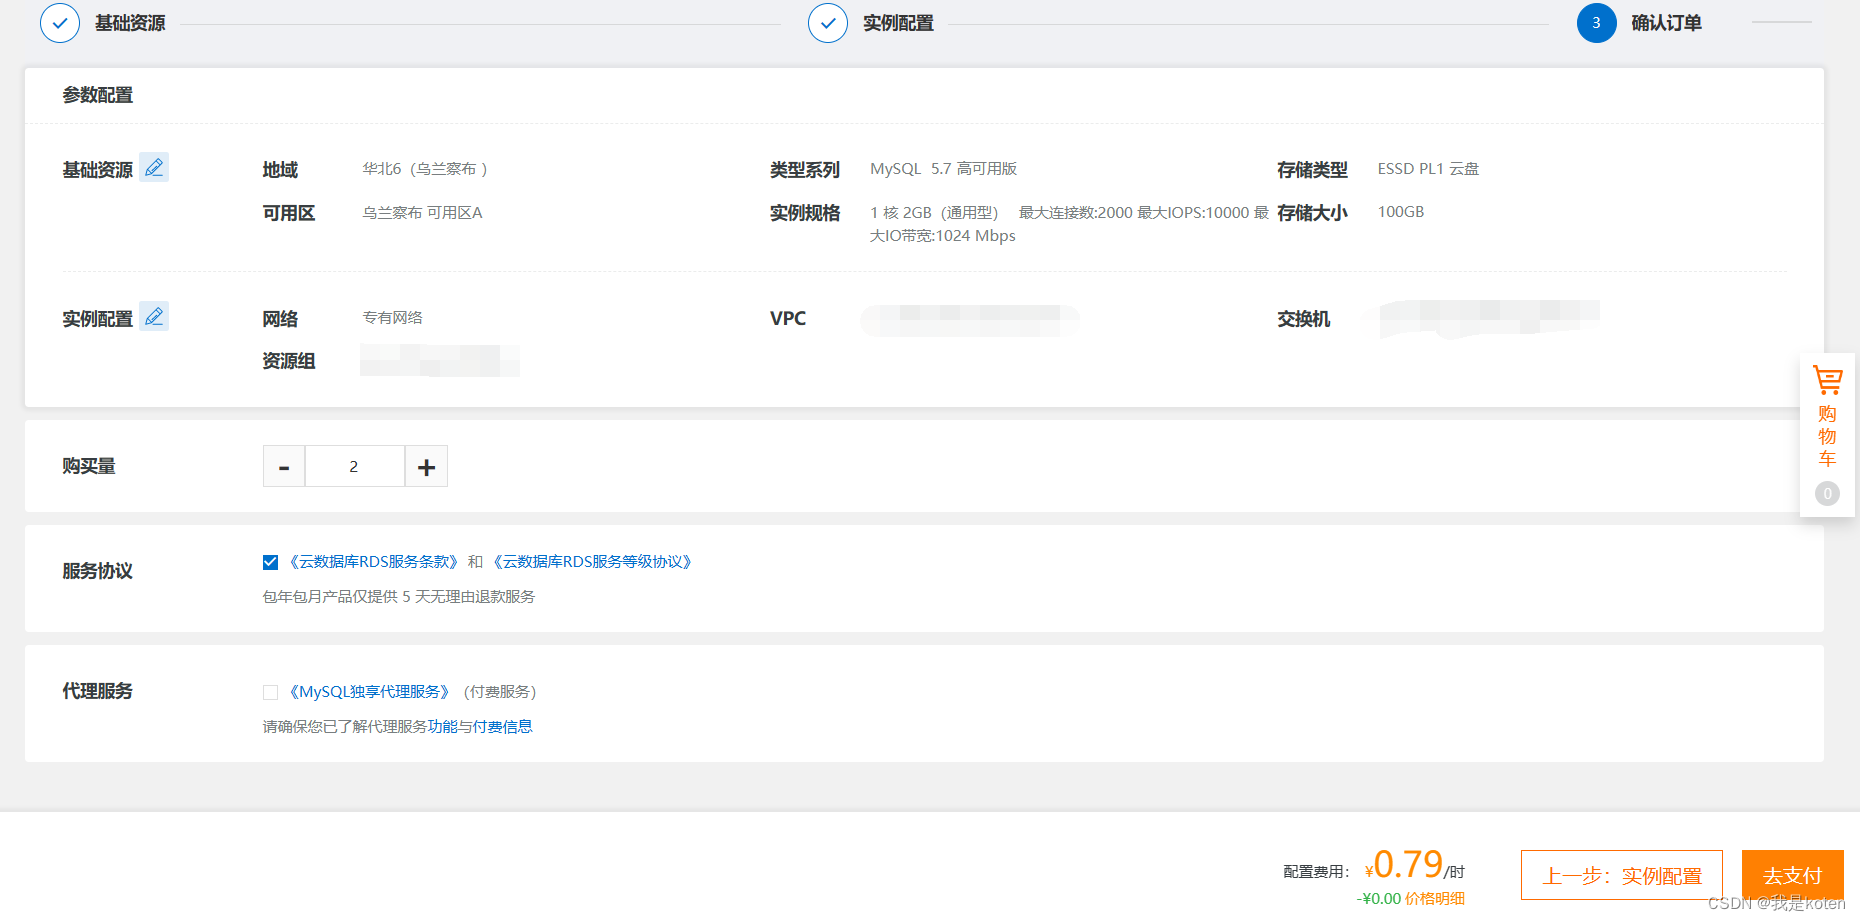
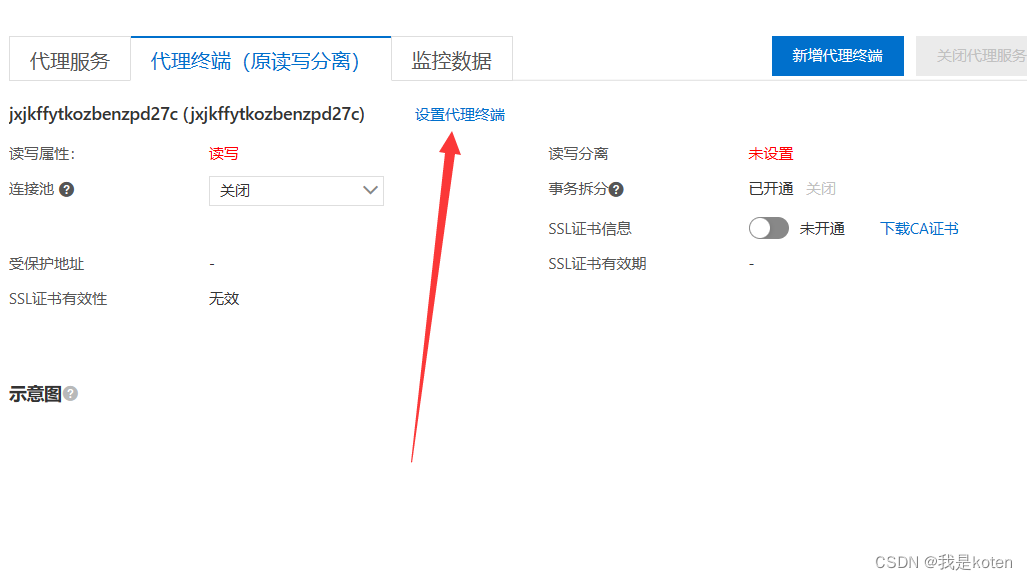
设置代理终端,点击直接确定即可。
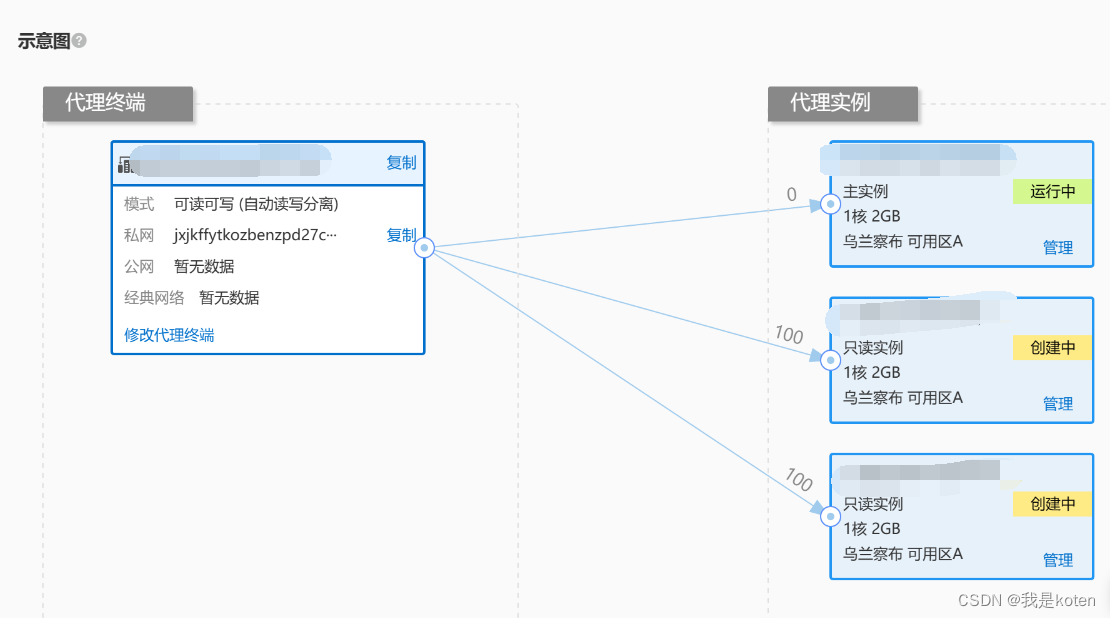
复制连接地址

也就是这个地址
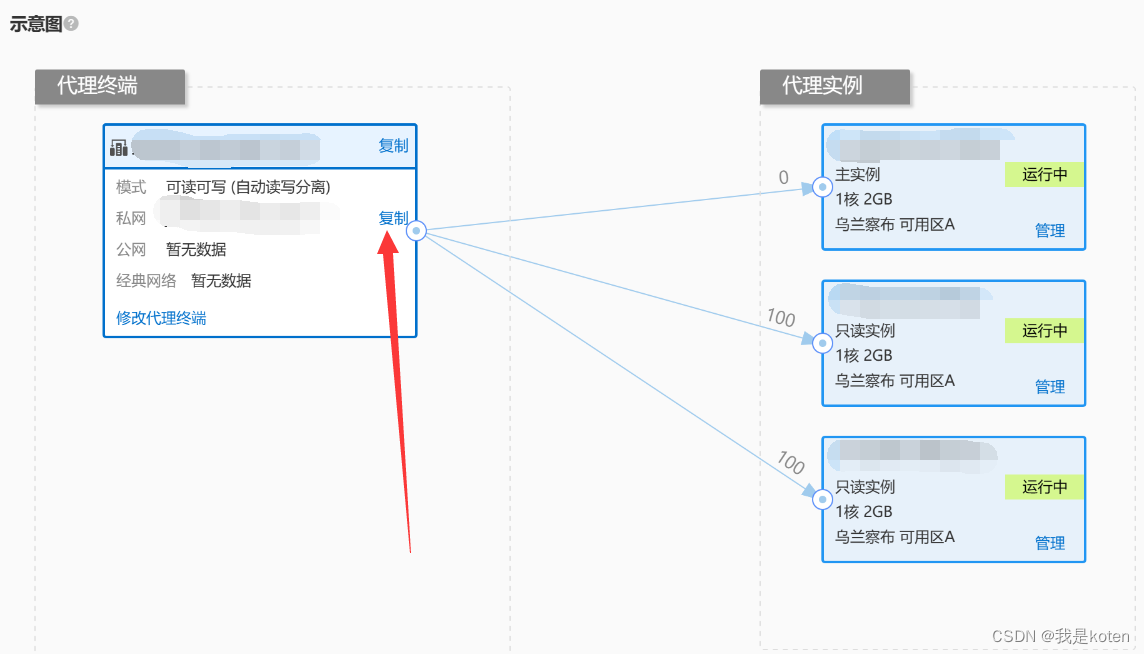
尝试登录,没有问题,需要将项目中的配置文件的mysql地址修改成这个,才算使用上,这一点不再演示。
[root@web01 config]# mysql -umysql_db01 -pMysqldb01 -h jxjkffytkozbenzpd27c-rw4rm.rwlb.rds.aliyuncs.com
Welcome to the MariaDB monitor.  Commands end with ; or \g.
Your MySQL connection id is 268436052
Server version: 5.7.40-log Source distributionCopyright (c) 2000, 2018, Oracle, MariaDB Corporation Ab and others.Type 'help;' or '\h' for help. Type '\c' to clear the current input statement.MySQL [(none)]> show databases;
+--------------------+
| Database           |
+--------------------+
| information_schema |
| __recycle_bin__    |
| kodbox             |
| mysql              |
| performance_schema |
| sys                |
+--------------------+
6 rows in set (0.01 sec)MySQL [(none)]>
NAS
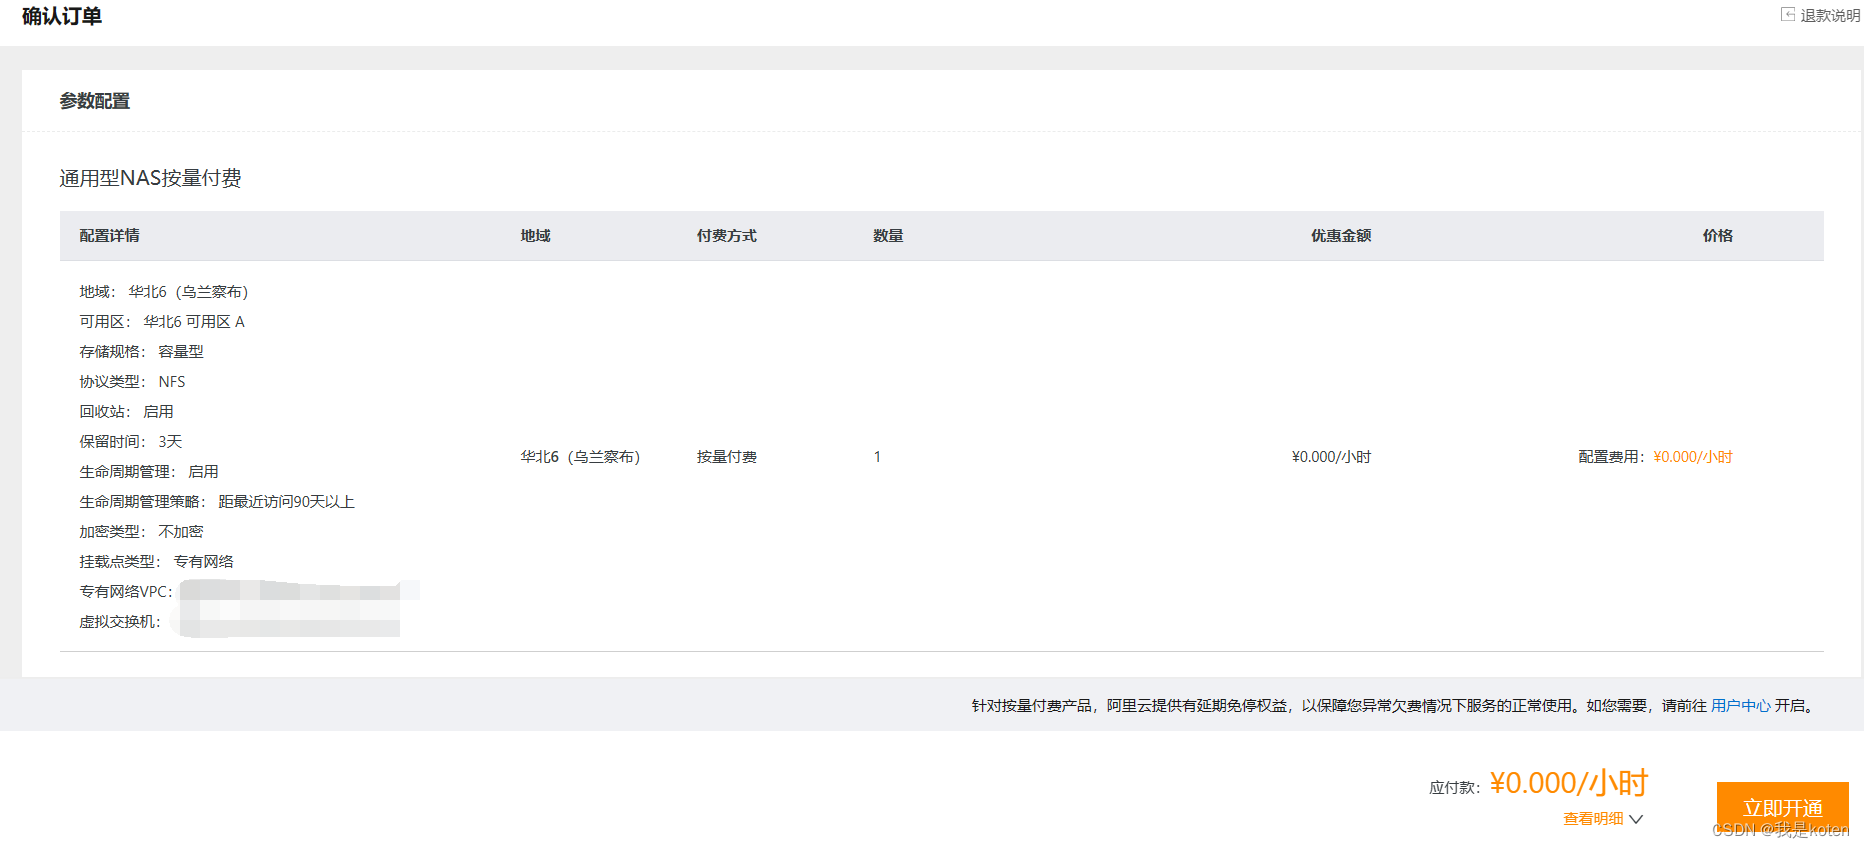
一、购买NAS挂载到ESC的/mnt下
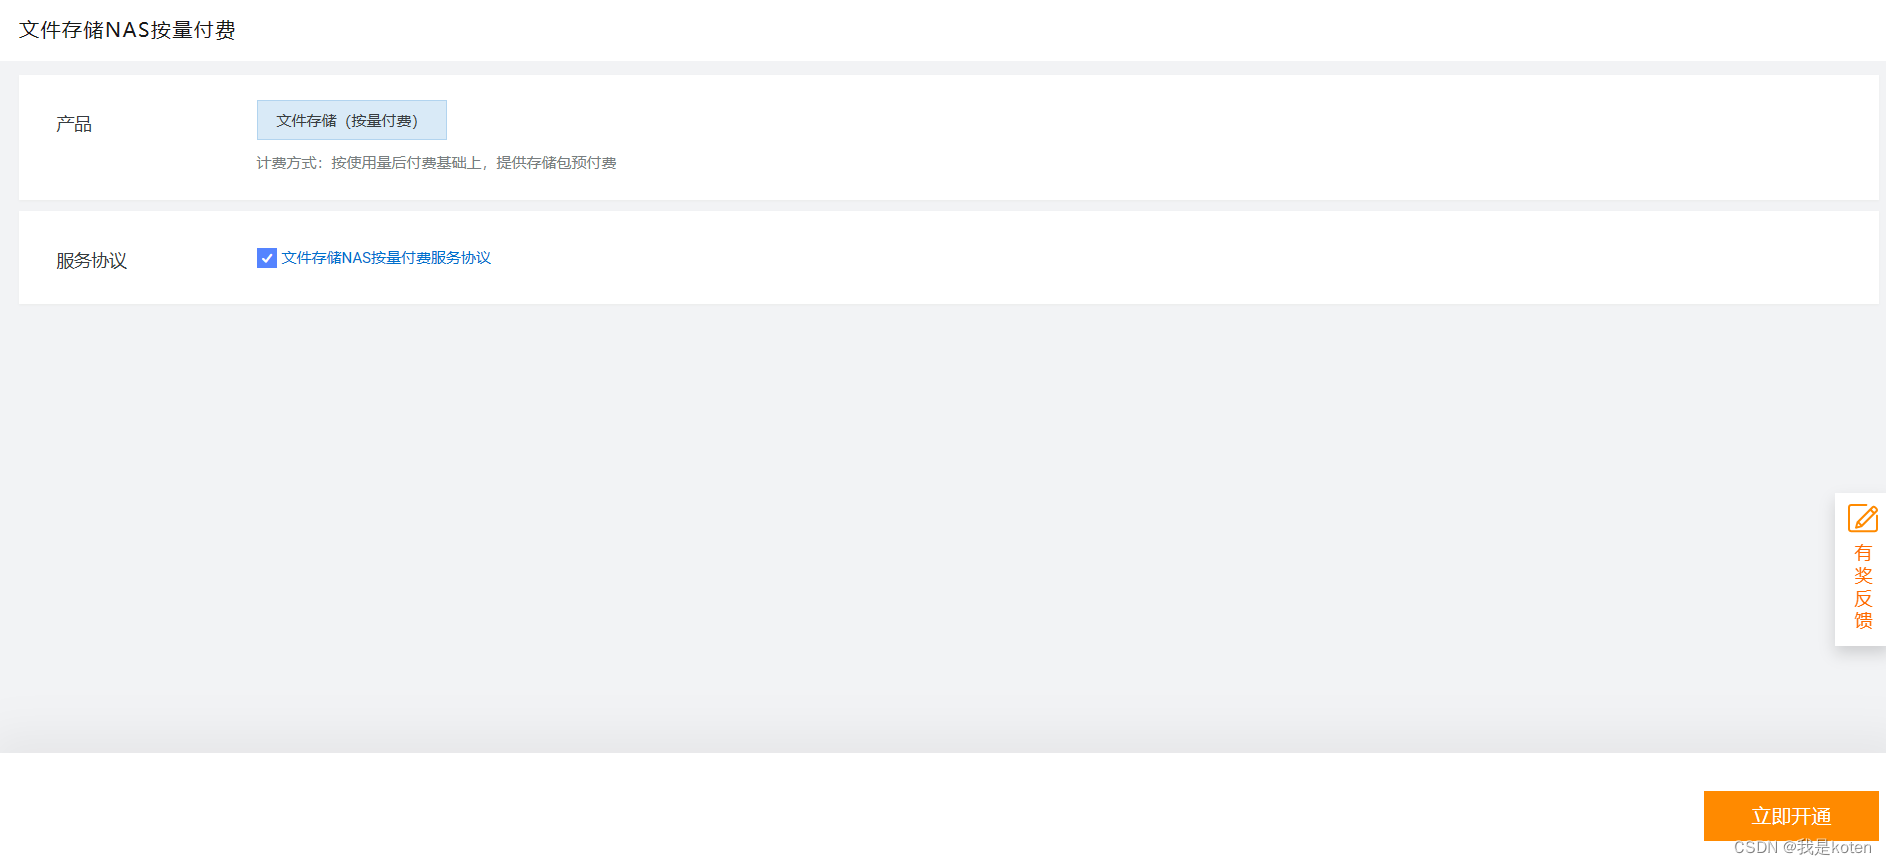
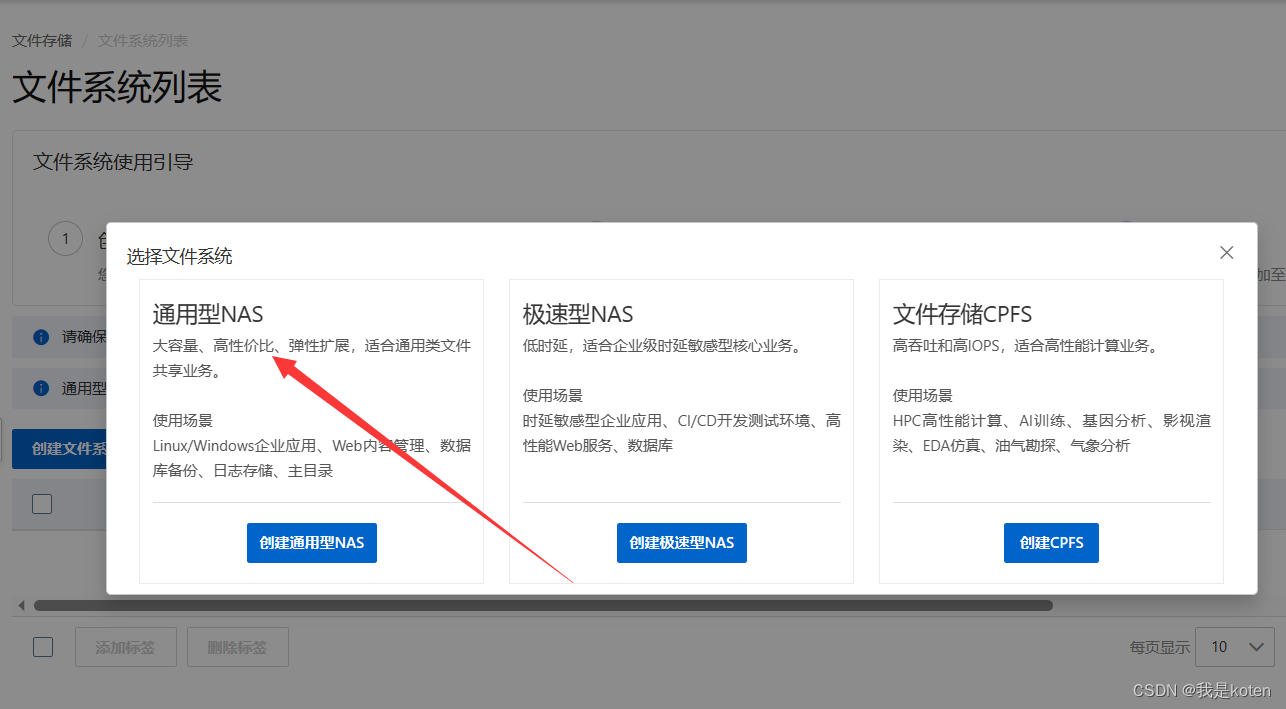
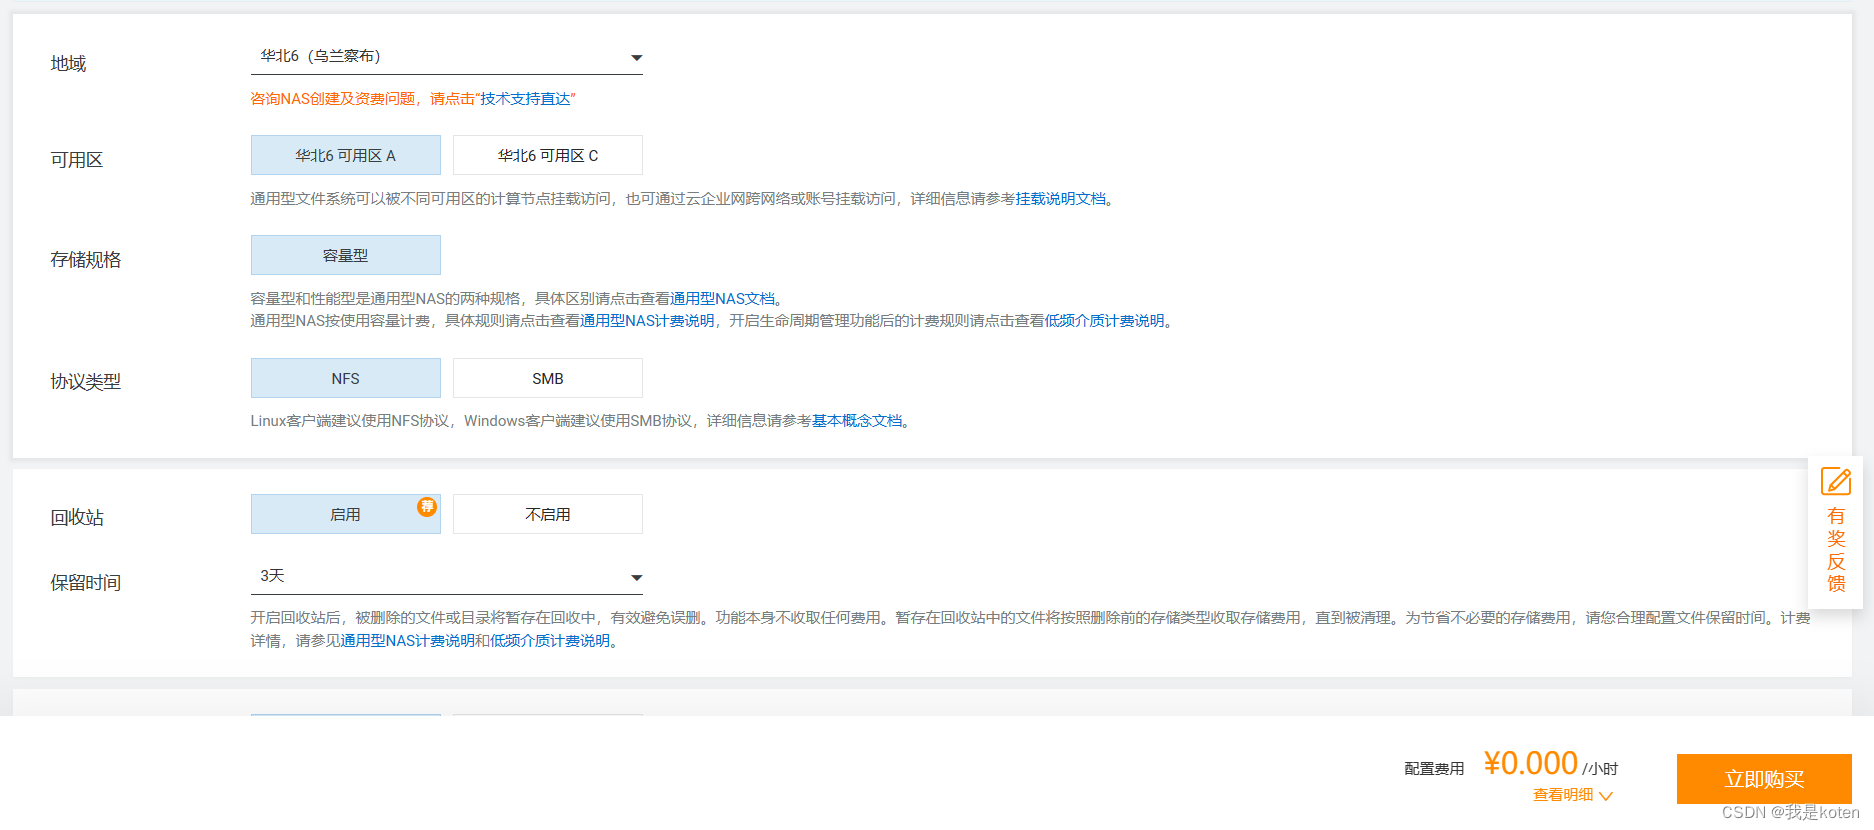
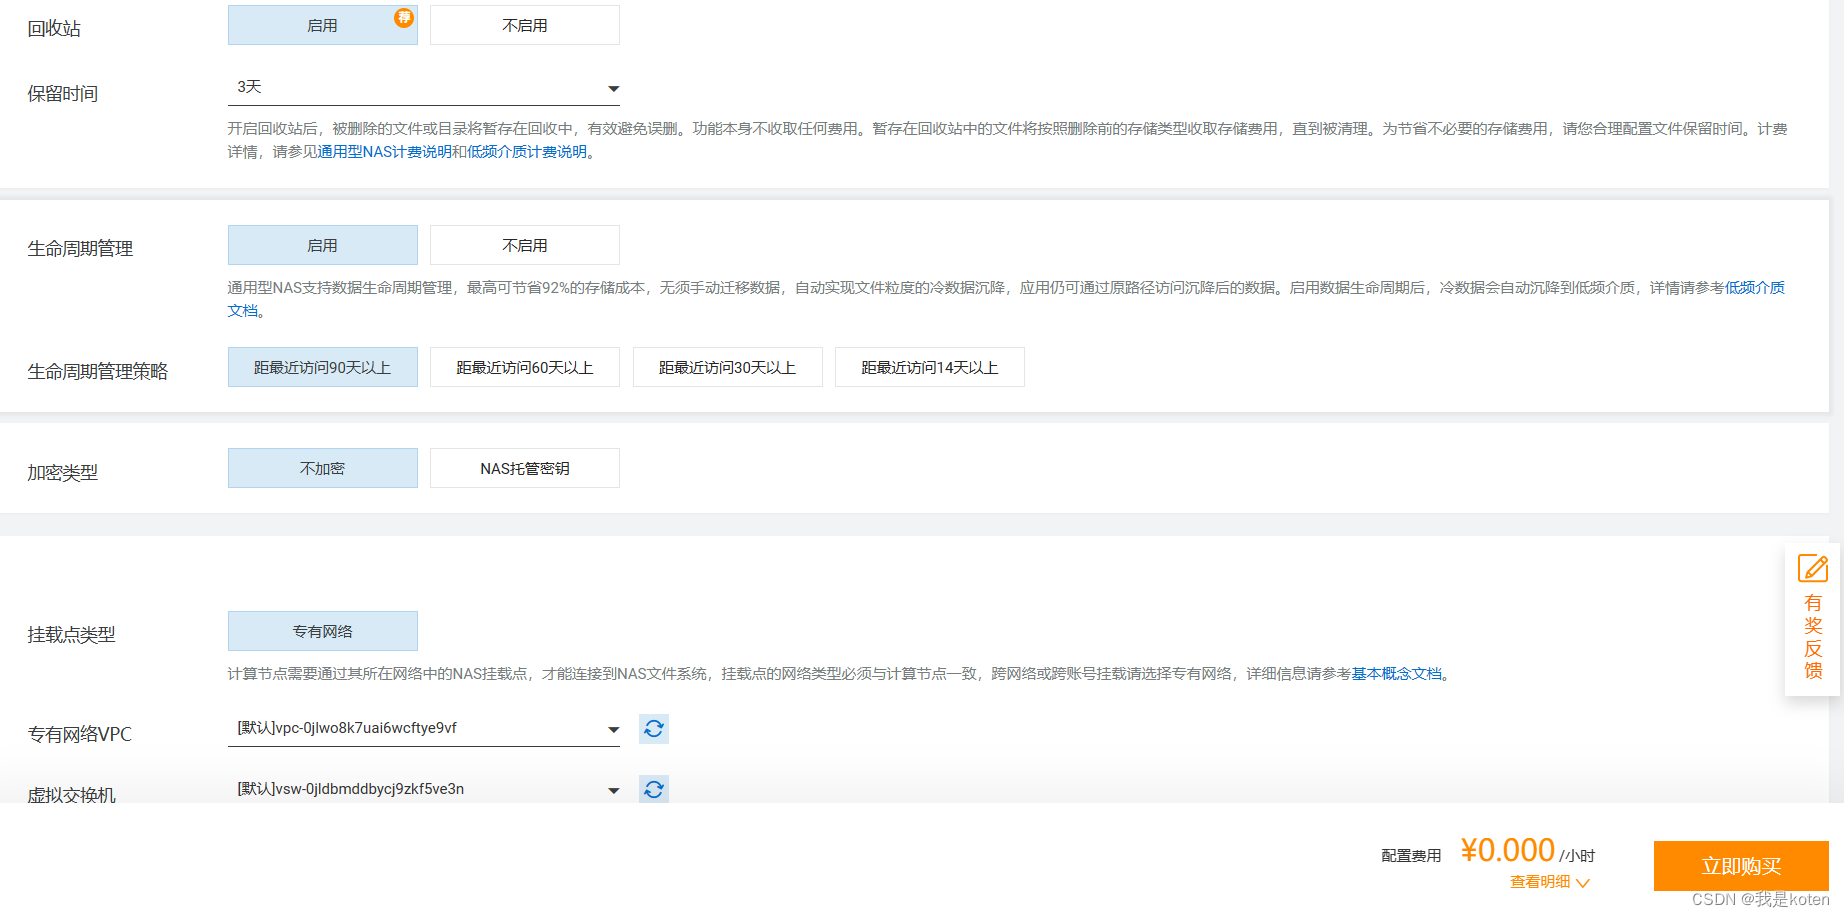
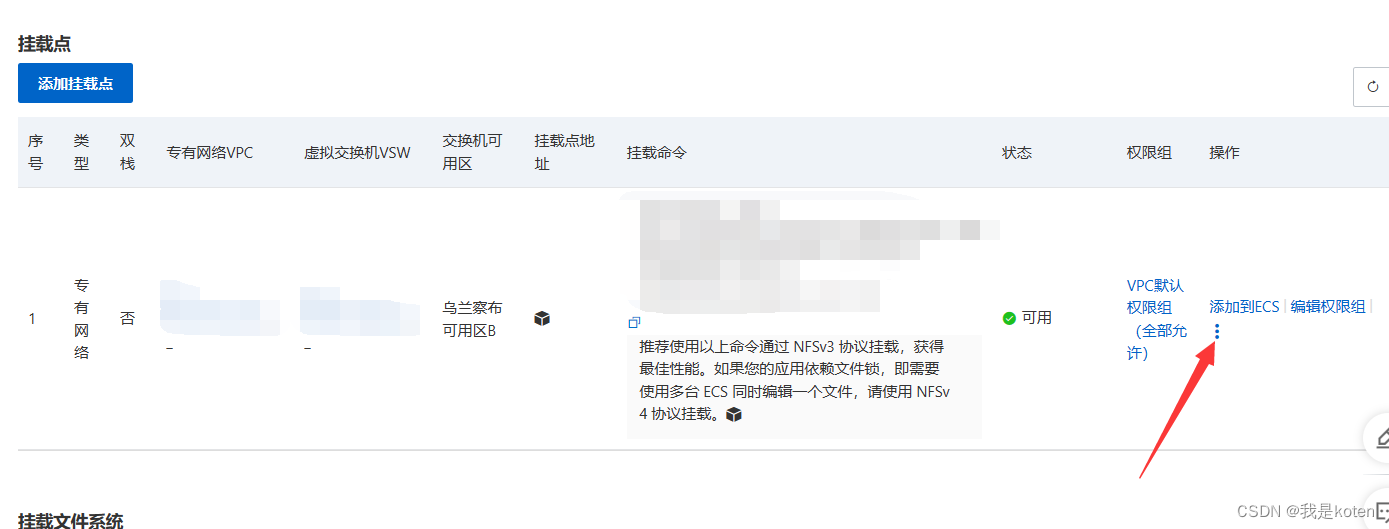
添加到ECS
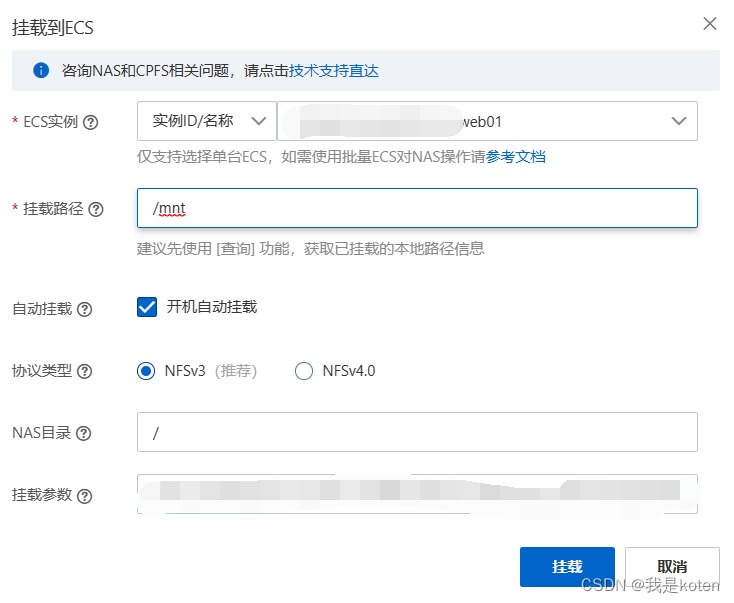
web1与web2都挂载下
[root@web01 config]# df -h
Filesystem                                         Size  Used Avail Use% Mounted on
devtmpfs                                           461M     0  461M   0% /dev
tmpfs                                              471M     0  471M   0% /dev/shm
tmpfs                                              471M  500K  471M   1% /run
tmpfs                                              471M     0  471M   0% /sys/fs/cgroup
/dev/vda1                                           20G  3.3G   16G  18% /
tmpfs                                               95M     0   95M   0% /run/user/0
29d8604a9d7-bwb8.cn-wulanchabu.nas.aliyuncs.com:/   10P     0   10P   0% /mnt[root@web02 ~]# df -h
Filesystem                                         Size  Used Avail Use% Mounted on
devtmpfs                                           461M     0  461M   0% /dev
tmpfs                                              471M     0  471M   0% /dev/shm
tmpfs                                              471M  492K  471M   1% /run
tmpfs                                              471M     0  471M   0% /sys/fs/cgroup
/dev/vda1                                           20G  3.4G   16G  19% /
tmpfs                                               95M     0   95M   0% /run/user/0
29d8604a9d7-bwb8.cn-wulanchabu.nas.aliyuncs.com:/   10P     0   10P   0% /mnt
在虚拟机中创建文件,成功显示在云盘上
[root@web01 mnt]# touch 1.txt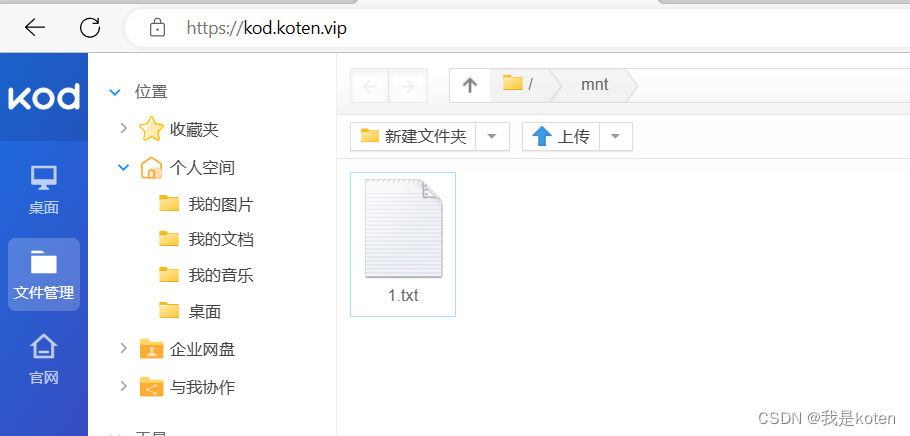
OSS
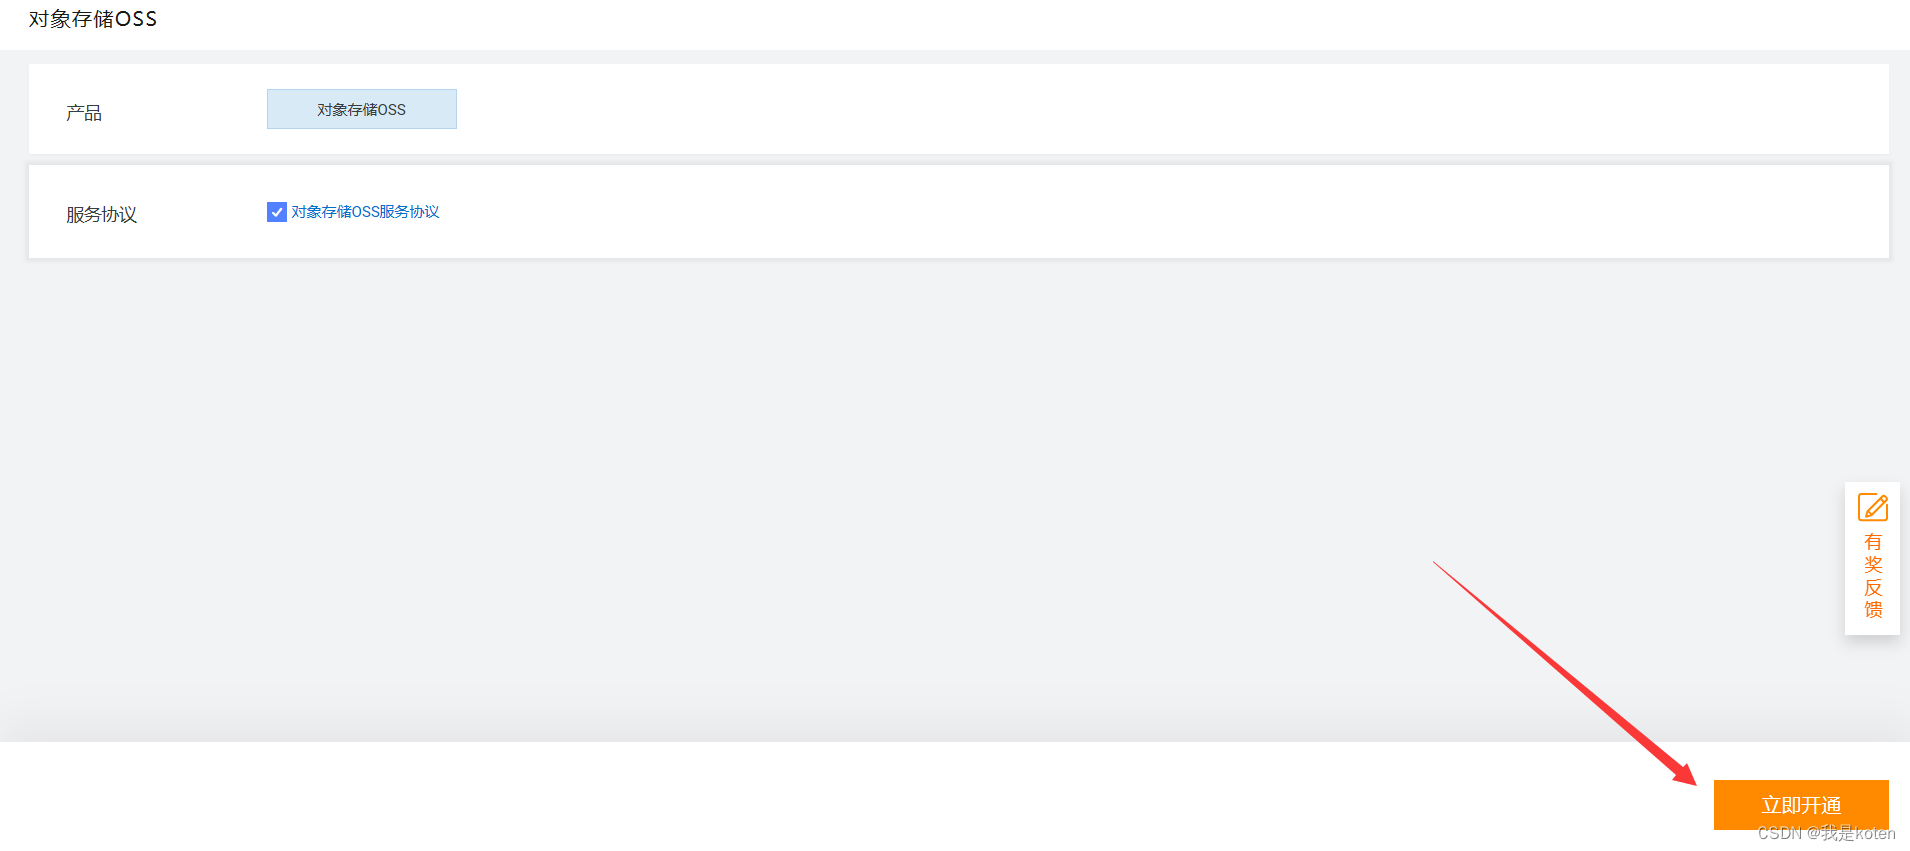
一、创建bucket


二、创建子账号
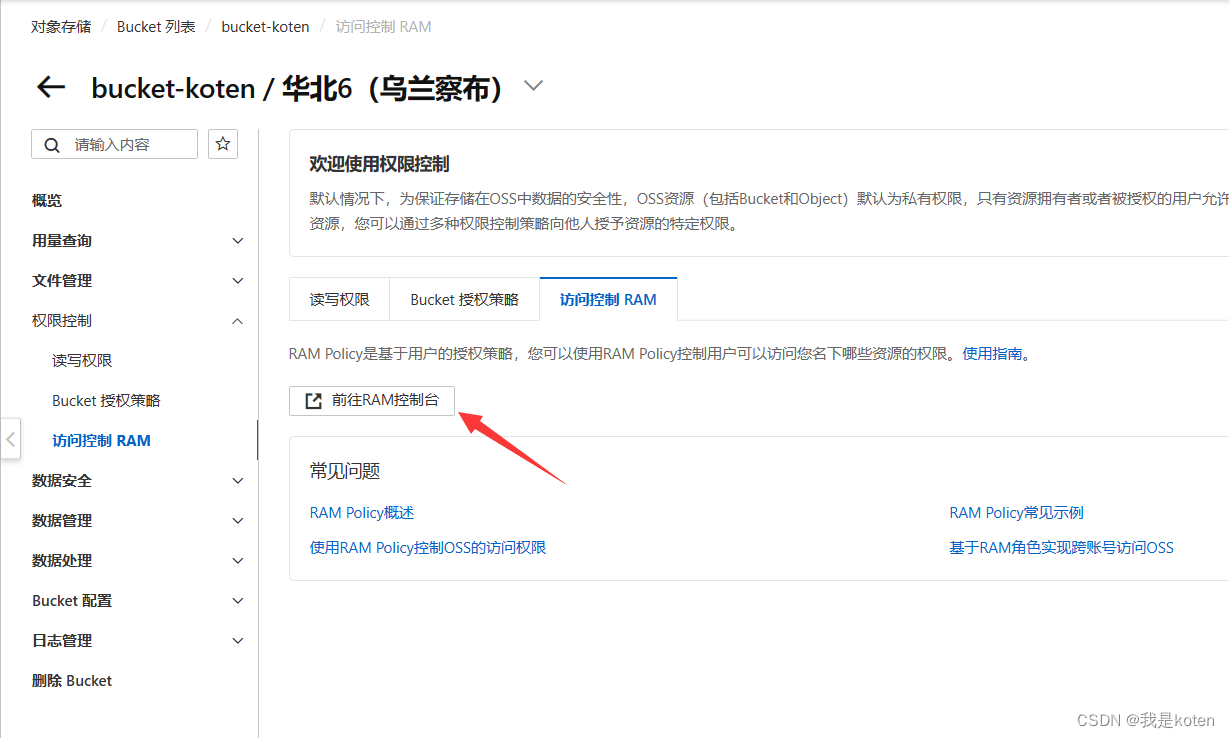
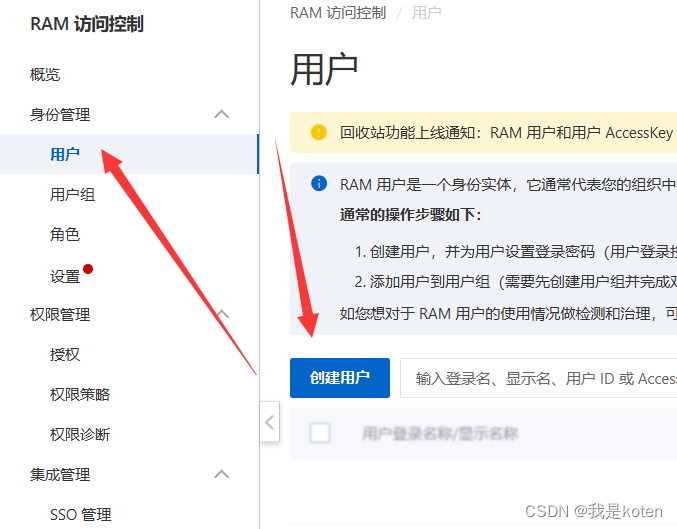
进入bucket-->权限控制-->访问控制RAM--> 访问控制RAM-->前往RAM控制台--用户:创建用户

三、授权子账号管理bucket
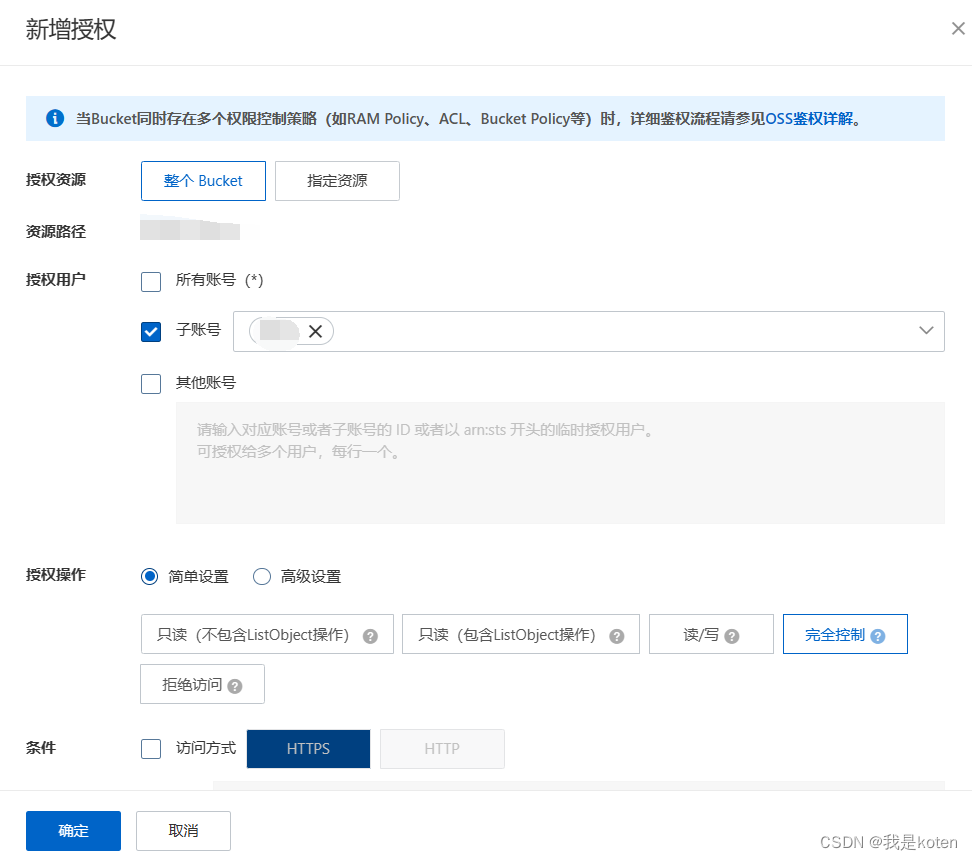
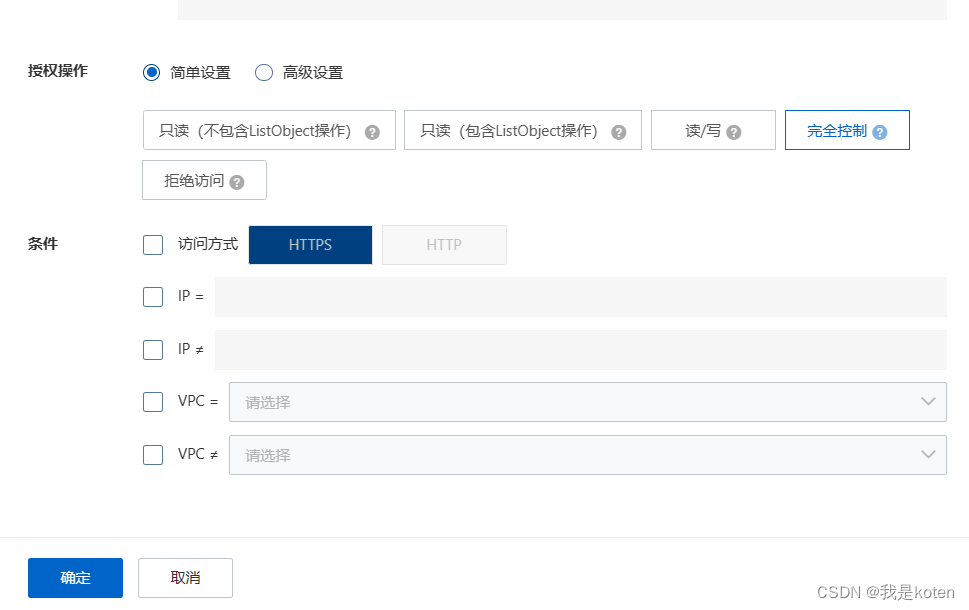
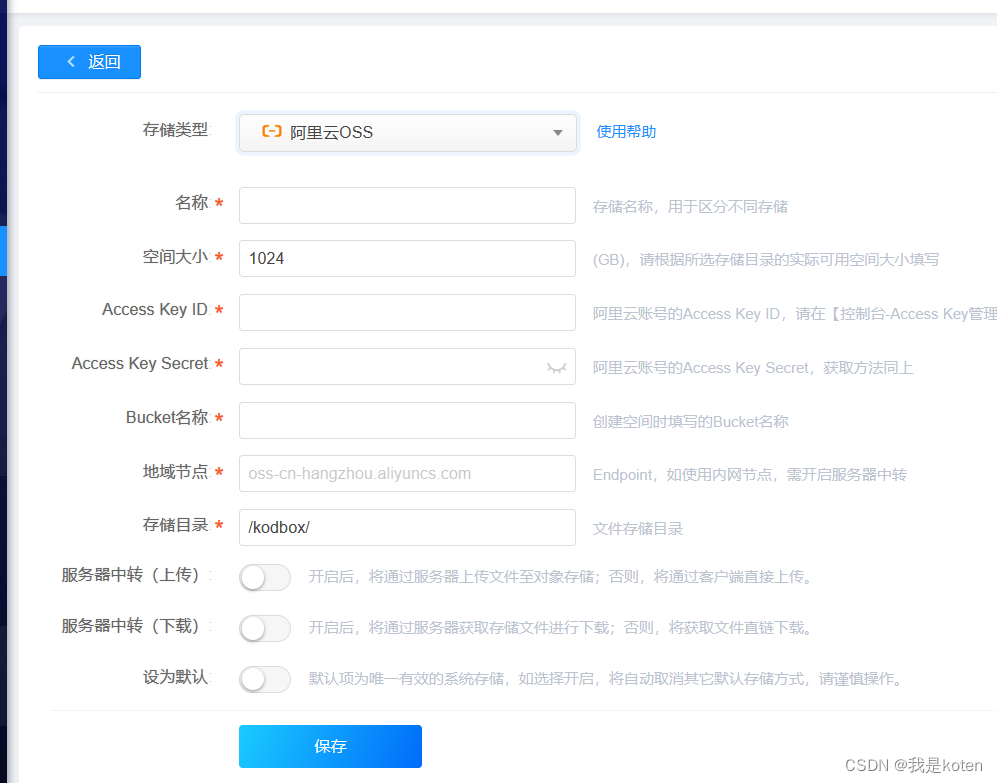
收集信息配置kod
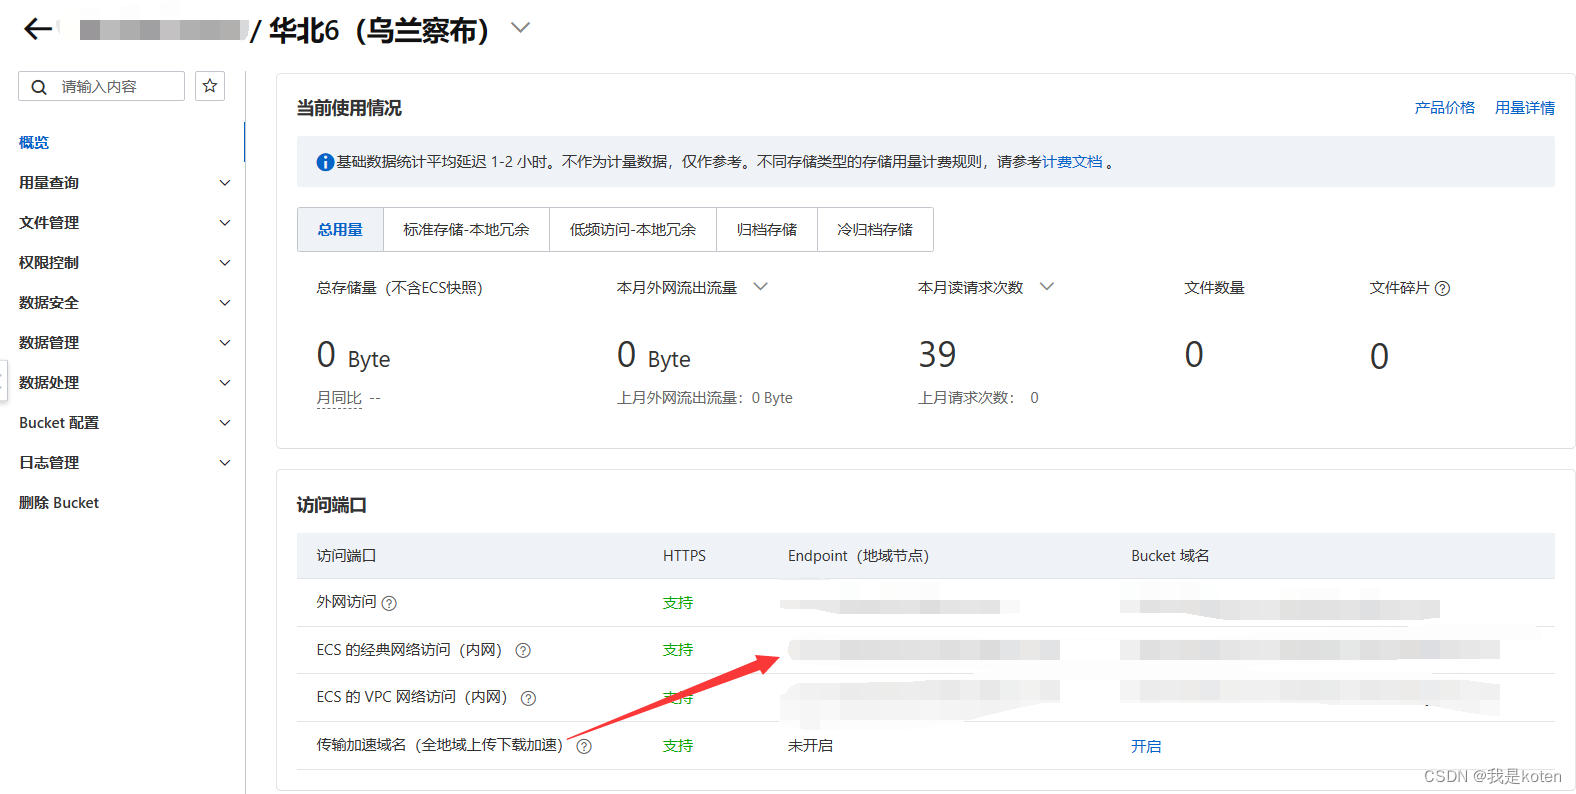
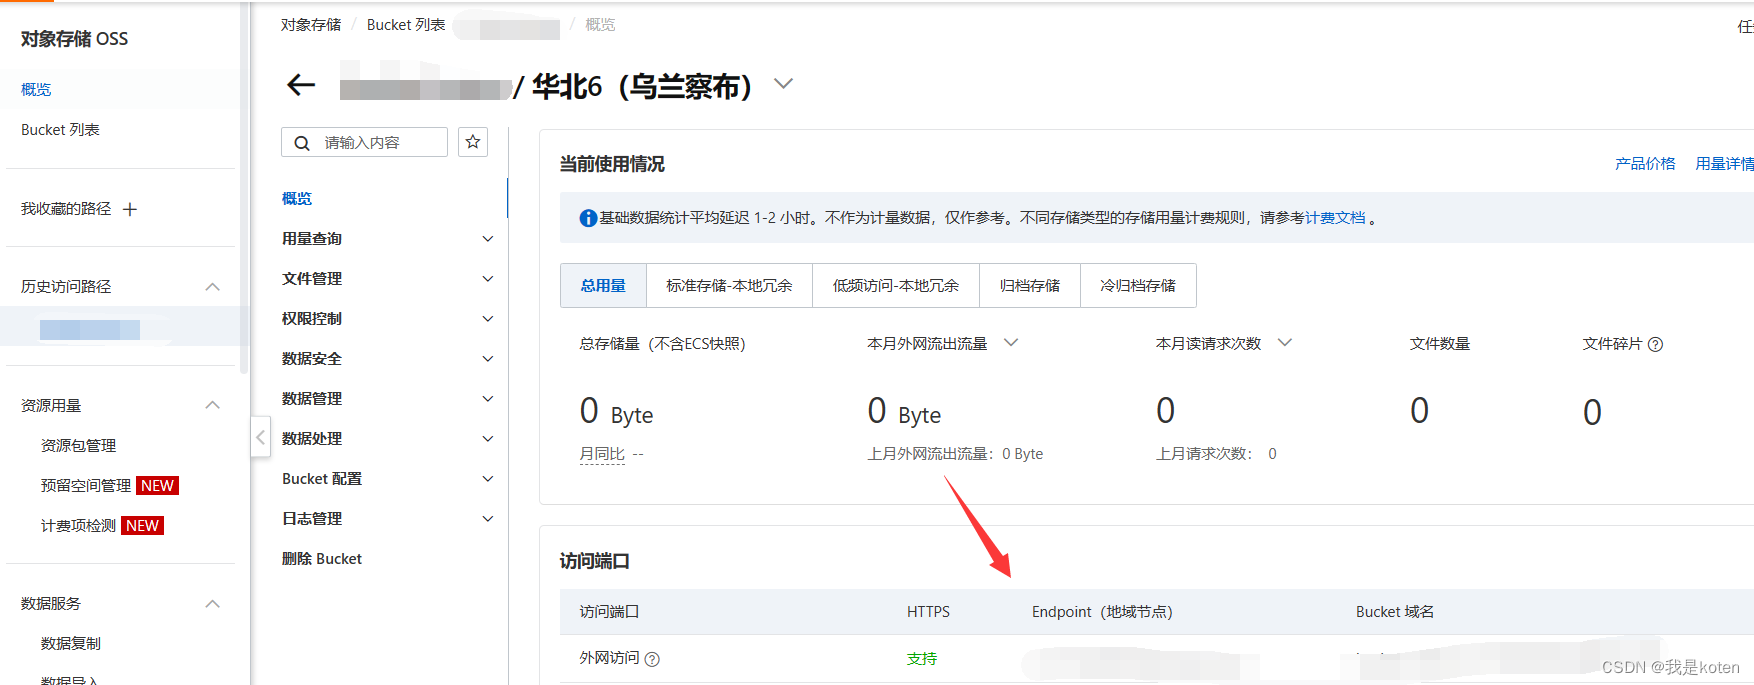
填写对应数据,填好后点保存,由于有两个web,这个操作也需要执行两步。
四、oss后台存储增加oss存储 上传图片测试
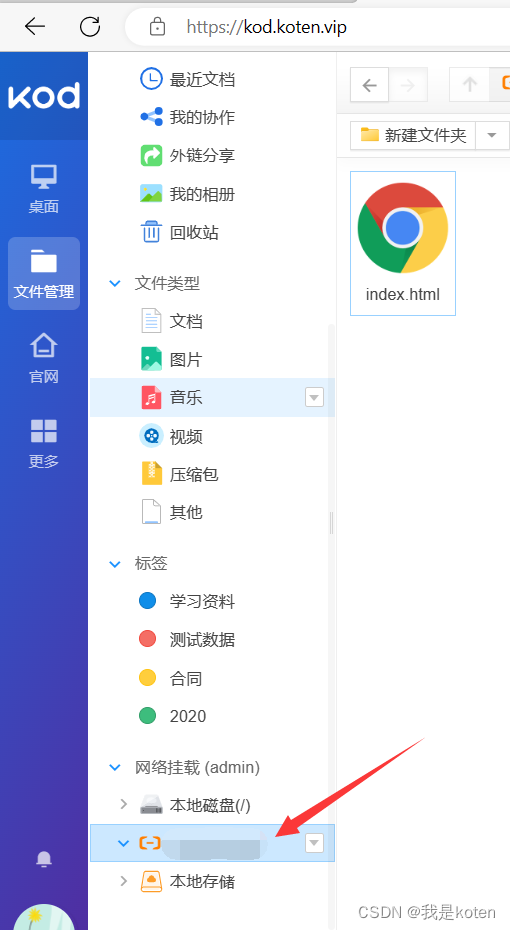
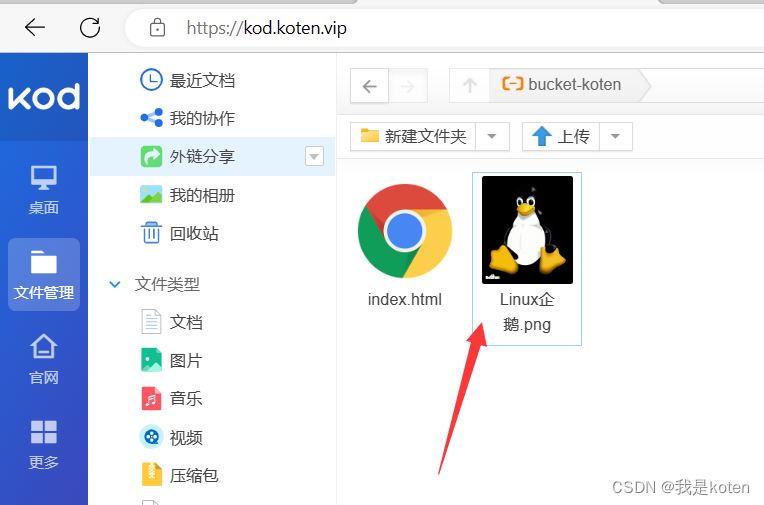
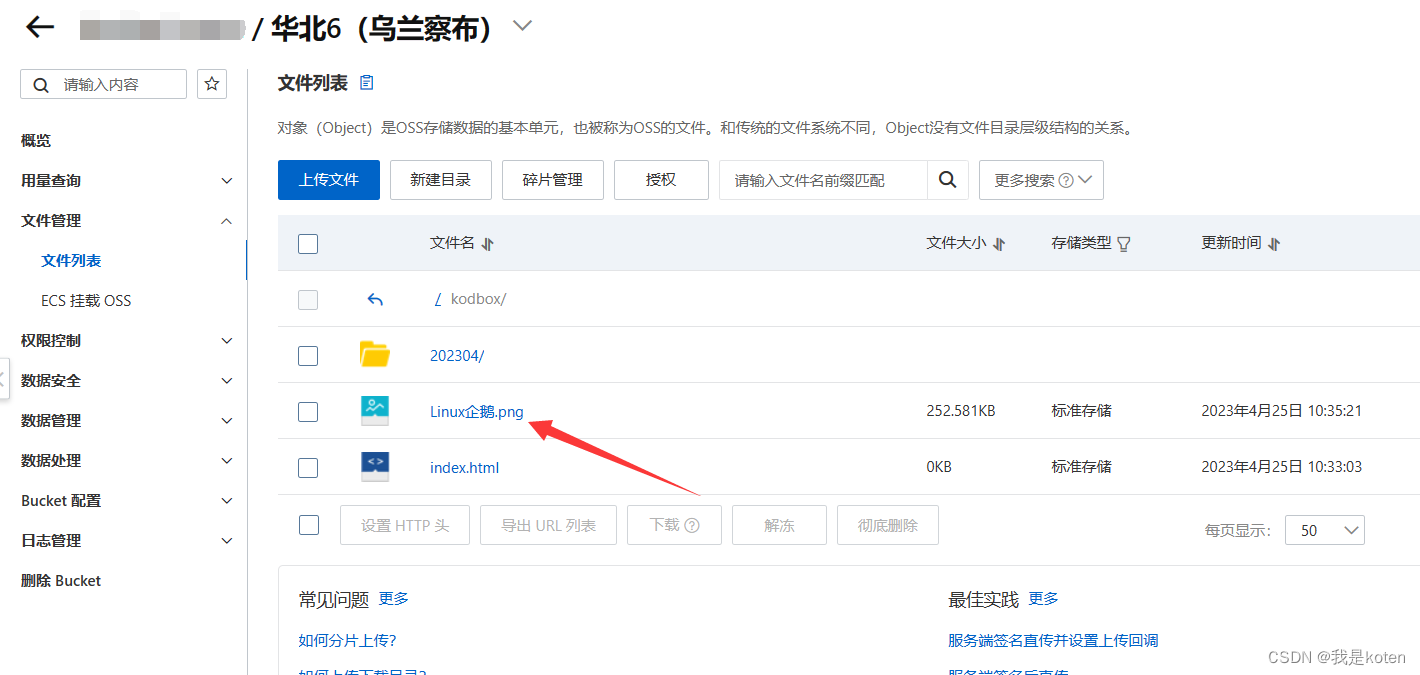
浏览器上传,阿里云成功显示。
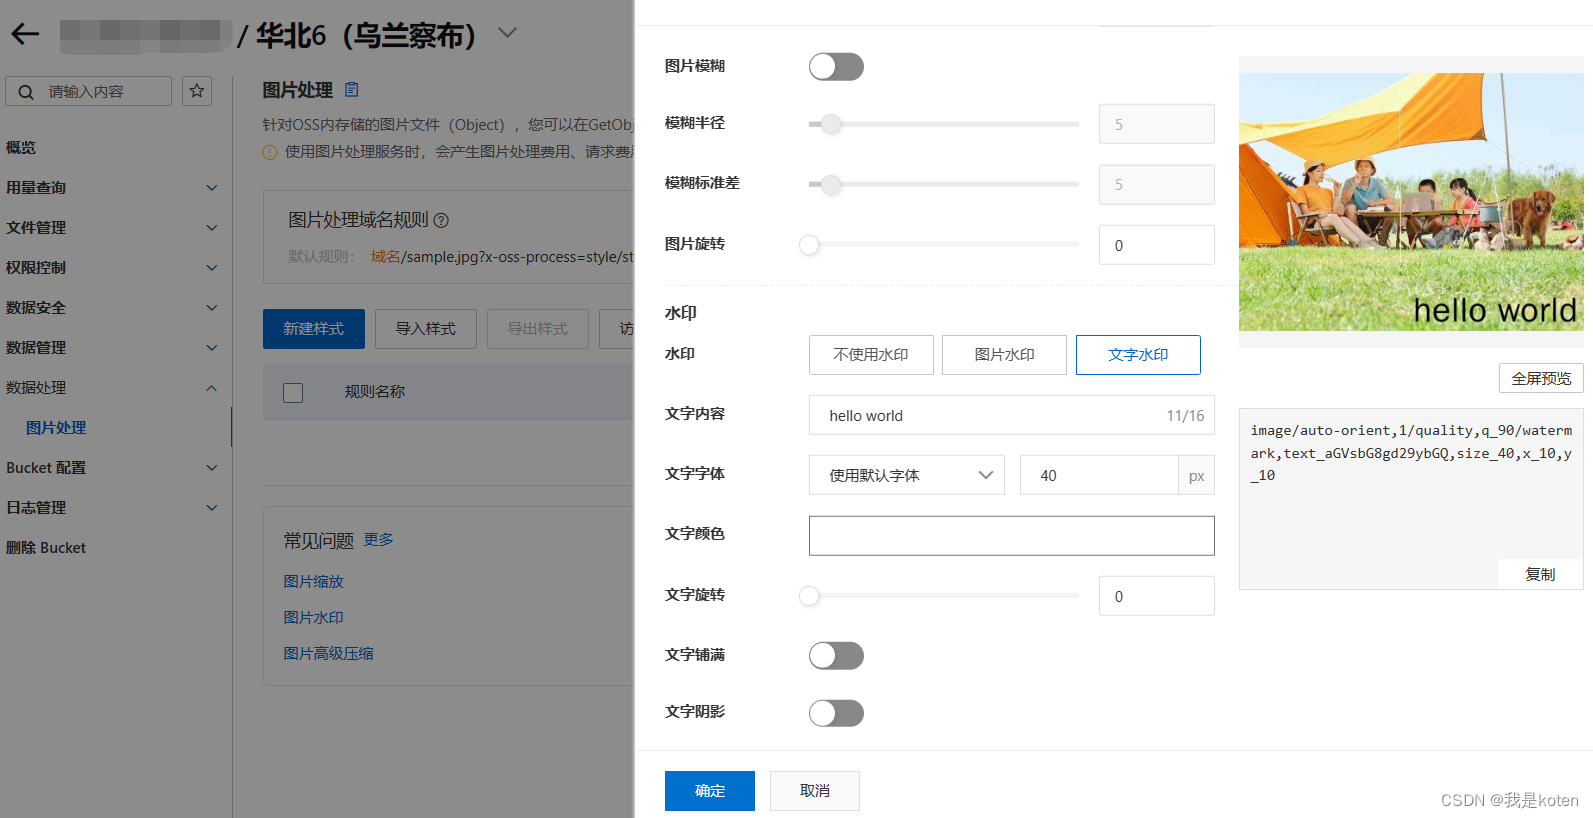
还可以进行图片处理,上传图片上去后,可以加水印,类似于百度图片右下角的水印。
我是koten,10年运维经验,持续分享运维干货,感谢大家的阅读和关注!
这篇关于【运维知识进阶篇】用阿里云部署kod可道云网盘(配置Redis+MySQL+NAS+OSS)的文章就介绍到这儿,希望我们推荐的文章对编程师们有所帮助!
