本文主要是介绍Flutter——最详细(Scaffold)使用教程,希望对大家解决编程问题提供一定的参考价值,需要的开发者们随着小编来一起学习吧!
Scaffold简介
相当于界面的主体(类似于安卓最外层PhoneWindow),组件的展示都必须依附于它。
使用场景:
每一个界面都是脚手架,通过它来进行架构实现,优美的布局效果。
| 属性 | 作用 |
|---|---|
| appBar | 顶部的标题栏 |
| body | 显示整体布局 |
| floatingActionButton | 右下角按钮 |
| floatingActionButtonLocation | 按钮的位置 |
| floatingActionButtonAnimator | 按钮动画 |
| drawer | 左侧滑动组件 |
| onDrawerChanged | 滑动事件监听 |
| endDrawer | 右侧滑动组件 |
| onEndDrawerChanged | 编辑完成 |
| bottomNavigationBar | 底部菜单组件 |
| backgroundColor | 背景色 |
| persistentFooterButtons | 显示在基架底部的一组按钮 |
| resizeToAvoidBottomInset | 如果脚手架上方显示屏幕键盘,则可以调整机身大小以避免与键盘重叠,从而防止机身内部的小部件被键盘遮挡。 |
endDrawer 属性效果
endDrawer: Container(color: Colors.white,width: 200,child: Center(child: Column(children: [Text('测试endDrawer'),Text('测试endDrawer'),],),),)

floatingActionButton 属性
floatingActionButtonLocation: 属性 startFloat、centerFloat、endFloat、 等几个属性
floatingActionButtonLocation: FloatingActionButtonLocation.endFloat,
floatingActionButton: FloatingActionButton(onPressed: () {},tooltip: 'Increment',child: const Icon(Icons.add),)


body: 属性代表布局的身体,相当于红色这一区域;
backgroundColor: 整体红色区域部分的背景颜色;

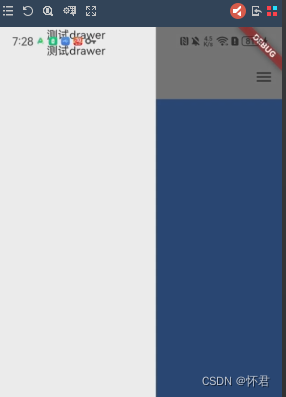
drawer: 左侧滑动组件
drawer: Container(color: Colors.white,width: 200,child: Center(child: Column(children: [Text('测试drawer'),Text('测试drawer'),],),),),

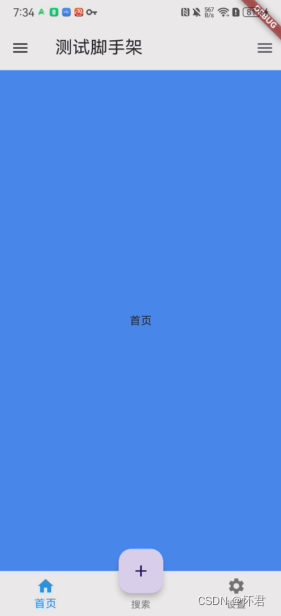
bottomNavigationBar: 底部菜单栏按钮
bottomNavigationBar: BottomNavigationBar(items: const <BottomNavigationBarItem>[BottomNavigationBarItem(icon: Icon(Icons.home),label: '首页',),BottomNavigationBarItem(icon: Icon(Icons.search),label: '搜索',),BottomNavigationBarItem(icon: Icon(Icons.settings),label: '设置',),],currentIndex: _selectedIndex,selectedItemColor: Colors.blue,onTap: (index) {setState(() {_selectedIndex = index;});},)

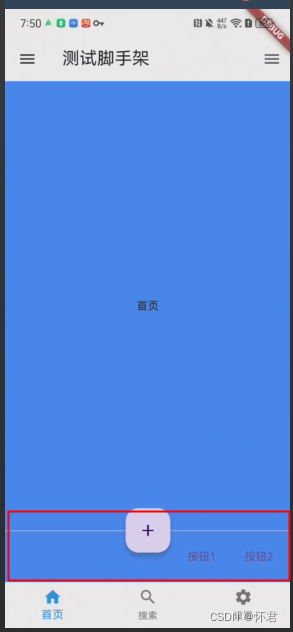
persistentFooterButtons: 显示在基架底部的一组按钮。
persistentFooterAlignment: AlignmentDirectional.bottomEnd,persistentFooterButtons: [TextButton(onPressed: () {// 按钮1的点击事件处理逻辑},child: Text('按钮1'),),TextButton(onPressed: () {// 按钮2的点击事件处理逻辑},child: Text('按钮2'),),],

整体代码块
import 'package:flutter/material.dart';class ScaffoldPage extends StatefulWidget {const ScaffoldPage({Key? key}) : super(key: key);State<ScaffoldPage> createState() => _ScaffoldPageState();
}class _ScaffoldPageState extends State<ScaffoldPage> {int _selectedIndex = 0;List<Widget> _widgetOptions = [// 每个选项对应的页面或小部件// 可以根据需要替换为自己的页面或小部件Text('首页'),Text('搜索'),Text('设置'),];Widget build(BuildContext context) {return Scaffold(appBar: AppBar(title: const Text('测试脚手架'),),backgroundColor: Colors.blueAccent,body: Center(child: _widgetOptions.elementAt(_selectedIndex),),endDrawer: Container(color: Colors.white,width: 200,child: Center(child: Column(children: [Text('测试endDrawer'),Text('测试endDrawer'),],),),),drawer: Container(color: Colors.white,width: 200,child: Center(child: Column(children: [Text('测试drawer'),Text('测试drawer'),],),),),bottomNavigationBar: BottomNavigationBar(items: const <BottomNavigationBarItem>[BottomNavigationBarItem(icon: Icon(Icons.home),label: '首页',),BottomNavigationBarItem(icon: Icon(Icons.search),label: '搜索',),BottomNavigationBarItem(icon: Icon(Icons.settings),label: '设置',),],currentIndex: _selectedIndex,selectedItemColor: Colors.blue,onTap: (index) {setState(() {_selectedIndex = index;});},),floatingActionButtonLocation: FloatingActionButtonLocation.centerDocked,floatingActionButton: FloatingActionButton(onPressed: () {},tooltip: 'Increment',child: const Icon(Icons.add),),persistentFooterAlignment: AlignmentDirectional.bottomEnd,persistentFooterButtons: [TextButton(onPressed: () {// 按钮1的点击事件处理逻辑},child: Text('按钮1'),),TextButton(onPressed: () {// 按钮2的点击事件处理逻辑},child: Text('按钮2'),),],);}
}项目地址
https://github.com/z244370114/flutter_demo
这篇关于Flutter——最详细(Scaffold)使用教程的文章就介绍到这儿,希望我们推荐的文章对编程师们有所帮助!


