本文主要是介绍字节流及存放本地文件上传和下载文件,希望对大家解决编程问题提供一定的参考价值,需要的开发者们随着小编来一起学习吧!
前言
之前的文章有写过
vue+springboot使用文件流实现文件下载
实现如何通过
D:\file\文件名.文件格式
的形式进行下载文件
但是它对于很多业务场景相对适用性不是很广泛。
以及
elementUI加springboot实现上传excel文件给后端并读取excel
也只能是通过elementui的元素类型进行上传。
因此,本次文章将通过两种方式
存放本地文件和存放字节流两种方式教大家如何进行文件的上传和下载,适用绝大部分场景.
存放本地文件实现上传和下载
我们在开发完项目,并且将项目部署到服务器的时候,如果我们有实现上传的功能,实际上还是保存文件在部署项目的这个服务器上,下载也是从服务器下载,因此,我们就可以直接使用存放本地文件的方式实现上传和下载
存放本地文件-上传
我们都知道,在前端如果需要接收文件的传递给后端的话,可以使用
formData进行保存数据,那么对应前端代码如下:
前端
为演示方便,后续上传都使用原生的input进行获取文件
界面
<input type="file" id="upload" />
<button onclick="uploadFile">上传</button>
js逻辑
uploadFile() {// 获取上传图片let dom = document.getElementById("upload");// 定义接收文件的formData,并用"file"去接收数据let formDataInfo = new FormData();// 接收第一个文件,适用单文件formDataInfo.append("file",dom.files[0]);// 需要引入axiosthis.$axios({method: 'post', // 为post请求url: "/fileUplod"// 请求后端的路径,改成自己的就行,data: formDataInfo,// 传递参数responseType: 'json',// 响应类型}).then(res = > {// 响应数据})
以上是适用于单文件,如果需要上传多文件,参考如下代码
uploadFile() {// 获取上传图片let dom = document.getElementById("upload");// 定义接收文件的formData,并用"file"去接收数据let formDataInfo = new FormData();// 接收文件数量formDataInfo.append("length",dom.files.length)// 遍历文件加入formData,后端处理的时候获取length的长度进行遍历文件for (let i = 0;i<dom.files.length;i++) {formDataInfo.append("file"+i,dom.files[i]);}// 需要引入axiosthis.$axios({method: 'post', // 为post请求url: "/fileUplod"// 请求后端的路径,改成自己的就行,data: formDataInfo,// 传递参数responseType: 'json', // 响应类型}).then(res = > {// 响应数据})
}
后端
@POST@Path("fileUplod")public String fileUplod(FormDataMultiPart form) {try {// 需要保存文件路径String path = "D:/file";// 文件流InputStream inputStream= form.getField("file").getValueAs(InputStream.class);// 文件名String fileName = form.getField("file").getContentDisposition().getFileName();// 调用下面的保存本地文件方法uploadFileToLocal(inputStream,path,fileName);return "上传文件成功!";}catch(Exception e) {return "上传文件到本地磁盘失败" + e.getMessage();}}/*** @param inputStream 文件流* @param path 上传路径* @param fileName 文件名* @return 如果返回含义字符串【报错】上传失败,否则返回文件路径* @author ks027276* @description 上传文件到本地方法*/public String uploadFileToLocal(InputStream inputStream, String path, String fileName) throws Exception {try {File folder = new File(path);// 创建没有的文件夹if (!folder.isDirectory()) {folder.mkdirs();}//创建空文件FileOutputStream outputStream = new FileOutputStream(path + "/" + fileName);// 将文件流数据填充到空文件int index = 0;byte[] bytes = new byte[1024];while ((index = inputStream.read(bytes)) != -1) {outputStream.write(bytes, 0, index);outputStream.flush();}inputStream.close();outputStream.close();return path + "/" + fileName;} catch (Exception e) {return "【报错】" + e.getMessage();}}
假如需要获取文件名,使用代码:
String fileName = form.getField("file").getContentDisposition().getFileName();
值得一提的是,如果上传文件名为中文,那么这个方式上传会乱码,需要处理为如下:
String fileName = new String(form.getField("file").getContentDisposition().getFileName()
.getBytes("iso-8859-1"), "UTF-8");
上述皆为单文件上传的方式,假如使用我上方前端多文件上传,逻辑其实差不多,就是多了一个遍历而已,具体逻辑如下:
  @POST@Path("fileUplod")public String fileUplod(FormDataMultiPart form) {try {// 需要保存文件路径String path = "D:/file";for (int i = 0;i <Integer.valueof(form.getField("length").getvalue());i++) {// 文件流InputStream inputStream= form.getField("file"+i).getValueAs(InputStream.class);// 文件名String fileName = form.getField("file"+i).getContentDisposition().getFileName();// 调用下面的保存本地文件方法uploadFileToLocal(inputStream,path,fileName);}return "上传文件成功!";}catch(Exception e) {return "上传文件到本地磁盘失败" + e.getMessage();}
}/*** @param inputStream 文件流* @param path        上传路径* @param fileName    文件名* @return 如果返回含义字符串【报错】上传失败,否则返回文件路径* @author ks027276* @description 上传文件到本地方法*/public String uploadFileToLocal(InputStream inputStream, String path, String fileName) throws Exception {try {File folder = new File(path);// 创建没有的文件夹if (!folder.isDirectory()) {folder.mkdirs();}//创建空文件FileOutputStream outputStream = new FileOutputStream(path + "/" + fileName);// 将文件流数据填充到空文件int index = 0;byte[] bytes = new byte[1024];while ((index = inputStream.read(bytes)) != -1) {outputStream.write(bytes, 0, index);outputStream.flush();}inputStream.close();outputStream.close();return path + "/" + fileName;} catch (Exception e) {return "【报错】" + e.getMessage();}}
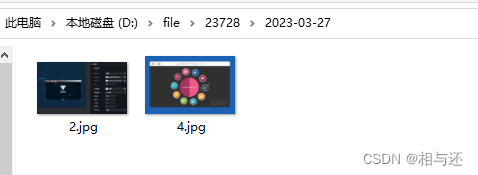
保存结果
以下截图为我用上方功能实现保存到本地:
存放本地文件-下载
下载的话,既然上面已经接收到了路径,那么直接用路径去查找就好了
路径形式如下:
D:/file/1.jpg
前端代码
<button onclick="getFile">获取文件</button>
// path值形式为:D:/file/1.jpg
// name值形式为:1.jpg
getFile(path,name) {// 需要引入axiosthis.axios({method: 'get', // 为get请求url: "/downFile"// 请求后端的路径,改成自己的就行,data: {path: path,name: name},// 传递参数responseType: 'json',// 响应类型}).then(res => {var a = document.createElement('a');a.href = res.data // 这里需要根据自己实际项目作变更,可能你的数据在res,或res.data或res.data.datadocument.body.appendChild(a);a.click();document.body.removeChild(a);})}
后端
  /*** 文件下载 根据路径*/
// response类型引用为:
import javax.ws.rs.core.Response;@GET@Path("/downFile")public Response downLoadPanorama(@QueryParam("path") String path,@QueryParam("name") String name) {try {FileInputStream inputStream = new FileInputStream(path);byte[] bytes = toByteArray(inputStream);return Response.ok(new StreamingOutput() {@Overridepublic void write(OutputStream output) throws IOException, WebApplicationException {try {output.write(bytes);} catch (Exception ex) {}}}).header("Content-disposition","attachment;filename=" + name).header("Cache-Control", "no-cache").build();} catch (Exception e) {e.printStackTrace();return Response.status(Response.Status.NOT_FOUND).build();}}
使用上面的代码会将文件下载下来
形式如:
存放字节流的形式上传和下载
一般来说,会更推荐使用字节流的方式进行实现文件的上传和下载,因为是文件流,所以我们可以更方便便捷的用它实现各种操作。
存字节流实际上是保存在数据库,因此对数据库的内存会占用更多。
存放字节流-上传
首先,数据库表的字段需要新建blob类型的字段接收数据
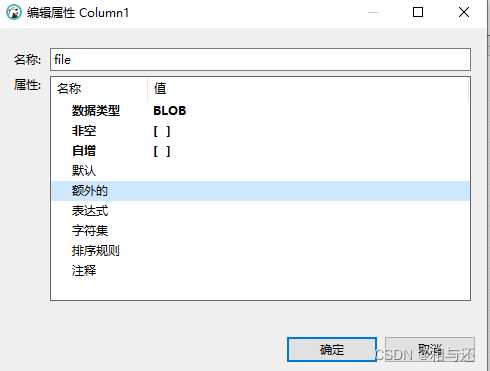
在java代码对象需要用byte数组类型接收文件转字节流的字段属性接收
@Data
public class FileObject {private byte[] file;
}
前端
界面
<input type="file" id="upload" />
<button onclick="uploadFile">上传</button>
js逻辑
uploadFile() {// 获取上传图片let dom = document.getElementById("upload");// 定义接收文件的formData,并用"file"去接收数据let formDataInfo = new FormData();// 接收第一个文件,适用单文件formDataInfo.append("file",dom.files[0]);// 需要引入axiosthis.$axios({method: 'post', // 为post请求url: "/fileUplod"// 请求后端的路径,改成自己的就行,data: formDataInfo,// 传递参数responseType: 'json',// 响应类型}).then(res = > {// 响应数据})
以上是适用于单文件,如果需要上传多文件,参考如下代码
uploadFile() {// 获取上传图片let dom = document.getElementById("upload");// 定义接收文件的formData,并用"file"去接收数据let formDataInfo = new FormData();// 接收文件数量formDataInfo.append("length",dom.files.length)// 遍历文件加入formData,后端处理的时候获取length的长度进行遍历文件for (let i = 0;i<dom.files.length;i++) {formDataInfo.append("file"+i,dom.files[i]);}// 需要引入axiosthis.$axios({method: 'post', // 为post请求url: "/fileUplod"// 请求后端的路径,改成自己的就行,data: formDataInfo,// 传递参数responseType: 'json', // 响应类型}).then(res = > {// 响应数据})
}
其实逻辑是一样的,和存放本地文件上传的数据一样
最主要的逻辑差距在后端
后端
  @POST@Path("fileUplod")public String fileUplod(FormDataMultiPart form) {try {// 文件流InputStream inputStream= form.getField("file").getValueAs(InputStream.class);// 调用下面的保存本地文件方法byte[] fileBytes =  getBytes(inputStream);// 调用新增数据库sql存到数据库// 这边就属于自己的功能逻辑了,我以下就不写了return "上传文件成功!";}catch(Exception e) {return "上传文件到数据库失败" + e.getMessage();}
}/*** 存字节流到数据库* @param inputStream 字节流* 有值说明获取成功,无值说明失败*/public byte[] getBytes(InputStream inputStream) throws Exception {try {BufferedInputStream bufferedInputStream = new BufferedInputStream(inputStream);ByteArrayOutputStream byteArrayOutputStream = new ByteArrayOutputStream();byte[] buffer;int len;byte[] buf = new byte[2048];while ((len = bufferedInputStream.read(buf)) != -1) {byteArrayOutputStream.write(buf, 0, len);}byteArrayOutputStream.flush();buffer = byteArrayOutputStream.toByteArray();inputStream.close();return buffer;} catch (Exception e) {return null;}}
上述皆为单文件上传的方式,假如使用我上方前端多文件上传,逻辑其实差不多,就是多了一个遍历而已,具体逻辑如下:
    @POST@Path("fileUplod")public String fileUplod(FormDataMultiPart form) {try {for (int i = 0;i <Integer.valueof(form.getField("length").getvalue());i++) {// 文件流InputStream inputStream= form.getField("file"+i).getValueAs(InputStream.class);// 调用下面的保存本地文件方法byte[] "file"+i = getBytes(inputStream);// 调用新增数据库sql存到数据库// 这边就属于自己的功能逻辑了,我以下就不写了}return "上传文件成功!";}catch(Exception e) {return "上传文件到数据库失败" + e.getMessage();}
}/*** 存字节流到数据库* @param inputStream 字节流* 有值说明获取成功,无值说明失败*/public byte[] getBytes(InputStream inputStream) throws Exception {try {BufferedInputStream bufferedInputStream = new BufferedInputStream(inputStream);ByteArrayOutputStream byteArrayOutputStream = new ByteArrayOutputStream();byte[] buffer;int len;byte[] buf = new byte[2048];while ((len = bufferedInputStream.read(buf)) != -1) {byteArrayOutputStream.write(buf, 0, len);}byteArrayOutputStream.flush();buffer = byteArrayOutputStream.toByteArray();inputStream.close();return buffer;} catch (Exception e) {return null;}}
如果需要获取文件名,参照上面存放本地文件方式有说明
存到数据库结果为:
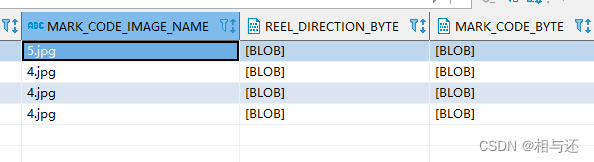
是一个BLOB数据
存放字节流-下载
通过sql查询语句我们查找到存放的字节流文件数据,展示到前端,结果为:

是一个Array数组的形式
ps:需要注意的是,由于不同后端项目架构的问题,可能返回给前端的不是字节流
而是如下方的base64:

因此我们对于处理base64的需要下载,思路应该是将base64转为文件
后端逻辑就不写了,单纯就是一个sql查数据而已
如果是图片文件,可以使用一个img元素直接展示图片
<img :src="base64"/>
<button onclick="showImage">上传</button>
上面我们绑定了一个自定义属性:base64,js逻辑直接把它拿过来赋值即可
showImage(byte,type) {let binary = "";const bytes = new Uint8Array(byte);const len = bytes.byteLength;for (let i = 0; i < len; i++) {binary +=String.fromCharCode(bytes[i]);}// base64前缀let base64Before = "";if (type == 'jpg' || type == 'jpeg') {base64Before = 'data:image/jpeg;base64,';} else if (type == 'png') {base64Before = 'data:image/png;base64,';}this.base64 =base64Before +window.btoa(binary);
}
假如你需要拿到字节流下载文件的话,使用如下逻辑:
// byte,字节流,数据形式如: [11,-1,44,20,......]
// _type,数据形式如: jpg  txt
// name,文件名,数据形式如 1.jpg  2.txt
downFile (byte,_type,name) {var eleLink = document.createElement('a');// 根据文件类型设定blob文件类型let fileType = this.extToMimes(_type);// 设定下载文件名eleLink.download = name;// 设置a标签不显示eleLink.style.display = 'none';// 将文件流转Uint8Arrayconst bytes = new Uint8Array(byte);// 将转换后的数据和获取的文件类型,创建blobvar blob = new Blob([bytes],{type: fileType});eleLink.href = URL.createObjectURL(blob);// 自动触发点击document.body.appendChild(eleLink);eleLink.click();// 然后移除document.body.removeChild(eleLink);
}
// 根据传入的类型设定blob文件类型extToMimes(ext) {let type = undefined;switch (ext) {case 'jpg':type = 'image/jpeg'case 'png':type = 'image/png'case 'jpeg':type = 'image/jpeg'break;case 'txt':type = 'text/plain'break;case 'xls':type = 'application/vnd.ms-excel'break;case 'doc':type = 'application/msword'break;case 'xlsx':type = 'application/vnd.ms-excel'break;default:}return type;}
下载结果
通过以上,可以下载文件,并且正确显示出内容
测试有效
字节流获取文件的另一种方式
除了上面那种获取字节流文件的方式,还有另外一种,上面基本上需要前端和后端同时参与,并且代码量也不少。
而这里我的字节流获取文件的方式大部分工作教给后端处理,前端单纯只是获取而已。
后端处理
后端代码如下:
这里我的思路是,将文件存在数据库,要用的时候直接通过主键拿到存储的byte数组,后端处理逻辑
// 通过id获取byte数组传给前端@GetMapping("getFileById")@ResponseBodypublic ResponseEntity<byte[]> getFileById(@RequestParam("id")Integer id) {HttpHeaders httpHeaders=new HttpHeaders();try {// 获取数据库byte数组,这里我假定已经从数据库拿到了字节流byte[] data= xxx数据库获取到的数据;// 文件名 格式如1.pngString fileNamehttpHeaders.setContentType(MediaType.APPLICATION_OCTET_STREAM);httpHeaders.setContentDisposition(ContentDisposition.builder("file").filename(fileName, StandardCharsets.UTF_8).build());return new ResponseEntity<>(data, httpHeaders, HttpStatus.OK);}catch (Exception e) {return new ResponseEntity<>(null, httpHeaders, HttpStatus.NOT_FOUND);}}
前端获取
按照如上我的后端代码,前端需要给入一个id调后端接口,
如果是图片,想展示出来显示图片可以这么做:
界面写一个img元素,并且直接给src赋值调用后端的接口
<img :src="localhost:端口/getFileById?id=11"/>
通过js可以动态赋值展示图片
如果想直接下载文件,则使用如下代码:
<button @click="down">点击下载</button>
down() {window.location.href = "localhost:端口/getFileById?id=11"";
}
两种方式皆可,只不过上面那种方式可以应对的情况更多,按照自己的需求酌情选择方式方法即可
结语
以上,为通过字节流和本地文件的方式进行上传和下载的方法。
这篇关于字节流及存放本地文件上传和下载文件的文章就介绍到这儿,希望我们推荐的文章对编程师们有所帮助!


