本文主要是介绍CMake-overall-advance2,希望对大家解决编程问题提供一定的参考价值,需要的开发者们随着小编来一起学习吧!
文章目录
- cmake相关部分(做实验)
- CMake常见错误
- depthmap 运行时错误
- qstring.h不存在问题
- qmeta_call类型的Qt未定义错误
- cmake文件拷贝原理探寻
- vcpkg编译时执行拷贝
- h2o编译时执行拷贝
- h2o.cmake深度解析
- applocal.ps1脚本文件解析
- qtdeploy.ps1脚本文件解析
- cmake相关环境变量
- CMAKE_BINARY_DIR&&CMAKE_RUNTIME_OUTPUT_DIRECTORY_<CONFIG>
- AUTOGEN_SOURCE_GROUP
- set_target_properties
- set_property
- 外部环境编译
- 哈希编码问题
- cmake库环境的导出
- 导出头文件和库文件
- CPack官方文档要点
- 首要知识点
- CPACK中cmake相关的系统变量
- CPack的命令行执行方式
- conda build打包
- conda-build 初体验
- 上传库到conda-forge
- fork conda-forge 仓库
- 创建属于自己想要上传的库的分支
- 编辑meta.yaml并创建scripts
- 向master分支创建请求
- conda-forge论坛
- meta.yaml解析
- 文件hash编码解析
- vcpkg实验
- vcpkg理解
- vcpkg集成到项目
- vcpkg安装的库类型
- vcpkg集成到cmake
- vcpkg编译流程
- vcpkg编译Qt经历
- 点云操作库
- PCL
cmake相关部分(做实验)
-
set_source_files_properties(win/Foo.cpp PROPERTIES HEADER_FILE_ONLY TRUE)上述解决的问题是下面这种情况
- 传统方法
if(WIN32)add_library(Foo Foo.hpp win/Foo.cpp)add_custom_target(NonWindows SOURCES osx/Foo.cpp)source_group("osx" osx/Foo.cpp) else(APPLE)add_library(Foo Foo.hpp osx/Foo.cpp)add_custom_target(NonApple SOURCES win/Foo.cpp)source_group("win" win/Foo.cpp) endif()- 改进方法
add_library(Foo Foo.hpp win/Foo.cpp osx/Foo.cpp) if(WIN32)set_source_files_properties(osx/Foo.cpp PROPERTIES HEADER_FILE_ONLY TRUE)source_group("osx" osx/Foo.cpp) else(APPLE)set_source_files_properties(win/Foo.cpp PROPERTIES HEADER_FILE_ONLY TRUE)source_group("win" win/Foo.cpp) endif() -
CUDA的编译标志继承C++的编译flags
set (CMAKE_CXX_STANDARD 11)
set (CUDA_PROPAGATE_HOST_FLAGS ON)
# 当然你也可以直接使用下面这个代替
cmake_minimum_required(VERSION 3.8.2)
enable_language(CUDA)
add_executable(foo ${foo_src} ${foo_cu})
set_property(TARGET foo PROPERTY CUDA_STANDARD 11)
CMake常见错误
depthmap 运行时错误
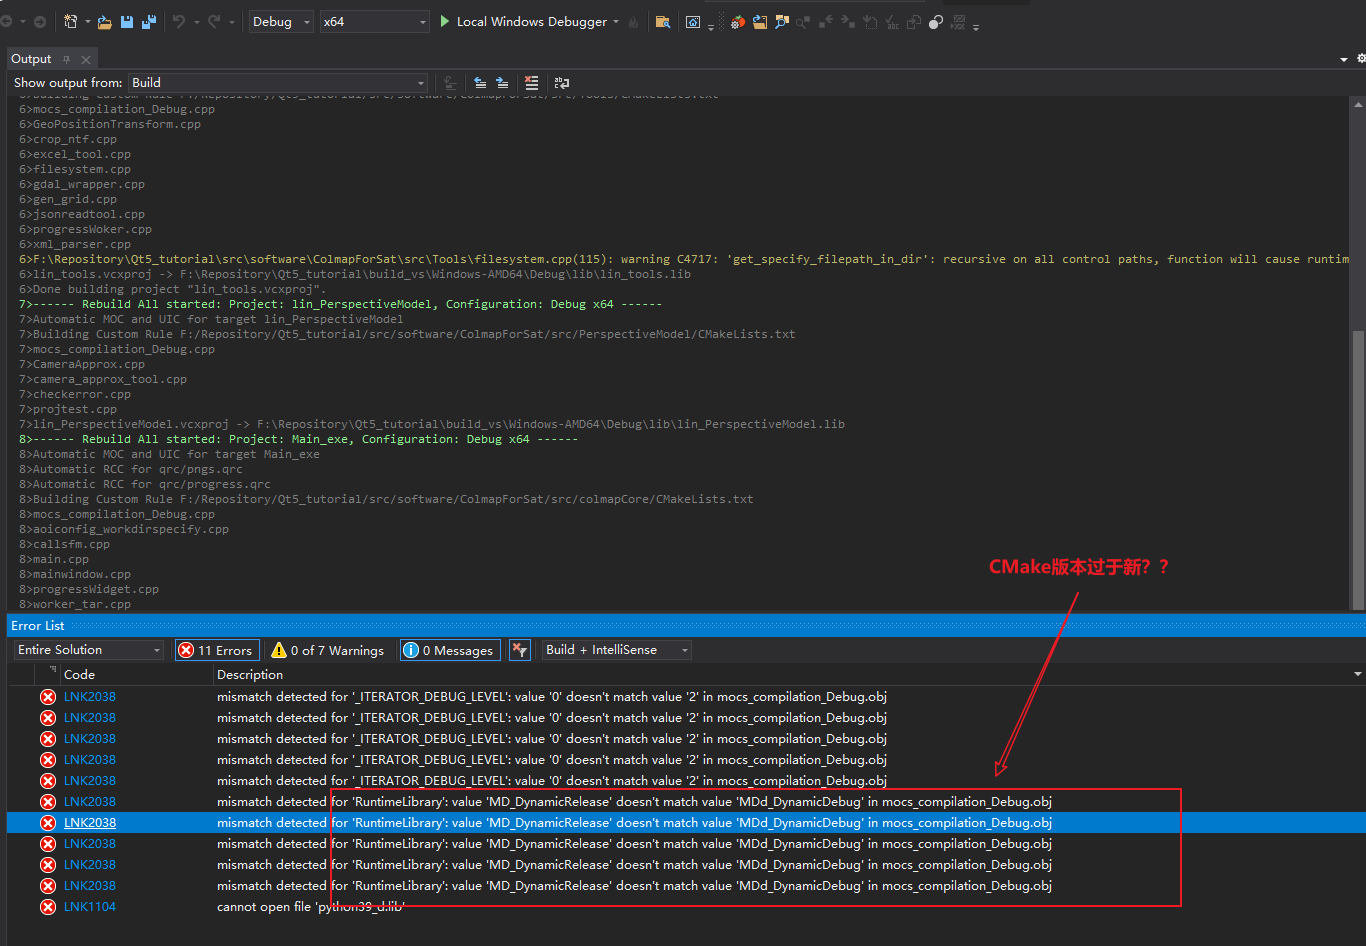
aliceVision_depthMap_generated_plane_sweeping_cuda.cu.obj mismatch detected for 'RuntimeLibrary': value 'MT_StaticRelease' doesn't match value 'MD_DynamicRelease' in main_depthMapEstimation.obj
-
初步查看貌似是cuda编译的为静态库但是exe要求使用它的静态库导致错误
RuntimeLibraryIndicates the version of the C++ Standard Library and C runtime that’s used by an app or library. Code that uses one version of the C++ Standard Library or C runtime is incompatible with code that uses a different version. For more information, see /MD, /MT, /LD (Use Run-Time Library).
-
cmake错误实际上就是我们的cmake版本要求的问题
之前我更改cmake最低要求版本是3.20,但是似乎cmake对cuda的编译支持并不是特别好
qstring.h不存在问题
# 实际上情况出现是这样子的
# prepareDense->aliceVision_alogrithm->aliceVision_common,错误显示在aliceVision_common不能够找到qstring.h,但很奇怪的一点就是单独编译aliceVision_algorithm是可以编译通过的
alicevision_add_library(aliceVision_algorithmSOURCES ${algorithm_files_headers} ${algorithm_files_sources}PRIVATE_LINKSEigen3::EigenQt5::Core${CERES_LIBRARIES}OpenMVG::openMVG_sfmglog::glogaliceVision_commonPRIVATE_INCLUDE_DIRS${CERES_INCLUDE_DIRS}${OPENMVG_INCLUDE_DIRS}
)
# 问题->prepareDense.exe包含了库的头文件aliceVision_algorithm,通过头文件中的函数声明调用库中的函数,但是此时我们的include头文件的任务转交给了exe文件,所以这里就需要将上诉的Qt5::Core转化为PUBLIC,exe就可以使用QtCore的include
Qt5::Core该变量虽然是通过链接库的形式进行执行,但是其也找到了对应的头文件进行链接
qmeta_call类型的Qt未定义错误
该种类型的问题就是AUTOMOC之类的出现问题
set(CMAKE_AUTOMOC ON)
set(CMAKE_AUTOUIC ON)
set(CMAKE_AUTORCC ON)
cmake文件拷贝原理探寻
vcpkg编译时执行拷贝
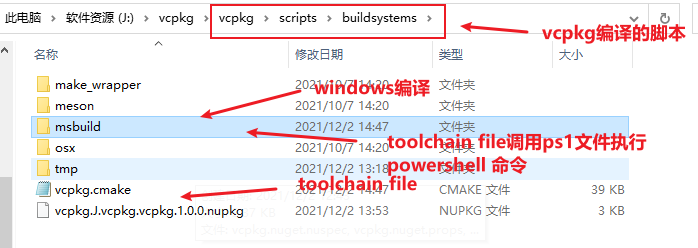
h2o编译时执行拷贝

h2o.cmake深度解析
# Mark variables as used so cmake doesn't complain about them
# 标志cmake已经使用这个toolchain file
mark_as_advanced(CMAKE_TOOLCHAIN_FILE)# 如果使用的是vcpkg的toolchain file,加载该toolchain file
if(VCPKG_CHAINLOAD_TOOLCHAIN_FILE)include("${VCPKG_CHAINLOAD_TOOLCHAIN_FILE}")
endif()# 如果加载了vcpkg的toolchain file,直接返回不执行下面的脚本
if(TOOLCHAIN_LOADED)return()
endif()
# 使用h2o.cmake进行编译
set(TOOLCHAIN_LOADED ON)# 在toolchain文件中设置CMAKE_PREFIX_PATH便于拷贝文件
set(CMAKE_PREFIX_PATH ${CMAKE_CURRENT_LIST_DIR}/Library)
# 标识已经设置了CMAKE_PREFIX_PATH
mark_as_advanced(CMAKE_PREFIX_PATH)# 执行add_executable的重写
function(add_executable name)# 调用cmake内置的_add_executable函数_add_executable(${ARGV})# 查找参数中的变量IMPORTED->查找结果IMPORTED_IDXlist(FIND ARGV "IMPORTED" IMPORTED_IDX)list(FIND ARGV "ALIAS" ALIAS_IDX)# 如果IMPORTED_IDX和ALIAS_IDX都为-1if(IMPORTED_IDX EQUAL -1 AND ALIAS_IDX EQUAL -1)# 为每个target生成自定义的POST_BUILD事件add_custom_command(TARGET ${name} POST_BUILDCOMMANDpowershell -noprofile -executionpolicy Bypass -file${CMAKE_PREFIX_PATH}/../applocal.ps1 -targetBinary$<TARGET_FILE:${name}> -installedDir"${CMAKE_PREFIX_PATH}/bin"-OutVariable out)endif()
endfunction()# 你可以使用powershell /?查看所有的命令行帮助# -NoProfile
#    Does not load the Windows PowerShell profile# -ExecutionPolicy
#    Sets the default execution policy for the current session and saves it
#    in the $env:PSExecutionPolicyPreference environment variable.
#    This parameter does not change the Windows PowerShell execution policy
#    that is set in the registry.# Bypass
# 	 No restrictions; all Windows PowerShell scripts can be run.
function(add_library name)_add_library(${ARGV})list(FIND ARGV "IMPORTED" IMPORTED_IDX)list(FIND ARGV "INTERFACE" INTERFACE_IDX)list(FIND ARGV "ALIAS" ALIAS_IDX)if(IMPORTED_IDX EQUAL -1 AND INTERFACE_IDX EQUAL -1 AND ALIAS_IDX EQUAL -1)get_target_property(IS_LIBRARY_SHARED ${name} TYPE)if((IS_LIBRARY_SHARED STREQUAL "SHARED_LIBRARY") OR (IS_LIBRARY_SHARED STREQUAL "MODULE_LIBRARY"))# 添加POST_BUILD事件,将ps1的脚本文件作用于二进制文件,指定需要拷贝的安装目录为Library/bin动态库add_custom_command(TARGET ${name} POST_BUILDCOMMANDpowershell -noprofile -executionpolicy Bypass -file${CMAKE_PREFIX_PATH}/../applocal.ps1 -targetBinary$<TARGET_FILE:${name}> -installedDir"${CMAKE_PREFIX_PATH}/bin"-OutVariable out)endif()endif()
endfunction()
applocal.ps1脚本文件解析
主要用于拷贝项目依赖的dll文件
# powershell传递参数的绑定,您需要指定installedDir,tlogFile,copiedFilesLog变量
[cmdletbinding()]
param([string]$targetBinary, [string]$installedDir, [string]$tlogFile, [string]$copiedFilesLog)$g_searched = @{}
# Note: installedDir is actually the bin\ directory.
$g_install_root = Split-Path $installedDir -parent
$g_is_debug = $g_install_root -match '(.*\\)?debug(\\)?$'# Ensure we create the copied files log, even if we don't end up copying any files
if ($copiedFilesLog)
{Set-Content -Path $copiedFilesLog -Value "" -Encoding Ascii
}# Note: this function signature is depended upon by the qtdeploy.ps1 script introduced in 5.7.1-7
function deployBinary([string]$targetBinaryDir, [string]$SourceDir, [string]$targetBinaryName) {if (Test-Path "$targetBinaryDir\$targetBinaryName") {$sourceModTime = (Get-Item $SourceDir\$targetBinaryName).LastWriteTime$destModTime = (Get-Item $targetBinaryDir\$targetBinaryName).LastWriteTimeif ($destModTime -lt $sourceModTime) {Write-Verbose "  ${targetBinaryName}: Updating $SourceDir\$targetBinaryName"Copy-Item "$SourceDir\$targetBinaryName" $targetBinaryDir} else {Write-Verbose "  ${targetBinaryName}: already present"}}else {Write-Verbose "  ${targetBinaryName}: Copying $SourceDir\$targetBinaryName"Copy-Item "$SourceDir\$targetBinaryName" $targetBinaryDir}if ($copiedFilesLog) { Add-Content $copiedFilesLog "$targetBinaryDir\$targetBinaryName" }if ($tlogFile) { Add-Content $tlogFile "$targetBinaryDir\$targetBinaryName" }
}Write-Verbose "Resolving base path $targetBinary..."
try
{$baseBinaryPath = Resolve-Path $targetBinary -erroraction stop$baseTargetBinaryDir = Split-Path $baseBinaryPath -parent
}
catch [System.Management.Automation.ItemNotFoundException]
{return
}# Note: this function signature is depended upon by the qtdeploy.ps1 script
function resolve([string]$targetBinary) {Write-Verbose "Resolving $targetBinary..."try{$targetBinaryPath = Resolve-Path $targetBinary -erroraction stop}catch [System.Management.Automation.ItemNotFoundException]{return}$targetBinaryDir = Split-Path $targetBinaryPath -parent$a = $(dumpbin /DEPENDENTS $targetBinary | ? { $_ -match "^    [^ ].*\.dll" } | % { $_ -replace "^    ","" })$a | % {if ([string]::IsNullOrEmpty($_)) {return}if ($_ -like "api-ms-win-*") {return}if ($_.StartsWith('MSVCP140') -Or $_.StartsWith('VCRUNTIME140') -Or $_.StartsWith('VCOMP140') -Or $_.StartsWith('CONCRT140')) {return}if ($g_searched.ContainsKey($_)) {Write-Verbose "  ${_}: previously searched - Skip"return}$g_searched.Set_Item($_, $true)if (Test-Path "$installedDir\$_") {deployBinary $baseTargetBinaryDir $installedDir "$_"if (Test-Path function:\deployPluginsIfQt) { deployPluginsIfQt $baseTargetBinaryDir "$g_install_root\plugins" "$_" }if (Test-Path function:\deployOpenNI2) { deployOpenNI2 $targetBinaryDir "$g_install_root" "$_" }if (Test-Path function:\deployPluginsIfMagnum) {if ($g_is_debug) {deployPluginsIfMagnum $targetBinaryDir "$g_install_root\bin\magnum-d" "$_"} else {deployPluginsIfMagnum $targetBinaryDir "$g_install_root\bin\magnum" "$_"}}resolve "$baseTargetBinaryDir\$_"} elseif (Test-Path "$targetBinaryDir\$_") {Write-Verbose "  ${_}: $_ not found in vcpkg; locally deployed"resolve "$targetBinaryDir\$_"} else {Write-Verbose "  ${_}: $installedDir\$_ not found"}}Write-Verbose "Done Resolving $targetBinary."
}# Note: This is a hack to make Qt5 work.
# Introduced with Qt package version 5.7.1-7
# 调用qtdeploy.ps1脚本部署qt依赖
if (Test-Path "$g_install_root\plugins\qtdeploy.ps1") {. "$g_install_root\plugins\qtdeploy.ps1"
}# Note: This is a hack to make OpenNI2 work.
# 调用openni2脚本部署openni2deploy依赖(正常项目中未使用)
if (Test-Path "$g_install_root\bin\OpenNI2\openni2deploy.ps1") {. "$g_install_root\bin\OpenNI2\openni2deploy.ps1"
}# Note: This is a hack to make Magnum work.
# 调用magnumdeploy脚本部署其依赖(正常项目中未使用)
if (Test-Path "$g_install_root\bin\magnum\magnumdeploy.ps1") {. "$g_install_root\bin\magnum\magnumdeploy.ps1"
} elseif (Test-Path "$g_install_root\bin\magnum-d\magnumdeploy.ps1") {. "$g_install_root\bin\magnum-d\magnumdeploy.ps1"
}resolve($targetBinary)
Write-Verbose $($g_searched | out-string)
qtdeploy.ps1脚本文件解析
主要用于部署plugins插件和qml插件,正常情况下安装的时候会存在这个脚本,但是随着环境拷贝创建过多,qtdeploy.ps1文件并不被拷贝到新创建环境中。
# This script is based on the implementation of windeployqt for qt5.7.1
#
# Qt's plugin deployment strategy is that each main Qt Module has a hardcoded
# set of plugin subdirectories. Each of these subdirectories is deployed in
# full if that Module is referenced.
#
# This hardcoded list is found inside qttools\src\windeployqt\main.cpp. For
# updating, inspect the symbols qtModuleEntries and qtModuleForPlugin.# Note: this function signature and behavior is depended upon by applocal.ps1
function deployPluginsIfQt([string]$targetBinaryDir, [string]$QtPluginsDir, [string]$targetBinaryName) {$baseDir = Split-Path $QtPluginsDir -parent$binDir = "$baseDir\bin"function deployPlugins([string]$pluginSubdirName) {if (Test-Path "$QtPluginsDir\$pluginSubdirName") {Write-Verbose "  Deploying plugins directory '$pluginSubdirName'"New-Item "$targetBinaryDir\plugins\$pluginSubdirName" -ItemType Directory -ErrorAction SilentlyContinue | Out-NullGet-ChildItem "$QtPluginsDir\$pluginSubdirName\*.dll" | % {deployBinary "$targetBinaryDir\plugins\$pluginSubdirName" "$QtPluginsDir\$pluginSubdirName" $_.Nameresolve "$targetBinaryDir\plugins\$pluginSubdirName\$($_.Name)"}} else {Write-Verbose "  Skipping plugins directory '$pluginSubdirName': doesn't exist"}}# We detect Qt modules in use via the DLLs themselves. See qtModuleEntries in Qt to find the mapping.if ($targetBinaryName -like "Qt5Core*.dll") {if (!(Test-Path "$targetBinaryDir\qt.conf")) {"[Paths]" | Out-File -encoding ascii "$targetBinaryDir\qt.conf"}} elseif ($targetBinaryName -like "Qt5Gui*.dll") {Write-Verbose "  Deploying platforms"New-Item "$targetBinaryDir\plugins\platforms" -ItemType Directory -ErrorAction SilentlyContinue | Out-NullGet-ChildItem "$QtPluginsDir\platforms\qwindows*.dll" | % {deployBinary "$targetBinaryDir\plugins\platforms" "$QtPluginsDir\platforms" $_.Name}deployPlugins "accessible"deployPlugins "imageformats"deployPlugins "iconengines"deployPlugins "platforminputcontexts"} elseif ($targetBinaryName -like "Qt5Network*.dll") {deployPlugins "bearer"if (Test-Path "$binDir\libeay32.dll"){deployBinary "$targetBinaryDir" "$binDir" "libeay32.dll"deployBinary "$targetBinaryDir" "$binDir" "ssleay32.dll"}} elseif ($targetBinaryName -like "Qt5Sql*.dll") {deployPlugins "sqldrivers"} elseif ($targetBinaryName -like "Qt5Multimedia*.dll") {deployPlugins "audio"deployPlugins "mediaservice"deployPlugins "playlistformats"} elseif ($targetBinaryName -like "Qt5PrintSupport*.dll") {deployPlugins "printsupport"} elseif ($targetBinaryName -like "Qt5Qml*.dll") {if(!(Test-Path "$targetBinaryDir\qml")){if (Test-Path "$binDir\..\qml") {cp -r "$binDir\..\qml" $targetBinaryDir} elseif (Test-Path "$binDir\..\..\qml") {cp -r "$binDir\..\..\qml" $targetBinaryDir} else {throw "FAILED"}}} elseif ($targetBinaryName -like "Qt5Quick*.dll") {foreach ($a in @("Qt5QuickControls2", "Qt5QuickControls2d", "Qt5QuickTemplates2", "Qt5QuickTemplates2d")){if (Test-Path "$binDir\$a.dll"){deployBinary "$targetBinaryDir" "$binDir" "$a.dll"}}deployPlugins "scenegraph"deployPlugins "qmltooling"} elseif ($targetBinaryName -like "Qt5Declarative*.dll") {deployPlugins "qml1tooling"} elseif ($targetBinaryName -like "Qt5Positioning*.dll") {deployPlugins "position"} elseif ($targetBinaryName -like "Qt5Location*.dll") {deployPlugins "geoservices"} elseif ($targetBinaryName -like "Qt5Sensors*.dll") {deployPlugins "sensors"deployPlugins "sensorgestures"} elseif ($targetBinaryName -like "Qt5WebEngineCore*.dll") {deployPlugins "qtwebengine"} elseif ($targetBinaryName -like "Qt53DRenderer*.dll") {deployPlugins "sceneparsers"} elseif ($targetBinaryName -like "Qt5TextToSpeech*.dll") {deployPlugins "texttospeech"} elseif ($targetBinaryName -like "Qt5SerialBus*.dll") {deployPlugins "canbus"}
}
-
FIND相关的查找
-
FIND_FILE(<VAR> name path1 path2 …)
VAR变量代表找到的文件全路径,包含文件名FIND_LIBRARY(<VAR> name path1 path2 …)
VAR变量代表找到的库全路径,包含库文件名
如:
FIND_LIBRARY(libz z /usr/lib)
IF (NOT libx)MESSAGE(FATAL_ERROR "libz not found")
ENDIF(NOT libz)FIND_PATH(<VAR> name path1 path2 …)
VAR变量代表包含这个文件的路径FIND_PROGRAM(<VAR> name path1 path2 …)
VAR变量代表包含这个程序的全路径FIND_PACKAGE(<name> [major.minor] [QUIET] [NO_MODULE] [[REQUIRED | COMPONENTS] [componets …]])
用来调用预定义在CMAKE_MODULE_PATH下的Find<name>.cmake模块,你也可以自己定义Find<name>
模块,通过SET(CMAKE_MODULE_PATH dir)将其放入工程的某个目录供工程使用
cmake相关环境变量
CMAKE_BINARY_DIR&&CMAKE_RUNTIME_OUTPUT_DIRECTORY_
设置为当前的工作目录,When run in -P script mode, CMake sets the variables
CMAKE_BINARY_DIR,CMAKE_SOURCE_DIR,CMAKE_CURRENT_BINARY_DIRandCMAKE_CURRENT_SOURCE_DIRto the current working directory.
- 利用上述变量标准化输出不同类型编译的文件(AliceVision操作)
# 格式化编译输出
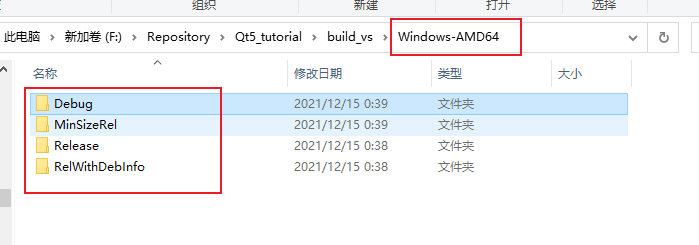
foreach(OUTPUTCONFIG ${CMAKE_CONFIGURATION_TYPES})string(TOUPPER ${OUTPUTCONFIG} OUTPUTCONFIG)if(${OUTPUTCONFIG} STREQUAL DEBUG)set(BUILD_TYPR Debug)elseif(${OUTPUTCONFIG} STREQUAL RELWITHDEBINFO)set(BUILD_TYPR RelWithDebInfo)elseif(${OUTPUTCONFIG} STREQUAL RELEASE)set(BUILD_TYPR Release)elseif(${OUTPUTCONFIG} STREQUAL MINSIZEREL)set(BUILD_TYPR MinSizeRel)endif()set(CMAKE_RUNTIME_OUTPUT_DIRECTORY_${OUTPUTCONFIG} ${CMAKE_BINARY_DIR}/${CMAKE_SYSTEM_NAME}-${CMAKE_SYSTEM_PROCESSOR}/${BUILD_TYPR}/bin)set(CMAKE_LIBRARY_OUTPUT_DIRECTORY_${OUTPUTCONFIG} ${CMAKE_BINARY_DIR}/${CMAKE_SYSTEM_NAME}-${CMAKE_SYSTEM_PROCESSOR}/${BUILD_TYPR}/lib)set(CMAKE_ARCHIVE_OUTPUT_DIRECTORY_${OUTPUTCONFIG} ${CMAKE_BINARY_DIR}/${CMAKE_SYSTEM_NAME}-${CMAKE_SYSTEM_PROCESSOR}/${BUILD_TYPR}/lib)
endforeach()
- 效果如下图所示,但是Debug会出现一些问题,但是其他模式并不会出现该问题
AUTOGEN_SOURCE_GROUP
参考网址1,参考网址2、参考网址3
该属性用于将烦人的mocs文件、qrc文件放置在杂项目录中
set_property(GLOBAL PROPERTY AUTOGEN_SOURCE_GROUP "Generated Files")
set_target_properties
适用于对单个target进行多属性配置
set_target_properties(mao_system PROPERTIES CXX_STANDARD 17)
set_property
使用于对单个target进行单个属性的配置
set_property(TARGET mao_base PROPERTY CXX_STANDARD 17)
外部环境编译
哈希编码问题
#检查文件的校验和
curl -sL https://github.com/username/reponame/archive/vX.X.X.tar.gz | openssl sha256
cmake库环境的导出
导出头文件和库文件
- fmt-releases-targets.cmake
# Commands may need to know the format version.
set(CMAKE_IMPORT_FILE_VERSION 1)# Import target "fmt::fmt" for configuration "Release"
set_property(TARGET fmt::fmt APPEND PROPERTY IMPORTED_CONFIGURATIONS RELEASE)
# 设置该target被外部导入之后的组件为fmt.lib、fmt.dll
set_target_properties(fmt::fmt PROPERTIESIMPORTED_IMPLIB_RELEASE "${_IMPORT_PREFIX}/lib/fmt.lib"IMPORTED_LOCATION_RELEASE "${_IMPORT_PREFIX}/bin/fmt.dll")
# 设置cmake环境变量中的check_target为fmt::fmt,其必要的文件是fmt.lib和fmt.dll
list(APPEND _IMPORT_CHECK_TARGETS fmt::fmt )
list(APPEND _IMPORT_CHECK_FILES_FOR_fmt::fmt "${_IMPORT_PREFIX}/lib/fmt.lib" "${_IMPORT_PREFIX}/bin/fmt.dll" )# Commands beyond this point should not need to know the version.
set(CMAKE_IMPORT_FILE_VERSION)
CPack官方文档要点
首要知识点
CPack这个东西,它会将用户的
install()install_files(),install_programs(),install_targets()所有的文件都进行安装,值得注意的是install命令中的DESTINATION一定是相对路径,不然就会直接被CPACK所忽略。
CPACK中cmake相关的系统变量
CPACK_SOURCE_IGNORE_FILESCPACK_GENERATORCPACK_PROJECT_CONFIG_FILE- CPACK_PACKAGE_NAME 程序名
- CPACK_PACKAGE_VENDOR 包开发者的名字
- CPACK_PACKAGE_DIRECTORY 默认是build目录,这是包的打包目录,也可以使用cpack -B 的方式覆盖
CPack的命令行执行方式
cmake --build . --target package
make package->Makefile
ninja package->Ninja
PACKAGE->Visual Studio
# CPack方式执行上面的分类,一招解决
cpack -G TGZ --config CPackSourceConfig.cmake
conda build打包
conda-build 初体验
# 安装conda-build
conda install conda-build
# 打包相关的包
conda skeleton pypi click
# 从上面拉取meta.yaml之后可以进行修改,然后进行提交
conda-build click
# 成功conda-build之后你可以选择上传到anaconda cloud或者仅仅用于本地安装
# 执行完上面的语句之后就已经将该包安装到本地
# 执行完毕之后显示
Source and build intermediates have been left in D:\ProgramData\Miniconda3\envs\sign\conda-bld.
# 即我们的conda-build进行编译安装的时候会在本地conda-build安装的环境中生成安装包
conda config --set anaconda_upload yes # 自动上传到anaconda cloud
# 包的安装位置D:\ProgramData\Miniconda3\envs\sign\conda-bld\win-64\click-8.0.3-py39_0.tar.bz2
# 清除环境中的安装缓存
conda build purge
# 安装本地包
conda install /path/to/package
上传库到conda-forge
fork conda-forge 仓库
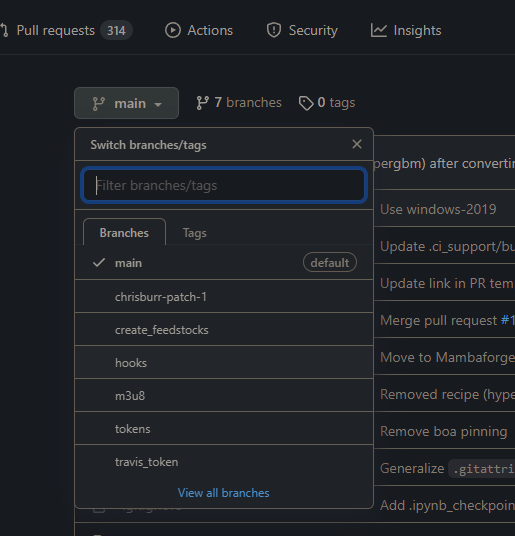
请forkconda-forge的github网址,github仓库地址
创建属于自己想要上传的库的分支
编辑meta.yaml并创建scripts
- 优先考虑创建build.sh,因为这样子conda-forge仓库才会考虑合并你,其他的平台提供bld.bat脚本很容易出现问题
- bld.bat脚本实际上和我们的build.bat脚本是差不多的,类似于像cmake一样传递命令参数
- meta.yaml相当于dockerfile,其中需要指定language、conda依赖包等
向master分支创建请求
此时,master管理员会让你持续提交分支,然后master看是否需要合并,一旦master分支将你的meta.yaml纳入仓库中,你就是conda-forge通道中这个包的创始人,你可以批准请求然后再make pull requests.
conda-forge论坛
类似于conda-forge的一个主页,其中包含着非常有趣的问题,请访问conda-forge.github.io网址
meta.yaml解析
文件hash编码解析
详细解释你可以查看CSDN网址
-
使用certutil直接生成hash文件的编码
-
# 执行语句为完整的文件生成hash编码用于校验完整性 certutil -hashfile gdal-3.0.2.tar.xz SHA256 -
gdal recipe示例

vcpkg实验
vcpkg理解
个人感觉vcpkg有一个好处就是可以直接从源码自动进行编译而不需要我们手动编译,同时vcpkg可迁移。
缺点:
- 每一个项目依赖都是从源头开始进行编译,特别慢
- 第二项目配置稍微比Anaconda繁琐一点
- 项目的安装依赖于NutGet
- 而且很奇怪的就是似乎vcpkg程序只能开启一个实例,当进行多窗口编译的时候报错,终止前面一个
- vcpkg安装的库会有两个版本,一个是debug版本用于调试,一个是release版本用于发布
vcpkg集成到项目
# 第一步
vcpkg integrate project
# 第二步配置NuGet包源为vcpkg的包源
Install-Package vcpkg.J.vcpkg.vcpkg -Source "J:\vcpkg\vcpkg\scripts\buildsystems"
vcpkg安装的库类型
vcpkg help triplet显示库版本
- vcpkg内置的库架构类型
- x64-windows
- x86-windows
- x64-windows-static
- x64-uwp
- x64-osx
- x64-linux
- arm-uwp
- arm64-windows
- vcpkg社区架构类型(并不能保证可以正确编译安装)
- arm-android
- arm-ios
- arm-linux
- arm-mingw-dynamic
- arm-mingw-static
- arm-neon-android
- arm-windows-static
- arm-windows
- arm64-android
- arm64-ios
- arm64-linux
- arm64-mingw-dynamic
- arm64-mingw-static
- arm64-osx-dynamic
- arm64-osx
- arm64-uwp
- arm64-windows-static-md
- arm64-windows-static
- armv6-android
- ppc64le-linux
- s390x-linux
- wasm32-emscripten
- x64-android
- x64-freebsd
- x64-ios
- x64-mingw-dynamic
- x64-mingw-static
- x64-openbsd
- x64-osx-dynamic
- x64-windows-static-md
- x86-android
- x86-freebsd
- x86-ios
- x86-mingw-dynamic
- x86-mingw-static
- x86-uwp
- x86-windows-static-md
- x86-windows-static
- x86-windows-v120
# 64位的动态库
vcpkg install opencv:x64-windows
# 32位的动态库
vcpkg install opencv::x86-windows
# 安装32位的静态库
vcpkg install mpir:x86-windows-static
# 整合visual studio
vcpkg integrate install
# 整合powershell
vcpkg integrate powershell
vcpkg集成到cmake
# 设置toolchain file
-DCMAKE_TOOLCHAIN_FILE=[path to vcpkg]/scripts/buildsystems/vcpkg.cmake
# Visual Studio中的头文件路径
($vcpkgDir)\installed\($platformTar)\include
vcpkg编译流程
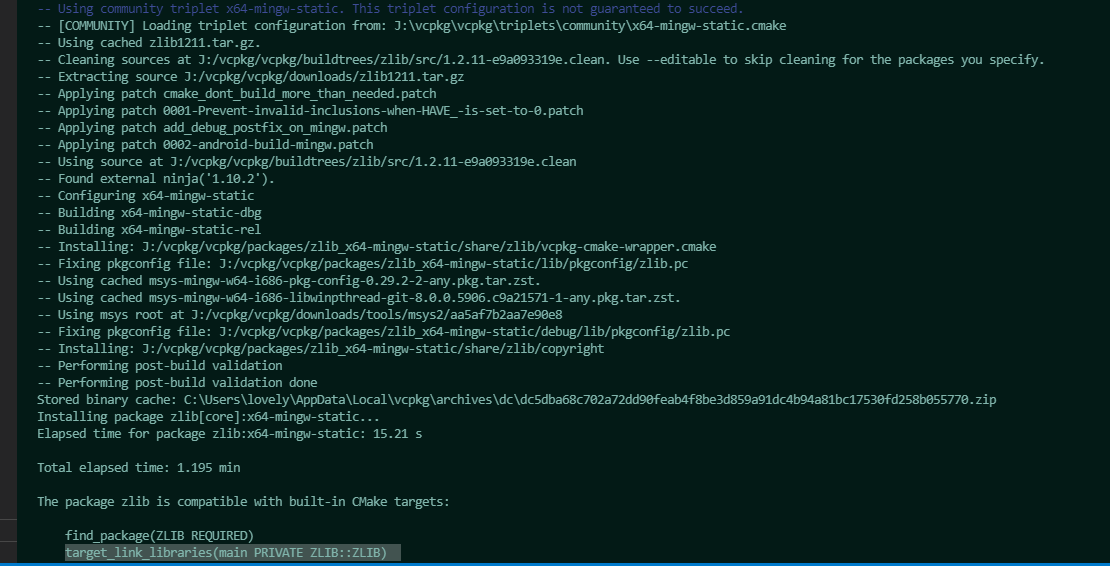
大概分为以下几个阶段:
- 从github上下载源码到buildtrees目录(记录下载的缓存信息以便后续接着下载)
- 提取到downloads文件夹下
- 利用外部的ninja配置项目
- 寻找系统环境变量中对应架构的C++编译器,比如mingw需要寻找到对应的编译器执行编译
- 安装cmake配置文件
- 验证编译的完整性
- 存储缓存到C盘
- 提示cmake链接库使用的方法
vcpkg编译Qt经历
- 虽然是使用的 x64-mingw-static版本,但是配置qt-base的时候却显示使用的是win-msvc,虽然说手动改为了win-g++,但是仍然会有g++的库依赖错误于windows的库,并没有链接到mingw版本的库。
- vcpkg自己有对应的编译器g++,但是首先会使用系统环境变量中的g++
- 同时系统环境中perl的g++和qt的g++不一致,因为依赖版本库牵连问题
#### CMake自定义函数##### 检验编译器###### 检验C编译器```cmake
# 源代码 测试结果 正则匹配
# <resultVar>只是用来临时存放code的执行结果,其中code中至少含有一个main函数
# check_c_source_compiles(<code> <resultVar>
#                        [FAIL_REGEX <regex1> [<regex2>...]])include(CheckCSourceCompiles)
# 从这里我们可以看到AliceVision是如何封装CMAKE原来的函数对编译器进行检测的
# 创建一个名为CHECK_C_COMPILER_FLAG的函数,参数为_FLAG _RESULT
macro(CHECK_C_COMPILER_FLAG _FLAG _RESULT)set(SAFE_CMAKE_REQUIRED_DEFINITIONS "${CMAKE_REQUIRED_DEFINITIONS}")set(CMAKE_REQUIRED_DEFINITIONS "${_FLAG}")# 将CMake自带的函数执行的结果通过_RESULT变量返回CHECK_C_SOURCE_COMPILES("int main() { return 0;}" ${_RESULT}# Some compilers do not fail with a bad flagFAIL_REGEX "error: bad value (.*) for .* switch"       # GNUFAIL_REGEX "argument unused during compilation"        # clangFAIL_REGEX "is valid for .* but not for C"             # GNUFAIL_REGEX "unrecognized .*option"                     # GNUFAIL_REGEX "ignoring unknown option"                   # MSVCFAIL_REGEX "[Uu]nknown option"                         # HPFAIL_REGEX "[Ww]arning: [Oo]ption"                     # SunProFAIL_REGEX "command option .* is not recognized"       # XLFAIL_REGEX "WARNING: unknown flag:"                    # Open64FAIL_REGEX " #10159: "                                 # ICC)set(CMAKE_REQUIRED_DEFINITIONS "${SAFE_CMAKE_REQUIRED_DEFINITIONS}")
endmacro(CHECK_C_COMPILER_FLAG)
点云操作库
PCL
- cmake链接地址
- PCL官方文档地址
unused during compilation" # clang
FAIL_REGEX “is valid for .* but not for C” # GNU
FAIL_REGEX “unrecognized .option" # GNU
FAIL_REGEX “ignoring unknown option” # MSVC
FAIL_REGEX “[Uu]nknown option” # HP
FAIL_REGEX “[Ww]arning: [Oo]ption” # SunPro
FAIL_REGEX "command option . is not recognized” # XL
FAIL_REGEX “WARNING: unknown flag:” # Open64
FAIL_REGEX " #10159: " # ICC
)
set(CMAKE_REQUIRED_DEFINITIONS “${SAFE_CMAKE_REQUIRED_DEFINITIONS}”)
endmacro(CHECK_C_COMPILER_FLAG)
#### 点云操作库##### PCL+ cmake[链接地址](https://pointclouds.org/documentation/tutorials/using_pcl_pcl_config.html)
+ PCL官方文档[地址](https://pcl.readthedocs.io/projects/tutorials/en/master/)
这篇关于CMake-overall-advance2的文章就介绍到这儿,希望我们推荐的文章对编程师们有所帮助!


