本文主要是介绍WebAssembly002 emcc install + 解决 Error: Downloading URL ‘https://storage.googleapis.com/…‘ error,希望对大家解决编程问题提供一定的参考价值,需要的开发者们随着小编来一起学习吧!
安装教程
// https://developer.mozilla.org/zh-CN/docs/WebAssembly/C_to_Wasm
git clone https://github.com/juj/emsdk.git
cd emsdk# 在 Linux 或者 Mac macOS 上
./emsdk install --build=Release sdk-incoming-64bit binaryen-master-64bit
./emsdk activate --global --build=Release sdk-incoming-64bit binaryen-master-64bit
# 如果在你的 macos 上获得以下错误
Error: No tool or SDK found by name 'sdk-incoming-64bit'
# 请执行
./emsdk install latest
# 按照提示配置环境变量即可
./emsdk activate latest# 在 Windows 上
emsdk install --build=Release sdk-incoming-64bit binaryen-master-64bit
emsdk activate --global --build=Release sdk-incoming-64bit binaryen-master-64bit# 注意:Windows 版本的 Visual Studio 2017 已经被支持,但需要在 emsdk install 需要追加 --vs2017 参数。
Error: Downloading URL ‘https://storage.googleapis.com/webassembly/emscripten-releases-builds/deps/node-v16.20.0-linux-x64.tar.xz’: <urlopen error [Errno 104] Connection reset by peer> error: installation failed!
$:~/Downloads$ git clone https://github.com/juj/emsdk.git
正克隆到 'emsdk'...
remote: Enumerating objects: 3754, done.
remote: Counting objects: 100% (644/644), done.
remote: Compressing objects: 100% (106/106), done.
remote: Total 3754 (delta 560), reused 595 (delta 533), pack-reused 3110
接收对象中: 100% (3754/3754), 2.18 MiB | 690.00 KiB/s, 完成.
处理 delta 中: 100% (2475/2475), 完成.
$:~/Downloads$ cd emsdk
$:~/Downloads/emsdk$ ./emsdk install --build=Release sdk-incoming-64bit binaryen-master-64bit
error: tool or SDK not found: 'sdk-incoming-64bit'
$:~/Downloads/emsdk$ ./emsdk install latest
Resolving SDK alias 'latest' to '3.1.44'
Resolving SDK version '3.1.44' to 'sdk-releases-b90507fcf011da61bacfca613569d882f7749552-64bit'
Installing SDK 'sdk-releases-b90507fcf011da61bacfca613569d882f7749552-64bit'..
Installing tool 'node-16.20.0-64bit'..
Error: Downloading URL 'https://storage.googleapis.com/webassembly/emscripten-releases-builds/deps/node-v16.20.0-linux-x64.tar.xz': <urlopen error [Errno 104] Connection reset by peer>
error: installation failed!
- 只能查看emsdk.py,查找文件下载调用的流程,在浏览器下载后放置在安装目录

------------------------------------------------------------------------------------------------------------------------------------------------
https://storage.googleapis.com/webassembly/emscripten-releases-builds/deps/node-v16.20.0-linux-x64.tar.xz
downloads/------------------------------------------------------------------------------------------------------------------------------------------------
- 发现直接放入不起作用,每次运行时会清空文件夹
> /home/pdd/Downloads/emsdk/emsdk.py(679)download_file()
-> print("="*300)
(Pdb) p download_even_if_exists
True
- 最终修改代码如下:
def download_and_extract(archive, dest_dir, filename_prefix='', clobber=True):debug_print('download_and_extract(archive=' + archive + ', dest_dir=' + dest_dir + ')')url = urljoin(emsdk_packages_url, archive)download_target = get_download_target(url, download_dir, filename_prefix)print("-"*300)print(url)print(download_dir)print(KEEP_DOWNLOADS)print(filename_prefix)print("-"*300)# received_download_target = download_file(url, download_dir, not KEEP_DOWNLOADS, filename_prefix)received_download_target = download_file(url, download_dir, False, filename_prefix)if not received_download_target:return Falseassert received_download_target == download_target# Remove the old directory, since we have some SDKs that install into the# same directory. If we didn't do this contents of the previous install# could remain.if clobber:remove_tree(dest_dir)if archive.endswith('.zip'):return unzip(download_target, dest_dir)else:return untargz(download_target, dest_dir)
- 注:下载需要依赖个各个文件时,有可能浏览器下载得到的和需要的文件名称有所差别,按照要求修改即可
$:~/Downloads/emsdk$ ./emsdk install latest
Resolving SDK alias 'latest' to '3.1.44'
Resolving SDK version '3.1.44' to 'sdk-releases-b90507fcf011da61bacfca613569d882f7749552-64bit'
Installing SDK 'sdk-releases-b90507fcf011da61bacfca613569d882f7749552-64bit'..
Skipped installing node-16.20.0-64bit, already installed.
Skipped installing releases-b90507fcf011da61bacfca613569d882f7749552-64bit, already installed.
All SDK components already installed: 'sdk-releases-b90507fcf011da61bacfca613569d882f7749552-64bit'.
$:~/Downloads/emsdk$ ./emsdk activate latest
Resolving SDK alias 'latest' to '3.1.44'
Resolving SDK version '3.1.44' to 'sdk-releases-b90507fcf011da61bacfca613569d882f7749552-64bit'
Setting the following tools as active:node-16.20.0-64bitreleases-b90507fcf011da61bacfca613569d882f7749552-64bitNext steps:
- To conveniently access emsdk tools from the command line,consider adding the following directories to your PATH:/home/pdd/Downloads/emsdk/home/pdd/Downloads/emsdk/upstream/emscripten
- This can be done for the current shell by running:source "/home/pdd/Downloads/emsdk/emsdk_env.sh"
- Configure emsdk in your shell startup scripts by running:echo 'source "/home/pdd/Downloads/emsdk/emsdk_env.sh"' >> $HOME/.bash_profile
(base) pdd@pdd-Dell-G15-5511:~/Downloads/emsdk$ source ./emsdk_env.sh
Setting up EMSDK environment (suppress these messages with EMSDK_QUIET=1)
Adding directories to PATH:
PATH += /home/pdd/Downloads/emsdk
PATH += /home/pdd/Downloads/emsdk/upstream/emscriptenSetting environment variables:
PATH = /home/pdd/Downloads/emsdk:/home/pdd/Downloads/emsdk/upstream/emscripten:/home/pdd/Downloads/video_rtsp/ffmpeg-master-latest-linux64-lgpl/bin:/usr/local/mpich-4.1/bin:/usr/local/cuda-11.4/bin:/home/pdd/anaconda3/bin:/home/pdd/anaconda3/condabin:/usr/local/sbin:/usr/local/bin:/usr/sbin:/usr/bin:/sbin:/bin:/usr/games:/usr/local/games:/snap/bin:/home/pdd/Documents/node-v20.5.0-linux-x64/bin
EMSDK = /home/pdd/Downloads/emsdk
EMSDK_NODE = /home/pdd/Downloads/emsdk/node/16.20.0_64bit/bin/node
测试
$:~/Downloads/emsdk$ emcc -v
emcc (Emscripten gcc/clang-like replacement + linker emulating GNU ld) 3.1.44 (bec42dac7873903d09d713963e34020c22a8bd2d)
clang version 17.0.0 (https://github.com/llvm/llvm-project a8cbd27d1f238e104a5d5ca345d93bc1f4d4ab1f)
Target: wasm32-unknown-emscripten
Thread model: posix
InstalledDir: /home/pdd/Downloads/emsdk/upstream/bin
#include <iostream>
using namespace std;bool IsBigEndian()
{  int a = 0x1234;  char b =  *(char *)&a;  //通过将int强制类型转换成char单字节,即等于 取b等于a的低地址部分  if( b == 0x12)  {  cout<< "big end"; return true; }  cout<< "small end"; return false;
}int main(){cout<<  IsBigEndian();return 0;
}
- emcc test.cpp -s WASM=1 -o hello.html
$:/home/user$ emcc test.cpp -s WASM=1 -o hello.html
shared:INFO: (Emscripten: Running sanity checks)
cache:INFO: generating system asset: symbol_lists/7a974f7065b03f039b58c3afd6b04fb646712f63.json... (this will be cached in "/home/pdd/Downloads/emsdk/upstream/emscripten/cache/symbol_lists/7a974f7065b03f039b58c3afd6b04fb646712f63.json" for subsequent builds)
cache:INFO:  - ok
$:/home/user$ ls
hello.html  hello.js  hello.wasm  test.cpp
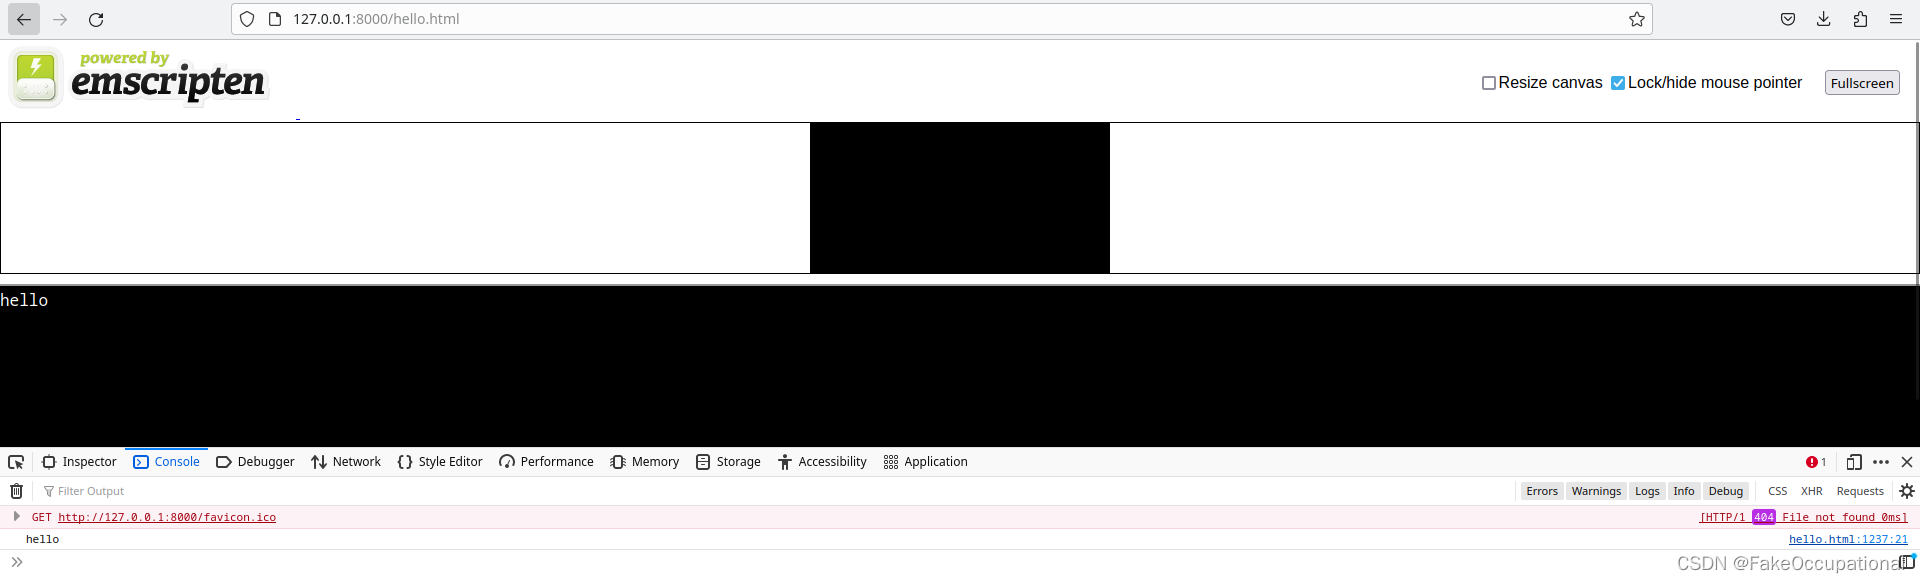
- 上边的代码不能正常展示,先简单测试一下
// test.c
#include <stdio.h>int main() {printf("hello\n");return 0;
}
$:/home/user$ python -m http.server
Serving HTTP on 0.0.0.0 port 8000 (http://0.0.0.0:8000/) ...
emcc( 替代gcc)
- https://emscripten.org/docs/tools_reference/emcc.html
| 示例 | 解释 |
|---|---|
-o <target> | [链接] 链接可执行文件时,target文件扩展名定义要生成的输出类型 |
-I | include头文件 |
-L | 链接放在/lib和/usr/lib和/usr/local/lib里的库 |
-l | 链接具体的静态库、动态库 |
-c | [compile] 告诉emcc生成一个目标文件,然后该目标文件可以与其他目标文件链接以生成可执行文件。 |
--preload-file <name> | [链接] 指定在异步运行编译代码之前预加载的文件。该路径是相对于编译时当前目录的。如果在此处传递目录,则其全部内容将被嵌入。预加载的文件存储在filename.data中,其中filename.html是您要编译到的主文件。要运行代码,您将需要.html和.data。 |
-sOPTION[=VALUE] | [不同的选项影响不同的阶段,大多数在链接时] Emscripten 构建选项。有关可用选项,请参阅src/settings.js |
-sASSERTIONS | Uncaught RuntimeError: Aborted(Assertion failed: false, at: /home/pdd/***/76/ggml.c,4542,ggml_new_object). Build with -sASSERTIONS for more info. |
-sALLOW_MEMORY_GROWTH | Aborted(Cannot enlarge memory arrays to size 106745856 bytes (OOM). Either (1) compile with -sINITIAL_MEMORY=X with X higher than the current value 16777216, (2) compile with -sALLOW_MEMORY_GROWTH which allows increasing the size at runtime, or (3) if you want malloc to return NULL (0) instead of this abort, compile with -sABORTING_MALLOC=0) |
-
例
emcc -I../../include -I../../include/ggml -I../../examples ../../src/ggml.c main.cpp -o web/mnist.js -s EXPORTED_FUNCTIONS='["_wasm_eval","_wasm_random_digit","_malloc","_free"]' -s EXPORTED_RUNTIME_METHODS='["ccall"]' -s ALLOW_MEMORY_GROWTH=1 --preload-file models/mnist -
Emscripten教程之emcc编译命令
-
注: 优化指令对效果的影响较大,如下为同一个矩阵乘法的速度对比

emmake( 替代cmake)
- https://emscripten.org/docs/compiling/Building-Projects.html
- https://www.infoq.cn/article/F6aI8wuLYiJ4B3CO7Lvf
- 首先我们从 Github 中找到 cJSON 的主页,然后下载相关的源码放置在我们项目的 vendor 文件夹中。接着我们在当前项目的根目录下创建一个CMakeList.txt文件,并填入如下内容:
cmake_minimum_required(VERSION 3.15) # 根据你的需求进行修改
project(sample C)set(CMAKE_C_STANDARD 11) # 根据你的C编译器支持情况进行修改
set(CMAKE_EXECUTABLE_SUFFIX ".html") # 编译生成.htmlinclude_directories(vendor) # 使得我们能引用第三方库的头文件
add_subdirectory(vendor/cJSON)add_executable(sample main.c)# 设置Emscripten的编译链接参数,我们等等会讲到一些常用参数set_target_properties(sample PROPERTIES LINK_FLAGS "-s EXIT_RUNTIME=1")
target_link_libraries(sample cjson) # 将第三方库与主程序进行链接- 在让我们在代码中引入 cJSON 然后并使用它进行 JSON 的解析操作,代码如下:
#include <stdio.h>
#include "cJSON/cJSON.h"int main() {const char jsonstr[] = "{\"data\":\"Hello World!\"}";cJSON *json = cJSON_Parse(jsonstr);const cJSON *data = cJSON_GetObjectItem(json, "data");printf("%s\n", cJSON_GetStringValue(data));cJSON_Delete(json);return 0;
}
> mkdir build
> cd build
> emcmake cmake ..
> emmake make
这篇关于WebAssembly002 emcc install + 解决 Error: Downloading URL ‘https://storage.googleapis.com/…‘ error的文章就介绍到这儿,希望我们推荐的文章对编程师们有所帮助!


