本文主要是介绍H5仿探探左右滑动效果Vue.js,希望对大家解决编程问题提供一定的参考价值,需要的开发者们随着小编来一起学习吧!
效果图:
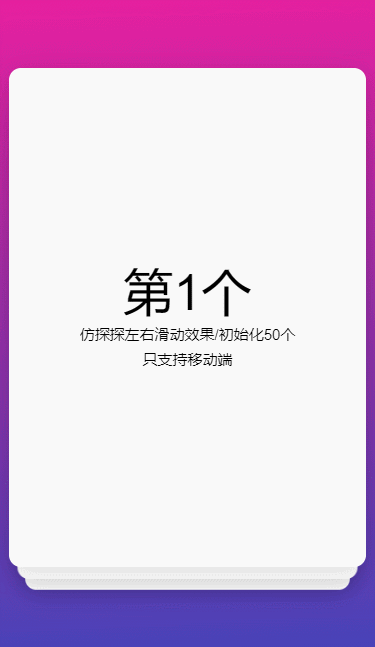
说明 H5仿探探左右滑动效果
<template><div class="slide"><divclass="slide_item"v-for="(item,index) in listArr":key="index":style="[initCSS(index),Transform(index)]"@touchstart.stop.prevent.capture="touchStart($event,index)"@touchmove.stop.prevent.capture="touchMove($event,index)"@touchend.stop.prevent.capture="touchEnd(index)"v-show="item.show"><span class="title">第{{item.index + 1}}个</span><span class="text">仿探探左右滑动效果/初始化50个</span><span class="text">只支持移动端</span></div></div>
</template>
<script>
export default {name: "slide",data() {return {listArr: [],/*记录x y轴*/x: {start: 0,move: 0,end: 0},y: {start: 0,move: 0,end: 0},/*下标*/currentIndex: 0,/*宽度宽度*/winWidth: 0,/*xy位移*/displacement: {x: 0,y: 0},/*滑动*/swipering: false,/*滑动中*/slideing: false,};},mounted() {this.init();},methods: {init() {/* 测试数据*/for (let index = 0; index < 50; index++) {var data = {index: index,show: true,x: 0,y: 0,opacity: index < 3 ? 1 : 0};this.listArr.push(data);}this.winWidth = document.documentElement.clientWidth;},initCSS(index) {let css = {};css["z-index"] = index;css["transform"] = `translate3d(0,0,${(this.currentIndex - index) *50}px)`;css["transitionDuration"] = "0ms";return css;},Transform(index) {let css = {};if (!this.swipering) {css["transitionDuration"] = "300ms";} else {css["transitionDuration"] = "0ms";}if (index === this.currentIndex) {css["transform"] = `translate3d(${this.listArr[index].x}px,${this.listArr[index].y}px,${(this.currentIndex - index) * 50}px)`;}css['opacity'] = this.listArr[index].opacity;return css;},touchStart(e) {if(this.slideing) return;this.swipering = true;this.x.start = e.touches[0].pageX;this.y.start = e.touches[0].pageY;},// 滑动计算touchMove(e, index) {if(this.slideing) return;if(this.listArr.length == index + 1){return;}this.x.move = e.touches[0].pageX;this.y.move = e.touches[0].pageY;this.displacement.x, (this.listArr[index].x = this.x.move - this.x.start);this.displacement.y, (this.listArr[index].y = this.y.move - this.y.start);},// 滑动结束判断是否超过一定值touchEnd(index) {this.swipering = false;if(this.listArr.length == index + 1){return;}if (this.listArr[index].x > 0 &&this.listArr[index].x > this.winWidth / 2 - this.winWidth / 4.5) {this.touchEndNext(index);} else if (this.listArr[index].x < 0 &&this.listArr[index].x < -this.winWidth / 2 + this.winWidth / 4.5) {this.touchEndNext(index);} else {this.listArr[index].x = 0;this.listArr[index].y = 0;this.slideing = false;}},touchEndNext(index) {this.slideing = true;this.listArr[index].x = this.listArr[index].x * 3;this.listArr[index].y = this.listArr[index].y * 3;var a = setTimeout(() => {this.$set(this.listArr[index], "show", false);this.$nextTick(() => {this.currentIndex++;if(index + 3 < this.listArr.length){this.$set(this.listArr[index + 3], "opacity", 1);}this.slideing = falsea;});}, 300);}}
};
</script>
.slide {position: relative;width: 95%;height: 500px;perspective: 1000px;perspective-origin: 50% 150%;transform-style: preserve-3d;
}
.slide .slide_item {transform-style: preserve-3d;display: flex;width: 100%;height: 100%;border-radius: 20px;position: absolute;z-index: 30;background: #fff;display: flex;justify-content: center;align-items: center;text-align: center;/* opacity: 0; *//* display: none; */text-align: center;font-size: 30px;line-height: 1;transform: translate3d(0px, 0px, 0px) rotate(0deg);box-shadow: 0 10px 15px 0 rgba(0, 0, 0, 0.15);transition: 300ms;opacity: 0;flex-direction: column;
}
.slide .slide_item .title{font-size: 50px;
}
.slide .slide_item .text{font-size: 16px;margin-top: 10px;
}
由于csdn没有vue格式代码插入所以分成三段展示
这篇关于H5仿探探左右滑动效果Vue.js的文章就介绍到这儿,希望我们推荐的文章对编程师们有所帮助!


