本文主要是介绍鸿蒙API9手机号验证,希望对大家解决编程问题提供一定的参考价值,需要的开发者们随着小编来一起学习吧!
鸿蒙API9手机号验证
做一个app用户认证,之前一直想着都是通过HMS Core里边来接入,但是里边的文档最高只支持到API7。
由于想直接用API9来接,毕竟感觉后续ts/java混合开发要被舍弃,尽量还是用新的来弄。看了一遍新的API9的文档,感觉比之前的完善了很多,不过就是相应的配套支持还少点。卡了好久,没事想先关注一下文档有没有更新。突然发现还有另外一个途径,在AppGallery Connect里边有个认证服务,目前API9支持手机跟邮箱两种方式,后续应该能更新华为账号方式登陆。据说现在微信也开始适配鸿蒙了,感觉再过一段时间可能就能接入微信登陆了。
文档地址
参考地址
下边按步骤接入一下,需要提前准备一个AppGallery Connect账号。
新建工程
随便创建一个,记录一下bundle ID,然后在通过 AppGallery Connect 创建一个应用,填写相同的bundle ID。或者反过来也行,只要保证两边的bundle ID一样就行了。
开通认证服务
进入AppGallery Connect开通认证服务
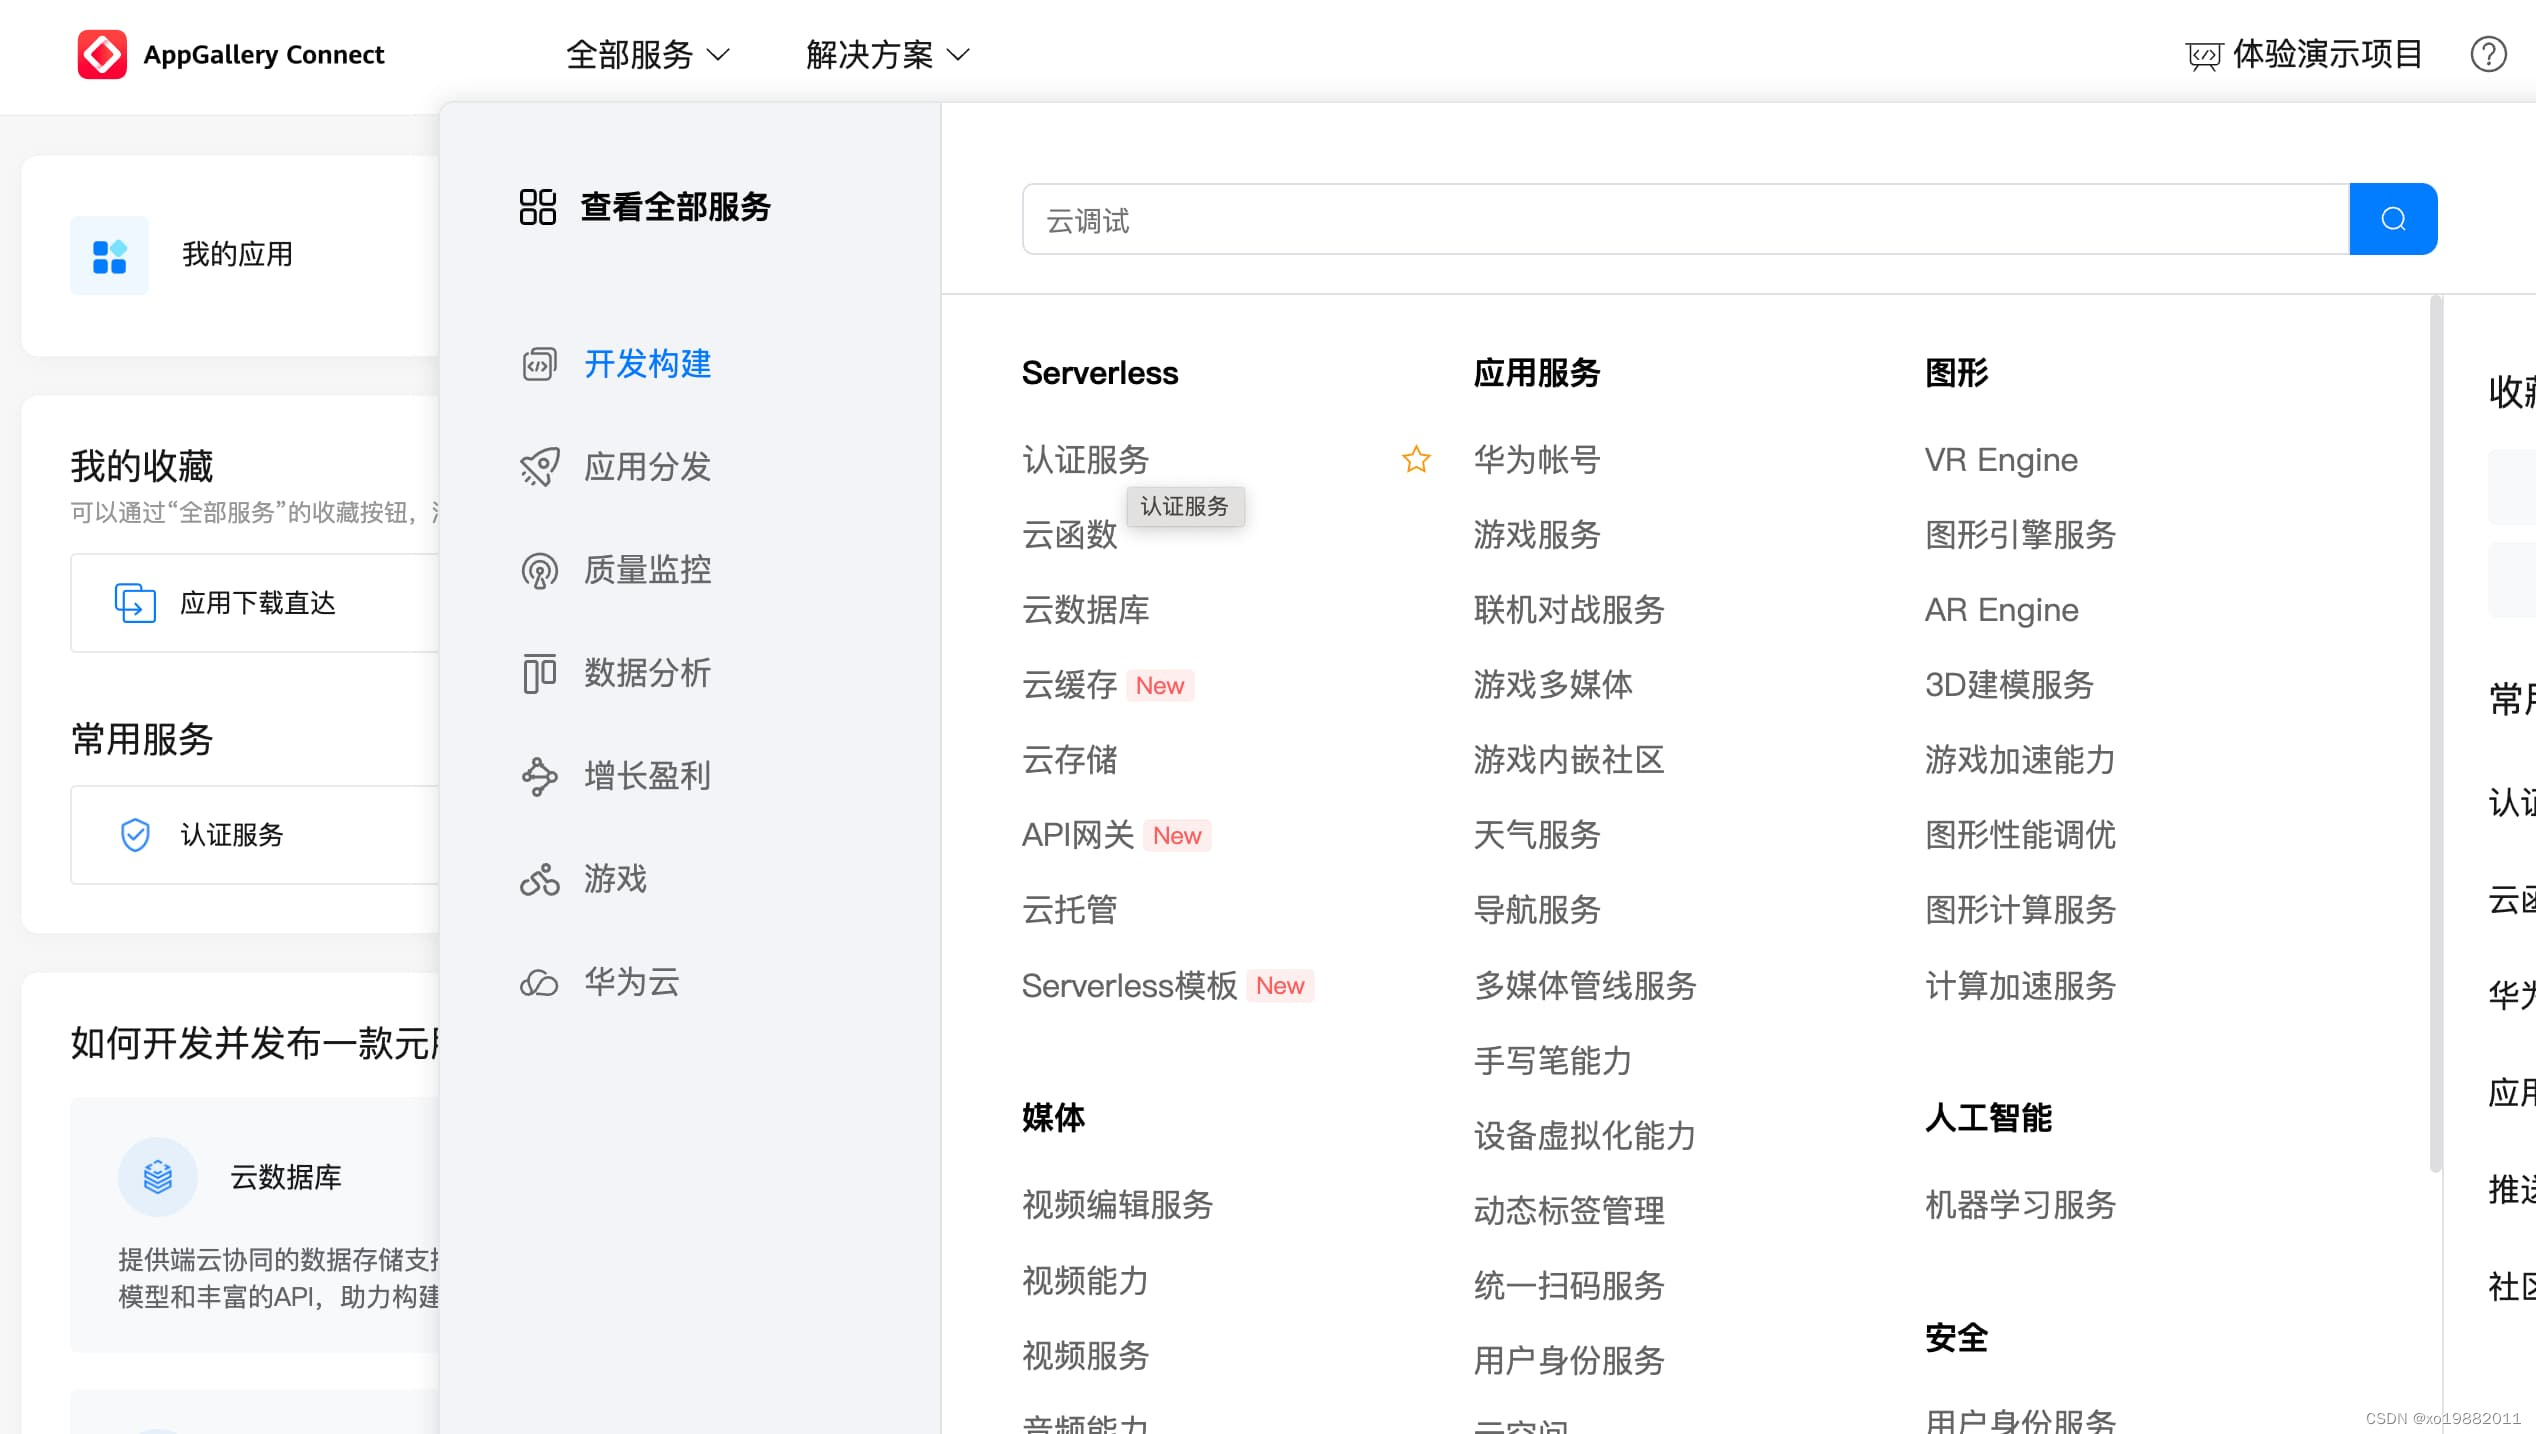
开通认证服务的手机号项目
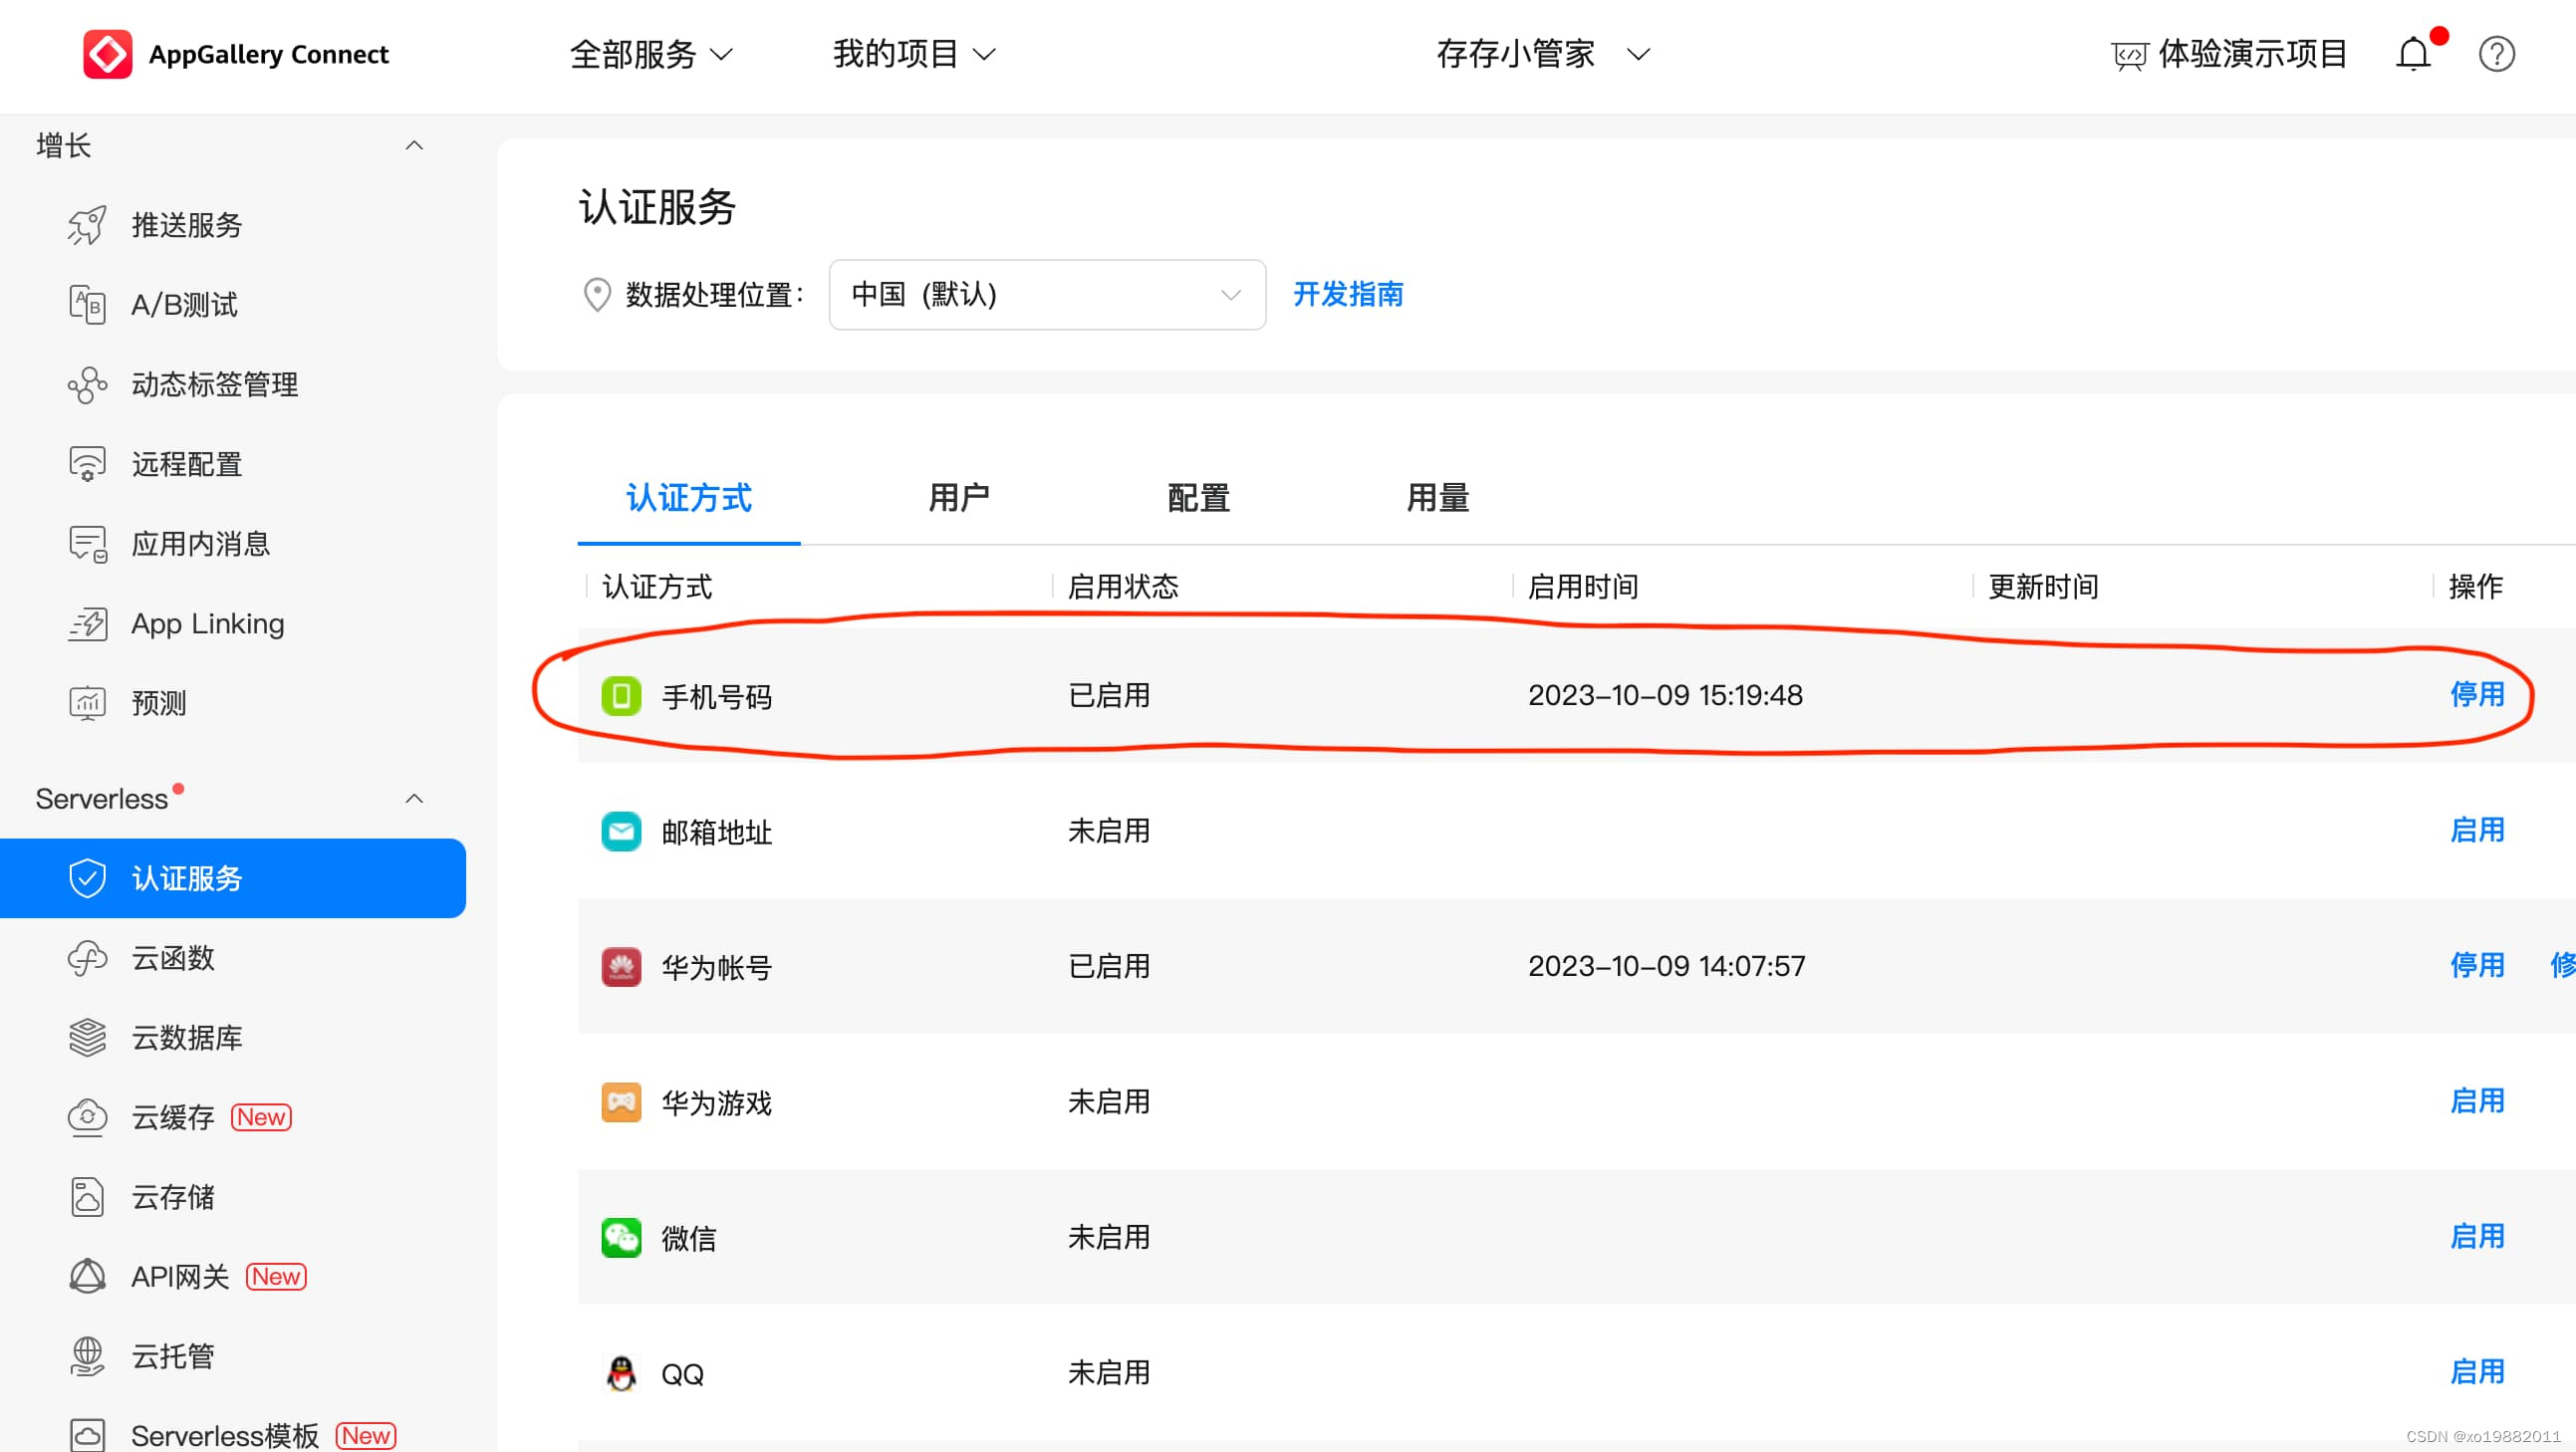
开局送了1000条短信每月,简直不要太爽,微信小程序的配额一共免费1000条,而且那个还不一定会发验证码,相比于这个就良心多了。
在认证的用量能看到短信的发送次数。
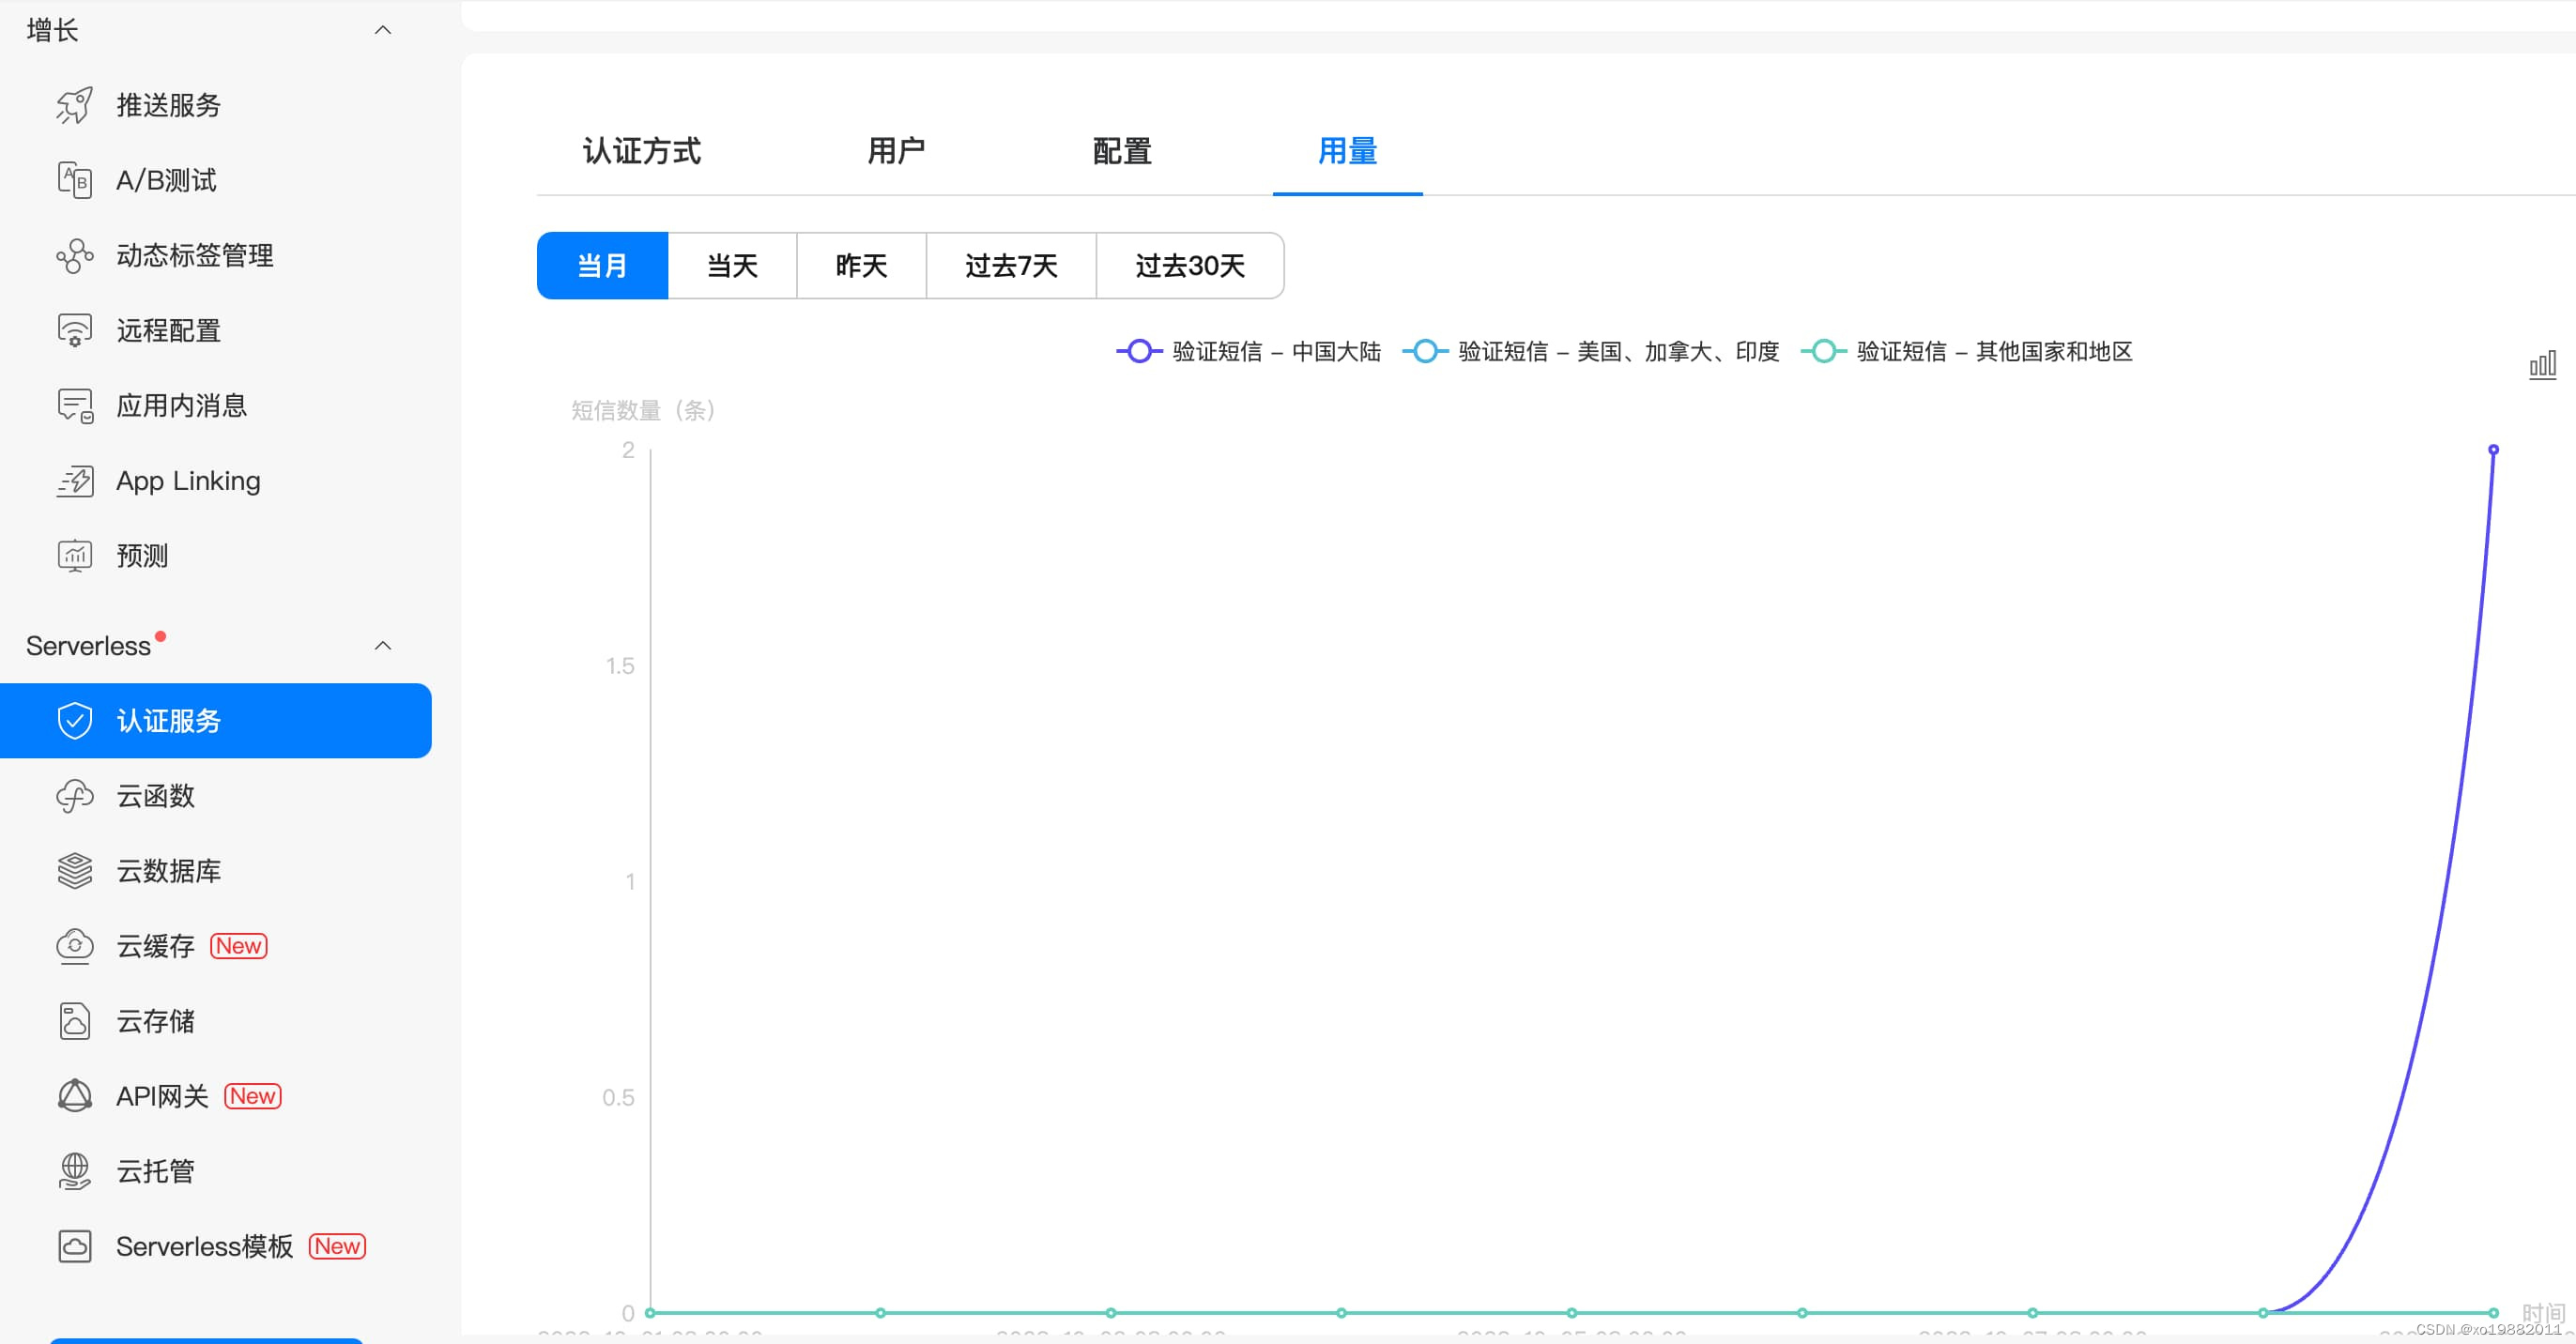
在项目设置的项目配额里边,改成查看认证服务能够看到短信的配额用多少了。
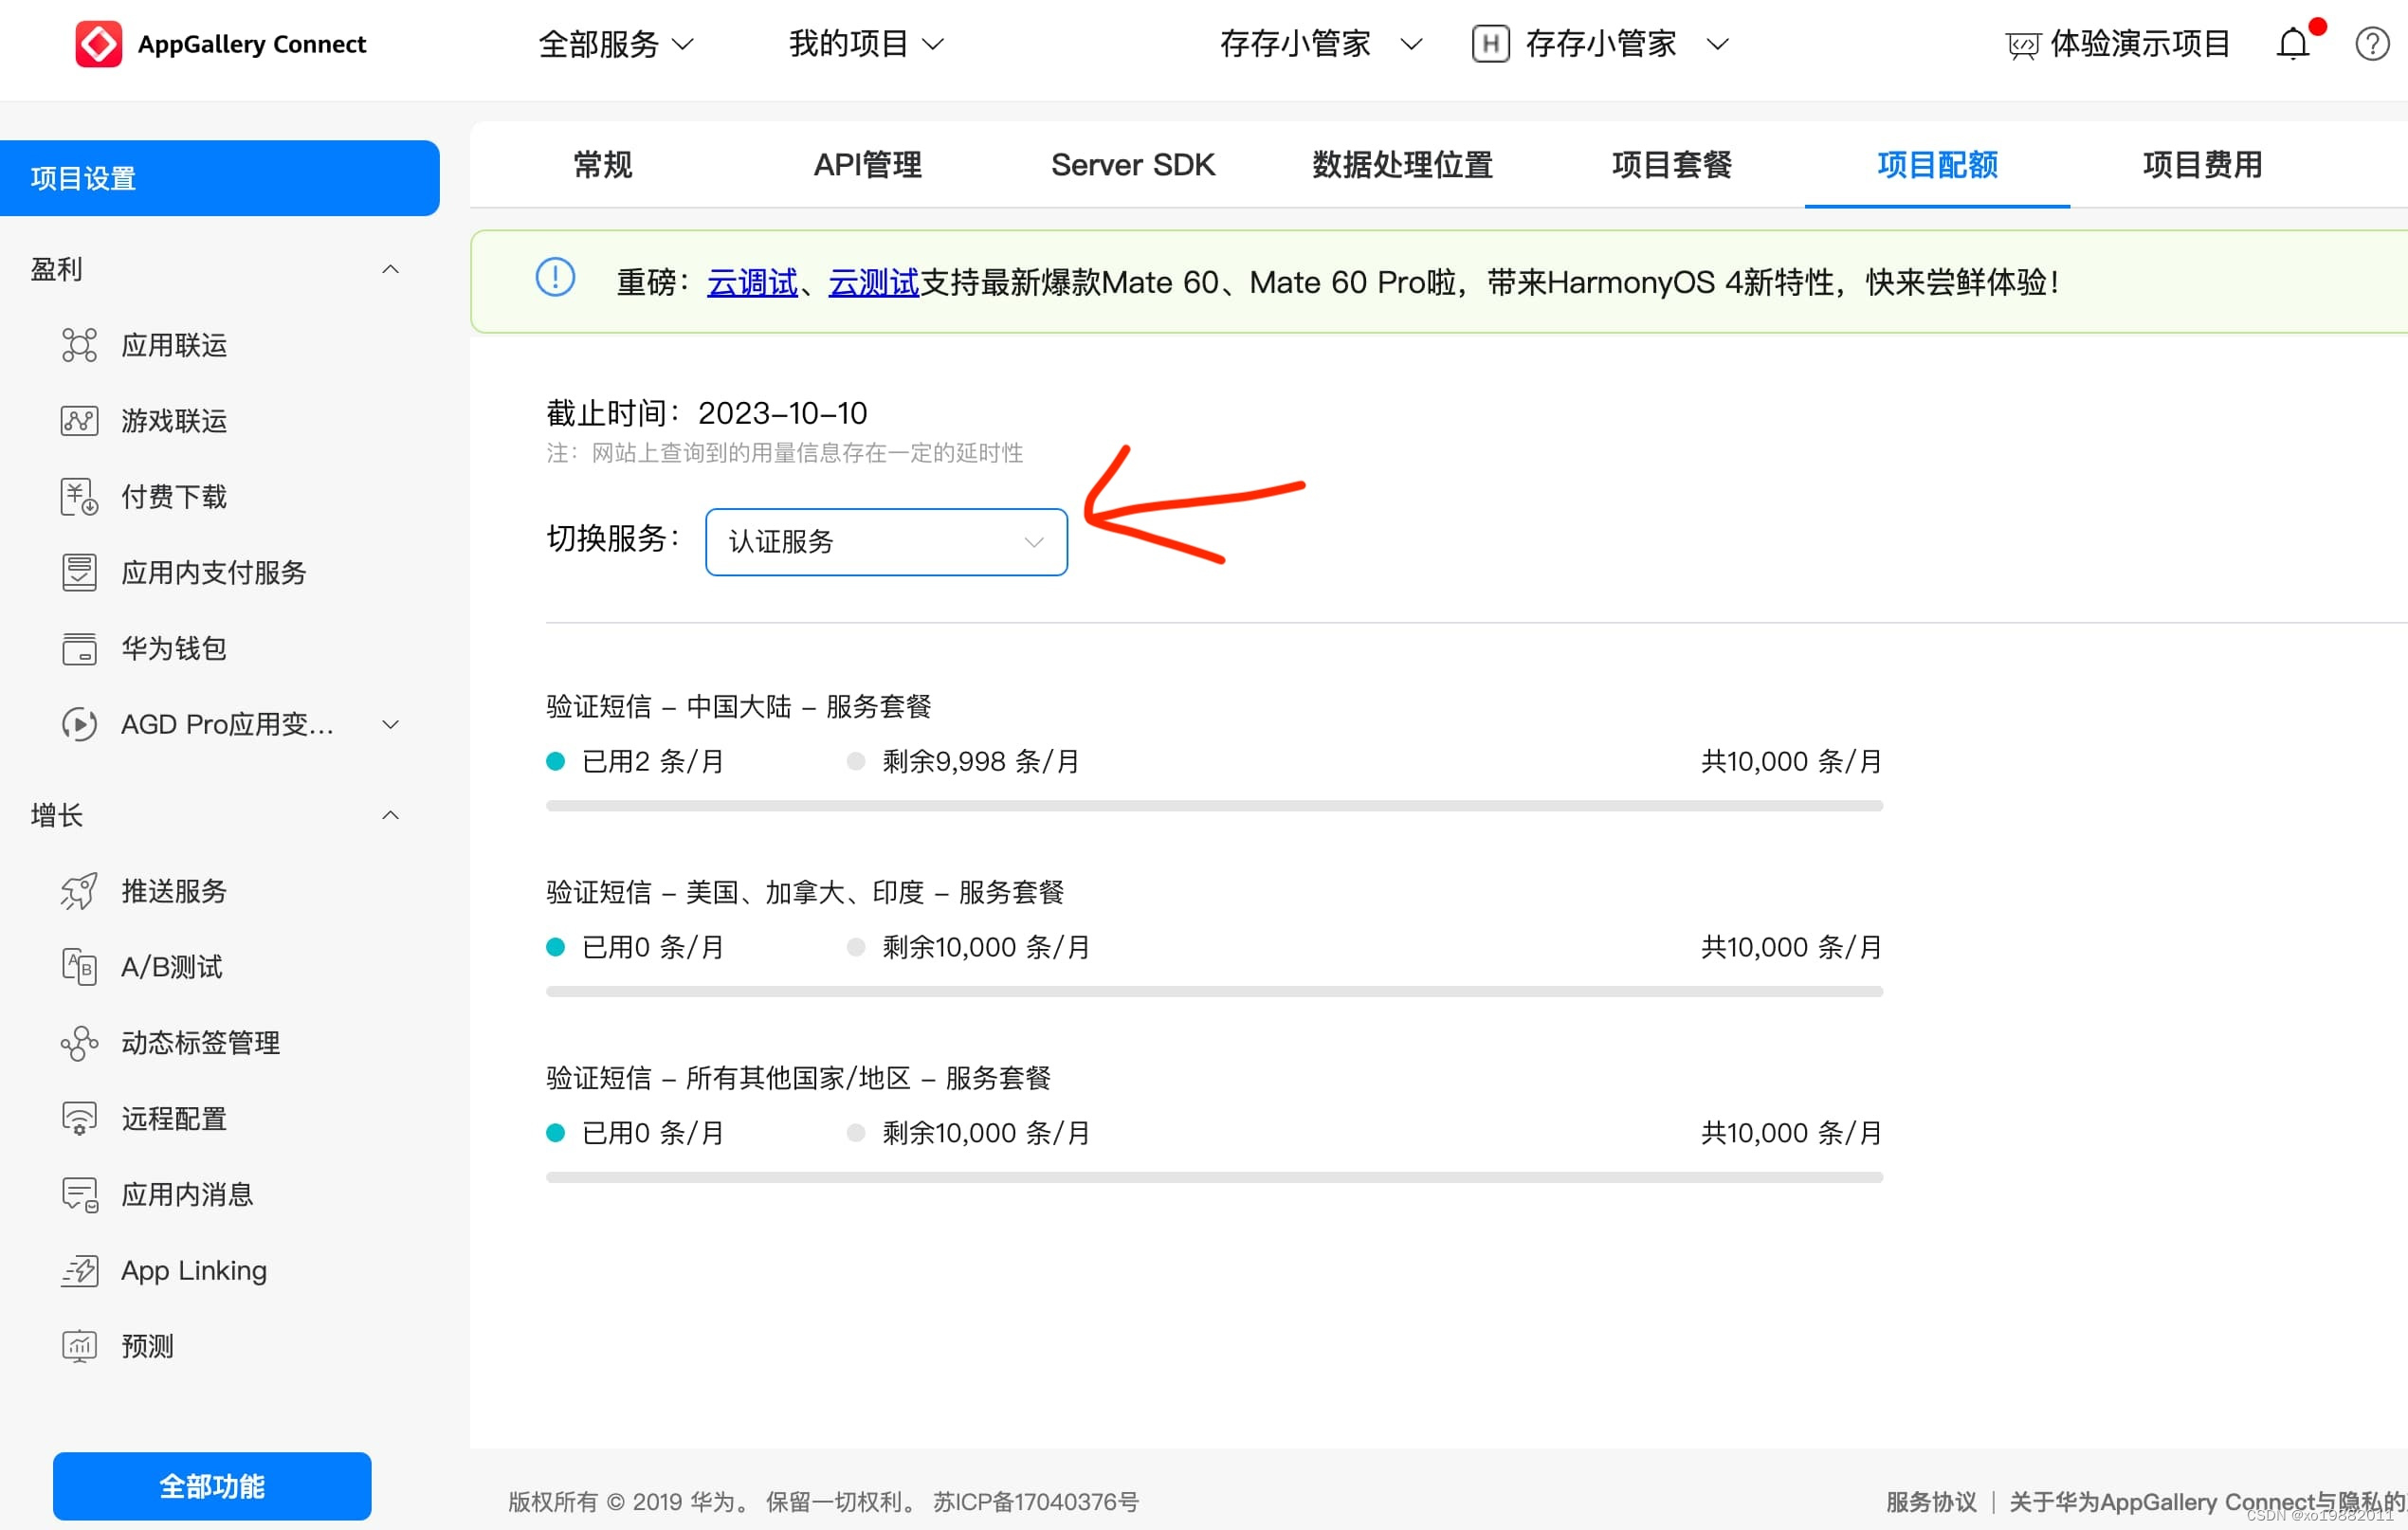
在认证服务的配置中还能设置短信模版内容
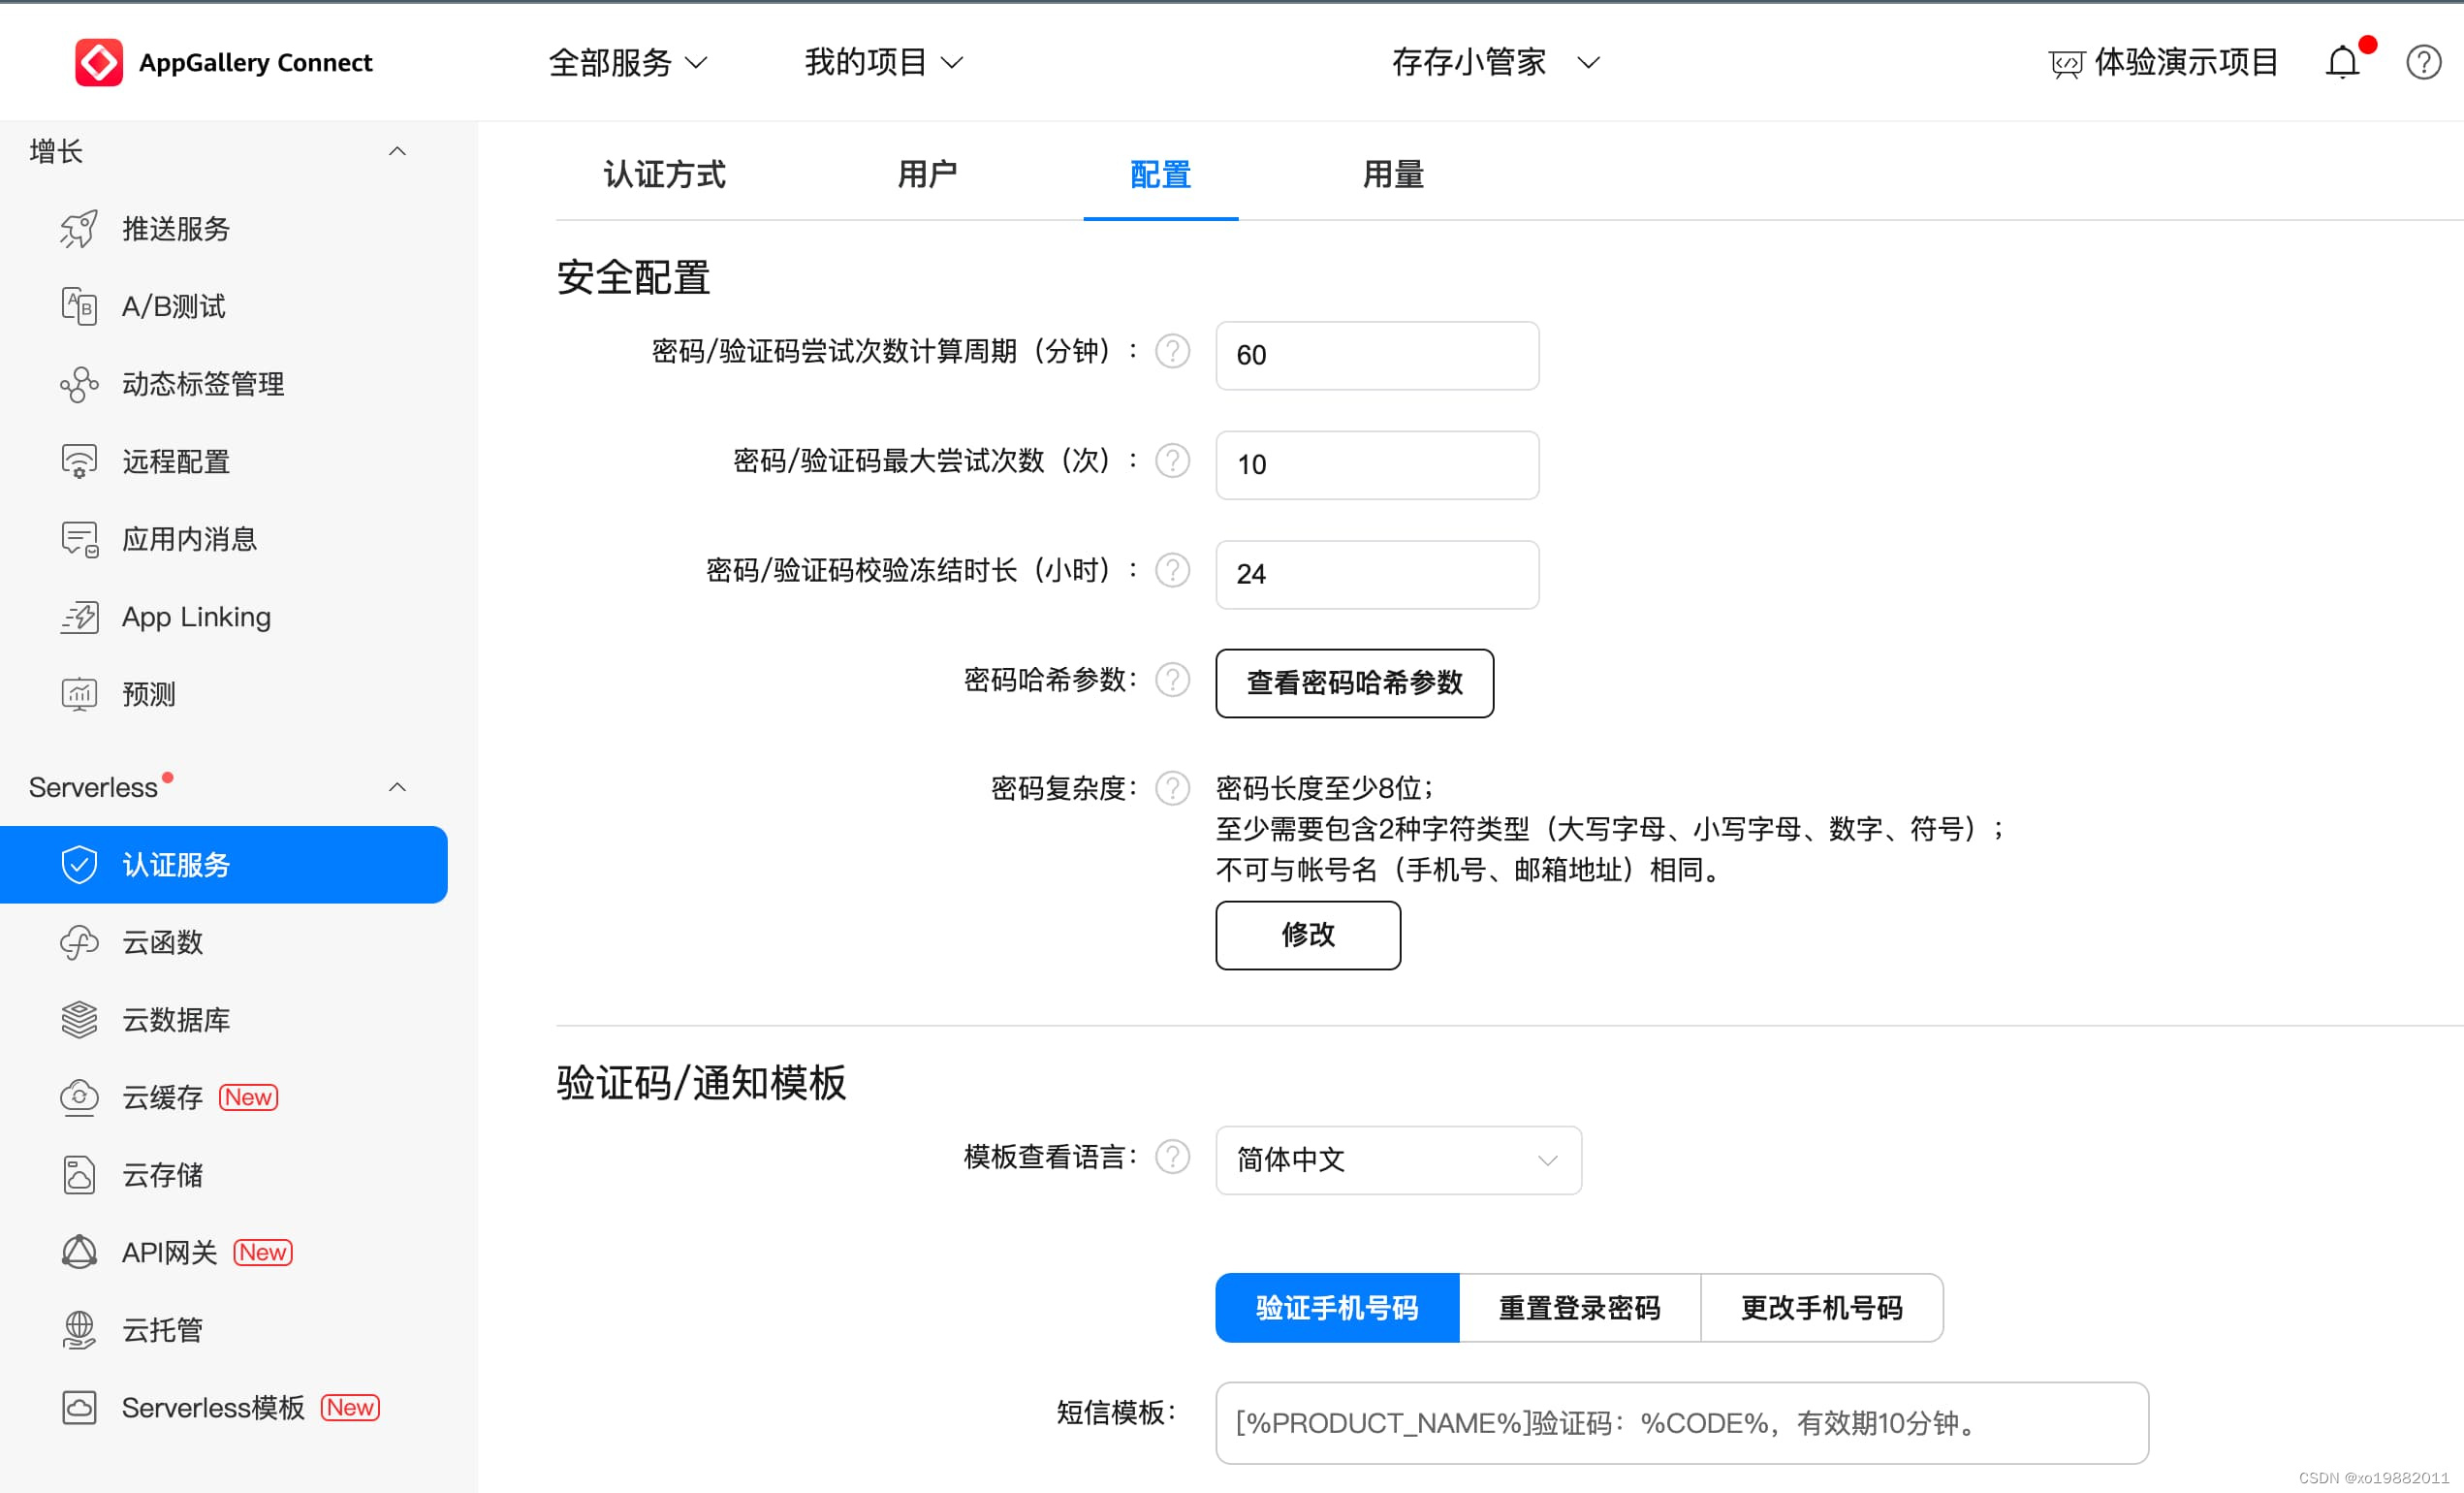
配置依赖
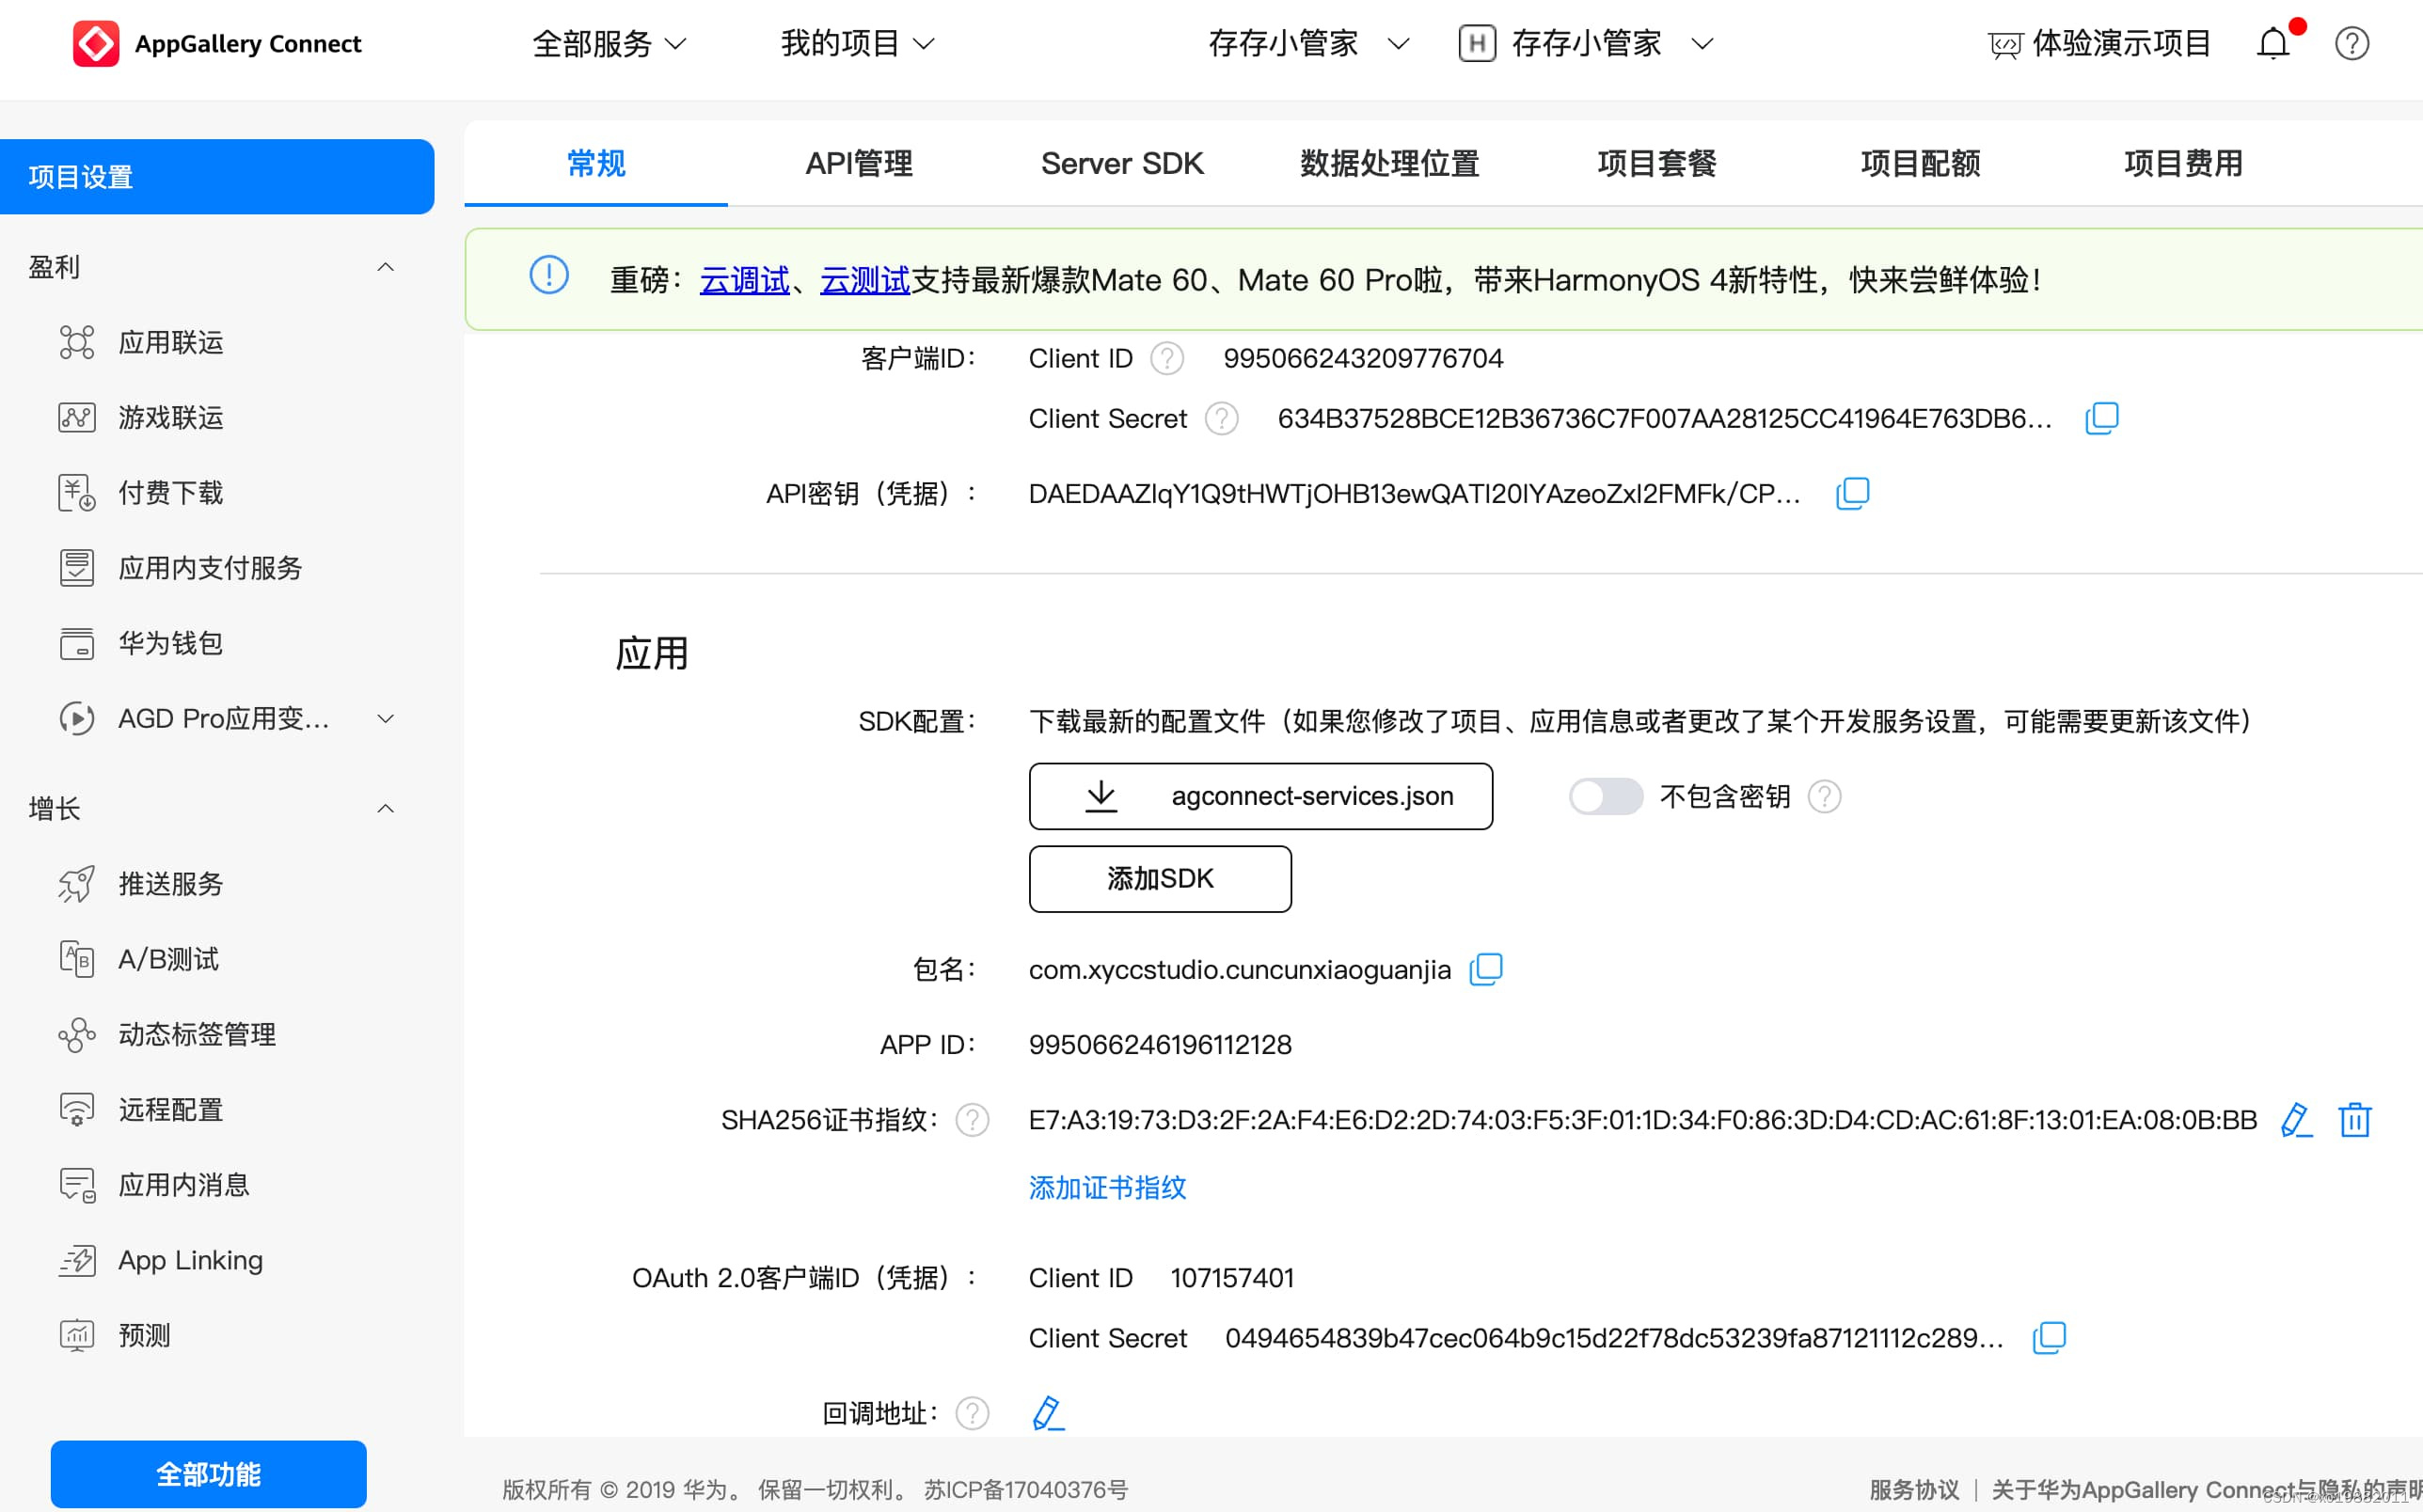
下载 agconnect-services.json,在AppGallery Connect项目配置->常规下边有这个文件的下载地方。
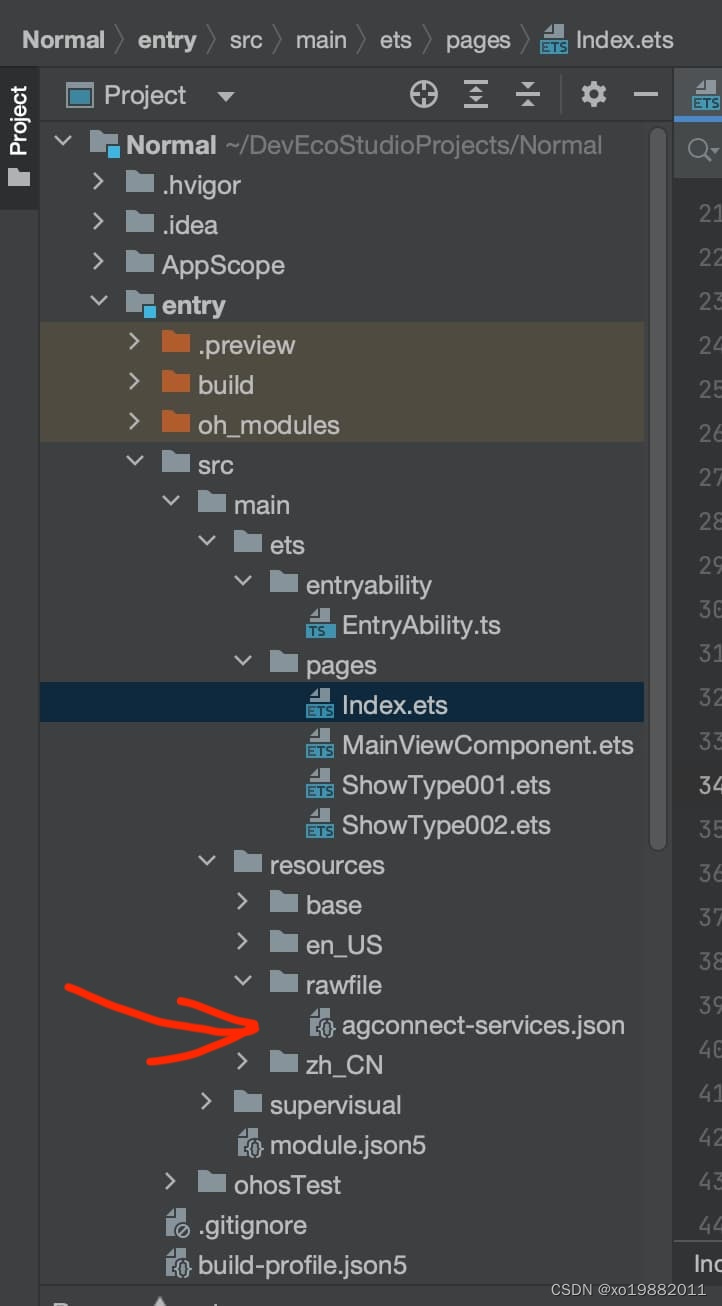
把其放到项目的这个位置上,resources/rawfile/文件夹下。
增加项目文件的依赖,项目文件路径 工程/entry/oh-package.json5
把如下内容添加到package.json5里边
{"@hw-agconnect/auth-ohos": "^1.1.2","@hw-agconnect/api-ohos": "^1.1.2","@hw-agconnect/core-ohos": "^1.1.2"
}
修改后文件如下:
{"license": "","devDependencies": {},"author": "","name": "entry","description": "Please describe the basic information.","main": "","version": "1.0.0","dependencies": {"@hw-agconnect/auth-ohos": "^1.1.2","@hw-agconnect/api-ohos": "^1.1.2","@hw-agconnect/core-ohos": "^1.1.2"}
}
之后同步项目工程,等待安装依赖库。
在 entry/src/main/module.json5 文件里边增加网络权限。
"requestPermissions": [{"name": "ohos.permission.INTERNET",}
]
写个大概的页面
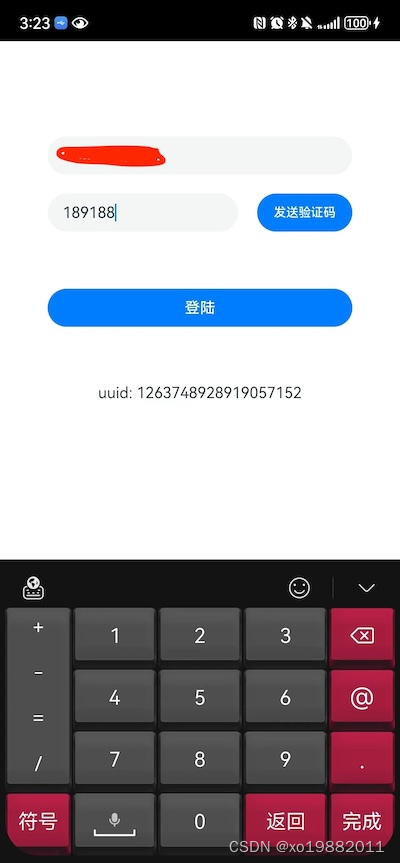
根据功能需要,要有一个短信输入框、验证码输入框、发送验证码按钮、登陆按钮几个。
稍微画一下界面,效果如下:
接入逻辑
引入模块
import agconnect from '@hw-agconnect/api-ohos';
import "@hw-agconnect/core-ohos";
import "@hw-agconnect/auth-ohos";
import { EmailAuthProvider, VerifyCodeAction, VerifyCodeSettingBuilder, PhoneUserBuilder,PhoneAuthProvider, AGConnectAuth, AGConnectAuthCredentialProvider
} from "@hw-agconnect/auth-ohos"
初始化及查看是否有用户登录信息,如果之前短信验证码验证成功的话,一般来说第二次启动就能拿到上次的登录信息:
agconnect.instance().init(this.context.getApplicationContext());
agconnect.auth().getCurrentUser().then(user=>{if(user){//业务逻辑console.log('xx get user success ' + JSON.stringify(user))this.message = 'uuid: ' + user.getUid()} else {console.log('xx not login')this.message = '暂无登陆信息'}
}).catch(error=>{console.log('xx get user failed'+JSON.stringify((error)))
})
把手机号跟验证码发到全局变量里边
@State message: string = '^_^'
@State phoneNumber: string = ''
@State verifyCode: string = ''
countryCode: string = '+86'
发送验证码及验证码登陆流程
private handleSendVerifyCode = () => {let verifyCodeSettings = new VerifyCodeSettingBuilder().setAction(VerifyCodeAction.REGISTER_LOGIN).setLang('zh_CN').setSendInterval(60).build();agconnect.auth().requestPhoneVerifyCode(this.countryCode,this.phoneNumber,verifyCodeSettings).then(verifyCodeResult => {console.log('xx verify code success '+JSON.stringify(verifyCodeResult))//验证码申请成功this.message = '发送验证码成功'}).catch(error => {//验证码申请失败console.log('xx verify code fail '+JSON.stringify(error))});
}private handleCheckVerifyCode = () => {let credential = PhoneAuthProvider.credentialWithVerifyCode(this.countryCode,this.phoneNumber, this.verifyCode);agconnect.auth().signIn(credential).then(user => {//登录成功console.log('xx user is '+JSON.stringify(user))this.message = 'uuid: ' + user.getUser().getUid()}).catch(error => {//登录失败console.log('xx login code fail '+JSON.stringify(error))});
}
之后整体代码接入一下完成:
import common from '@ohos.app.ability.common'
import agconnect from '@hw-agconnect/api-ohos';
import "@hw-agconnect/core-ohos";
import "@hw-agconnect/auth-ohos";
import { EmailAuthProvider, VerifyCodeAction, VerifyCodeSettingBuilder, PhoneUserBuilder,PhoneAuthProvider, AGConnectAuth, AGConnectAuthCredentialProvider
} from "@hw-agconnect/auth-ohos"@Entry
@Component
struct Index {@State message: string = '^_^'@State phoneNumber: string = ''@State verifyCode: string = ''countryCode: string = '+86'private context = getContext(this) as common.UIAbilityContextonPageShow() {agconnect.instance().init(this.context.getApplicationContext());agconnect.auth().getCurrentUser().then(user=>{if(user){//业务逻辑console.log('xx get user success ' + JSON.stringify(user))this.message = 'uuid: ' + user.getUid()} else {console.log('xx not login')this.message = '暂无登陆信息'}}).catch(error=>{console.log('xx get user failed'+JSON.stringify((error)))}) ;}private handleSendVerifyCode = () => {let verifyCodeSettings = new VerifyCodeSettingBuilder().setAction(VerifyCodeAction.REGISTER_LOGIN).setLang('zh_CN').setSendInterval(60).build();agconnect.auth().requestPhoneVerifyCode(this.countryCode,this.phoneNumber,verifyCodeSettings).then(verifyCodeResult => {console.log('xx verify code success '+JSON.stringify(verifyCodeResult))//验证码申请成功this.message = '发送验证码成功'}).catch(error => {//验证码申请失败console.log('xx verify code fail '+JSON.stringify(error))});}private handleCheckVerifyCode = () => {let credential = PhoneAuthProvider.credentialWithVerifyCode(this.countryCode,this.phoneNumber, this.verifyCode);agconnect.auth().signIn(credential).then(user => {//登录成功console.log('xx user is '+JSON.stringify(user))this.message = 'uuid: ' + user.getUser().getUid()}).catch(error => {//登录失败console.log('xx login code fail '+JSON.stringify(error))});}build() {Column({space: 20}) {TextInput({placeholder:"请输入手机号"}).width(320).height(40).type(InputType.Number).onChange((v) => {this.phoneNumber = v})Row({space: 20}) {TextInput({placeholder:"请输入验证码"}).width(200).height(40).type(InputType.Number).onChange((v) => {this.verifyCode = v})Button("发送验证码").width(100).height(40).onClick(()=>{if(this.phoneNumber.length == 11) {this.handleSendVerifyCode()} else {AlertDialog.show({message: '请输入正确的手机号',confirm: {value: '确定',action: ()=>{}}})}})}Button("登陆").width(320).height(40).margin({top: 40}).onClick(()=>{if(this.verifyCode.length >= 4) {this.handleCheckVerifyCode()} else {AlertDialog.show({message: '请输入正确的验证码',confirm: {value: '确定',action: ()=>{}}})}})Text(this.message).margin({top: 40})}.alignItems(HorizontalAlign.Center).padding({top: 100}).width('100%')}
}
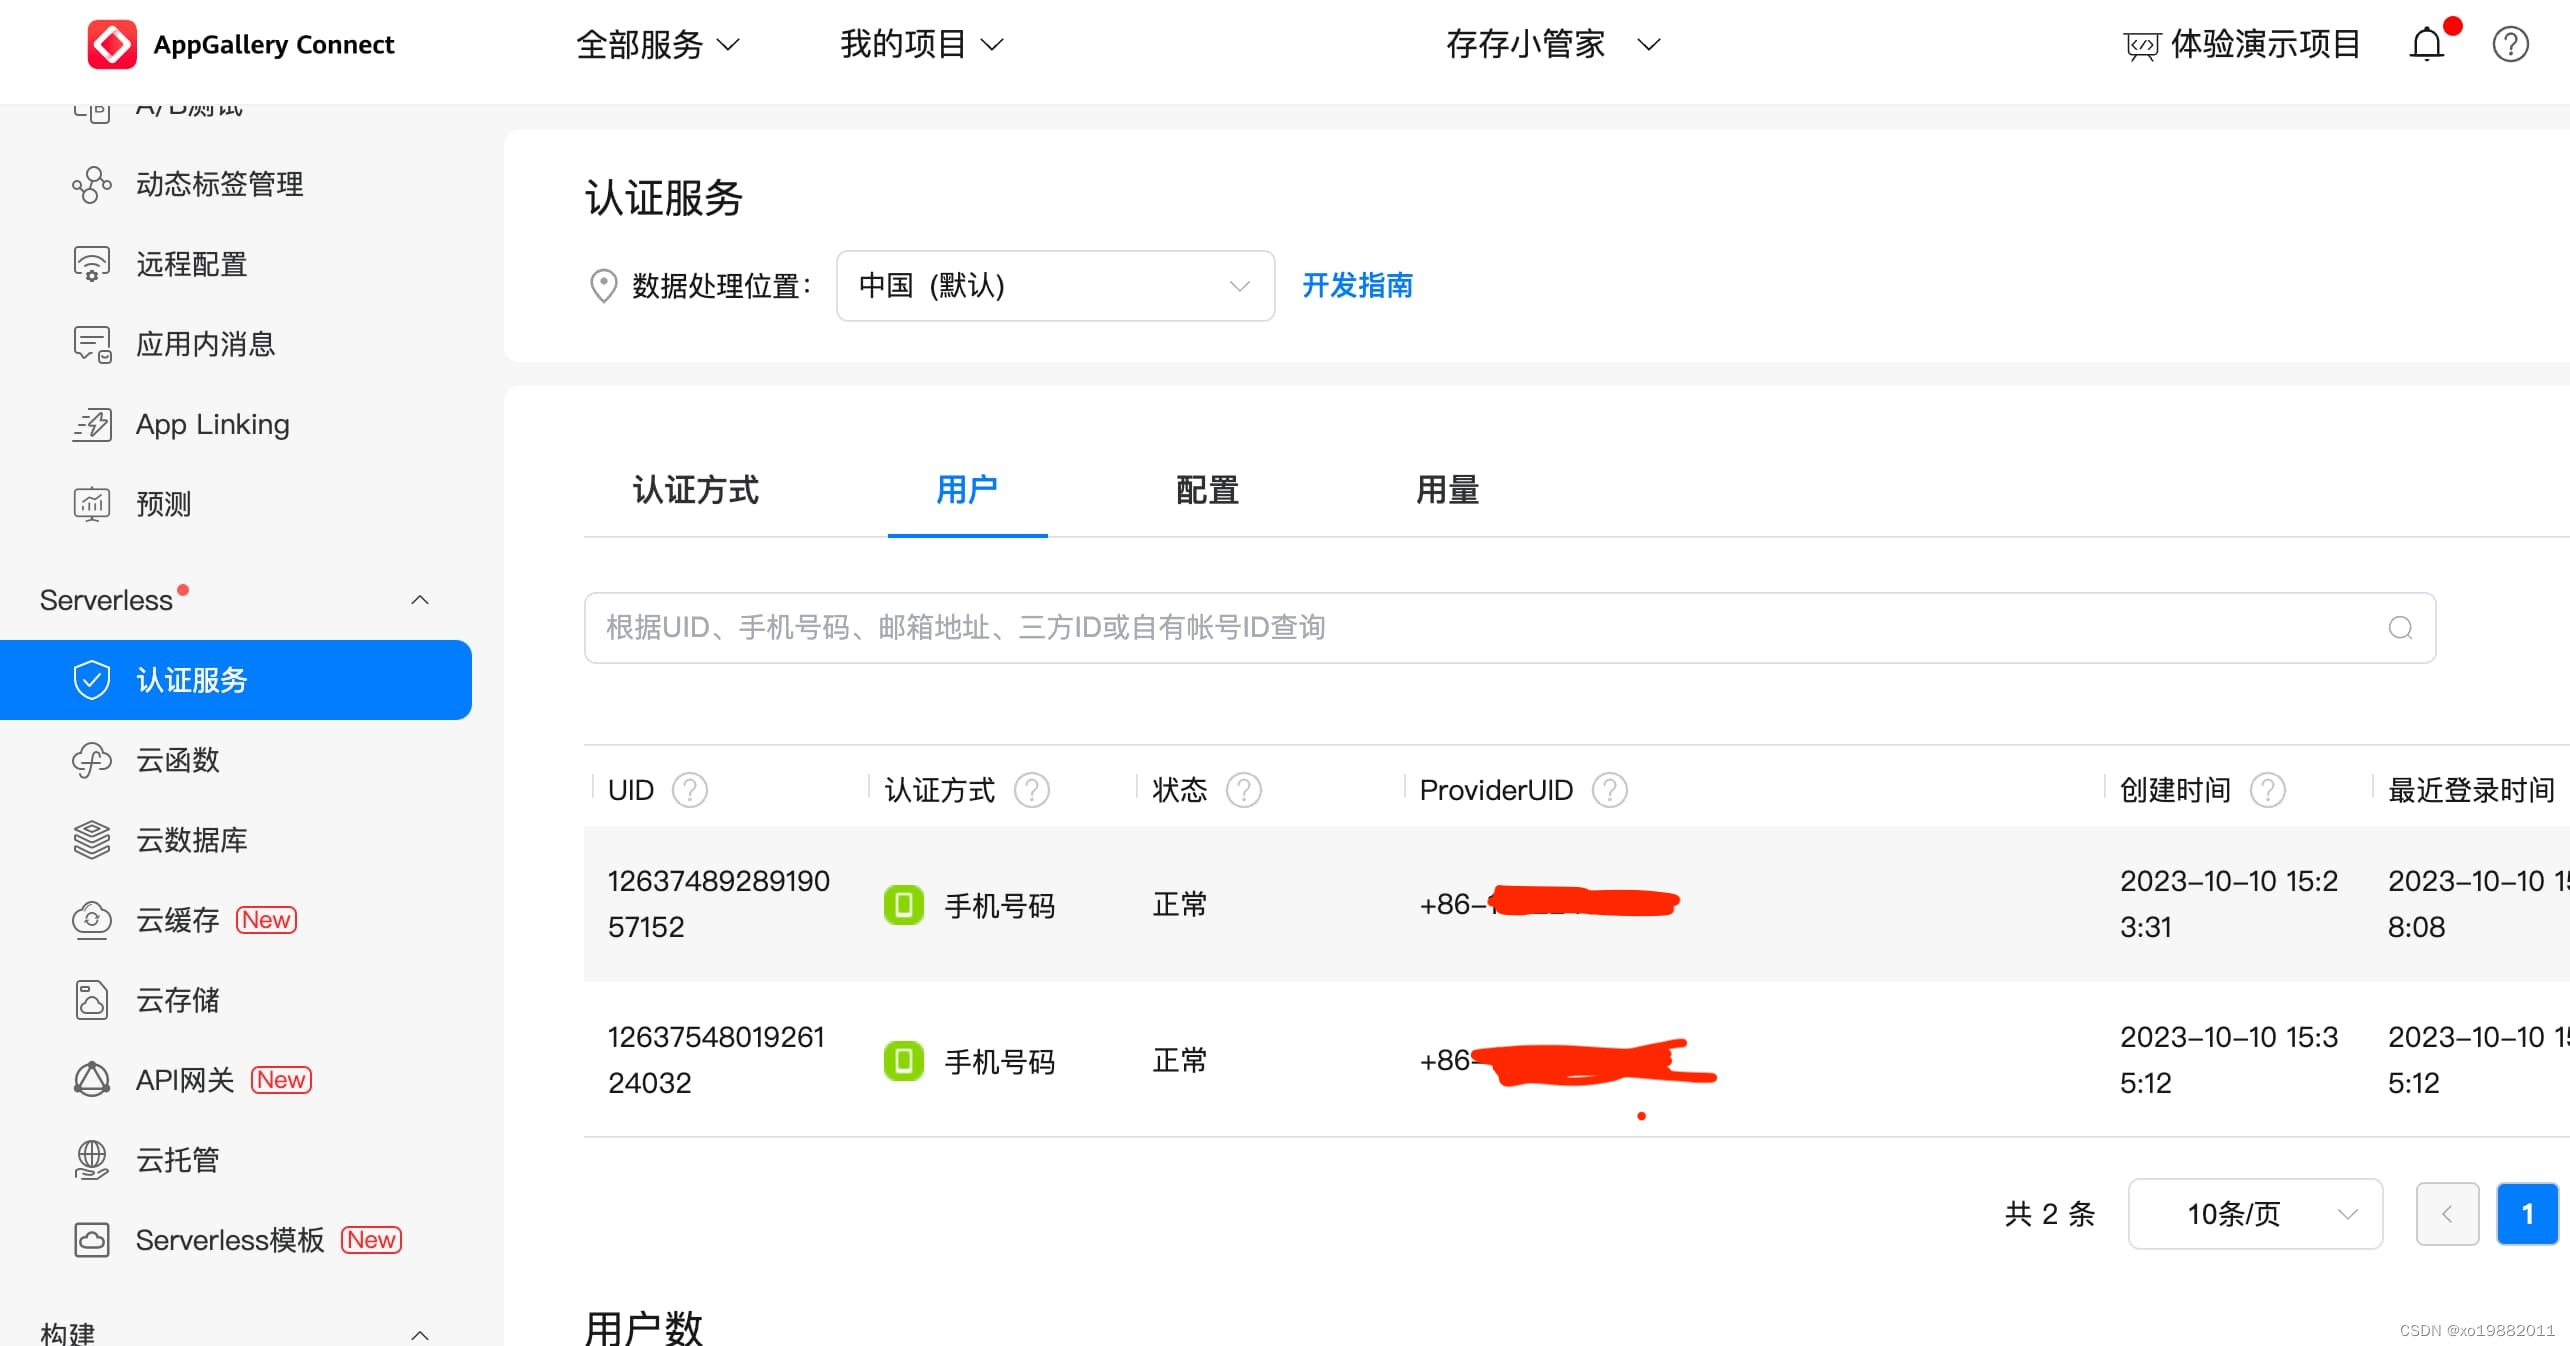
最后最后还有个比较好的功能就是谁发过短信注册过用户在AppGallery Connect都能够查看到。
这篇关于鸿蒙API9手机号验证的文章就介绍到这儿,希望我们推荐的文章对编程师们有所帮助!


