本文主要是介绍iOS 高仿《掌上生活》app 动画,希望对大家解决编程问题提供一定的参考价值,需要的开发者们随着小编来一起学习吧!
前几天突然看到了招商银行的《掌上生活》app ,看到她的首页的动画还有点意思,然后我就模仿写了一个高仿的掌上生活。
具体用到了重力感应和CABasicAnimation方法:
代码如下:
#import "ViewController.h"
#import <QuartzCore/QuartzCore.h>#define Accelerometer_Notice_Windage  0.03
#define DegreesToRadians(x) (M_PI * x / 180.0)@interface ViewController (){UIView *rightDown;UIView *leftdown;UIView *rightUp;UIView *leftup;float lastAccelerationX;float lastAccelerationY;float lastAccelerationZ;NSMutableArray* animationViewArray;
}@end@implementation ViewController- (void)viewDidLoad
{[super viewDidLoad];// Do any additional setup after loading the view, typically from a nib.[[UIAccelerometer sharedAccelerometer] setDelegate:self];lastAccelerationX=0;lastAccelerationY=0;lastAccelerationZ=0;animationViewArray=[[NSMutableArray alloc]init];self.view.backgroundColor=[UIColor colorWithPatternImage:[UIImage imageNamed:@"bg.png"]];UIImageView *headerBG=[[UIImageView alloc]initWithFrame:CGRectMake(0, 0, 320, 46)];headerBG.image=[UIImage imageNamed:@"navigation.png"];headerBG.userInteractionEnabled=YES;[self.view   addSubview:headerBG];[headerBG release];UIImageView *cmblogo=[[UIImageView alloc]initWithFrame:CGRectMake(10, 10, 88, 26)];cmblogo.image=[UIImage imageNamed:@"logo.png"];[headerBG   addSubview:cmblogo];[cmblogo release];UIImageView *titleimage=[[UIImageView alloc]initWithFrame:CGRectMake(110, 10, 93, 26)];titleimage.image=[UIImage imageNamed:@"font.png"];[headerBG   addSubview:titleimage];[titleimage release];UIButton *loginbutton=[UIButton buttonWithType:UIButtonTypeCustom];loginbutton.frame=CGRectMake(260,6, 50, 36);[loginbutton setBackgroundImage:[UIImage imageNamed:@"btm_nav.png"] forState:UIControlStateNormal];[loginbutton setBackgroundImage:[UIImage imageNamed:@"btm_nav.png"] forState:UIControlStateNormal];[loginbutton addTarget:self action:@selector(doanimation) forControlEvents:UIControlEventTouchUpInside];[loginbutton setTitle:@"登录" forState:UIControlStateNormal];[loginbutton setTitle:@"登录" forState:UIControlStateHighlighted];[headerBG addSubview:loginbutton];//便利生活view设置leftdown=[[UIImageView alloc]initWithFrame:CGRectMake(16,45,122,258)];leftdown.backgroundColor=[UIColor clearColor];[self.view addSubview:leftdown];[animationViewArray addObject:leftdown];[leftdown release];UIImageView *bianliImageButton=[[UIImageView alloc]initWithFrame:CGRectMake(5,164,122,91)];bianliImageButton.image=[UIImage imageNamed:@"note_bl.png"];[leftdown   addSubview:bianliImageButton];[bianliImageButton release];UIImageView *bianlishenghuoImage=[[UIImageView alloc]initWithFrame:CGRectMake(60,0,10, 175)];bianlishenghuoImage.image=[UIImage imageNamed:@"rope_lang-.png"];[leftdown   addSubview:bianlishenghuoImage];[bianlishenghuoImage release];//帐单还款view设置leftup=[[UIImageView alloc]initWithFrame:CGRectMake(48,45,122,148)];leftup.backgroundColor=[UIColor clearColor];[self.view addSubview:leftup];[animationViewArray addObject:leftup];[leftup release];UIImageView *zhangdanImageButton=[[UIImageView alloc]initWithFrame:CGRectMake(1,56,125,91)];zhangdanImageButton.image=[UIImage imageNamed:@"note_cx.png"];[leftup addSubview:zhangdanImageButton];[zhangdanImageButton release];UIImageView *zhangdanhaikuanImage=[[UIImageView alloc]initWithFrame:CGRectMake(60,0,10, 70)];zhangdanhaikuanImage.image=[UIImage imageNamed:@"rope.png"];[leftup   addSubview:zhangdanhaikuanImage];[zhangdanhaikuanImage release];//用卡服务view设置rightDown=[[UIImageView alloc]initWithFrame:CGRectMake(160,45,122,251)];rightDown.backgroundColor=[UIColor clearColor];[self.view addSubview:rightDown];[animationViewArray addObject:rightDown];[rightDown release];UIImageView *yongkaImageButton=[[UIImageView alloc]initWithFrame:CGRectMake(5,163,122,90)];yongkaImageButton.image=[UIImage imageNamed:@"note_zs_a.png"];[rightDown   addSubview:yongkaImageButton];[yongkaImageButton release];UIImageView *fuwuImage=[[UIImageView alloc]initWithFrame:CGRectMake(60,0,10,175)];fuwuImage.image=[UIImage imageNamed:@"rope_lang-.png"];[rightDown   addSubview:fuwuImage];[fuwuImage release];//缤纷优惠view设置rightUp=[[UIImageView alloc]initWithFrame:CGRectMake(180,45,122,148)];rightUp.backgroundColor=[UIColor clearColor];[self.view addSubview:rightUp];[animationViewArray addObject:rightUp];[rightUp release];UIImageView *bfImageButton=[[UIImageView alloc]initWithFrame:CGRectMake(2,60,125,88)];bfImageButton.image=[UIImage imageNamed:@"note_bf.png"];[rightUp  addSubview:bfImageButton];[bfImageButton release];UIImageView *youhuiImage=[[UIImageView alloc]initWithFrame:CGRectMake(58,0,10, 70)];youhuiImage.image=[UIImage imageNamed:@"rope_lang-.png"];[rightUp  addSubview:youhuiImage];[youhuiImage release];UIImageView *arrowImage=[[UIImageView alloc]initWithFrame:CGRectMake(0,44,320, 19)];arrowImage.image=[UIImage imageNamed:@"arrowall2.png"];[self.view   addSubview:arrowImage];[arrowImage release];}-(void)doanimation{NSArray* tempXPoint=[[NSArray alloc]initWithObjects:@"77",@"109",@"221",@"241",nil];for (int i=0; i<[animationViewArray count]; i++){[self doWiggle:[animationViewArray objectAtIndex:i]  startPoint:[tempXPoint objectAtIndex:i]];}[tempXPoint release];
}-(void)doWiggle:(UIView *)touchView startPoint:(NSString *)string{CALayer *touchedLayer = [touchView layer];float xpoint=[string floatValue];const CGFloat boneScale = 1;CATransform3D scale = CATransform3DMakeScale(boneScale , boneScale, 1);touchedLayer.position = CGPointMake(xpoint,45);touchedLayer.anchorPoint = CGPointMake(0.5, 0.0);touchedLayer.bounds = CGRectMake(0,0,122,88);touchedLayer.transform = scale;CABasicAnimation* r1 = [CABasicAnimation animationWithKeyPath:@"transform"];CATransform3D rot1 = CATransform3DMakeRotation(0.5, 0,0,1);rot1 = CATransform3DConcat(rot1, touchedLayer.transform);r1.toValue = [NSValue valueWithCATransform3D:rot1];r1.autoreverses = YES;r1.repeatCount = NO;r1.duration = 0.5;r1.timingFunction = [CAMediaTimingFunction functionWithName:kCAMediaTimingFunctionEaseInEaseOut];[touchedLayer addAnimation:r1 forKey:nil];}#pragma mark -
#pragma mark UIAccelerometerDelegate-(void)accelerometer:(UIAccelerometer *)accelerometer didAccelerate:(UIAcceleration *)acceleration {//    NSLog(@"==%f,%f", acceleration.x,lastAccelerationX);
//    NSLog(@"%f",ABS(lastAccelerationX-acceleration.x));if( ABS(lastAccelerationX-acceleration.x)>Accelerometer_Notice_Windage &&ABS(lastAccelerationY-acceleration.y)>Accelerometer_Notice_Windage &&ABS(lastAccelerationZ-acceleration.z)>Accelerometer_Notice_Windage ){NSLog(@"asdfasf");[self doanimation];}lastAccelerationX=acceleration.x;lastAccelerationY=acceleration.y;lastAccelerationZ=acceleration.z;}

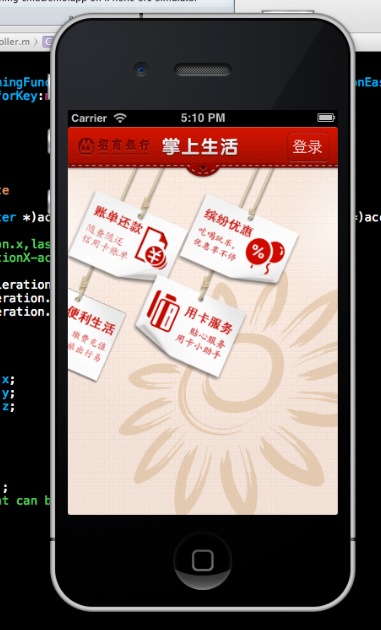
效果:
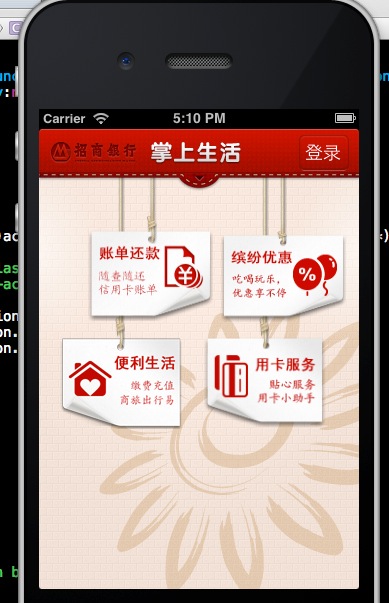
效果:
源代码下载
其他功能还在完善,敬请期待!
这篇关于iOS 高仿《掌上生活》app 动画的文章就介绍到这儿,希望我们推荐的文章对编程师们有所帮助!


