本文主要是介绍ExpandableListView的基本用法,希望对大家解决编程问题提供一定的参考价值,需要的开发者们随着小编来一起学习吧!
QQ上的好友列表在Android怎么实现,有一个最简单的方法,那就是ExpandableListView,下面简单介绍一下ExpandableListview的用法。
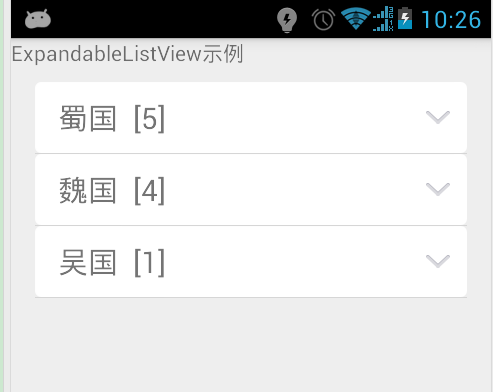
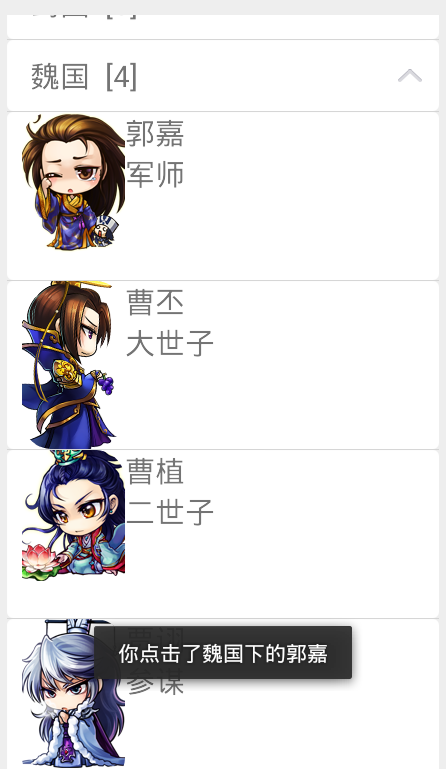
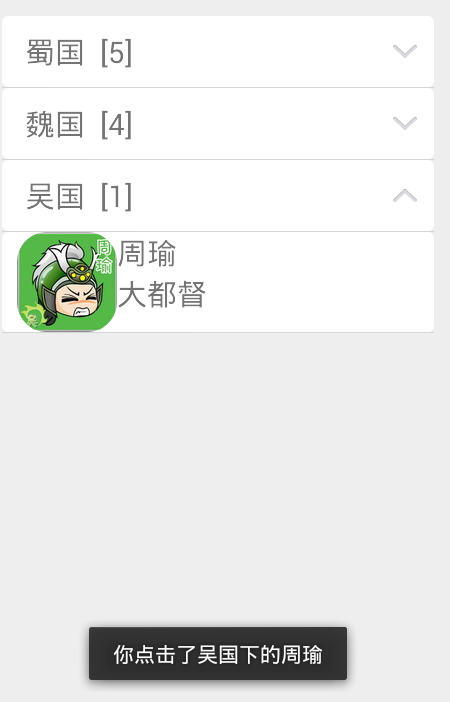
先看看效果图,没有找到大小合适的图片,所以凑合着看吧。 


一、准备工作(界面,和需要的数据)
<? xml version = "1.0" encoding = "utf-8" ?>
不知道为什么我这个直接写在Strings.xml文件中没效果,非要重新创建一个array.xml文件.
<? xml version = "1.0" encoding = "utf-8" ?>
< resources >
< string-array name = "groups" >
< item > 蜀国 </ item >
< item > 魏国 </ item >
< item > 吴国 </ item >
</ string-array >
< string-array name = "people_shu" >
< item > 刘备 </ item >
< item > 马超 </ item >
< item > 赵云 </ item >
< item > 黄忠 </ item >
< item > 诸葛亮 </ item >
</ string-array >
< string-array name = "people_shu_zhiwu" >
< item > 主公 </ item >
< item > 天威将军 </ item >
< item > 护国将军 </ item >
< item > 后将军 </ item >
< item > 丞相 </ item >
</ string-array >
< string-array name = "people_wei" >
< item > 郭嘉 </ item >
< item > 曹丕 </ item >
< item > 曹植 </ item >
< item > 贾诩 </ item >
</ string-array >
< string-array name = "people_wei_zhiwu" >
< item > 军师 </ item >
< item > 大世子 </ item >
< item > 二世子 </ item >
< item > 参谋 </ item >
</ string-array >
< string-array name = "people_wu" >
< item > 周瑜 </ item >
</ string-array >
< string-array name = "people_wu_zhiwu" >
< item > 大都督 </ item >
</ string-array >
</ resources >
不知道为什么我这个直接写在Strings.xml文件中没效果,非要重新创建一个array.xml文件.
二、主界面xml
<? xml version = "1.0" encoding = "utf-8" ?>
<? xml version = "1.0" encoding = "utf-8" ?>
< LinearLayout xmlns:android = "http://schemas.android.com/apk/res/android"
android:layout_width = "match_parent"
android:layout_height = "match_parent"
android:orientation = "vertical"
>
< TextView
android:id = "@+id/tv_title"
android:layout_width = "wrap_content"
android:layout_height = "wrap_content"
android:text = "ExpandableListView示例"
/>
< ExpandableListView
android:layout_marginTop = "10dp"
android:id = "@+id/ex_lv"
android:layout_width = "match_parent"
android:layout_height = "match_parent"
android:layout_marginLeft = "16dp"
android:layout_marginRight = "16dp"
android:scrollbars = "none" >
</ ExpandableListView >
</ LinearLayout >
这里就顺带说说 ExpandableListView的一些属性
android:scrollbars = "none" //设置下拉条消失
android:listSelector = "#00000000" //设置点击时的颜色
android:divider = "@null" //这两个属性设置分割线
android:dividerHeight = "1px"
三、 一级item的xml布局
<? xml version = "1.0" encoding = "utf-8" ?>
<? xml version = "1.0" encoding = "utf-8" ?>
< LinearLayout xmlns:android = "http://schemas.android.com/apk/res/android"
android:layout_width = "match_parent"
android:layout_height = "match_parent"
android:orientation = "horizontal"
>
< RelativeLayout
android:id = "@+id/group_layout"
android:layout_width = "match_parent"
android:layout_height = "wrap_content"
android:paddingBottom = "10dp"
android:paddingTop = "10dp"
android:background = "@drawable/text_item_bg" >
< TextView
android:id = "@+id/tv_title"
android:layout_width = "wrap_content"
android:layout_height = "wrap_content"
android:textSize = "20sp"
android:layout_marginLeft = "15dp"
/>
< TextView
android:layout_toRightOf = "@id/tv_title"
android:id = "@+id/tv_count"
android:layout_width = "wrap_content"
android:layout_height = "wrap_content"
android:textSize = "20sp"
android:layout_marginLeft = "10dp" />
< ImageView
android:id = "@+id/group_state"
android:layout_width = "wrap_content"
android:layout_height = "wrap_content"
android:layout_alignParentRight = "true"
android:layout_centerVertical = "true"
android:layout_marginRight = "10dp" />
</ RelativeLayout >
</ LinearLayout >
PS:如果想要改变一级item的外观,可以写一个shaper图形资源文件(如下所示),然后用background引用。
<? xml version = "1.0" encoding = "utf-8" ?>
< shape xmlns:android = "http://schemas.android.com/apk/res/android" >
< solid android:color = "#ffffff" />
< corners
android:bottomLeftRadius = "4dp"
android:bottomRightRadius = "4dp"
android:topLeftRadius = "4dp"
android:topRightRadius = "4dp" />
</ shape >
四、二级item的xml布局
<? xml version = "1.0" encoding = "utf-8" ?>
< LinearLayout xmlns:android = "http://schemas.android.com/apk/res/android"
android:layout_width = "match_parent"
android:layout_height = "match_parent"
android:orientation = "horizontal"
android:background = "@drawable/text_item_bg" >
< ImageView
android:id = "@+id/child_icon"
android:layout_width = "wrap_content"
android:layout_height = "wrap_content"
android:layout_marginLeft = "10dp" />
< LinearLayout
android:layout_width = "match_parent"
android:layout_height = "wrap_content"
android:orientation = "vertical" >
< TextView
android:id = "@+id/child_name"
android:layout_width = "wrap_content"
android:layout_height = "wrap_content"
android:textSize = "20sp"
/>
< TextView
android:id = "@+id/child_desc"
android:layout_width = "wrap_content"
android:layout_height = "wrap_content"
android:textSize = "20sp" />
</ LinearLayout >
</ LinearLayout >
五、一些关键的地方
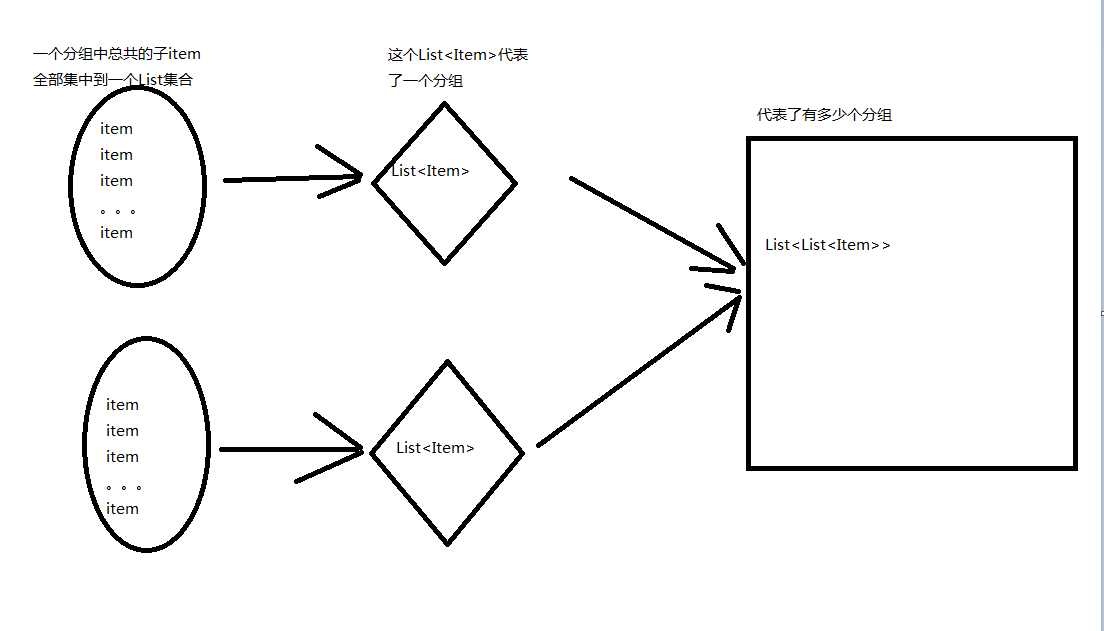
1. 数据的封装
画图理解
1. 数据的封装
画图理解

//每一个主视图中所包含的子视图个数(子视图中的名称个数)
for ( int i=0;i< childNameArrays . length ;i++){
//每一个子视图的item组成的集合
List<Item> list = new ArrayList<Item>();
//得到子视图中名称的String数组,有多少个名称就代表有多少个子item,所以可以用这个String数组来表示总共的子item
String[] childs = getResources().getStringArray( childNameArrays [i]);
//得到子视图中对应的描述信息
String[] desc = getResources().getStringArray( mDescDatas [i]);
//封装每一个具体的子item
for ( int j=0;j<childs. length ;j++){
Item item = new Item();
item.setName(childs[j]);
item.setDesc(desc[j]);
item.setResId( mImageDatas [i][j]);
//添加到所有子item的集合中
list.add(item);
}
//添加到allDatas中
allDatas .add(list);
}
2. BaseExpandableListAdapter的基本方法
class MyAdapter extends BaseExpandableListAdapter{
资源下载:代码里有注释,http://download.csdn.net/detail/u013467495/8487407 class MyAdapter extends BaseExpandableListAdapter{
//一级item的总数
@Override
public int getGroupCount() {
return allDatas .size();
}
//二级item的总数
@Override
public int getChildrenCount( int groupPosition) {
return allDatas .get(groupPosition).size();
}
//获得一级item的内容
@Override
public List<Item> getGroup( int groupPosition) {
return allDatas .get(groupPosition);
}
@Override
public Item getChild( int groupPosition, int childPosition) {
return allDatas .get(groupPosition).get(childPosition);
}
//获取一级item的Id
@Override
public long getGroupId( int groupPosition) {
return groupPosition;
}
@Override
public long getChildId( int groupPosition, int childPosition) {
return childPosition;
}
@Override
public boolean hasStableIds() {
return false ;
}
@Override
public View getGroupView( int groupPosition, boolean isExpanded,
View convertView, ViewGroup parent) {
GroupViewHolder mGroupViewHolder = null ;
if (convertView== null ){
convertView = mInflater .inflate(R.layout. group_item , null );
mGroupViewHolder = new GroupViewHolder();
//找到控件
mGroupViewHolder. mGroupName = (TextView) convertView.findViewById(R.id. tv_title );
mGroupViewHolder. mGroupChilds = (TextView) convertView.findViewById(R.id. tv_count );
mGroupViewHolder. mImageView = (ImageView) convertView.findViewById(R.id. group_state );
convertView.setTag(mGroupViewHolder);
} else {
mGroupViewHolder = (GroupViewHolder) convertView.getTag();
}
//设置内容
mGroupViewHolder. mGroupName .setText( groups_title [groupPosition]);
//每组对应的孩子总数 "[" + mData.get(groupPosition).size() + "]"
mGroupViewHolder. mGroupChilds .setText( "[" + allDatas .get(groupPosition).size()+ "]" );
//变换上下的箭头
if (isExpanded){
mGroupViewHolder. mImageView .setBackgroundResource( group_state_array [1]);
} else {
mGroupViewHolder. mImageView .setBackgroundResource( group_state_array [0]);
}
return convertView;
}
@Override
public View getChildView( int groupPosition, int childPosition,
boolean isLastChild, View convertView, ViewGroup parent) {
ChildViewHolder mChildViewHolder = null ;
if (convertView== null ){
convertView = mInflater .inflate(R.layout. child_item , null );
mChildViewHolder = new ChildViewHolder();
mChildViewHolder. mName = (TextView) convertView.findViewById(R.id. child_name );
mChildViewHolder. mDesc = (TextView) convertView.findViewById(R.id. child_desc );
mChildViewHolder. mIcon = (ImageView) convertView.findViewById(R.id. child_icon );
convertView.setTag(mChildViewHolder);
} else {
mChildViewHolder = (ChildViewHolder) convertView.getTag();
}
Bitmap bitmap = BitmapFactory.decodeResource(getResources(), getChild(groupPosition, childPosition).getResId());
Bitmap roundCornerBitmap = getRoundCornerBitmap(bitmap, 30);
mChildViewHolder. mIcon .setImageBitmap(roundCornerBitmap);
mChildViewHolder. mName .setText(getChild(groupPosition, childPosition).getName());
mChildViewHolder. mDesc .setText(getChild(groupPosition, childPosition).getDesc());
return convertView;
}
@Override
public boolean isChildSelectable( int groupPosition, int childPosition) {
return true ;
}
}
class GroupViewHolder {
TextView mGroupName ;
TextView mGroupChilds ;
ImageView mImageView ;
}
class ChildViewHolder{
ImageView mIcon ;
TextView mDesc ;
TextView mName ;
}
3.去掉默认的左边的箭头
//设置默认左边的箭头样式
mExpandableListView .setGroupIndicator( null );
4. 默认展开
//默认打开第一个分组
mExpandableListView .expandGroup(0);
注意一定要在 设置适配器后写上面的一行代码
mExpandableListView .setAdapter( adapter );
循环展开全部的
exListView.setAdapter(exlvAdapter);
//遍历所有group,将所有项设置成默认展开
int groupCount = exListView.getCount();
for (int i=0; i<groupCount; i++) {
exListView.expandGroup(i);
};
这篇关于ExpandableListView的基本用法的文章就介绍到这儿,希望我们推荐的文章对编程师们有所帮助!


