本文主要是介绍编译LineageOS模拟器镜像,导出到AndroidStudio,希望对大家解决编程问题提供一定的参考价值,需要的开发者们随着小编来一起学习吧!
版权归作者所有,如有转发,请注明文章出处:https://cyrus-studio.github.io/blog/
源码下载
LineageOS官网:https://lineageos.org/
LineageOS源码 github 地址:https://github.com/LineageOS/android
LineageOS源码国内镜像地址:https://mirrors.tuna.tsinghua.edu.cn/help/lineageOS/
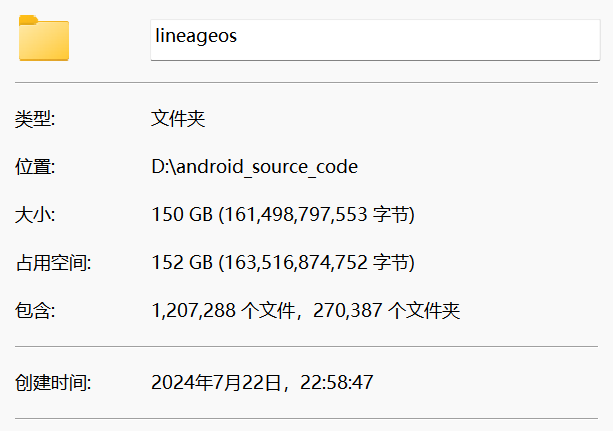
源码大概需要150GB的硬盘空间,编译完成差不多300G
1. 配置git
git config --global user.email "you@example.com"
git config --global user.name "Your Name"
2. 安装 repo
mkdir ~/bin
PATH=~/bin:$PATH
curl https://storage.googleapis.com/git-repo-downloads/repo > ~/bin/repo
chmod a+x ~/bin/repo
3. 安装 Git LFS
sudo apt install git-lfs
git lfs install
4. 设置REPO_URL
找到 repo 所在路径
which repo
编辑 repo
nano /home/cyrus/bin/repo
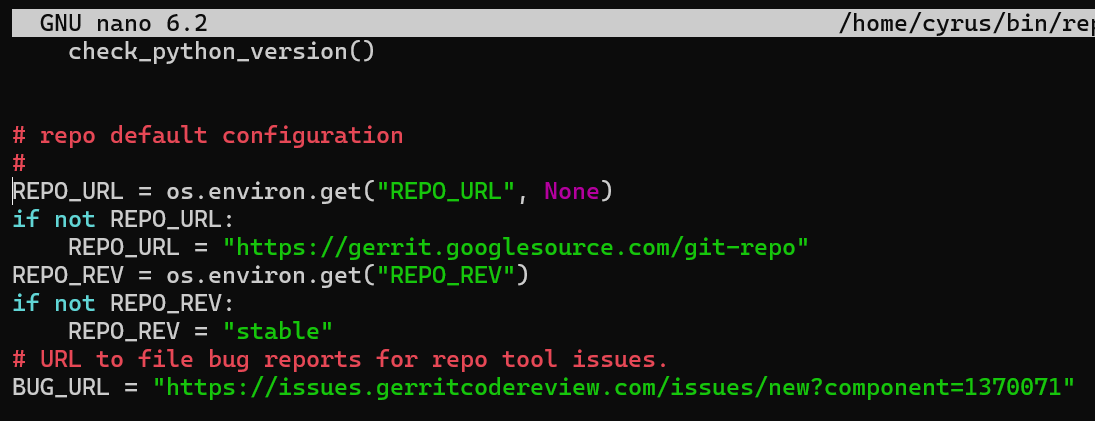
可以看到repo会优先取环境变量中的REPO_URL,否则默认使用googlesource
Ctrl +X 退出nano
通过下面的命令设置 REPO_URL 环境变量,设置为清华大学镜像源,解决国内访问不了 googlesource 问题
export REPO_URL=https://mirrors.tuna.tsinghua.edu.cn/git/git-repo/
5. 下载源码
创建目录
mkdir lineageos
进入到 lineageos 目录
cd lineageos
如果可正常访问 github,使用下面的命令初始化 repo
repo init -u https://github.com/LineageOS/android.git -b lineage-21.0 --git-lfs
否则,使用清华大学镜像初始化 repo,并修改 default.xml
repo init -u https://mirrors.tuna.tsinghua.edu.cn/git/lineageOS/LineageOS/android.git -b lineage-21.0 --git-lfs
打开 .repo/manifests/default.xml,将
<remote name="github"fetch=".."review="review.lineageos.org" />
改成
<remote name="github"fetch="https://github.com/" /><remote name="lineage"fetch="https://mirrors.tuna.tsinghua.edu.cn/git/lineageOS/"review="review.lineageos.org" />
将
<remote name="aosp"fetch="https://android.googlesource.com" >
改成
<remote name="aosp"fetch="https://mirrors.tuna.tsinghua.edu.cn/git/AOSP">
将 remote=“github”
<default revision="..."remote="github">
改成 remote=“lineage”
<default revision="..."remote="lineage">
或者直接修改 .gitconfig,把访问 LineageOS 仓库的 url 替换为使用清华大学镜像源
cat >> ~/.gitconfig <<EOF[url "https://mirrors.tuna.tsinghua.edu.cn/git/git-repo"]
insteadof = https://gerrit.googlesource.com/git-repo
[url "https://mirrors.tuna.tsinghua.edu.cn/git/lineageOS/"]
insteadof = https://review.lineageos.org/
[url "https://mirrors.tuna.tsinghua.edu.cn/git/AOSP/"]
insteadof = https://android.googlesource.com/
[url "https://mirrors.tuna.tsinghua.edu.cn/git/lineageOS/LineageOS/"]
insteadof = https://github.com/LineageOS/
EOF
最后,同步源码
repo sync
6. 解决同步不完整问题
error: Unable to fully sync the tree
error: Checking out local projects failed.
Failing repos:
android
device/generic/goldfish
device/generic/mini-emulator-x86
external/ImageMagick
build/blueprint
Try re-running with "-j1 --fail-fast" to exit at the first error.
================================================================================
Repo command failed due to the following `SyncError` errors:
Cannot initialize work tree for LineageOS/android
Cannot initialize work tree for device/generic/goldfish
Cannot initialize work tree for device/generic/mini-emulator-x86
Cannot initialize work tree for LineageOS/android_external_ImageMagick
Cannot initialize work tree for platform/build/blueprint
尝试使用单线程同步,减少同步过程中的冲突。
repo sync -j1 --fail-fast
这会在第一个错误发生时终止同步,以便更容易定位和解决问题。
或者,清理工作树,手动删除有问题的项目并重新同步
rm -rf .repo/projects/device/generic/goldfish.git
rm -rf .repo/projects/device/generic/mini-emulator-x86.git
rm -rf .repo/projects/external/ImageMagick.git
rm -rf .repo/projects/build/blueprint.git
repo sync
设置缓存
创建缓存目录
mkdir -p /mnt/case_sensitive/ccache
把缓存配置添加到环境变量配置文件.bashrc结尾
cat >> ~/.bashrc <<EOF
# 使用缓存
export USE_CCACHE=1
# ccache文件路径
export CCACHE_EXEC=/usr/bin/ccache
# 设置缓存目录
export CCACHE_DIR=/mnt/case_sensitive/ccache
EOF
执行下面命令使配置生效
source ~/.bashrc
设置最大缓存空间为 50GB
ccache -M 50G
启用 ccache 的压缩功能,可以减少缓存文件所占用的磁盘空间
ccache -o compression=true
开始编译
# 初始化编译环境
source build/envsetup.sh# 设置构建目标
breakfast sdk_phone_x86_64 eng# 开始编译
mka
breakfast 是 LineageOS 构建系统中的一个命令,用于设置构建环境。它会下载并配置设备相关的源代码和依赖项。
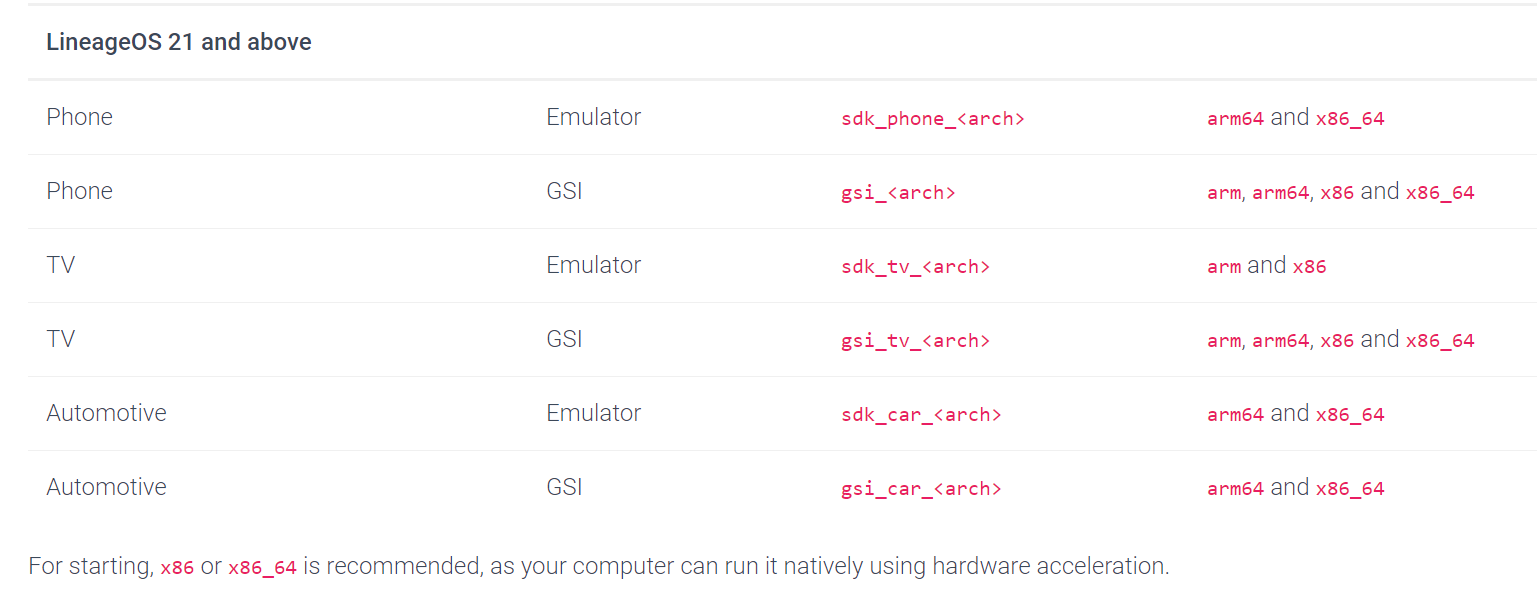
sdk_phone_x86_64 指目标设备的代码名称。在这个例子中,它代表一个用于 Android 模拟器的 x86_64 架构的虚拟手机设备。
具体参考:https://wiki.lineageos.org/emulator
在构建 LineageOS 时,eng 和 userdebug 是两种不同的构建类型,它们主要在调试功能和安全性方面有所区别
eng:
-
适用于开发者调试使用。
-
含有完全无优化的调试功能,允许广泛的日志记录、调试器连接和各种测试。
-
安全性较低,没有启用某些生产环境中的安全措施。
userdebug:
-
适用于调试接近生产环境的构建。
-
含有用户构建的所有功能,但保留了一些调试工具,安全性高于 eng 构建。
-
更加接近最终用户使用的环境,同时仍然允许调试。
总之,eng 更适合深入的开发调试,而 userdebug 适合在接近生产环境的条件下进行调试。
解决编译报错
__1. exit status 137 __
[ 55% 50817/91235] //packages/apps/HTMLViewer:HTMLViewer r8
Warning: The rule `-checkdiscard interface kotlin.coroutines.jvm.internal.DebugMetadata` matches a class not in the program.
18:03:04 ninja may be stuck, check /mnt/case_sensitive/lineageos/out/soong.log for list of running processes.
18:03:04 ninja may be stuck, check /mnt/case_sensitive/lineageos/out/soong.log for list of running processes.
18:03:04 ninja failed with: exit status 137
#### failed to build some targets (02:14:44 (hh:mm:ss)) ####
exit status 137 通常表示进程因内存不足被系统杀死。可以使用 htop 或 free -h 命令检查内存使用情况。
如果内存不足,可以尝试增加虚拟机的内存,或在本地机器上添加交换分区。
# 创建一个新的16G交换文件
sudo fallocate -l 16G /mnt/case_sensitive/swapfile# 将交换文件的权限设置为600,以确保只有root用户可以读取和写入该文件。
sudo chmod 600 /mnt/case_sensitive/swapfile# 将交换文件格式化为swap格式
sudo mkswap /mnt/case_sensitive/swapfile# 启用新的交换文件
sudo swapon /mnt/case_sensitive/swapfile# 使用 swapon --show 或 free -h 命令验证新的交换文件是否已正确启用。
swapon --show
# 或
free -h
为了确保 /mnt/case_sensitive/swapfile 在重启后仍然有效,将其添加到/etc/fstab文件中
echo '/mnt/case_sensitive/swapfile swap swap sw 0 0
' | sudo tee -a /etc/fstab
2. Read-only file system: '/home/*/.repo.gitconfig.json’_
这个错误表明在编译过程中尝试写入一个只读文件,报错如下
OSError: [Errno 30] Read-only file system: '/home/cyrus/.repo_.gitconfig.json'
\nWrite to a read-only file system detected. Possible fixes include
1\. Generate file directly to out/ which is ReadWrite, #recommend solution
2\. BUILD_BROKEN_SRC_DIR_RW_ALLOWLIST := <my/path/1> <my/path/2> #discouraged, subset of source tree will be RW
3\. BUILD_BROKEN_SRC_DIR_IS_WRITABLE := true #highly discouraged, entire source tree will be RW
19:26:39 ninja failed with: exit status 1
给 .repo_.gitconfig.json 文件添加写入权限,再重新编译
cyrus@cyrus-studio:/mnt/case_sensitive/lineageos$ chmod a+w ~/.repo_.gitconfig.json
cyrus@cyrus-studio:/mnt/case_sensitive/lineageos$ ls -alh /home/cyrus/.repo_.gitconfig.json
-rw-rw-rw- 1 cyrus cyrus 442 Aug 30 21:41 /home/cyrus/.repo_.gitconfig.json
发现还是不行,使用 nano 命令编辑 .repo_.gitconfig.json 随便修改一下保存,再编辑改回来,再重新编译,可以了。
nano /home/cyrus/.repo_.gitconfig.json
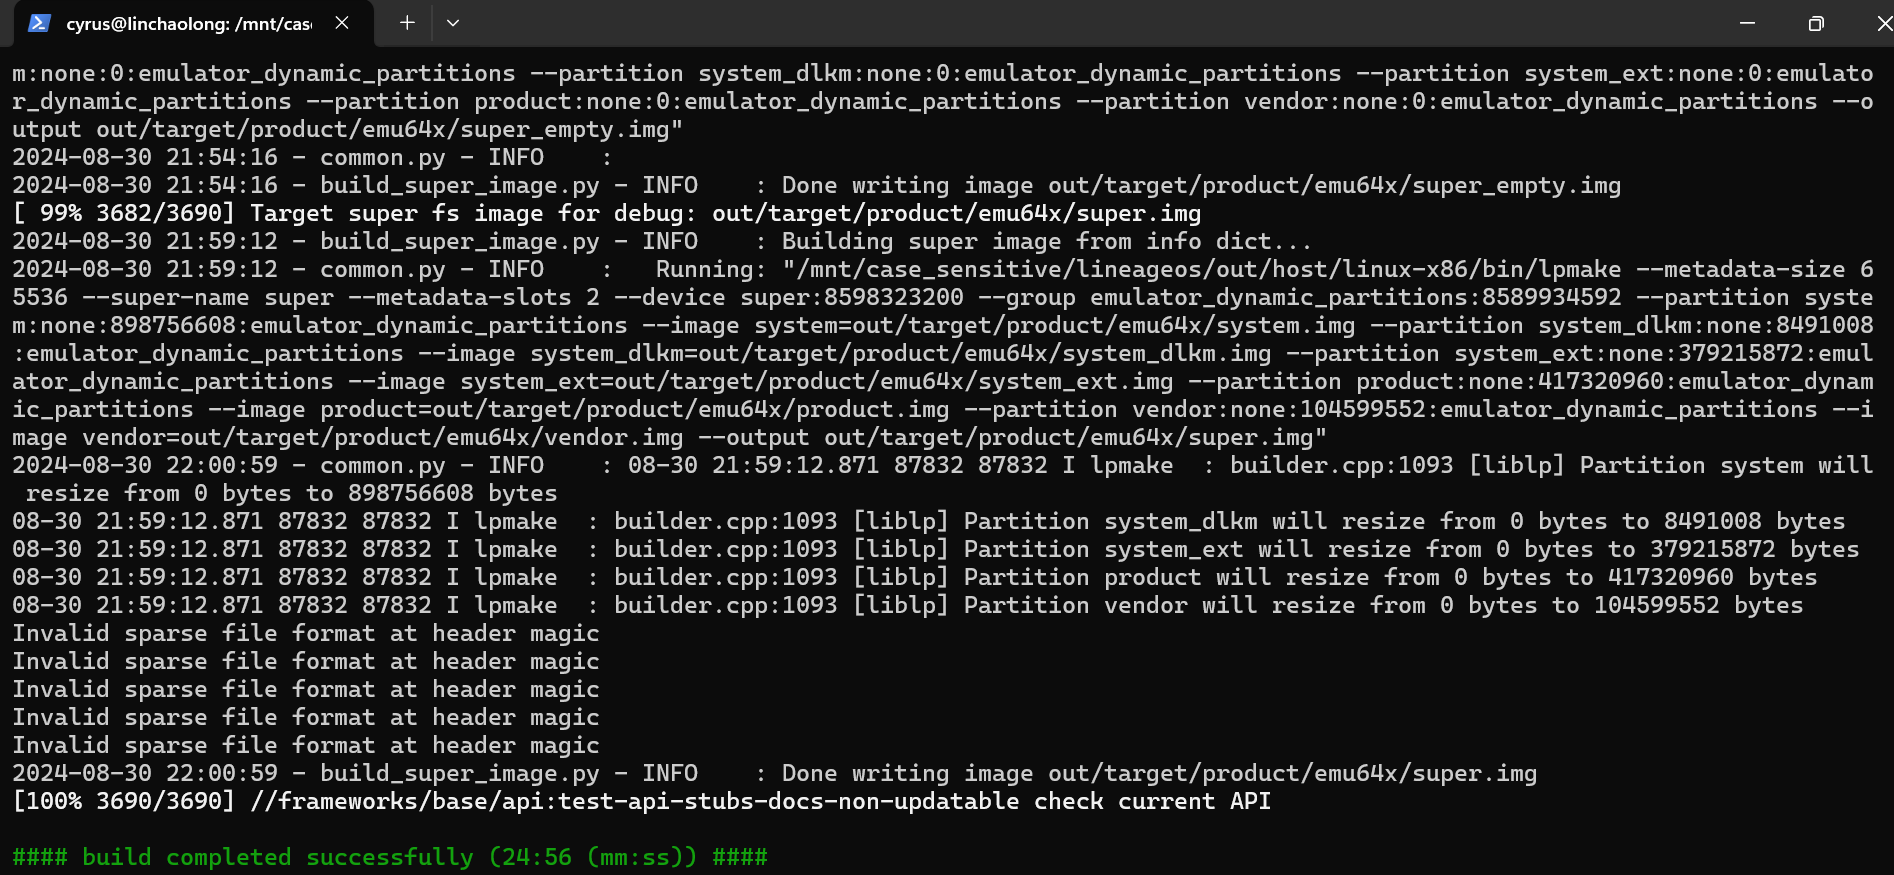
编译完成
启动模拟器
执行 emulator 命令启动模拟器
启动失败,报错如下
INFO    | Storing crashdata in: /tmp/android-cyrus/emu-crash-34.2.7.db, detection is enabled for process: 1799459
INFO    | Android emulator version 34.2.7.0 (build_id 11381971) (CL:N/A)
INFO    | Storing crashdata in: /tmp/android-cyrus/emu-crash-34.2.7.db, detection is enabled for process: 1799459
INFO    | Duplicate loglines will be removed, if you wish to see each individual line launch with the -log-nofilter flag.
INFO    | Changing default hw.initialOrientation to portrait
ProbeKVM: This user doesn't have permissions to use KVM (/dev/kvm).
The KVM line in /etc/group is: [kvm:x:109:]If the current user has KVM permissions,
the KVM line in /etc/group should end with ":" followed by your username.If we see LINE_NOT_FOUND, the kvm group may need to be created along with permissions:sudo groupadd -r kvm# Then ensure /lib/udev/rules.d/50-udev-default.rules contains something like:# KERNEL=="kvm", GROUP="kvm", MODE="0660"# and then run:sudo gpasswd -a $USER kvmIf we see kvm:... but no username at the end, running the following command may allow KVM access:sudo gpasswd -a $USER kvmYou may need to log out and back in for changes to take effect.ERROR   | x86_64 emulation currently requires hardware acceleration!
CPU acceleration status: This user doesn't have permissions to use KVM (/dev/kvm).
The KVM line in /etc/group is: [kvm:x:109:]If the current user has KVM permissions,
the KVM line in /etc/group should end with ":" followed by your username.If we see LINE_NOT_FOUND, the kvm gr
More info on configuring VM acceleration on Linux:
https://developer.android.com/studio/run/emulator-acceleration#vm-linux
General information on acceleration: https://developer.android.com/studio/run/emulator-acceleration.
这个错误是因为 QEMU 启用硬件加速( KVM)失败了。
确认 /dev/kvm 的权限是否正确。你可以通过以下命令检查
$ ls -l /dev/kvm
crw-rw---- 1 cyrus kvm 10, 232 Aug 31 21:01 /dev/kvm
输出应该类似于 crw-rw---- 1 YourUserName kvm 10, 232 date /dev/kvm,其中
kvm 是该设备的组。
如果权限设置不正确,你可以尝试以下命令修复
sudo apt install qemu-kvm
sudo adduser $USER kvm
sudo chown $USER:kvm /dev/kvm
sudo chmod 660 /dev/kvm
最后重新执行 emulator 启动模拟器
导出用于 Android Studio/AVD
将构建的镜像导出为 Android Studio/AVD 可使用的格式,通过以下命令
LineageOS 20 及以下版本
mka sdk_addon
构建完成后在 out/host/linux-x86/sdk_addon 目录,会生成一个 ZIP 文件(文件名以 -img.zip 结尾),其中包含在外部运行模拟器镜像所需的所有文件。
LineageOS 21 及以上版本
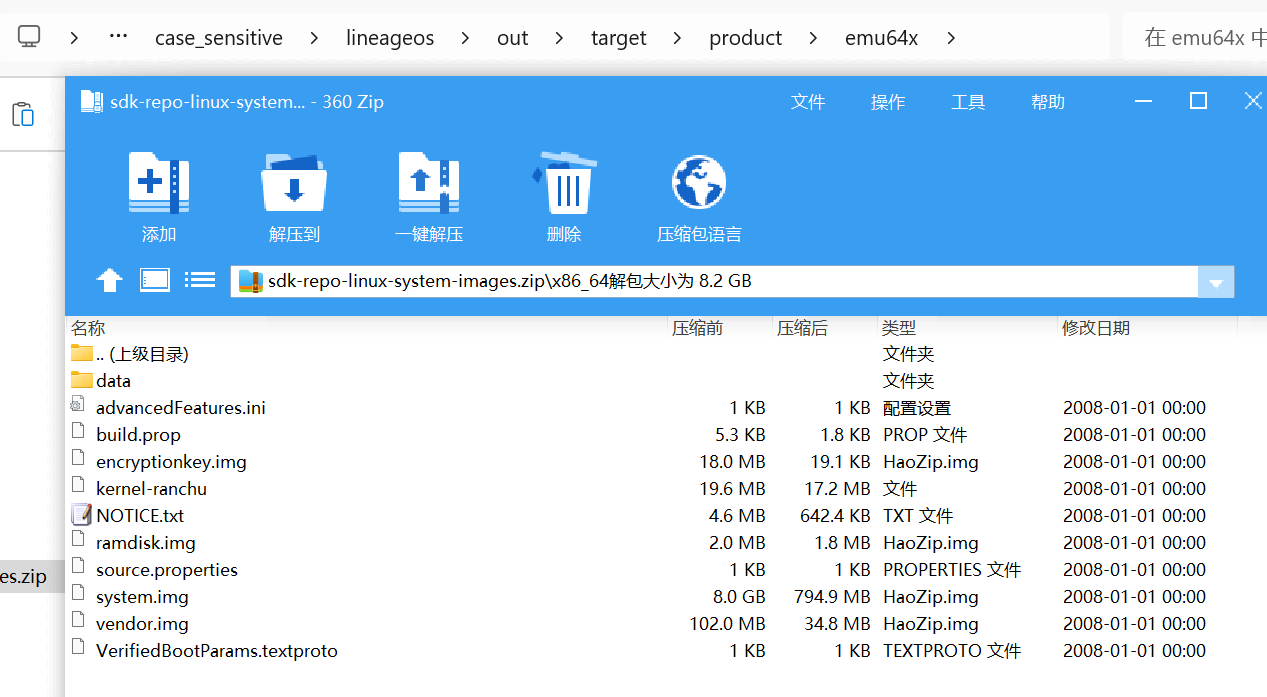
mka emu_img_zip
构建完成后在 out/target/product/ 目录,会生成一个 ZIP 文件 sdk-repo-linux-system-images.zip,其中包含在外部运行模拟器镜像所需的所有文件。
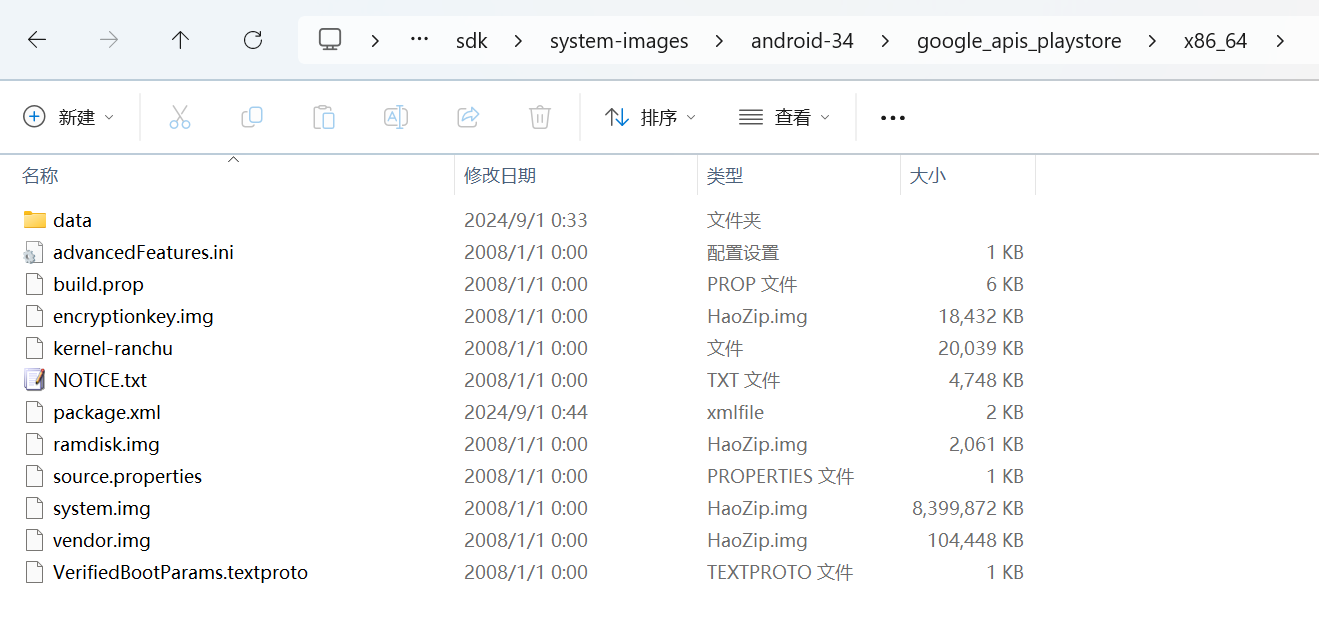
将 zip 文件解压到 android sdk 的 system-images 目录下,解压路径如下
system-images/android-<sdk version>/<tag>/<arch> (其中 <tag> 是 default/google_apis/google_apis_playstore 中的一个)
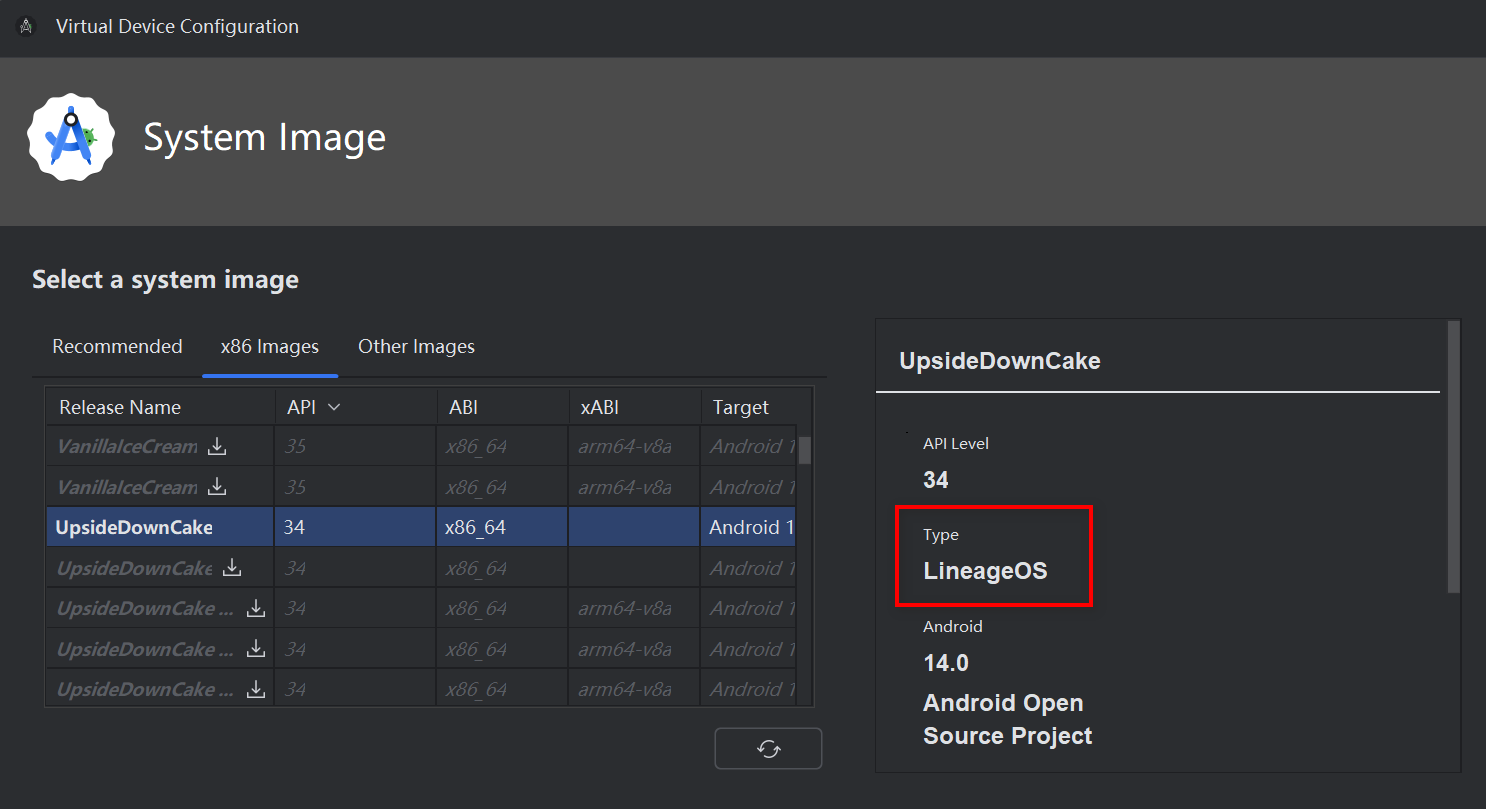
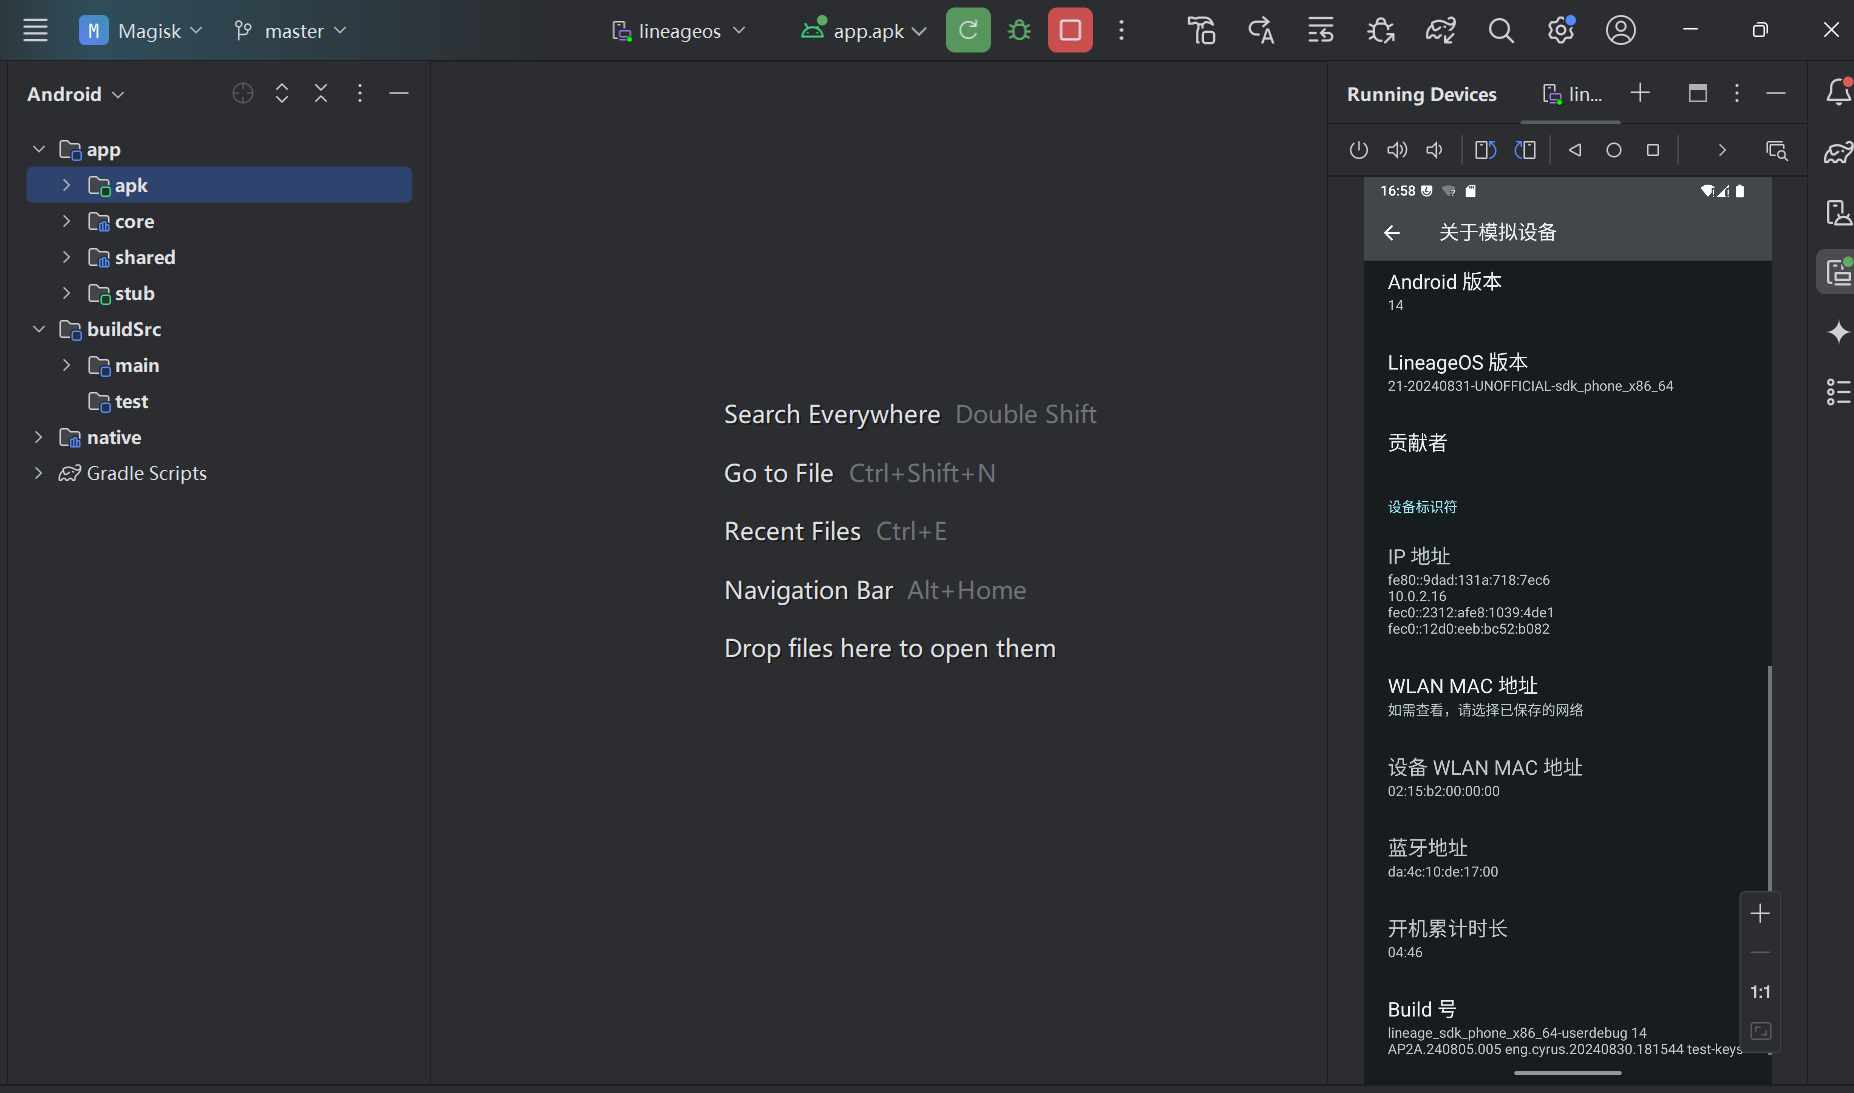
在 Android Studio 的【Device Manager】【Create Virtual Device】中创建虚拟设备并选择 LineageOS 镜像
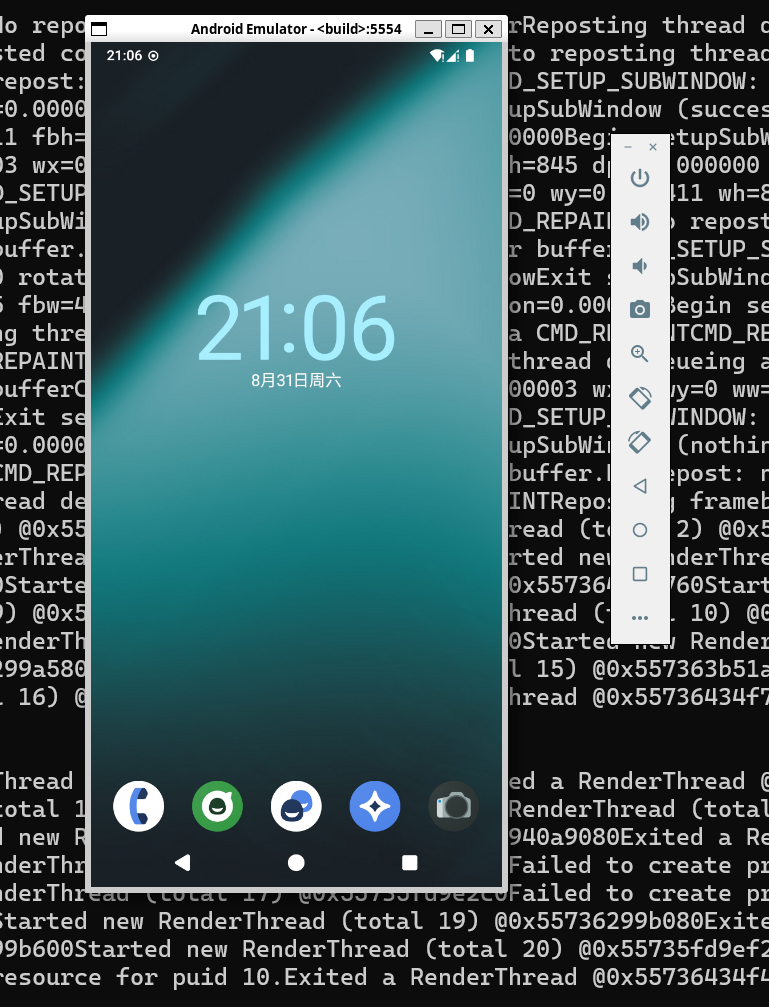
最终在Android Studio下运行效果如下
参考:
https://wiki.lineageos.org/emulator
这篇关于编译LineageOS模拟器镜像,导出到AndroidStudio的文章就介绍到这儿,希望我们推荐的文章对编程师们有所帮助!


