本文主要是介绍[spring] Spring MVC Thymeleaf(下),希望对大家解决编程问题提供一定的参考价值,需要的开发者们随着小编来一起学习吧!
[spring] Spring MVC & Thymeleaf(下)
上篇笔记讲了一下怎么使用 thymeleaf 作为 HTML 模板,与 Spring MVC 进行沟通,这里主要说一下验证的部分
常用表单验证
一些 Spring MVC 内置的常用验证注解如下:
| Annotation | Description |
|---|---|
@NotNull | Ensures the annotated field is not null. |
@NotEmpty | Ensures the annotated field is not empty. This applies to Strings, Collections, Maps, and arrays. |
@NotBlank | Ensures the annotated string field is not null or empty. |
@Size | Validates that the annotated field has a size within the specified bounds. |
@Min | Validates that the annotated field has a value no smaller than the specified minimum. |
@Max | Validates that the annotated field has a value no larger than the specified maximum. |
@Email | Validates that the annotated field is a valid email address. |
@Pattern | Validates that the annotated field matches the specified regular expression. |
@Past | Validates that the annotated field contains a date in the past. |
@Future | Validates that the annotated field contains a date in the future. |
@Positive | Validates that the annotated field is a positive number. |
@PositiveOrZero | Validates that the annotated field is a positive number or zero. |
@Negative | Validates that the annotated field is a negative number. |
@NegativeOrZero | Validates that the annotated field is a negative number or zero. |
@Digits | Validates that the annotated field is a number within the specified integer and fraction digits. |
@DecimalMin | Validates that the annotated field is a decimal number no smaller than the specified minimum. |
@DecimalMax | Validates that the annotated field is a decimal number no larger than the specified maximum. |
@AssertTrue | Validates that the annotated field is true. |
@AssertFalse | Validates that the annotated field is false. |
@CreditCardNumber | Validates that the annotated field is a valid credit card number. |
这个列表只是做个参考,具体用法大同小异,后面会选几个比较常用的实现一下,以及会实现自定义验证
设置开发环境
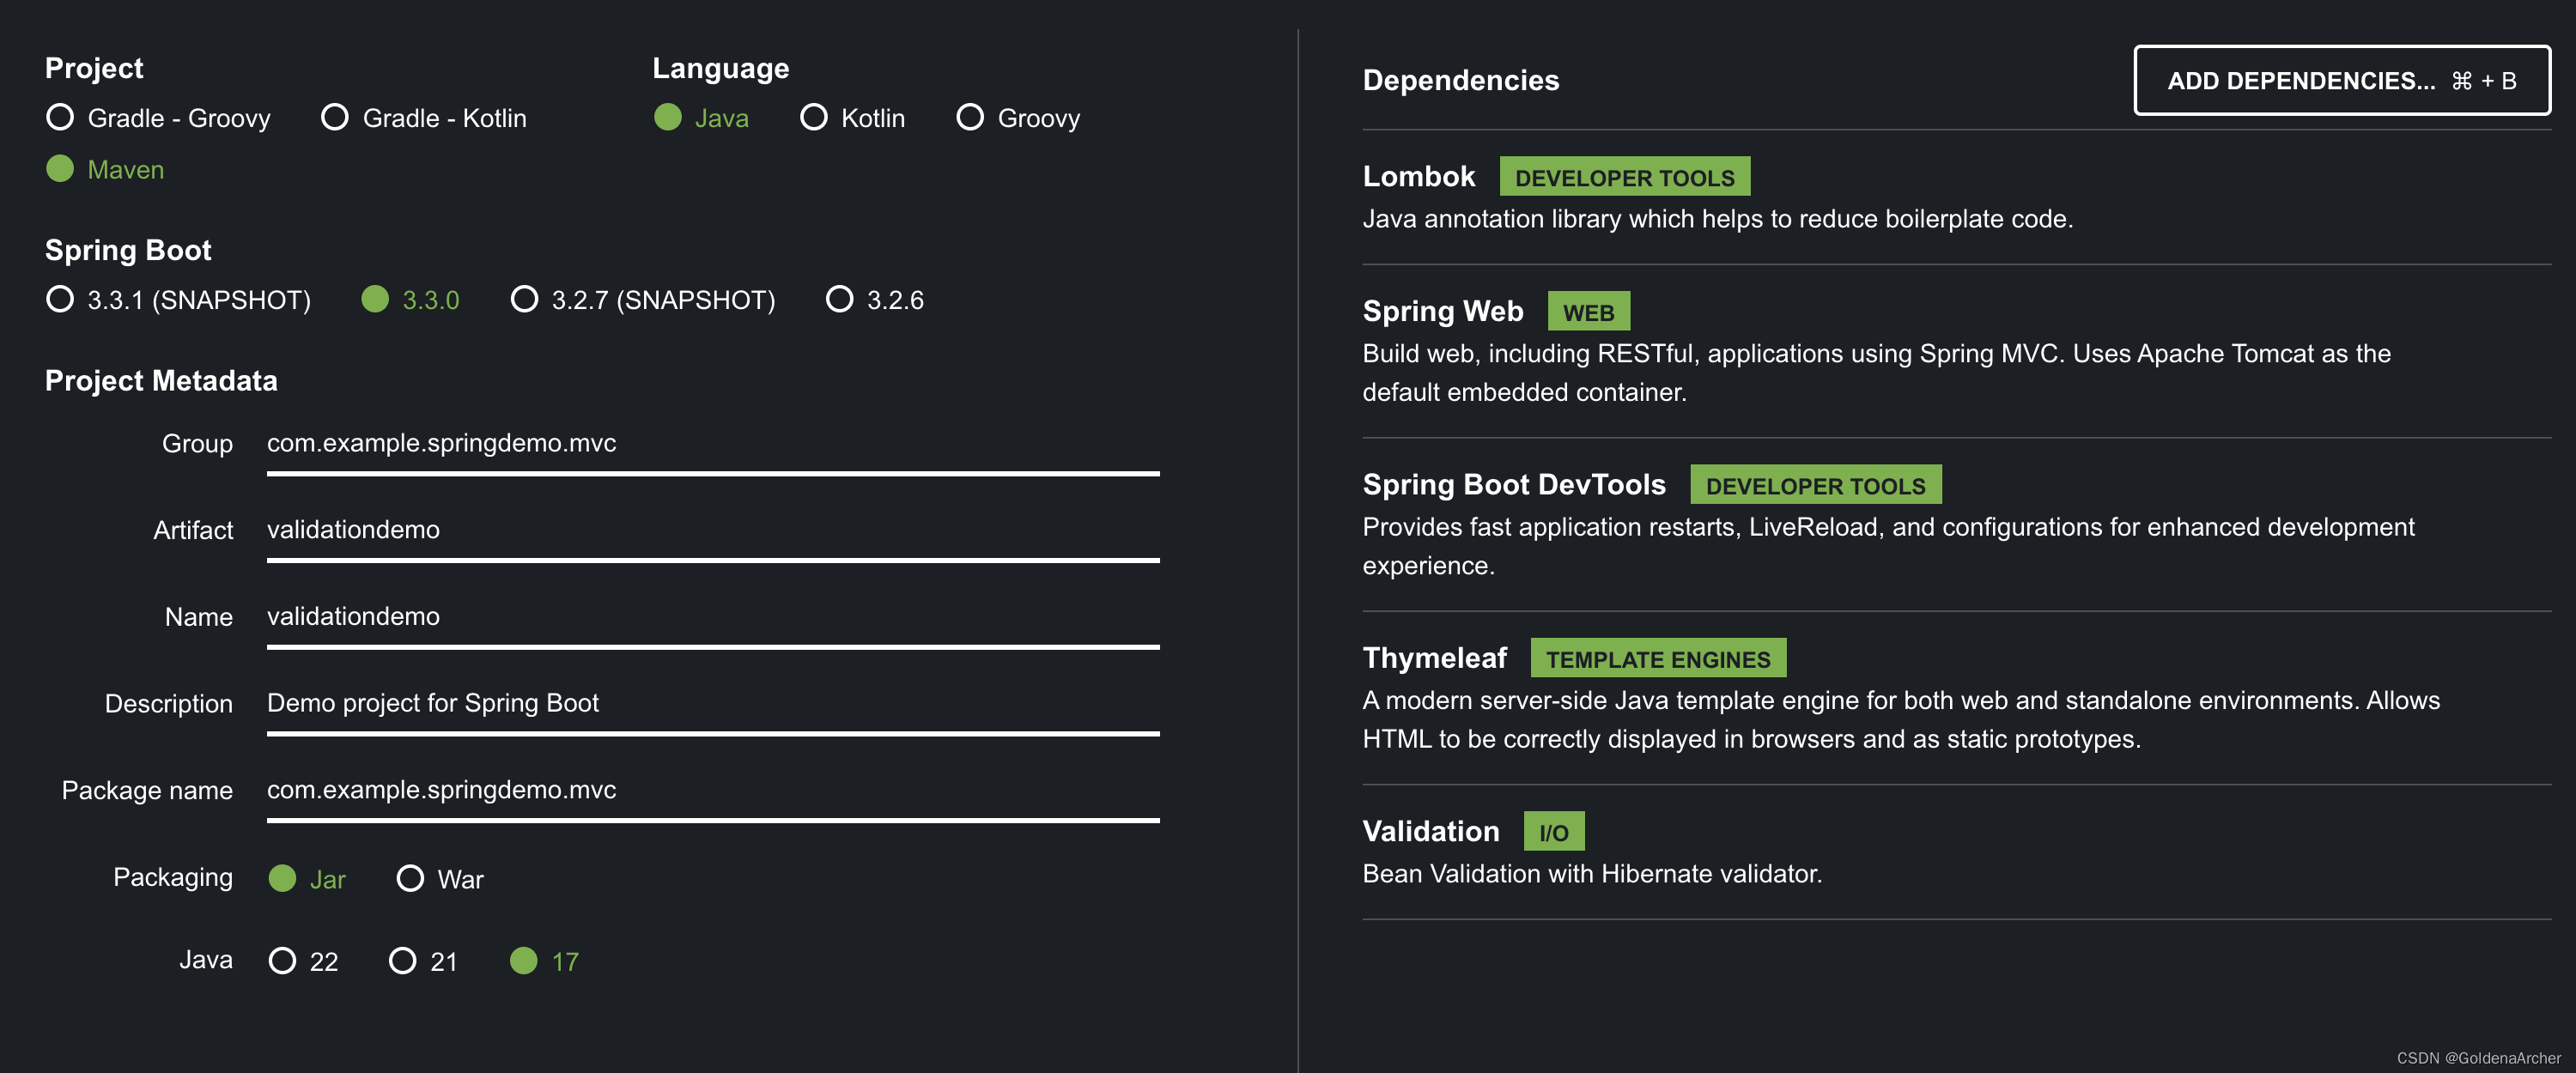
依旧从 spring.io 下载,具体配置如下:

和上里的内容比起来,这里多了一个 Validator
必填选项
这里的实现步骤如下:
-
创建一个 DAO,并添加验证规则
实现代码如下:
package com.example.springdemo.mvc;import jakarta.validation.constraints.NotNull;
import jakarta.validation.constraints.Size;
import lombok.Data;@Data
public class Customer {private String firstName;@NotNull(message = "is required")@Size(min = 1, message = "is required")private String lastName;
}
⚠️:这里的
@NotNull和@Size是从jakarta.validation.constraints中导入的。这里的message就是验证失败后,会返回的错误信息👀:这里其实有一个小问题,就是如果用户提供的数据是空的字符串,那么也是可以通过验证的。空字符串的处理在后面会提到
-
添加 controller
package com.example.springdemo.mvc;import jakarta.validation.Valid;
import org.springframework.stereotype.Controller;
import org.springframework.ui.Model;
import org.springframework.validation.BindingResult;
import org.springframework.web.bind.annotation.GetMapping;
import org.springframework.web.bind.annotation.ModelAttribute;
import org.springframework.web.bind.annotation.PostMapping;@Controller
public class CustomerController {@GetMapping("/")public String showForm(Model model) {model.addAttribute("customer", new Customer());return "customer-form";}@PostMapping("/processForm")public String processForm(@Valid @ModelAttribute("customer") Customer customer,BindingResult bindingResult) {if (bindingResult.hasErrors()) {return "customer-form";}return "customer-confirmation";}
}
这里其实直接把第 4 步也做了,后面会具体提一下实现的功能
-
添加 HTML 和验证支持
<!DOCTYPE html>
<html lang="en" xmlns:th="http://www.thymeleaf.org"><head><meta charset="UTF-8" /><title>Customer Registration Form</title><style>.error {color: red;}</style></head><body><i>Fill out the form</i><br /><br /><formth:action="@{/processForm}"th:object="${customer}"method="post"autocomplete="off"><label>First Name:<input type="text" th:field="*{firstName}" /></label><br /><br /><label>Last Name (*):<input type="text" th:field="*{lastName}" /></label><!--  add error message (if present)  --><spanth:if="#{fields.hasErrors('lastName')}"th:errors="*{lastName}"class="error"></span><br /><br /><input type="submit" value="Submit" /></form><script src="http://localhost:35729/livereload.js"></script></body>
</html>
这里的代码和之前实现的 thymeleaf 没有什么特别大的区别,唯一的差别在于用于显示错误信息的
span这部分th:if的用法之前已经提过,这里不多赘述#fields是一个内置的工具对象,可以用来检查哪个属性有错。在这个情况下,它会检查lastName是否验证失败th:errors="*{lastName}"是一个没见过的 thymeleaf 语法,这里主要就是将报错信息渲染到 DOM 中class="error"用于添加 css -
在 controller 中实现验证
@PostMapping("/processForm")public String processForm(@Valid @ModelAttribute("customer") Customer customer,BindingResult bindingResult) {if (bindingResult.hasErrors()) {return "customer-form";}return "customer-confirmation";}这里着重讲一下这部分的代码
@Valid注解代表customer对象包含验证需要被执行,这也是在 DAO 层中,在lastName上添加的验证BindingResult bindingResult也是通过依赖注入获取的,这个对象会绑定所有的验证结果 -
创建 confirm 页面
<!DOCTYPE html>
<html lang="en" xmlns:th="http://www.thymeleaf.org"><head><meta charset="UTF-8" /><title>Customer Confirmation</title></head><body>The customer is confirmed:<span th:text="${customer.firstName + ' ' + customer.lastName}"></span><script src="http://localhost:35729/livereload.js"></script></body>
</html>
这部分没什么特殊的,之前已经写过很多遍了
具体的实现效果如下:

@InitBinder
上面的实现中,如果用户输入空白的字符串,那么也会通过检查。因此这里会使用 @InitBinder 去对数据进行一个自定义处理(预处理)
具体的使用方式如下:
public class CustomerController {@InitBinderpublic void initBinder(WebDataBinder dataBinder) {StringTrimmerEditor stringTrimmerEditor = new StringTrimmerEditor(true);dataBinder.registerCustomEditor(String.class, stringTrimmerEditor);}
}
这部分其实没有什么特别复杂的,WebDataBinder 是一个数据绑定器,传入的参数也是需要处理的数据类型,与处理的方式。如这里的实现就是对所有输入的字符串进行一个处理,处理的方式就是将空格去除
需要注意的就是,这部分的代码需要在 controller 中实现,这里的代码就是在 CustomerController 中实现的
@Min & @Max
@Min & @Max 也是两个常见的对数字进行的验证,实现方法如下:
@Data
public class Customer {@Min(value = 0, message = "must be greater than or equals to 0")@Max(value = 10, message = "must be smaller than or equals to 10")private int freePasses;
}
这里不需要修改 controller,HTML 模板的修改部分如下:
<label>Free passes:<input type="text" th:field="*{freePasses}" />
</label><!--  add error message (if present)  -->
<spanth:if="#{fields.hasErrors('freePasses')}"th:errors="*{freePasses}"class="error"
></span><br /><br />
实现效果:

regex,正则
验证同样可以接受正则,这里只做一个比较简单的处理方式,即邮政编码的处理,可以包含数字和大小写字母
DAO 修改如下:
@Pattern(regexp = "^[a-zA-Z0-9]{5}", message = "only 5 chars/digits")private String postalCode;
同样不需要修改 controller,只需要更新 HTML 模板:
<label>Postal Code<input type="text" th:field="*{postalCode}" />
</label><!--  add error message (if present)  -->
<spanth:if="#{fields.hasErrors('postalCode')}"th:errors="*{postalCode}"class="error"
></span>
这是 confirmation 的修改:
Postal Code: <span th:text="${customer.postalCode}"></span>
显示效果:

数字的一些问题
@NotNull
数字类型使用使用 @NotNull 会造成一点问题,如:

这是因为 Java 的数据类型转换问题,其中一个解决方式可以吧声明的 private int freePasses; 换成 private Integer freePasses;,这样 Integer 这个包装类可以自动实现数据转换的处理

字符串
另一个可能会遇到的问题,就是在处理数字的输入框中输入字符串,如:

这种情况下,Spring 也是没有办法正常转换类型,这里可以解决的方法是在 resource 文件夹下,新建一个 messages.properties 文件
这是一个特殊的 properties 文件,Spring 会自动扫描并读取这个文件,并可以通过这个文件信息进行处理。除了报错信息外,它也经常被用于 i18n 和 l10n
配置方式如下:
typeMismatch.customer.freePasses=Invalid number
实现效果:


⚠️:使用这个配置文件也可以覆盖上面 @NotNull 带来的问题,主要因为空字符串也不是一个合法的数字,所以这个错误也会被 typeMismatch 所捕获
自定义验证
Spring 提供的验证肯定没有办法满足所有的需求,这个情况下就需要开发手动实现自定义验证
具体的实现步骤如下:
-
创建一个自定义验证规则
这里会使用
@interface去创建一个注解的 interface,并且实现注解package com.example.springdemo.mvc.validation;import jakarta.validation.Constraint; import jakarta.validation.Payload;import java.lang.annotation.ElementType; import java.lang.annotation.Retention; import java.lang.annotation.RetentionPolicy; import java.lang.annotation.Target;@Constraint(validatedBy = CourseCodeConstraintValidator.class) @Target({ElementType.METHOD, ElementType.FIELD}) @Retention(RetentionPolicy.RUNTIME) public @interface CourseCode {public String value() default "CS";public String message() default "must start with CS";public Class<?>[] groups() default {};public Class<? extends Payload>[] payload() default {}; }注解实现:
package com.example.springdemo.mvc.validation;import jakarta.validation.ConstraintValidator;
import jakarta.validation.ConstraintValidatorContext;public class CourseCodeConstraintValidator  implements ConstraintValidator<CourseCode, String> {private String coursePrefix;@Overridepublic void initialize(CourseCode courseCode) {coursePrefix = courseCode.value();}@Overridepublic boolean isValid(String code, ConstraintValidatorContext constraintValidatorContext) {// handle null value, since when user doesn't provide any input, code will be nullif (code != null) return code.startsWith(coursePrefix);return false;}
}
到这一步就可以使用新实现的自定义验证了
注解的部分不会涉及太多……主要是我也不太熟。等后面重新学一些 java 的新特性的时候再研究叭
-
在
Customer中使用心得自定义验证@Data public class Customer {// omit other impl// it will take default value@CourseCode// can be overwritten in this way:// @CourseCode(value = "something", message = "must start with example")private String courseCode; }这里是用的就是默认的信息
不使用默认信息的方法在注释掉的代码里
后面的步骤,就是更新 HTML 模板的部分就省略了,最终的实现效果如下:

这篇关于[spring] Spring MVC Thymeleaf(下)的文章就介绍到这儿,希望我们推荐的文章对编程师们有所帮助!


