本文主要是介绍不需要new关键字创建实例?jQuery是如何做到的,希望对大家解决编程问题提供一定的参考价值,需要的开发者们随着小编来一起学习吧!
这篇文章是jQuery源码专栏的开篇文章了,有人会问为什么都2024年了, 还要研究一个已经过时的框架呢,其实,jQuery对比vue和react这种响应式框架,其在使用上算是过时的,毕竟直接操作DOM远不如操作虚拟DOM来的方便,但是jQuery的框架设计和对于操作的封装以及浏览器的兼容这些,太值得我们去学习了。
这个专栏更新的速度不会快,这框架代码我是刚开始进行了解,所以只能边看边查资料边写,但是肯定会完成这个专栏的, 做完这个专栏,后面还会有其它框架或者三方库源码的解析,写上来也是为了强制要求一下自己去学习。
正文
为什么在使用jQuery的时候,直接$()就可以调用.css(), .val() 这样的实例方法呢?以v3.7.1代码为例,看一下jQuery做了些什么。
// Define a local copy of jQueryjQuery = function (selector, context) {// The jQuery object is actually just the init constructor 'enhanced'// Need init if jQuery is called (just allow error to be thrown if not included)return new jQuery.fn.init(selector, context);};
这段代码定义了一个函数,函数的返回值为jQuery.fn.init函数的执行结果,并将返回值赋给名为jQuery的变量。为什么返回init的执行结果,而不是直接return new jQuery() 呢,改写一下试试。
var jQuery = function () {return new jQuery()}jQuery()
打开浏览器控制台看一下:
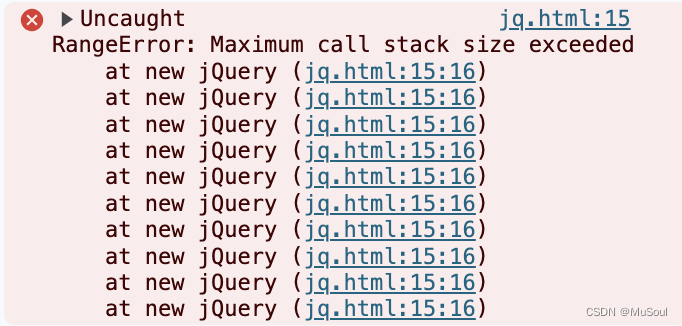
哦吼,报错了,栈溢出了,因为上述的代码一直在循环调用jQuery()这个构造函数,死循环了。
所以,jQuery为了避免这个问题,另外指定了一个构造函数init()。
接下来就要聚焦一下init这个构造函数都做了什么
jQuery.fn.init
先贴一下源代码
jQuery.fn.init = function (selector, context, root) {var match, elem; // HANDLE: $(""), $(null), $(undefined), $(false)if (!selector) {return this;}// Method init() accepts an alternate rootjQuery// so migrate can support jQuery.sub (gh-2101)root = root || rootjQuery;// Handle HTML stringsif (typeof selector === "string") {if (selector[0] === "<" &&selector[selector.length - 1] === ">" &&selector.length >= 3) {// Assume that strings that start and end with <> are HTML and skip the regex checkmatch = [null, selector, null];} else {match = rquickExpr.exec(selector);}// Match html or make sure no context is specified for #idif (match && (match[1] || !context)) {// HANDLE: $(html) -> $(array)if (match[1]) {context = context instanceof jQuery ? context[0] : context;// Option to run scripts is true for back-compat// Intentionally let the error be thrown if parseHTML is not presentjQuery.merge(this, jQuery.parseHTML(match[1],context && context.nodeType ? context.ownerDocument || context : document,true));// HANDLE: $(html, props)if (rsingleTag.test(match[1]) && jQuery.isPlainObject(context)) {for (match in context) {// Properties of context are called as methods if possibleif (isFunction(this[match])) {this[match](context[match]);// ...and otherwise set as attributes} else {this.attr(match, context[match]);}}}return this;// HANDLE: $(#id)} else {elem = document.getElementById(match[2]);if (elem) {// Inject the element directly into the jQuery objectthis[0] = elem;this.length = 1;}return this;}// HANDLE: $(expr, $(...))} else if (!context || context.jquery) {return (context || root).find(selector);// HANDLE: $(expr, context)// (which is just equivalent to: $(context).find(expr)} else {return this.constructor(context).find(selector);}// HANDLE: $(DOMElement)} else if (selector.nodeType) {this[0] = selector;this.length = 1;return this;// HANDLE: $(function)// Shortcut for document ready} else if (isFunction(selector)) {return root.ready !== undefined ?root.ready(selector) :// Execute immediately if ready is not presentselector(jQuery);}return jQuery.makeArray(selector, this);};
很长的一段代码,不过大多都是在处理$()内部传入的不同类型的选择器,暂时不关注如何对选择器进行处理,直接简化代码:
jQuery.fn.init = function () {return this}
去掉了目前不关注的选择器处理,init这个函数就只是返回了一个自身的this,那么问题来了, 这个this指向init,jQuery里面的那些方法init里面又没有提供,还是不能通过$().xxx() 来实现函数的调用呀。
没事儿,接着看代码:
init.prototype = jQuery.fn;
jQuery.fn 其实就是 jQuery.prototype,语义上更容易理解,就是jQuery的实例方法。
上述代码init.prototype 引用 jQuery.prototype ,意味着init就是jQuery对象。
现在可知init就是jQuery,那么,jQuery.fn.init() 就是创建jQuery的构造函数。
现在我们可以以jQuery的风格来编写一段创建jQuery实例的代码:
var jQuery = function () {return new jQuery.fn.init()}jQuery.fn = jQuery.prototype = {each: function () {console.log('each', this)return this}}jQuery.fn.init = function () {return this}jQuery.fn.init.prototype = jQuery.fnvar $ = jQueryconsole.log($().each())
运行结果:

这篇关于不需要new关键字创建实例?jQuery是如何做到的的文章就介绍到这儿,希望我们推荐的文章对编程师们有所帮助!


