本文主要是介绍Android MVVM框架搭建(七)Permission、AlertDialog、拍照和相册选取,希望对大家解决编程问题提供一定的参考价值,需要的开发者们随着小编来一起学习吧!
}
return dialog;
}
public AlertDialog show() {
final AlertDialog dialog = create();
dialog.show();
return dialog;
}
}
}
④ 样式
在设置弹窗的样式和弹窗出现的方式,在themes.xml下新增如下代码:
这里还用到动画样式文件,在res文件夹下新建一个anim文件夹,里面定义了7个xml文件,如下所示:
新建dialog_from_bottom_anim_in.xml,代码如下:
<?xml version="1.0" encoding="utf-8"?><translate
android:duration=“400”
android:fromXDelta=“0”
android:fromYDelta=“1000”
android:toXDelta=“0”
android:toYDelta=“0” />
dialog_from_bottom_anim_out.xml,代码如下:
<?xml version="1.0" encoding="utf-8"?><translate
android:duration=“400”
android:fromXDelta=“0”
android:fromYDelta=“0”
android:toXDelta=“0”
android:toYDelta=“1000” />
dialog_from_top_anim_in.xml,代码如下:
<?xml version="1.0" encoding="utf-8"?><translate
android:duration=“1000”
android:fromYDelta=“-100%”
android:toYDelta=“0” />
dialog_from_top_anim_out.xml,代码如下:
<?xml version="1.0" encoding="utf-8"?><translate
android:duration=“1000”
android:fromYDelta=“0”
android:toYDelta=“-100%” />
dialog_scale_anim_in.xml,代码如下:
<?xml version="1.0" encoding="utf-8"?><scale
android:duration=“135”
android:fromXScale=“0.8”
android:fromYScale=“0.8”
android:pivotX=“50%”
android:pivotY=“50%”
android:toXScale=“1.05”
android:toYScale=“1.05” />
<scale
android:duration=“105”
android:fromXScale=“1.05”
android:fromYScale=“1.05”
android:pivotX=“50%”
android:pivotY=“50%”
android:startOffset=“135”
android:toXScale=“0.95”
android:toYScale=“0.95” />
<scale
android:duration=“60”
android:fromXScale=“0.95”
android:fromYScale=“0.95”
android:pivotX=“50%”
android:pivotY=“50%”
android:startOffset=“240”
android:toXScale=“1.0”
android:toYScale=“1.0” />
<alpha
android:duration=“90”
android:fromAlpha=“0.0”
android:interpolator=“@android:anim/accelerate_interpolator”
android:toAlpha=“1.0” />
dialog_scale_anim_out.xml,代码如下:
<?xml version="1.0" encoding="utf-8"?><scale
android:duration=“150”
android:fromXScale=“1.0”
android:fromYScale=“1.0”
android:pivotX=“50%”
android:pivotY=“50%”
android:toXScale=“0.6”
android:toYScale=“0.6” />
<alpha
android:duration=“150”
android:fromAlpha=“1.0”
android:interpolator=“@android:anim/accelerate_interpolator”
android:toAlpha=“0.0” />
loading_animation.xml,代码如下:
<?xml version="1.0" encoding="utf-8"?><rotate
android:interpolator=“@android:anim/linear_interpolator”
android:pivotX=“50%”
android:pivotY=“50%”
android:fromDegrees=“0”
android:toDegrees=“+360”
android:duration=“1500”
android:startOffset=“-1”
android:repeatMode=“restart”
android:repeatCount=“-1”/>
这里还有一个shape_bg_white_radius_6.xml样式,在drawable中创建,里面的代码如下:
<?xml version="1.0" encoding="utf-8"?>同样再创建一个shape_bg_white_radius_12.xml,代码如下:
<?xml version="1.0" encoding="utf-8"?>还有一个shape_bg_white_radius_24.xml,代码如下:
<?xml version="1.0" encoding="utf-8"?>⑤ 布局
在本文章将会创建三个弹窗布局,一个用于表示加载状态,一个用于表示修改用户信息,最后一个用于输入信息。
在layout下新建一个dialog_edit.xml,代码如下:
<?xml version="1.0" encoding="utf-8"?><RelativeLayout
android:layout_width=“300dp”
android:layout_height=“wrap_content”
android:background=“@drawable/shape_bg_white_radius_12”>
<TextView
android:id=“@+id/tv_title”
android:layout_width=“match_parent”
android:layout_height=“wrap_content”
android:gravity=“center”
android:padding=“12dp”
android:text=“标题”
android:textSize=“16sp” />
<androidx.appcompat.widget.AppCompatEditText
android:id=“@+id/et_content”
android:layout_width=“match_parent”
android:layout_height=“wrap_content”
android:layout_below=“@+id/tv_title”
android:layout_margin=“12dp”
android:maxLength=“18”
android:singleLine=“true”
android:textSize=“@dimen/sp_14” />
<View
android:id=“@+id/v_line”
android:layout_width=“match_parent”
android:layout_height=“1dp”
android:layout_below=“@+id/et_content”
android:background=“@color/line” />
<TextView
android:id=“@+id/tv_cancel”
android:layout_width=“150dp”
android:layout_height=“50dp”
android:textSize=“@dimen/sp_14”
android:layout_below=“@+id/v_line”
android:foreground=“?attr/selectableItemBackground”
android:gravity=“center”
android:text=“取消” />
<View
android:layout_width=“1dp”
android:layout_height=“50dp”
android:layout_below=“@+id/v_line”
android:layout_centerHorizontal=“true”
android:background=“@color/line” />
<TextView
android:id=“@+id/tv_sure”
android:layout_width=“150dp”
android:layout_height=“50dp”
android:textColor=“@color/purple_500”
android:layout_below=“@+id/v_line”
android:textSize=“@dimen/sp_14”
android:layout_toEndOf=“@+id/tv_cancel”
android:foreground=“?attr/selectableItemBackground”
android:gravity=“center”
android:text=“确定” />
在layout下新建一个dialog_loading.xml,代码如下:
<?xml version="1.0" encoding="utf-8"?><LinearLayout xmlns:android=“http://schemas.android.com/apk/res/android”
android:id=“@+id/dialog_view”
android:orientation=“vertical”
android:layout_width=“120dp”
android:layout_height=“120dp”
android:gravity=“center”
android:padding=“10dp”>
<ImageView
android:id=“@+id/iv_loading”
android:layout_width=“40dp”
android:layout_height=“40dp”
android:src=“@mipmap/ic_loading” />
<TextView
android:id=“@+id/tv_loading_tx”
android:layout_width=“wrap_content”
android:layout_height=“wrap_content”
android:layout_marginTop=“10dp”
android:maxLines=“1”
android:text=“Loading…”
android:textColor=“@color/purple_500”
android:textSize=“14sp” />
这里有一个图标

放在mipmap下。
最后在layout下新建一个dialog_modify_user_info.xml,里面的代码如下:
<?xml version="1.0" encoding="utf-8"?><LinearLayout
android:layout_width=“330dp”
android:layout_height=“wrap_content”
android:background=“@drawable/shape_bg_white_radius_24”
android:orientation=“vertical”>
<TextView
android:layout_width=“match_parent”
android:layout_height=“wrap_content”
android:gravity=“center”
android:padding=“12dp”
android:text=“修改用户信息”
android:textColor=“@color/purple_500”
android:textSize=“16sp” />
<View
android:layout_width=“match_parent”
android:layout_height=“1dp”
android:background=“@color/line” />
<TextView
android:id=“@+id/tv_modify_avatar”
android:layout_width=“match_parent”
android:layout_height=“wrap_content”
android:foreground=“?selectableItemBackground”
android:gravity=“center”
android:padding=“12dp”
android:text=“修改头像”
android:textColor=“@color/black”
android:textSize=“16sp” />
<LinearLayout
android:id=“@+id/lay_modify_avatar”
android:layout_width=“match_parent”
android:layout_height=“wrap_content”
android:orientation=“vertical”
android:visibility=“gone”>
<TextView
android:id=“@+id/tv_album_selection”
android:layout_width=“match_parent”
android:layout_height=“wrap_content”
android:background=“@color/line”
android:foreground=“?selectableItemBackground”
android:gravity=“center”
android:padding=“12dp”
android:text=“相册选择”
android:textColor=“@color/black”
android:textSize=“16sp” />
<TextView
android:id=“@+id/tv_camera_photo”
android:layout_width=“match_parent”
android:layout_height=“wrap_content”
android:background=“@color/line”
android:foreground=“?selectableItemBackground”
android:gravity=“center”
android:padding=“12dp”
android:text=“相机拍照”
android:textColor=“@color/black”
android:textSize=“16sp” />
<View
android:layout_width=“match_parent”
android:layout_height=“0.5dp”
android:background=“@color/line” />
<TextView
android:id=“@+id/tv_modify_nickname”
android:layout_width=“match_parent”
android:layout_height=“wrap_content”
android:foreground=“?selectableItemBackground”
android:gravity=“center”
android:padding=“12dp”
android:text=“修改昵称”
android:textColor=“@color/black”
android:textSize=“16sp” />
<View
android:layout_width=“match_parent”
android:layout_height=“0.5dp”
android:background=“@color/line” />
<TextView
android:id=“@+id/tv_modify_Introduction”
android:layout_width=“match_parent”
android:layout_height=“wrap_content”
android:foreground=“?selectableItemBackground”
android:gravity=“center”
android:padding=“12dp”
android:text=“修改简介”
android:textColor=“@color/black”
android:textSize=“16sp” />
<View
android:layout_width=“match_parent”
android:layout_height=“0.5dp”
android:background=“@color/line” />
<TextView
android:id=“@+id/tv_close”
android:layout_width=“match_parent”
android:layout_height=“wrap_content”
android:gravity=“center”
android:padding=“12dp”
android:text=“关闭”
android:textColor=“@color/purple_500”
android:textSize=“16sp” />
这里的准备工作就都做好了,后面会用到,先不着急,然后在BaseActivity中增加一个加载弹窗,
private LoadingDialog loadingDialog;
/**
- 显示加载弹窗
*/
protected void showLoading() {
loadingDialog = new LoadingDialog(this);
loadingDialog.show();
}
/**
-
显示加载弹窗
-
@param isClose true 则点击其他区域弹窗关闭, false 不关闭。
*/
protected void showLoading(boolean isClose) {
loadingDialog = new LoadingDialog(this, isClose);
loadingDialog.show();
}
/**
- 隐藏加载弹窗
*/
protected void dismissLoading() {
if (loadingDialog != null) {
loadingDialog.dismiss();
}
}
这样在Activity中就可以直接使用,显示加载弹窗,隐藏加载弹窗。
权限在Android上是一个麻烦但是又不得不做的事情,如果你要是还是Android6.0以下的手机就可以不用管这些,但是很可惜现在都是Android10,11了,因此我们还需要做兼容。
① 权限配置
因为要用到文件读写和相机,所以就需要在AndroidManifest.xml中增加如下代码:
<uses-permission
android:name=“android.permission.WRITE_EXTERNAL_STORAGE”
tools:ignore=“ScopedStorage” />
<uses-permission
android:name=“android.permission.MANAGE_EXTERNAL_STORAGE”
tools:ignore=“ScopedStorage” />
这还没有完的,在Android10.0上要访问文件,需要在application比前中添加
android:requestLegacyExternalStorage=“true”
如下图所示:

同事我们还需要兼容Android7.0,在xml文件夹下新建一个file_paths.xml,里面的代码如下:
<?xml version="1.0" encoding="utf-8"?><external-files-path
name=“images”
path=“Pictures” />
然后我们在AndroidManifest.xml中配置它,代码如下:
<provider
android:name=“androidx.core.content.FileProvider”
android:authorities=“${applicationId}.fileprovider”
android:exported=“false”
android:grantUriPermissions=“true”>
<meta-data
android:name=“android.support.FILE_PROVIDER_PATHS”
android:resource=“@xml/file_paths” />
添加位置如下:

② 权限工具类
我这里可以自己写一个工具类,当然也可以用第三方框架,在utils包下新建一个PermissionUtils类,里面的代码如下:
public class PermissionUtils {
private static PermissionUtils mInstance;
public static final String READ_EXTERNAL_STORAGE = Manifest.permission.READ_EXTERNAL_STORAGE;
public static final String WRITE_EXTERNAL_STORAGE = Manifest.permission.WRITE_EXTERNAL_STORAGE;
public static final String CAMERA = Manifest.permission.CAMERA;
public static final int REQUEST_STORAGE_CODE = 1001;
public static final int REQUEST_CAMERA_CODE = 1002;
public static final int REQUEST_MANAGE_EXTERNAL_STORAGE_CODE = 1000;
public static PermissionUtils getInstance() {
if (mInstance == null) {
synchronized (PermissionUtils.class) {
if (mInstance == null) {
mInstance = new PermissionUtils();
}
}
}
return mInstance;
}
/**
-
检查是有拥有某权限
-
@param permission 权限名称
-
@return true 有 false 没有
*/
public static boolean hasPermission(Activity activity, String permission) {
if (Build.VERSION.SDK_INT >= Build.VERSION_CODES.M) {
return activity.checkSelfPermission(permission) == PackageManager.PERMISSION_GRANTED;
} else {
return true;
}
}
/**
-
通过权限名称获取请求码
-
@param permissionName 权限名称
-
@return requestCode 权限请求码
*/
private static int getPermissionRequestCode(String permissionName) {
int requestCode;
switch (permissionName) {
case READ_EXTERNAL_STORAGE:
case WRITE_EXTERNAL_STORAGE:
requestCode = REQUEST_STORAGE_CODE;
break;
case CAMERA:
requestCode = REQUEST_CAMERA_CODE;
break;
default:
requestCode = 1000;
break;
}
return requestCode;
}
/**
-
请求权限
-
@param permission 权限名称
*/
public static void requestPermission(Activity activity, String permission) {
int requestCode = getPermissionRequestCode(permission);
//请求此权限
ActivityCompat.requestPermissions(activity, new String[]{permission}, requestCode);
}
}
然后因为权限请求是Activity有关系,那么我们可以在BaseActivity中再封装一层,
/**
- 打开相册请求码
*/
protected static final int SELECT_PHOTO_CODE = 2000;
/**
- 打开相机请求码
*/
protected static final int TAKE_PHOTO_CODE = 2001;
添加两个请求吗,因为打开相机和相册都需要跳转到系统的页面,还需要获取返回的数据,这里我就提前定义好,然后在onCreate中对PermissionUtils进行初始化。
在BaseActivity中添加如下代码:
/**
- 当前是否在Android11.0及以上
*/
protected boolean isAndroid11() {
return Build.VERSION.SDK_INT >= Build.VERSION_CODES.R;
}
/**
- 当前是否在Android10.0及以上
*/
protected boolean isAndroid10() {
return Build.VERSION.SDK_INT >= Build.VERSION_CODES.Q;
}
/**
- 当前是否在Android7.0及以上
*/
protected boolean isAndroid7() {
return Build.VERSION.SDK_INT >= Build.VERSION_CODES.N;
}
/**
- 当前是否在Android6.0及以上
*/
protected boolean isAndroid6() {
return Build.VERSION.SDK_INT >= Build.VERSION_CODES.M;
}
protected boolean isStorageManager() {
return Environment.isExternalStorageManager();
}
protected boolean hasPermission(String permissionName) {
return PermissionUtils.hasPermission(this, permissionName);
}
protected void requestPermission(String permissionName) {
PermissionUtils.requestPermission(this, permissionName);
}
/**
- 请求外部存储管理 Android11版本时获取文件读写权限时调用
*/
protected void requestManageExternalStorage() {
Intent intent = new Intent(Settings.ACTION_MANAGE_APP_ALL_FILES_ACCESS_PERMISSION);
intent.setData(Uri.parse(“package:” + getPackageName()));
startActivityForResult(intent, PermissionUtils.REQUEST_MANAGE_EXTERNAL_STORAGE_CODE);
}
定义了一些需要用到的方法。下面进行DataBinding使用,弹窗中怎么获取DataBinding。
首先在activity_home.xml中添加 , 代码如下:
<variable
name=“homeViewModel”
type=“com.llw.mvvm.viewmodels.HomeViewModel” />
然后修改主页面的头像数据DataBinding,代码如下:
<com.llw.mvvm.view.CustomImageView
android:id=“@+id/iv_avatar”
localUrl=“@{homeViewModel.user.avatar}”
android:layout_width=“36dp”
android:layout_height=“36dp”
android:padding=“0.5dp”
android:scaleType=“centerCrop”
android:src=“@drawable/logo”
app:shapeAppearanceOverlay=“@style/circleImageStyle”
app:strokeColor=“@color/white”
app:strokeWidth=“1dp” />
这里的localUrl需要我们再去CustomImageView类中定义,在CustomImageView中添加如下代码:
private static final RequestOptions OPTIONS_LOCAL = new RequestOptions()
.placeholder(R.drawable.logo)//图片加载出来前,显示的图片
.fallback(R.drawable.logo) //url为空的时候,显示的图片
.error(R.mipmap.ic_loading_failed)//图片加载失败后,显示的图片
.diskCacheStrategy(DiskCacheStrategy.NONE)//不做磁盘缓存
.skipMemoryCache(true);
@BindingAdapter(value = {“localUrl”}, requireAll = false)
public static void setLocalUrl(ImageView imageView, String url) {
Glide.with(BaseApplication.getContext()).load(url).apply(OPTIONS_LOCAL).into(imageView);
}
然后就是在nav_header.xml中绑定DataBinding,里面的代码如下:
<?xml version="1.0" encoding="utf-8"?><layout xmlns:android=“http://schemas.android.com/apk/res/android”
xmlns:app=“http://schemas.android.com/apk/res-auto”>
<variable
name=“homeViewModel”
type=“com.llw.mvvm.viewmodels.HomeViewModel” />
<LinearLayout
android:layout_width=“match_parent”
android:layout_height=“wrap_content”
android:orientation=“vertical”>
<RelativeLayout
android:id=“@+id/lay_user_info”
android:layout_width=“match_parent”
android:layout_height=“120dp”
android:background=“@color/purple_500”>
<com.llw.mvvm.view.CustomImageView
android:id=“@+id/iv_avatar”
localUrl=“@{homeViewModel.user.avatar}”
android:layout_width=“80dp”
android:layout_height=“80dp”
android:layout_centerVertical=“true”
android:layout_marginStart=“24dp”
android:layout_marginEnd=“24dp”
android:padding=“1dp”
android:scaleType=“centerCrop”
android:src=“@drawable/logo”
app:shapeAppearanceOverlay=“@style/circleImageStyle”
app:strokeColor=“@color/white”
app:strokeWidth=“2dp” />
<TextView
android:id=“@+id/tv_name”
android:layout_width=“wrap_content”
android:layout_height=“wrap_content”
android:layout_alignTop=“@+id/iv_avatar”
android:layout_marginTop=“16dp”
android:layout_toEndOf=“@+id/iv_avatar”
android:text=“@{homeViewModel.user.nickname ?? homeViewModel.defaultName}”
android:textColor=“#FFF”
android:textSize=“16sp” />
<TextView
android:id=“@+id/tv_tip”
android:layout_width=“wrap_content”
android:layout_height=“wrap_content”
android:layout_below=“@+id/tv_name”
android:layout_marginTop=“8dp”
android:layout_toEndOf=“@+id/iv_avatar”
android:text=“@{homeViewModel.user.introduction ?? homeViewModel.defaultIntroduction}”
android:textColor=“#FFF”
android:textSize=“14sp” />
这里面的这一行代码需要说一下
homeViewModel.user.nickname ?? homeViewModel.defaultName
这一行代码就等同于
homeViewModel.user.nickname != null ? homeViewModel.user.nickname : homeViewModel.defaultName
这个defaultName是我前面设置的默认值,因为注册时可能不会填写昵称和简介。这里要让这个默认值起作用,在保存用户信息的使用。这里需要修改注册页面中的默认值,从之前的空字符串改成null,这样在xml中的判断值才会有作用,同时及时你的值为null,在xml中也不会报错,这是DataBinding做了处理,类似于Kotlin中的空安全。

这里的DataBinding主要实现两个功能,第一个是HomeActivity的标题栏头像能够根据用户修改图片变化而变化,没有修改则使用默认的头像,第二个就是NavigationView中的head_layout也是通过用户手动去修改昵称、简介、头像时发生变化。
很快就要进入主要内容了,在代码中我们经常会用到一些工具类,比如dp转px,时间处理、Bitmp处理,相机图片处理,鉴于在后面我将会用到这些工具类,现在就给贴出来。这里的工具类都放在utils包下面,新建SizeUtils类,代码如下:
public final class SizeUtils {
private SizeUtils() {
throw new UnsupportedOperationException(“u can’t instantiate me…”);
}
/**
-
Value of dp to value of px.
-
@param dpValue The value of dp.
-
@return value of px
*/
public static int dp2px(Context context, final float dpValue) {
final float scale = context.getApplicationContext().getResources().getDisplayMetrics().density;
return (int) (dpValue * scale + 0.5f);
}
/**
-
Value of px to value of dp.
-
@param pxValue The value of px.
-
@return value of dp
*/
public static int px2dp(Context context, final float pxValue) {
final float scale = context.getApplicationContext().getResources().getDisplayMetrics().density;
return (int) (pxValue / scale + 0.5f);
}
/**
-
Value of sp to value of px.
-
@param spValue The value of sp.
-
@return value of px
*/
public static int sp2px(Context context, final float spValue) {
final float fontScale = context.getApplicationContext().getResources().getDisplayMetrics().scaledDensity;
return (int) (spValue * fontScale + 0.5f);
}
/**
-
Value of px to value of sp.
-
@param pxValue The value of px.
-
@return value of sp
*/
public static int px2sp(Context context, final float pxValue) {
final float fontScale = context.getApplicationContext().getResources().getDisplayMetrics().scaledDensity;
return (int) (pxValue / fontScale + 0.5f);
}
/**
-
Converts an unpacked complex data value holding a dimension to its final floating
-
point value. The two parameters unit and value
-
are as in {@link TypedValue#TYPE_DIMENSION}.
-
@param value The value to apply the unit to.
-
@param unit The unit to convert from.
-
@return The complex floating point value multiplied by the appropriate
-
metrics depending on its unit.
*/
public static float applyDimension(Context context, final float value, final int unit) {
DisplayMetrics metrics = context.getApplicationContext().getResources().getDisplayMetrics();
switch (unit) {
case TypedValue.COMPLEX_UNIT_PX:
return value;
case TypedValue.COMPLEX_UNIT_DIP:
return value * metrics.density;
case TypedValue.COMPLEX_UNIT_SP:
return value * metrics.scaledDensity;
case TypedValue.COMPLEX_UNIT_PT:
return value * metrics.xdpi * (1.0f / 72);
case TypedValue.COMPLEX_UNIT_IN:
return value * metrics.xdpi;
case TypedValue.COMPLEX_UNIT_MM:
return value * metrics.xdpi * (1.0f / 25.4f);
}
return 0;
}
/**
-
Force get the size of view.
-
e.g.
-
SizeUtils.forceGetViewSize(view, new SizeUtils.onGetSizeListener() {
-
Override -
public void onGetSize(final View view) { -
view.getWidth(); -
} -
});
-
@param view The view.
-
@param listener The get size listener.
*/
public static void forceGetViewSize(final View view, final onGetSizeListener listener) {
view.post(new Runnable() {
@Override
public void run() {
if (listener != null) {
listener.onGetSize(view);
}
}
});
}
/**
-
Return the width of view.
-
@param view The view.
-
@return the width of view
*/
public static int getMeasuredWidth(final View view) {
return measureView(view)[0];
}
/**
-
Return the height of view.
-
@param view The view.
-
@return the height of view
*/
public static int getMeasuredHeight(final View view) {
return measureView(view)[1];
}
/**
-
Measure the view.
-
@param view The view.
-
@return arr[0]: view’s width, arr[1]: view’s height
*/
public static int[] measureView(final View view) {
ViewGroup.LayoutParams lp = view.getLayoutParams();
if (lp == null) {
lp = new ViewGroup.LayoutParams(
ViewGroup.LayoutParams.MATCH_PARENT,
ViewGroup.LayoutParams.WRAP_CONTENT
);
}
int widthSpec = ViewGroup.getChildMeasureSpec(0, 0, lp.width);
int lpHeight = lp.height;
int heightSpec;
if (lpHeight > 0) {
heightSpec = View.MeasureSpec.makeMeasureSpec(lpHeight, View.MeasureSpec.EXACTLY);
} else {
heightSpec = View.MeasureSpec.makeMeasureSpec(0, View.MeasureSpec.UNSPECIFIED);
}
view.measure(widthSpec, heightSpec);
return new int[]{view.getMeasuredWidth(), view.getMeasuredHeight()};
}
public interface onGetSizeListener {
void onGetSize(View view);
}
}
EasyDate类,代码如下:
public final class EasyDate {
public static final String STANDARD_TIME = “yyyy-MM-dd HH:mm:ss”;
public static final String FULL_TIME = “yyyy-MM-dd HH:mm:ss.SSS”;
public static final String YEAR_MONTH_DAY = “yyyy-MM-dd”;
public static final String YEAR_MONTH_DAY_CN = “yyyy年MM月dd号”;
public static final String HOUR_MINUTE_SECOND = “HH:mm:ss”;
public static final String HOUR_MINUTE_SECOND_CN = “HH时mm分ss秒”;
public static final String YEAR = “yyyy”;
public static final String MONTH = “MM”;
public static final String DAY = “dd”;
public static final String HOUR = “HH”;
public static final String MINUTE = “mm”;
public static final String SECOND = “ss”;
public static final String MILLISECOND = “SSS”;
public static final String YESTERDAY = “昨天”;
public static final String TODAY = “今天”;
public static final String TOMORROW = “明天”;
public static final String SUNDAY = “星期日”;
public static final String MONDAY = “星期一”;
public static final String TUESDAY = “星期二”;
public static final String WEDNESDAY = “星期三”;
public static final String THURSDAY = “星期四”;
public static final String FRIDAY = “星期五”;
public static final String SATURDAY = “星期六”;
public static final String[] weekDays = {SUNDAY, MONDAY, TUESDAY, WEDNESDAY, THURSDAY, FRIDAY, SATURDAY};
/**
-
获取标准时间
-
@return 例如 2021-07-01 10:35:53
*/
public static String getDateTime() {
return new SimpleDateFormat(STANDARD_TIME, Locale.CHINESE).format(new Date());
}
/**
-
获取完整时间
-
@return 例如 2021-07-01 10:37:00.748
*/
public static String getFullDateTime() {
return new SimpleDateFormat(FULL_TIME, Locale.CHINESE).format(new Date());
}
/**
-
获取年月日(今天)
-
@return 例如 2021-07-01
*/
public static String getTheYearMonthAndDay() {
return new SimpleDateFormat(YEAR_MONTH_DAY, Locale.CHINESE).format(new Date());
}
/**
-
获取年月日
-
@return 例如 2021年07月01号
*/
public static String getTheYearMonthAndDayCn() {
return new SimpleDateFormat(YEAR_MONTH_DAY_CN, Locale.CHINESE).format(new Date());
}
/**
-
获取年月日
-
@param delimiter 分隔符
-
@return 例如 2021年07月01号
*/
public static String getTheYearMonthAndDayDelimiter(CharSequence delimiter) {
return new SimpleDateFormat(YEAR + delimiter + MONTH + delimiter + DAY, Locale.CHINESE).format(new Date());
}
/**
-
获取时分秒
-
@return 例如 10:38:25
*/
public static String getHoursMinutesAndSeconds() {
return new SimpleDateFormat(HOUR_MINUTE_SECOND, Locale.CHINESE).format(new Date());
}
/**
-
获取时分秒
-
@return 例如 10时38分50秒
*/
public static String getHoursMinutesAndSecondsCn() {
return new SimpleDateFormat(HOUR_MINUTE_SECOND_CN, Locale.CHINESE).format(new Date());
}
/**
-
获取时分秒
-
@param delimiter 分隔符
-
@return 例如 2021/07/01
*/
public static String getHoursMinutesAndSecondsDelimiter(CharSequence delimiter) {
return new SimpleDateFormat(HOUR + delimiter + MINUTE + delimiter + SECOND, Locale.CHINESE).format(new Date());
}
/**
-
获取年
-
@return 例如 2021
*/
public static String getYear() {
return new SimpleDateFormat(YEAR, Locale.CHINESE).format(new Date());
}
/**
-
获取月
-
@return 例如 07
*/
public static String getMonth() {
return new SimpleDateFormat(MONTH, Locale.CHINESE).format(new Date());
}
/**
-
获取天
-
@return 例如 01
*/
public static String getDay() {
return new SimpleDateFormat(DAY, Locale.CHINESE).format(new Date());
}
/**
-
获取小时
-
@return 例如 10
*/
public static String getHour() {
return new SimpleDateFormat(HOUR, Locale.CHINESE).format(new Date());
}
/**
-
获取分钟
-
@return 例如 40
*/
public static String getMinute() {
return new SimpleDateFormat(MINUTE, Locale.CHINESE).format(new Date());
}
/**
-
获取秒
-
@return 例如 58
*/
public static String getSecond() {
return new SimpleDateFormat(SECOND, Locale.CHINESE).format(new Date());
}
/**
-
获取毫秒
-
@return 例如 666
*/
public static String getMilliSecond() {
return new SimpleDateFormat(MILLISECOND, Locale.CHINESE).format(new Date());
}
/**
-
获取时间戳
-
@return 例如 1625107306051
*/
public static long getTimestamp() {
return System.currentTimeMillis();
}
/**
-
将时间转换为时间戳
-
@param time 例如 2021-07-01 10:44:11
-
@return 1625107451000
*/
public static long dateToStamp(String time) {
SimpleDateFormat simpleDateFormat = new SimpleDateFormat(STANDARD_TIME, Locale.CHINESE);
Date date = null;
try {
date = simpleDateFormat.parse(time);
} catch (ParseException e) {
e.printStackTrace();
}
return Objects.requireNonNull(date).getTime();
}
/**
-
将时间戳转换为时间
-
@param timeMillis 例如 1625107637084
-
@return 例如 2021-07-01 10:47:17
*/
public static String stampToDate(long timeMillis) {
return new SimpleDateFormat(STANDARD_TIME, Locale.CHINESE).format(new Date(timeMillis));
}
/**
-
获取今天是星期几
-
@return 例如 星期四
*/
public static String getTodayOfWeek() {
Calendar cal = Calendar.getInstance();
cal.setTime(new Date());
int index = cal.get(Calendar.DAY_OF_WEEK) - 1;
if (index < 0) {
index = 0;
}
return weekDays[index];
}
/**
-
根据输入的日期时间计算是星期几
-
@param dateTime 例如 2021-06-20
-
@return 例如 星期日
*/
public static String getWeek(String dateTime) {
Calendar cal = Calendar.getInstance();
if (“”.equals(dateTime)) {
cal.setTime(new Date(System.currentTimeMillis()));
} else {
SimpleDateFormat sdf = new SimpleDateFormat(YEAR_MONTH_DAY, Locale.getDefault());
Date date;
try {
date = sdf.parse(dateTime);
} catch (ParseException e) {
date = null;
e.printStackTrace();
}
if (date != null) {
cal.setTime(new Date(date.getTime()));
}
}
return weekDays[cal.get(Calendar.DAY_OF_WEEK) - 1];
}
/**
-
获取输入日期的昨天
-
@param date 例如 2021-07-01
-
@return 例如 2021-06-30
*/
public static String getYesterday(Date date) {
Calendar calendar = new GregorianCalendar();
calendar.setTime(date);
calendar.add(Calendar.DATE, -1);
date = calendar.getTime();
return new SimpleDateFormat(YEAR_MONTH_DAY, Locale.getDefault()).format(date);
}
/**
-
获取输入日期的明天
-
@param date 例如 2021-07-01
-
@return 例如 2021-07-02
*/
public static String getTomorrow(Date date) {
Calendar calendar = new GregorianCalendar();
calendar.setTime(date);
calendar.add(Calendar.DATE, +1);
date = calendar.getTime();
return new SimpleDateFormat(YEAR_MONTH_DAY, Locale.getDefault()).format(date);
}
/**
-
根据年月日计算是星期几并与当前日期判断 非昨天、今天、明天 则以星期显示
-
@param dateTime 例如 2021-07-03
-
@return 例如 星期六
*/
public static String getDayInfo(String dateTime) {
String dayInfo;
String yesterday = getYesterday(new Date());
String today = getTheYearMonthAndDay();
String tomorrow = getTomorrow(new Date());
if (dateTime.equals(yesterday)) {
dayInfo = YESTERDAY;
} else if (dateTime.equals(today)) {
dayInfo = TODAY;
} else if (dateTime.equals(tomorrow)) {
dayInfo = TOMORROW;
} else {
dayInfo = getWeek(dateTime);
}
return dayInfo;
}
/**
-
获取本月天数
-
@return 例如 31
*/
public static int getCurrentMonthDays() {
Calendar calendar = Calendar.getInstance();
//把日期设置为当月第一天
calendar.set(Calendar.DATE, 1);
//日期回滚一天,也就是最后一天
calendar.roll(Calendar.DATE, -1);
return calendar.get(Calendar.DATE);
}
/**
-
获得指定月的天数
-
@param year 例如 2021
-
@param month 例如 7
-
@return 例如 31
*/
public static int getMonthDays(int year, int month) {
Calendar calendar = Calendar.getInstance();
calendar.set(Calendar.YEAR, year);
calendar.set(Calendar.MONTH, month - 1);
//把日期设置为当月第一天
calendar.set(Calendar.DATE, 1);
//日期回滚一天,也就是最后一天
calendar.roll(Calendar.DATE, -1);
return calendar.get(Calendar.DATE);
}
}
CameraUtils类,代码如下:
public class CameraUtils {
/**
-
相机Intent
-
@param context
-
@param outputImagePath
-
@return
*/
public static Intent getTakePhotoIntent(Context context, File outputImagePath) {
// 激活相机
Intent intent = new Intent(MediaStore.ACTION_IMAGE_CAPTURE);
// 判断存储卡是否可以用,可用进行存储
if (hasSdcard()) {
if (Build.VERSION.SDK_INT < Build.VERSION_CODES.N) {
// 从文件中创建uri
Uri uri = Uri.fromFile(outputImagePath);
intent.putExtra(MediaStore.EXTRA_OUTPUT, uri);
} else {
//兼容android7.0 使用共享文件的形式
ContentValues contentValues = new ContentValues(1);
contentValues.put(MediaStore.Images.Media.DATA, outputImagePath.getAbsolutePath());
Uri uri = context.getApplicationContext().getContentResolver().insert(MediaStore.Images.Media.EXTERNAL_CONTENT_URI, contentValues);
intent.putExtra(MediaStore.EXTRA_OUTPUT, uri);
}
}
return intent;
}
/**
-
相册Intent
-
@return
*/
public static Intent getSelectPhotoIntent() {
Intent intent = new Intent(“android.intent.action.GET_CONTENT”);
intent.setType(“image/*”);
return intent;
}
/**
- 判断sdcard是否被挂载
*/
public static boolean hasSdcard() {
return Environment.getExternalStorageState().equals(
Environment.MEDIA_MOUNTED);
}
/**
- 4.4及以上系统处理图片的方法
*/
@TargetApi(Build.VERSION_CODES.KITKAT)
public static String getImageOnKitKatPath(Intent data, Context context) {
String imagePath = null;
Uri uri = data.getData();
Log.d(“uri=intent.getData :”, “” + uri);
if (DocumentsContract.isDocumentUri(context, uri)) {
//数据表里指定的行
String docId = DocumentsContract.getDocumentId(uri);
Log.d(“getDocumentId(uri) :”, “” + docId);
Log.d(“uri.getAuthority() :”, “” + uri.getAuthority());
if (“com.android.providers.media.documents”.equals(uri.getAuthority())) {
String id = docId.split(“:”)[1];
String selection = MediaStore.Images.Media._ID + “=” + id;
imagePath = getImagePath(MediaStore.Images.Media.EXTERNAL_CONTENT_URI, selection, context);
} else if (“com.android.providers.downloads.documents”.equals(uri.getAuthority())) {
Uri contentUri = ContentUris.withAppendedId(Uri.parse(“content://downloads/public_downloads”), Long.valueOf(docId));
imagePath = getImagePath(contentUri, null, context);
}
} else if (“content”.equalsIgnoreCase(uri.getScheme())) {
imagePath = getImagePath(uri, null, context);
}
return imagePath;
}
/**
- 通过uri和selection来获取真实的图片路径,从相册获取图片时要用
*/
public static String getImagePath(Uri uri, String selection, Context context) {
String path = null;
Cursor cursor = context.getContentResolver().query(uri, null, selection, null, null);
if (cursor != null) {
if (cursor.moveToFirst()) {
path = cursor.getString(cursor.getColumnIndex(MediaStore.Images.Media.DATA));
}
cursor.close();
}
return path;
}
/**
-
更改图片显示角度
-
@param filepath
-
@param orc_bitmap
-
@param iv
*/
public static void ImgUpdateDirection(String filepath, Bitmap orc_bitmap, ImageView iv) {
//图片旋转的角度
int digree = 0;
//根据图片的filepath获取到一个ExifInterface的对象
ExifInterface exif = null;
try {
exif = new ExifInterface(filepath);
if (exif != null) {
// 读取图片中相机方向信息
int ori = exif.getAttributeInt(ExifInterface.TAG_ORIENTATION, ExifInterface.ORIENTATION_UNDEFINED);
// 计算旋转角度
switch (ori) {
case ExifInterface.ORIENTATION_ROTATE_90:
digree = 90;
break;
case ExifInterface.ORIENTATION_ROTATE_180:
digree = 180;
break;
case ExifInterface.ORIENTATION_ROTATE_270:
digree = 270;
break;
default:
digree = 0;
break;
}
}
//如果图片不为0
if (digree != 0) {
// 旋转图片
Matrix m = new Matrix();
m.postRotate(digree);
orc_bitmap = Bitmap.createBitmap(orc_bitmap, 0, 0, orc_bitmap.getWidth(),
orc_bitmap.getHeight(), m, true);
}
if (orc_bitmap != null) {
iv.setImageBitmap(orc_bitmap);
}
} catch (IOException e) {
e.printStackTrace();
exif = null;
}
}
/**
- 4.4以下系统处理图片的方法
*/
public static String getImageBeforeKitKatPath(Intent data, Context context) {
Uri uri = data.getData();
String imagePath = getImagePath(uri, null, context);
return imagePath;
}
/**
-
比例压缩
-
@param image
-
@return
*/
public static Bitmap compression(Bitmap image) {
ByteArrayOutputStream outputStream = new ByteArrayOutputStream();
image.compress(Bitmap.CompressFormat.JPEG, 100, outputStream);
//判断如果图片大于1M,进行压缩避免在生成图片(BitmapFactory.decodeStream)时溢出
if (outputStream.toByteArray().length / 1024 > 1024) {
//重置outputStream即清空outputStream
outputStream.reset();
//这里压缩50%,把压缩后的数据存放到baos中
image.compress(Bitmap.CompressFormat.JPEG, 50, outputStream);
}
ByteArrayInputStream inputStream = new ByteArrayInputStream(outputStream.toByteArray());
BitmapFactory.Options options = new BitmapFactory.Options();
//开始读入图片,此时把options.inJustDecodeBounds 设回true了
options.inJustDecodeBounds = true;
Bitmap bitmap = BitmapFactory.decodeStream(inputStream, null, options);
options.inJustDecodeBounds = false;
int outWidth = options.outWidth;
int outHeight = options.outHeight;
//现在主流手机比较多是800*480分辨率,所以高和宽我们设置为
float height = 800f;//这里设置高度为800f
float width = 480f;//这里设置宽度为480f
//缩放比。由于是固定比例缩放,只用高或者宽其中一个数据进行计算即可
int zoomRatio = 1;//be=1表示不缩放
if (outWidth > outHeight && outWidth > width) {//如果宽度大的话根据宽度固定大小缩放
zoomRatio = (int) (options.outWidth / width);
} else if (outWidth < outHeight && outHeight > height) {//如果高度高的话根据宽度固定大小缩放
zoomRatio = (int) (options.outHeight / height);
}
if (zoomRatio <= 0) {
zoomRatio = 1;
}
options.inSampleSize = zoomRatio;//设置缩放比例
options.inPreferredConfig = Bitmap.Config.RGB_565;//降低图片从ARGB888到RGB565
//重新读入图片,注意此时已经把options.inJustDecodeBounds 设回false了
inputStream = new ByteArrayInputStream(outputStream.toByteArray());
//压缩好比例大小后再进行质量压缩
bitmap = BitmapFactory.decodeStream(inputStream, null, options);
return bitmap;
}
}
BitmapUtils类,代码如下(本文中没有用到,因为我没有服务器,但是如果你需要上传到服务器的话,常规做法是将图片转成Base64,发送给服务器):
public class BitmapUtils {
/**
-
bitmap转为base64
-
@param bitmap
-
@return
*/
public static String bitmapToBase64(Bitmap bitmap) {
String result = null;
ByteArrayOutputStream baos = null;
try {
if (bitmap != null) {
baos = new ByteArrayOutputStream();
bitmap.compress(Bitmap.CompressFormat.JPEG, 100, baos);
baos.flush();
baos.close();
byte[] bitmapBytes = baos.toByteArray();
result = Base64.encodeToString(bitmapBytes, Base64.DEFAULT);
}
} catch (IOException e) {
e.printStackTrace();
} finally {
try {
if (baos != null) {
baos.flush();
baos.close();
}
} catch (IOException e) {
e.printStackTrace();
}
}
return result;
}
/**
-
base64转为bitmap
-
@param base64Data
-
@return
*/
public static Bitmap base64ToBitmap(String base64Data) {
byte[] bytes = Base64.decode(base64Data, Base64.DEFAULT);
return BitmapFactory.decodeByteArray(bytes, 0, bytes.length);
}
/**
-
url转bitmap
-
@param url
-
@return
*/
public static Bitmap urlToBitmap(final String url){
final Bitmap[] bitmap = {null};
new Thread(() -> {
URL imageurl = null;
try {
imageurl = new URL(url);
} catch (MalformedURLException e) {
e.printStackTrace();
}
try {
HttpURLConnection conn = (HttpURLConnection)imageurl.openConnection();
conn.setDoInput(true);
conn.connect();
InputStream is = conn.getInputStream();
bitmap[0] = BitmapFactory.decodeStream(is);
is.close();
} catch (IOException e) {
e.printStackTrace();
}
}).start();
return bitmap[0];
}
}
下面的代码都写在HomeActivity中,首先声明一些变量
//可输入弹窗
private AlertDialog editDialog = null;
//修改用户信息弹窗
private AlertDialog modifyUserInfoDialog = null;
//是否显示修改头像的两种方式
private boolean isShow = false;
//用于保存拍照图片的uri
private Uri mCameraUri;
// 用于保存图片的文件路径,Android 10以下使用图片路径访问图片
private String mCameraImagePath;
首先我们在onCreate方法中,增加一行显示加载弹窗的代码,这个方法是写在BaseActivity中,而当前的HomeActivity是要继承自BaseActivity的。
//显示加载弹窗
showLoading();
添加的位置

然后就是在initView方法中增加代码:
//获取NavigationView的headerLayout视图
View headerView = binding.navView.getHeaderView(0);
headerView.setOnClickListener(v -> showModifyUserInfoDialog());
//获取headerLayout视图的Binding
NavHeaderBinding headerBinding = DataBindingUtil.bind(headerView);
//获取本地用户信息
homeViewModel.getUser();
//用户信息发生改变时给对应的xml设置数据源也就是之前写好的ViewModel。
homeViewModel.user.observe(this, user -> {
localUser = user;
binding.setHomeViewModel(homeViewModel);
if (headerBinding != null) {
headerBinding.setHomeViewModel(homeViewModel);
}
//隐藏加载弹窗
dismissLoading();
});
添加位置如下图

这里的代码很关键,首先是在HomeActivity中要获取到本地的User数据,这是通过HomeViewModel中的UserRepository去获取的,然后是获取之后通知xml去加载数据,这就是DataBinding的魅力,数据改变之后我们就隐藏掉加载弹窗,所以这一步很关键。
① 显示修改用户信息弹窗
如果不出意外的话,你是没有写showModifyUserInfoDialog方法的,因此这里肯定是红色的,那么你可以手动创建,也可以通过快捷键Alt + Enter的方式快速创建方法,里面的代码如下:
/**
- 显示修改用户弹窗
*/
private void showModifyUserInfoDialog() {
DialogModifyUserInfoBinding binding = DataBindingUtil.inflate(LayoutInflater.from(this), R.layout.dialog_modify_user_info, null, false);
AlertDialog.Builder builder = new AlertDialog.Builder(this)
.addDefaultAnimation()
.setCancelable(true)
.setContentView(binding.getRoot())
.setWidthAndHeight(SizeUtils.dp2px(this, 300), LinearLayout.LayoutParams.WRAP_CONTENT)
.setOnClickListener(R.id.tv_modify_avatar, v -> {
//修改头像,点击显示修改头像的方式,再次点击隐藏修改方式
binding.layModifyAvatar.setVisibility(isShow ? View.GONE : View.VISIBLE);
isShow = !isShow;
}).setOnClickListener(R.id.tv_album_selection, v -> albumSelection())//相册选择
.setOnClickListener(R.id.tv_camera_photo, v -> cameraPhoto())//相机拍照
.setOnClickListener(R.id.tv_modify_nickname, v -> showEditDialog(0))//修改昵称
.setOnClickListener(R.id.tv_modify_Introduction, v -> showEditDialog(1))//修改简介
.setOnClickListener(R.id.tv_close, v -> modifyUserInfoDialog.dismiss())//关闭弹窗
.setOnDismissListener(dialog -> isShow = false);
modifyUserInfoDialog = builder.create();
modifyUserInfoDialog.show();
}
这里的方法是显示修改用户信息弹窗,当我们点击NavigationView的headerLayout时就会显示这个弹窗,那么这个弹窗里面做了什么呢?
首先是获取DataBinding,这里只是为了方便不写findViewById,不获取也没有关系就直接用布局,然后是在点击tv_modify_avatar的时候控制修改头像的布局的显示和隐藏,这里要是还想优化的话,可以增加一个动画效果,例如向下展开显示,向上收缩隐藏。我这里就不搞这些花里胡哨的东西了。然后就是这里有四个方法的调用,实际上是三个方法,有一个是复用的,只不过是传入的类型不同。
② 相册选取
这里我们从上往下来写这些方法,首先是albumSelection方法,我们切换头像有两种方式,这里是通过相册去选取。
/**
- 相册选择
*/
private void albumSelection() {
modifyUserInfoDialog.dismiss();
if (isAndroid11()) {
//请求打开外部存储管理
requestManageExternalStorage();
} else {
if (!isAndroid6()) {
//打开相册
openAlbum();
return;
}
if (!hasPermission(PermissionUtils.READ_EXTERNAL_STORAGE)) {
requestPermission(PermissionUtils.READ_EXTERNAL_STORAGE);
return;
}
//打开相册
openAlbum();
}
}
这里我们首先是关闭之前的弹窗,然后检查用户是否在Android11,是的话请求打开外部存储管理的开关,不是再判断是不是Android6.0及以上版本,不是就不用请求动态权限,直接调用openAlbum打开相册,是就检查有没有获取读取存储文件的权限,没有获取就去请求这个权限,如果已经获取了就打开相册,我们先看打开外部存储管理的返回,
/**
- 页面返回结果
*/
@Override
protected void onActivityResult(final int requestCode, final int resultCode, final Intent data) {
super.onActivityResult(requestCode, resultCode, data);
if (resultCode != RESULT_OK) {
showMsg(“未知原因”);
return;
}
switch (requestCode) {
case PermissionUtils.REQUEST_MANAGE_EXTERNAL_STORAGE_CODE:
//从外部存储管理页面返回
if (!isStorageManager()) {
showMsg(“未打开外部存储管理开关,无法打开相册,抱歉”);
return;
}
if (!hasPermission(PermissionUtils.READ_EXTERNAL_STORAGE)) {
requestPermission(PermissionUtils.READ_EXTERNAL_STORAGE);
return;
}
//打开相册
openAlbum();
break;
}
}
这里我们对返回的结果要做处理,如果打开了则再检查是否有这个存储权限,请注意这里我没有去检查是不是Android6.0及以上版本,因为如果我有这个返回的话,那么毋庸置疑,肯定在Android6.0以上,就没有必要再去多此一举了,如果没有打开开关的话这里就会提示你。
下面我们再去看权限请求的回调,
/**
- 权限请求结果
*/
@Override
public void onRequestPermissionsResult(int requestCode, @NonNull @NotNull String[] permissions, @NonNull @NotNull int[] grantResults) {
super.onRequestPermissionsResult(requestCode, permissions, grantResults);
switch (requestCode) {
case PermissionUtils.REQUEST_STORAGE_CODE:
//文件读写权限
if (grantResults[0] != PackageManager.PERMISSION_GRANTED) {
showMsg(“您拒绝了读写文件权限,无法打开相册,抱歉。”);
return;
}
openAlbum();
break;
default:
break;
}
}
这里我们同样要对权限通过和不通过做处理,这一步弄清楚之后,就是真的要去打开相册了,调用openAlbum方法,方法代码如下:
/**
- 打开相册
*/
private void openAlbum() {
startActivityForResult(CameraUtils.getSelectPhotoIntent(), SELECT_PHOTO_CODE);
}
一句话就搞定了,不过这里我用的startActivityForResult是已经过时的API了,但是还是可以用的,你也可以用新的API。当我们选择了一个图片之后会返回一个结果,也在onActivityResult回调中,那么我们在这个里面再加一个case。
case SELECT_PHOTO_CODE:
//相册中选择图片返回
modifyAvatar(CameraUtils.getImageOnKitKatPath(data, this));
break;
这应该很好理解吧,然后我们保存返回的图片路径,这里又用到一个方法。方法代码如下:
/**
- 修改头像
*/
private void modifyAvatar(String imagePath) {
if (!TextUtils.isEmpty(imagePath)) {
//保存到数据表中
modifyContent(2, imagePath);
Log.d(TAG, "modifyAvatar: " + imagePath);
} else {
showMsg(“图片获取失败”);
}
}
这里是修改头像,如果获取到的图片不是空的就调用modifyContent方法去保存,方法代码如下:
/**
-
修改内容
-
@param type 类型 0:昵称 1:简介 2: 头像
-
@param content 修改内容
*/
private void modifyContent(int type, String content) {
if (type == 0) {
localUser.setNickname(content);
} else if (type == 1) {
localUser.setIntroduction(content);
} else if (type == 2) {
localUser.setAvatar(content);
}
homeViewModel.updateUser(localUser);
homeViewModel.failed.observe(this, failed -> {
dismissLoading();
if (“200”.equals(failed)) {
showMsg(“修改成功”);
}
});
}
因为要修改的三个数据都是字符串,所以我们可以写一个通用方法,用一个type来区分保存。这样就只用修改一个值了。虽然从代码上看像是俄罗斯套娃,但是逻辑就是这样的。
到这里为止,通过相册选取方式修改头像就写完了,下面来看通过相机拍照修改头像。运行效果如下图所示:

③ 相机拍照
回到我们之前的修改用户信息弹窗,现在第一个方法已经不报错了,下面写第二个方法cameraPhoto,代码如下:
/**
- 相册拍照
*/
private void cameraPhoto() {
modifyUserInfoDialog.dismiss();
if (!isAndroid6()) {
//打开相机
openCamera();
return;
}
if (!hasPermission(PermissionUtils.CAMERA)) {
requestPermission(PermissionUtils.CAMERA);
return;
}
//打开相机
openCamera();
}
这里的逻辑我想不用再重复了,一目了然。下面是相机权限的回调,在onRequestPermissionsResult中增加一个case,代码如下:
case PermissionUtils.REQUEST_CAMERA_CODE:
if (grantResults[0] != PackageManager.PERMISSION_GRANTED) {
showMsg(“您拒绝了相机权限,无法打开相机,抱歉。”);
return;
}
openCamera();
break;
如果通过权限就打开相机,打开相机要比相册麻烦一些,openCamera方法代码如下:
/**
- 调起相机拍照
*/
private void openCamera() {
Intent captureIntent = new Intent(MediaStore.ACTION_IMAGE_CAPTURE);
// 判断是否有相机
if (captureIntent.resolveActivity(getPackageManager()) != null) {
File photoFile = null;
Uri photoUri = null;
if (isAndroid10()) {
// 适配android 10 创建图片地址uri,用于保存拍照后的照片 Android 10以后使用这种方法
photoUri = getContentResolver().insert(Environment.getExternalStorageState().equals(Environment.MEDIA_MOUNTED) ?
MediaStore.Images.Media.EXTERNAL_CONTENT_URI : MediaStore.Images.Media.INTERNAL_CONTENT_URI, new ContentValues());
} else {
photoFile = createImageFile();
if (photoFile != null) {
mCameraImagePath = photoFile.getAbsolutePath();
if (isAndroid7()) {
//适配Android 7.0文件权限,通过FileProvider创建一个content类型的Uri
photoUri = FileProvider.getUriForFile(this, getPackageName() + “.fileprovider”, photoFile);
} else {
photoUri = Uri.fromFile(photoFile);
}
}
}
mCameraUri = photoUri;
if (photoUri != null) {
captureIntent.putExtra(MediaStore.EXTRA_OUTPUT, photoUri);
captureIntent.addFlags(Intent.FLAG_GRANT_WRITE_URI_PERMISSION);
最后
小编这些年深知大多数初中级Android工程师,想要提升自己,往往是自己摸索成长,自己不成体系的自学效果低效漫长且无助。
因此我收集整理了一份《2024年Android移动开发全套学习资料》,初衷也很简单,就是希望能够帮助到想自学提升又不知道该从何学起的朋友。
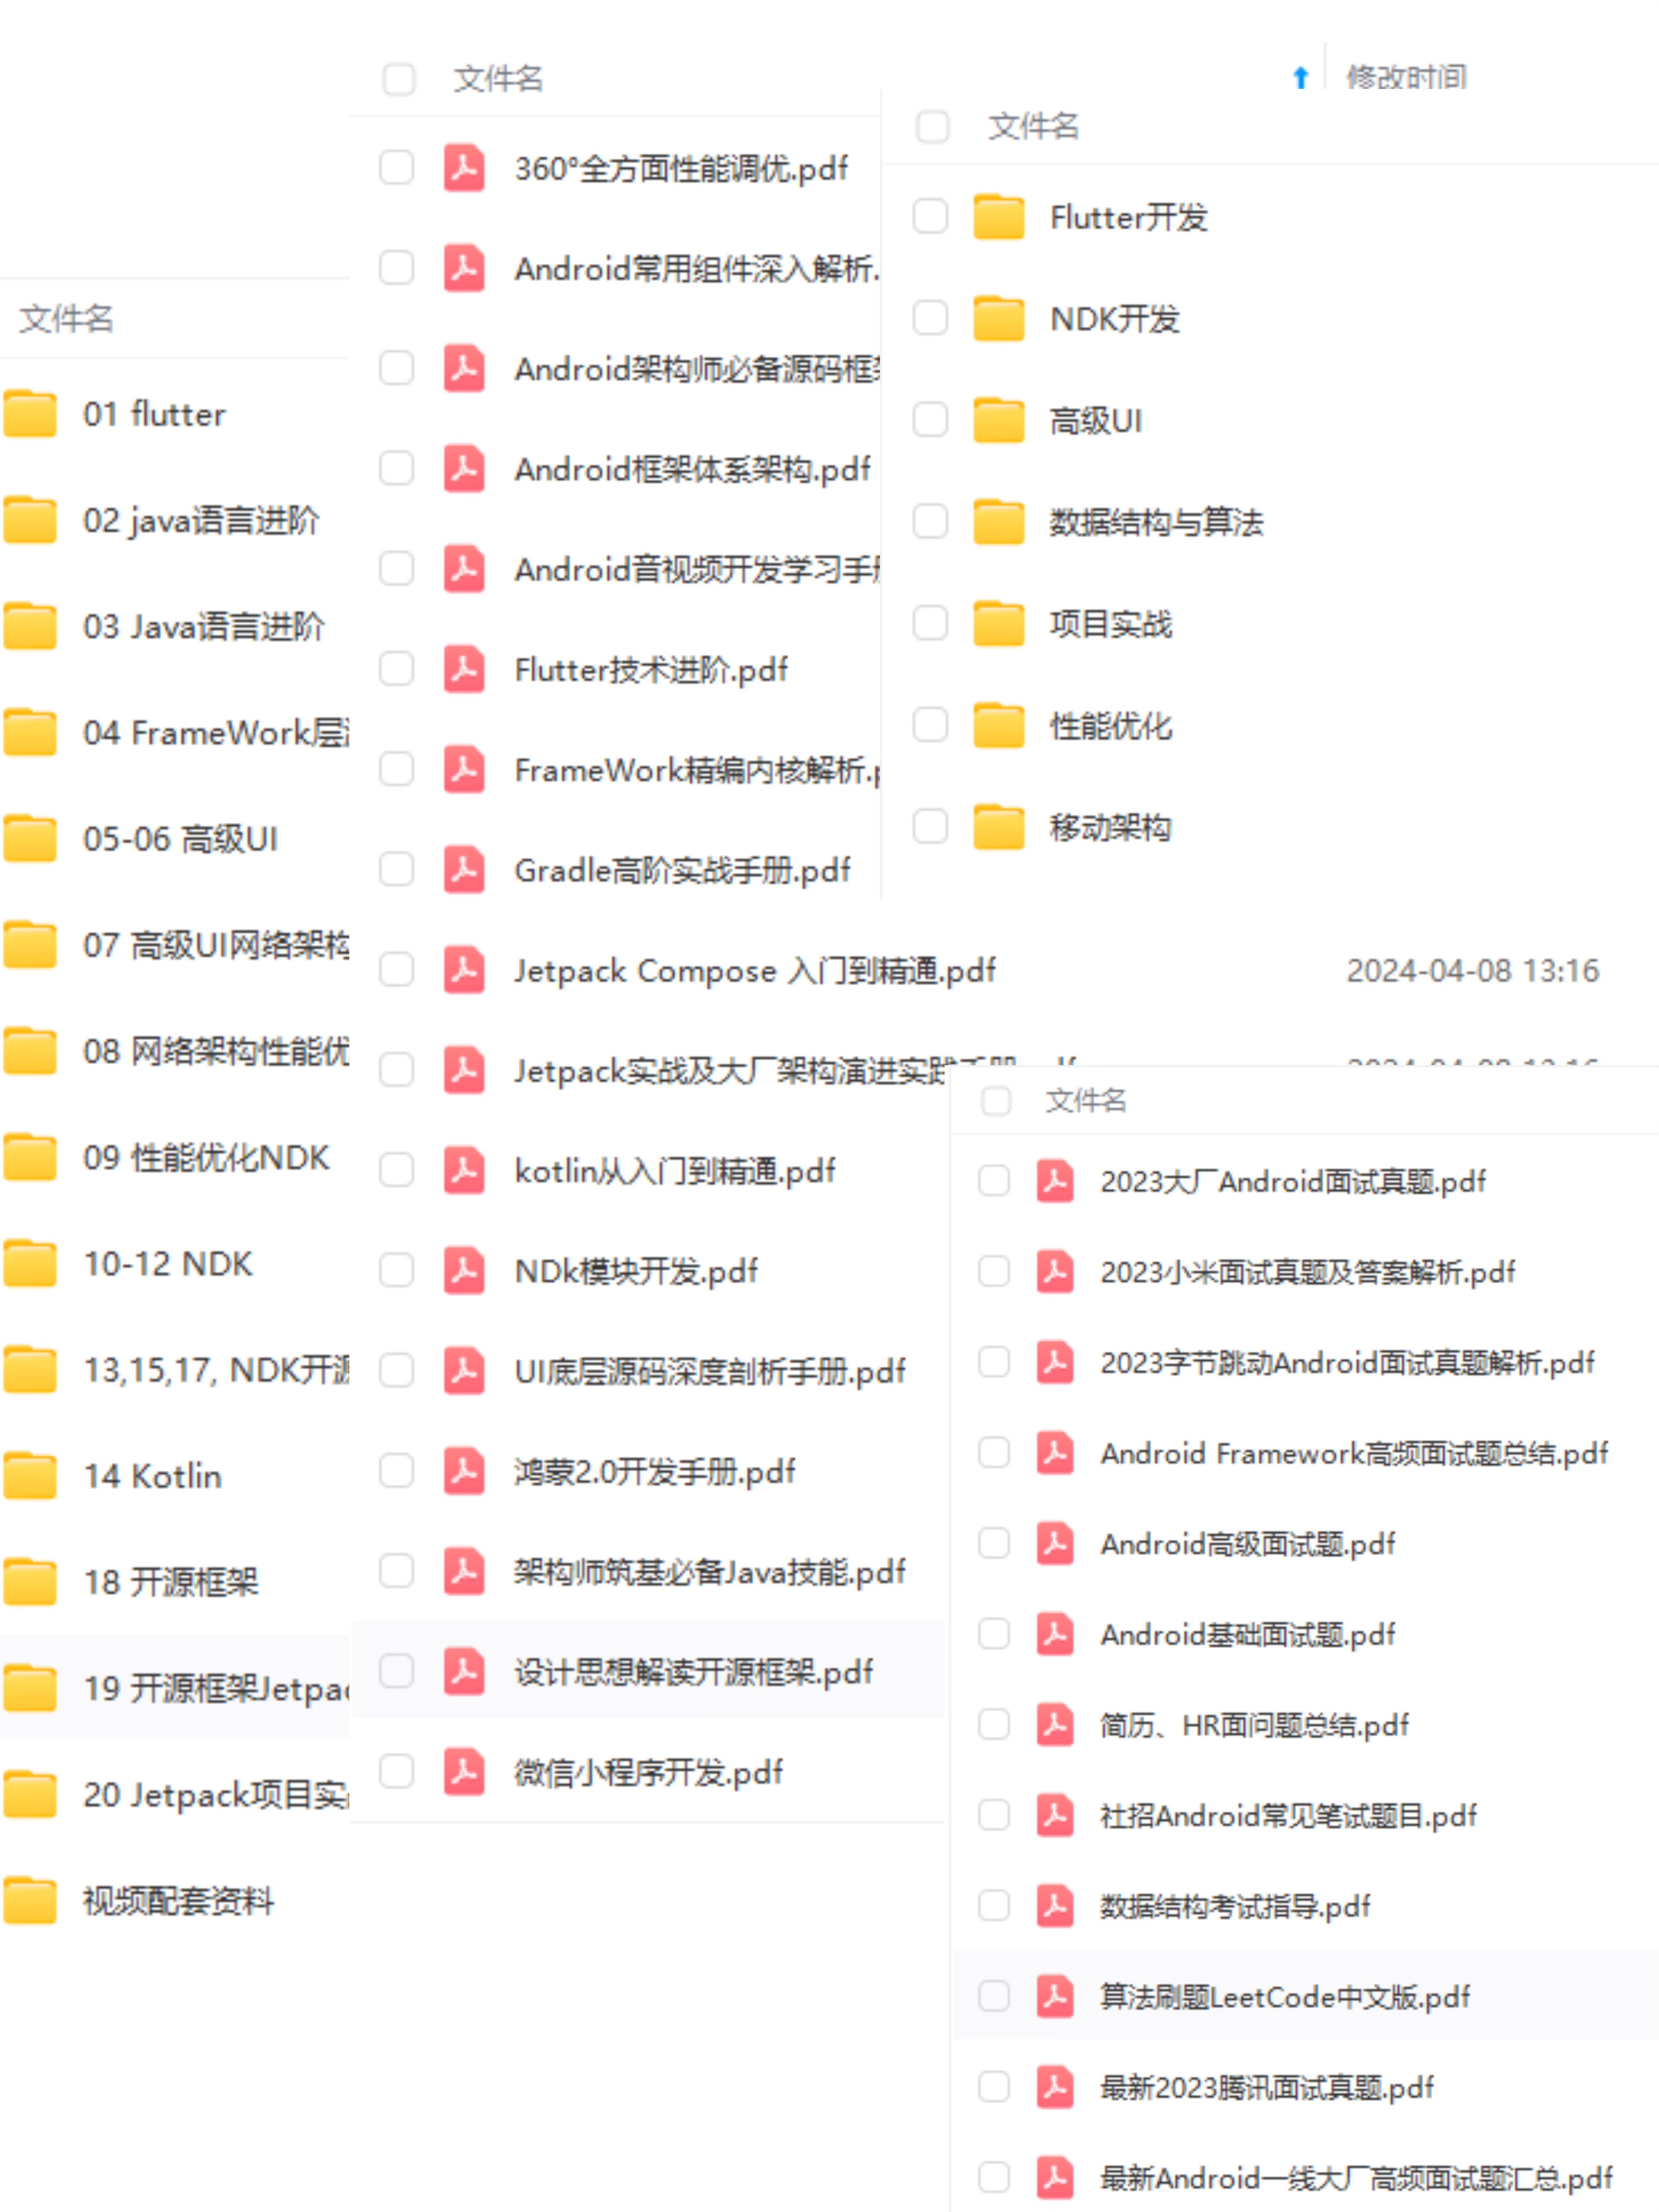 一个人可以走的很快,但一群人才能走的更远!不论你是正从事IT行业的老鸟或是对IT行业感兴趣的新人
都欢迎加入我们的的圈子(技术交流、学习资源、职场吐槽、大厂内推、面试辅导),让我们一起学习成长!
资料⬅专栏获取
rn;
}
openAlbum();
break;
default:
break;
}
}
这里我们同样要对权限通过和不通过做处理,这一步弄清楚之后,就是真的要去打开相册了,调用openAlbum方法,方法代码如下:
/**
- 打开相册
*/
private void openAlbum() {
startActivityForResult(CameraUtils.getSelectPhotoIntent(), SELECT_PHOTO_CODE);
}
一句话就搞定了,不过这里我用的startActivityForResult是已经过时的API了,但是还是可以用的,你也可以用新的API。当我们选择了一个图片之后会返回一个结果,也在onActivityResult回调中,那么我们在这个里面再加一个case。
case SELECT_PHOTO_CODE:
//相册中选择图片返回
modifyAvatar(CameraUtils.getImageOnKitKatPath(data, this));
break;
这应该很好理解吧,然后我们保存返回的图片路径,这里又用到一个方法。方法代码如下:
/**
- 修改头像
*/
private void modifyAvatar(String imagePath) {
if (!TextUtils.isEmpty(imagePath)) {
//保存到数据表中
modifyContent(2, imagePath);
Log.d(TAG, "modifyAvatar: " + imagePath);
} else {
showMsg(“图片获取失败”);
}
}
这里是修改头像,如果获取到的图片不是空的就调用modifyContent方法去保存,方法代码如下:
/**
-
修改内容
-
@param type 类型 0:昵称 1:简介 2: 头像
-
@param content 修改内容
*/
private void modifyContent(int type, String content) {
if (type == 0) {
localUser.setNickname(content);
} else if (type == 1) {
localUser.setIntroduction(content);
} else if (type == 2) {
localUser.setAvatar(content);
}
homeViewModel.updateUser(localUser);
homeViewModel.failed.observe(this, failed -> {
dismissLoading();
if (“200”.equals(failed)) {
showMsg(“修改成功”);
}
});
}
因为要修改的三个数据都是字符串,所以我们可以写一个通用方法,用一个type来区分保存。这样就只用修改一个值了。虽然从代码上看像是俄罗斯套娃,但是逻辑就是这样的。
到这里为止,通过相册选取方式修改头像就写完了,下面来看通过相机拍照修改头像。运行效果如下图所示:
③ 相机拍照
回到我们之前的修改用户信息弹窗,现在第一个方法已经不报错了,下面写第二个方法cameraPhoto,代码如下:
/**
- 相册拍照
*/
private void cameraPhoto() {
modifyUserInfoDialog.dismiss();
if (!isAndroid6()) {
//打开相机
openCamera();
return;
}
if (!hasPermission(PermissionUtils.CAMERA)) {
requestPermission(PermissionUtils.CAMERA);
return;
}
//打开相机
openCamera();
}
这里的逻辑我想不用再重复了,一目了然。下面是相机权限的回调,在onRequestPermissionsResult中增加一个case,代码如下:
case PermissionUtils.REQUEST_CAMERA_CODE:
if (grantResults[0] != PackageManager.PERMISSION_GRANTED) {
showMsg(“您拒绝了相机权限,无法打开相机,抱歉。”);
return;
}
openCamera();
break;
如果通过权限就打开相机,打开相机要比相册麻烦一些,openCamera方法代码如下:
/**
- 调起相机拍照
*/
private void openCamera() {
Intent captureIntent = new Intent(MediaStore.ACTION_IMAGE_CAPTURE);
// 判断是否有相机
if (captureIntent.resolveActivity(getPackageManager()) != null) {
File photoFile = null;
Uri photoUri = null;
if (isAndroid10()) {
// 适配android 10 创建图片地址uri,用于保存拍照后的照片 Android 10以后使用这种方法
photoUri = getContentResolver().insert(Environment.getExternalStorageState().equals(Environment.MEDIA_MOUNTED) ?
MediaStore.Images.Media.EXTERNAL_CONTENT_URI : MediaStore.Images.Media.INTERNAL_CONTENT_URI, new ContentValues());
} else {
photoFile = createImageFile();
if (photoFile != null) {
mCameraImagePath = photoFile.getAbsolutePath();
if (isAndroid7()) {
//适配Android 7.0文件权限,通过FileProvider创建一个content类型的Uri
photoUri = FileProvider.getUriForFile(this, getPackageName() + “.fileprovider”, photoFile);
} else {
photoUri = Uri.fromFile(photoFile);
}
}
}
mCameraUri = photoUri;
if (photoUri != null) {
captureIntent.putExtra(MediaStore.EXTRA_OUTPUT, photoUri);
captureIntent.addFlags(Intent.FLAG_GRANT_WRITE_URI_PERMISSION);
最后
小编这些年深知大多数初中级Android工程师,想要提升自己,往往是自己摸索成长,自己不成体系的自学效果低效漫长且无助。
因此我收集整理了一份《2024年Android移动开发全套学习资料》,初衷也很简单,就是希望能够帮助到想自学提升又不知道该从何学起的朋友。
[外链图片转存中…(img-uwUVa8Rx-1719078053200)]一个人可以走的很快,但一群人才能走的更远!不论你是正从事IT行业的老鸟或是对IT行业感兴趣的新人
都欢迎加入我们的的圈子(技术交流、学习资源、职场吐槽、大厂内推、面试辅导),让我们一起学习成长!
资料⬅专栏获取
这篇关于Android MVVM框架搭建(七)Permission、AlertDialog、拍照和相册选取的文章就介绍到这儿,希望我们推荐的文章对编程师们有所帮助!


