本文主要是介绍springboot特殊问题处理2——springboot集成flowable实现工作流程的完整教程(一),希望对大家解决编程问题提供一定的参考价值,需要的开发者们随着小编来一起学习吧!
在实际项目开发过程中,流程相关的业务实现采用工作流会异常清晰明了,但是Activity学习成本和开发难度对追求效率的开发工作者来说异常繁琐,但是作为Activity的亲儿子之一的flowable,其轻量化的使用和对应的api会让开发者感受简单,学习成本很低,值得推荐。
本文案基于springboot2.3.12为例讲解,jdk版本要求至少1.8+,mysql为8.0以上。
一.flowable相关官方网址
官方网站(英文):https://www.flowable.com/
第三方中文用户手册(V6.3.0):https://tkjohn.github.io/flowable-userguide/
二.如何集成springboot
1.引入官方jar或者对应springboot的starter
<dependency><groupId>org.flowable</groupId><artifactId>flowable-spring-boot-starter</artifactId><version>${flowable.version}</version>
</dependency>
我这边根据项目需要只引入相关的flowable-engine
<dependency><groupId>org.flowable</groupId><artifactId>flowable-engine</artifactId><version>6.3.0</version><exclusions><exclusion><groupId>org.mybatis</groupId><artifactId>mybatis</artifactId></exclusion><exclusion><groupId>mysql</groupId><artifactId>mysql-connector-java</artifactId></exclusion></exclusions></dependency>2. 配置项目需要的数据
- flowable.properties
flowable.url=jdbc:mysql://10.1.0.223:3306/test?autoReconnect=true&useUnicode=true&characterEncoding=utf8&zeroDateTimeBehavior=CONVERT_TO_NULL&useSSL=false&serverTimezone=CTT&nullCatalogMeansCurrent=true
flowable.username=root
flowable.password=123456
flowable.driverClassName=com.mysql.cj.jdbc.Driver
###生成数据表
flowable.initialize=true
flowable.name=flowable
###动态生成流程执行图(定义中文字体为宋体,防止生成的图片资源存在乱码)
flowable.activityFontName=\u5B8B\u4F53
flowable.labelFontName=\u5B8B\u4F53
flowable.annotationFontName=\u5B8B\u4F53
flowable.xml.encoding=UTF-8- 项目结构如下
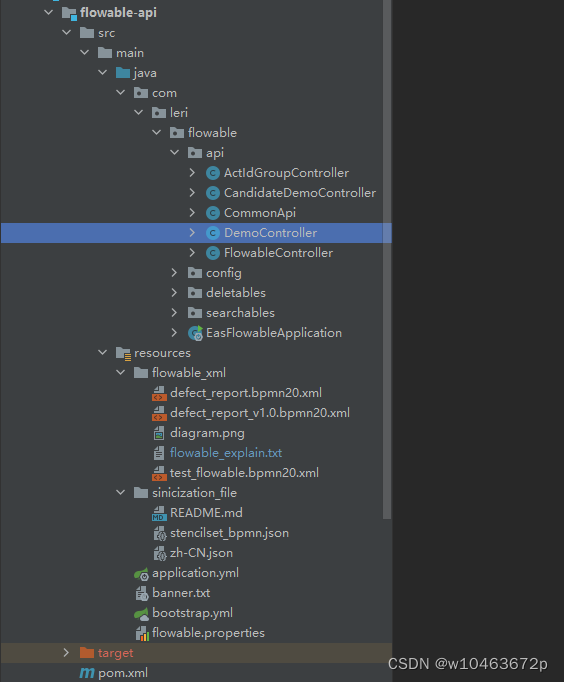
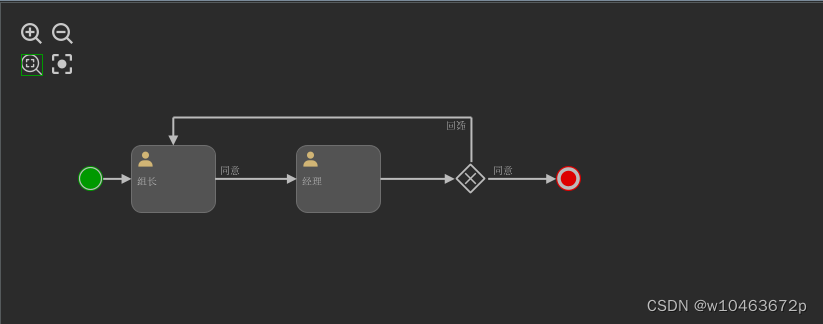
- 测试需要的流程图
三.flowable项目正确开发使用流程
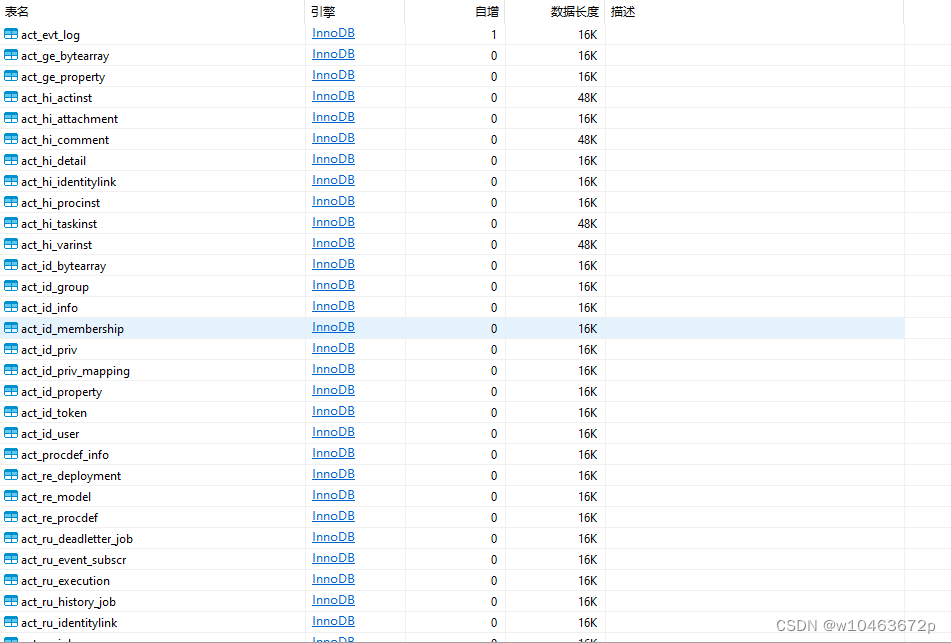
1.首先正确配置flowable.properties该文件,默认在启动项目时会生成34张工作流数据表(均已ACT_开头)
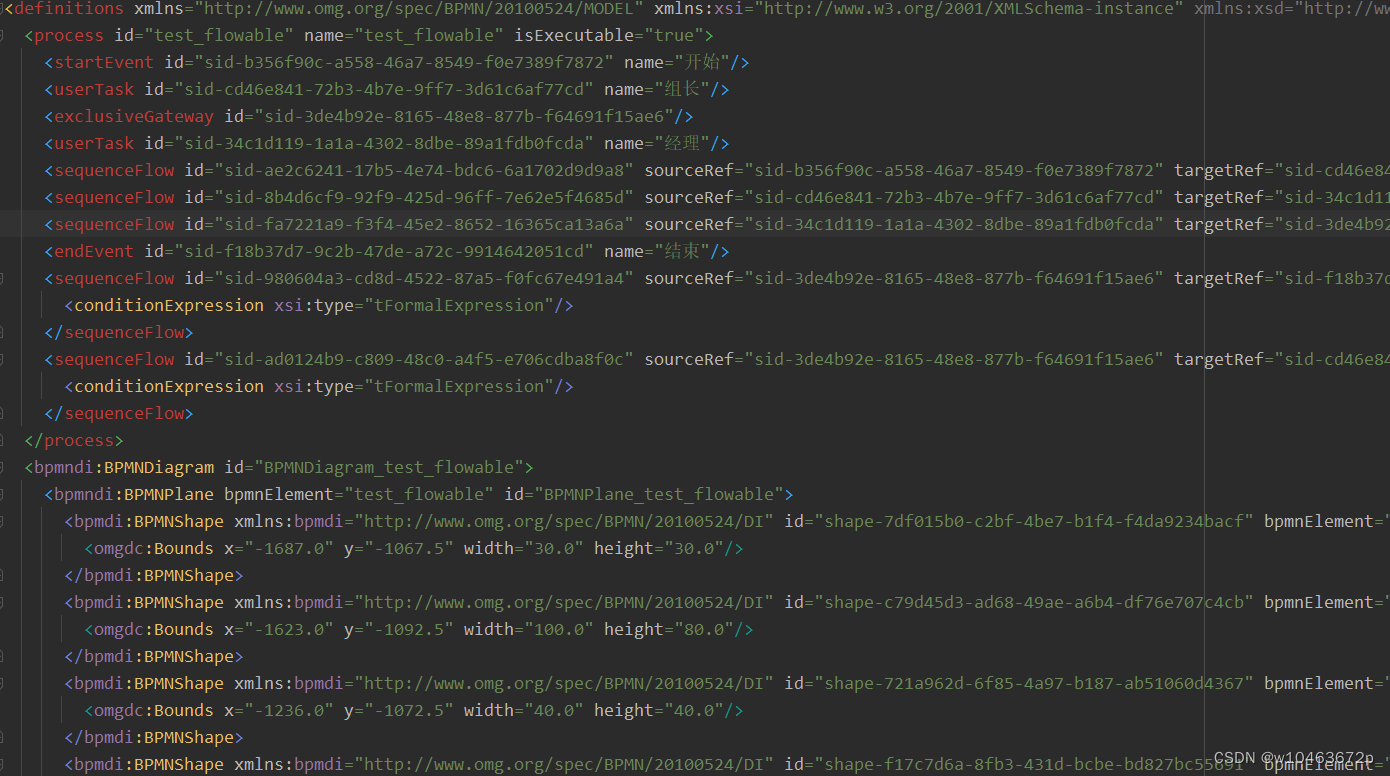
2.利用tomcat启动flowable-admin.war,然后用flowable-ui创建对应的bpm文件(或者其他的bpm工具)
3.调用/deployment这个接口,部署已经写好的流程实例,参数参照后台方法说明传递即可
4.分别查看act_re_deployment,act_re_procdef和act_ge_bytearray数据表,如果生成了相关数据即代表部署成功

5.最后就可以在相关模块创建任务开始动态执行流程
四.flowable流程业务实现以及部分关键代码展示
以下关键代码,需要特意说明的是:
-
ProcessEngine是flowable提供对公开BPM和工作流操作的所有服务的访问关键对象。
-
FlowProcessDiagramGenerator是flowable生成流程实例图片的关键,继承自
org.flowable.image.impl.DefaultProcessDiagramGenerator类
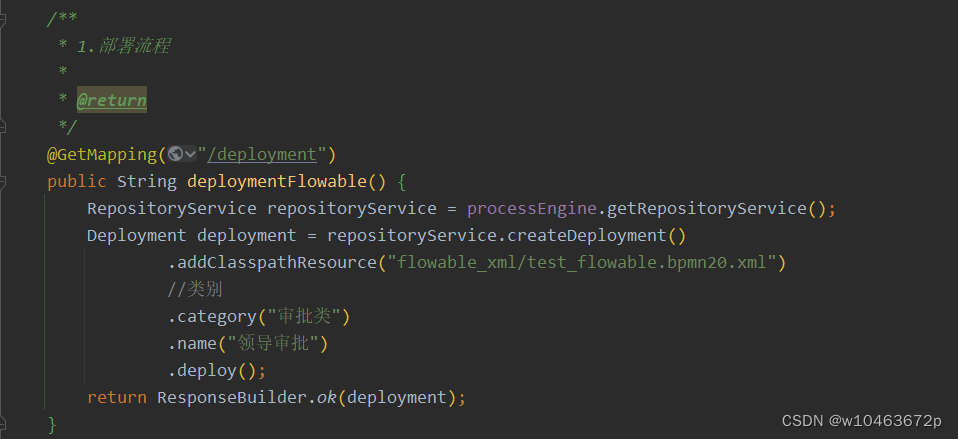
1.流程部署
/*** 1.部署流程** @return*/@GetMapping("/deployment")public String deploymentFlowable() {RepositoryService repositoryService = processEngine.getRepositoryService();Deployment deployment = repositoryService.createDeployment().addClasspathResource("flowable_xml/test_flowable.bpmn20.xml")//类别.category("审批类").name("领导审批").deploy();return ResponseResult.ok(deployment);}2. 查询流程定义
    /*** 2.查询流程定义** @return*/@GetMapping("/queryDeployment")public String queryFlowableDeploy() {RepositoryService repositoryService = processEngine.getRepositoryService();//查询所有定义的流程List<ProcessDefinition> list = repositoryService.createProcessDefinitionQuery().list();//查询单个定义的流程/*ProcessDefinition processDefinition = repositoryService.createProcessDefinitionQuery().deploymentId("5").singleResult();*/
//        System.out.println("Found process definition : " + processDefinition.getName());return ResponseResult.ok(list);}
3.启动流程实例
/*** 3.启动流程实例** @return*/@RequestMapping("/start/instance")public String startProcessInstance() {RuntimeService runtimeService = processEngine.getRuntimeService();//要启动流程实例,需要提供一些初始化流程变量,自定义Map<String, Object> variables = new HashMap<String, Object>(0);variables.put("employee", "工作组");variables.put("nrOfHolidays", 8);variables.put("description", "请假");ProcessInstance processInstance =runtimeService.startProcessInstanceByKey("leader_approval_key", variables);return ResponseResult.ok(processInstance.getName());}4.通过流程执行人员查询任务和流程变量
    /*** 通过流程人员定义查询任务和流程变量** @return*/@RequestMapping("/query/task")public String queryProcessInstance() {TaskService taskService = processEngine.getTaskService();//通过组查询任务表
//        List<Task> tasks = taskService.createTaskQuery().taskCandidateGroup("managers").list();//通过人查询单个任务Task task = taskService.createTaskQuery().taskAssignee("小王").singleResult();//通过任务id查询流程变量Map<String, Object> processVariables = taskService.getVariables(task.getId());return ResponseResult.ok(processVariables);}
5.通过任务id完成任务
/*** 通过任务id完成任务** @return*/@RequestMapping("/complete/task")public String completeTask(String taskId) {TaskService taskService = processEngine.getTaskService();//领导审批提交的表达信息Map<String, Object> variables = new HashMap<String, Object>(0);taskService.complete(taskId, variables);return ResponseResult.ok();}6.通过流程执行人或者审批人查询审批历史记录
/*** 通过审批人获取历史任务数据** @param name* @return*/@RequestMapping("/history/task")public String getHistoryTask(@RequestParam("name") String name) {HistoryService historyService = processEngine.getHistoryService();//历史任务流程——流程idList<HistoricActivityInstance> activities =historyService.createHistoricActivityInstanceQuery().processInstanceId("2501").finished().orderByHistoricActivityInstanceEndTime().asc().list();//历史任务List<HistoricTaskInstance> list = historyService.createHistoricTaskInstanceQuery().taskAssignee(name).list();return ResponseResult.ok(list.toString());}7.通过流程id查询流程执行图(多种获取方式)
/*** 通过流程id获取流程资源** @return*/@RequestMapping("/process/resource")public void getProcessResource(HttpServletResponse response) throws IOException {RepositoryService repositoryService = processEngine.getRepositoryService();/*ProcessDefinition processDefinition = repositoryService.createProcessDefinitionQuery().deploymentId("5085").processDefinitionId("defect_report_flowable:1:5088")
//                .processDefinitionKey("leader_approval_key")
//                .deploymentId("5").singleResult();*/BpmnModel bpmnModel = repositoryService.getBpmnModel("defect_report_flowable:1:4");InputStream imageStream = processDiagramGenerator.generateDiagram(bpmnModel);/*String diagramResourceName = processDefinition.getDiagramResourceName();InputStream imageStream = repositoryService.getResourceAsStream(processDefinition.getDeploymentId(), diagramResourceName);*/FileOutputStream fos = new FileOutputStream("D:\\data\\22222.png");byte[] b = new byte[1024];int leng = -1;while ((leng = imageStream.read(b)) != -1) {fos.write(b, 0, leng);}fos.flush();imageStream.close();fos.close();/*//文件流直接写出ByteArrayOutputStream baos = new ByteArrayOutputStream();OutputStream os = response.getOutputStream();int ch = 0;while (-1 != (ch = imageStream.read())) {baos.write(ch);}os.write(baos.toByteArray());imageStream.close();baos.close();os.close();*/}
五.其他相关的功能和问题持续更新,有问题私信
1.生成流程实例图片的关键代码
@Service
public class FlowProcessDiagramGenerator extends DefaultProcessDiagramGenerator {private static final String IMAGE_TYPE = "png";@Value("${flowable.activityFontName}")private String activityFontName;@Value("${flowable.labelFontName}")private String labelFontName;@Value("${flowable.annotationFontName}")private String annotationFontName;@Value("${flowable.xml.encoding}")private String encoding;@Autowiredprivate ProcessEngine processEngine;/*** 生成执行动态图片流** @param processDefinitionId 流程定义的id——xml文件规固定的key* @param businessKey* @return*/public InputStream generateActiveDiagram(String processDefinitionId, String businessKey) {RuntimeService runtimeService = processEngine.getRuntimeService();HistoryService historyService = processEngine.getHistoryService();RepositoryService repositoryService = processEngine.getRepositoryService();//1.获取当前的流程定义ProcessInstance processInstance = runtimeService.createProcessInstanceQuery().processDefinitionId(processDefinitionId)
//                .processInstanceId(processInstanceId).processInstanceBusinessKey(businessKey).singleResult();//流程实例执行的实例idString processId = null;List<String> activeActivityIds = new ArrayList<>();List<String> highLightedFlows = new ArrayList<>();//3. 获取流程定义id和高亮的节点idif (processInstance != null) {//3.1. 正在运行的流程实例processId = processInstance.getProcessInstanceId();//2.获取所有的历史轨迹线对象List<HistoricActivityInstance> historicSquenceFlows = historyService.createHistoricActivityInstanceQuery()
//                .processDefinitionId(processInstanceId).processInstanceId(processId).activityType(BpmnXMLConstants.ELEMENT_SEQUENCE_FLOW).list();historicSquenceFlows.forEach(historicActivityInstance -> highLightedFlows.add(historicActivityInstance.getActivityId()));activeActivityIds = runtimeService.getActiveActivityIds(processId);} else {//3.2. 已经结束的流程实例HistoricProcessInstance historicProcessInstance = historyService.createHistoricProcessInstanceQuery().processDefinitionId(processDefinitionId)
//                    .processInstanceId(processId).processInstanceBusinessKey(businessKey).singleResult();if(historicProcessInstance == null){throw new MessageCodeException(MessageCode.FLOWABLE_PROCESS_IS_RELEASE_SUCCESS);}processId = historicProcessInstance.getId();//3.3. 获取结束节点列表List<HistoricActivityInstance> historicEnds = historyService.createHistoricActivityInstanceQuery().processInstanceId(processId).activityType(BpmnXMLConstants.ELEMENT_EVENT_END).list();List<String> finalActiveActivityIds = activeActivityIds;historicEnds.forEach(historicActivityInstance -> finalActiveActivityIds.add(historicActivityInstance.getActivityId()));}//4. 获取bpmnModel对象BpmnModel bpmnModel = repositoryService.getBpmnModel(processDefinitionId);//模型 活动节点 高亮线return generateDiagram(bpmnModel, IMAGE_TYPE, activeActivityIds,highLightedFlows, activityFontName, labelFontName, annotationFontName,null, 1.0);}/*** 生成工作流程图** @param bpmnModel 模型* @return*/public InputStream generateDiagram(BpmnModel bpmnModel) {return generateDiagram(bpmnModel, IMAGE_TYPE, activityFontName,labelFontName, annotationFontName,null, 1.0);}
这篇关于springboot特殊问题处理2——springboot集成flowable实现工作流程的完整教程(一)的文章就介绍到这儿,希望我们推荐的文章对编程师们有所帮助!


