本文主要是介绍根据 axis2自动生成wsdl的java类,编写客户端,希望对大家解决编程问题提供一定的参考价值,需要的开发者们随着小编来一起学习吧!
因为发现很多人现在 对webservice的调用都是死记硬背,有些代码又写的很长。为了能实现跨平台操作 我们这边选用java来做。
一下这些都是自己原创心得,所有有什么不对的地方望各位指出。
根据 axis2自动生成wsdl的java类,编写客户端
1.首先必须安装java客户端(这是基础,就不说了)
2.查看webservice 这里随便找了2个用不同技术写的webservice,以便做对比
2.1 用java 自带的JAX-WS写的 webservice:
<?xml version="1.0" encoding="UTF-8" ?>
- <!--  Published by JAX-WS RI at http://jax-ws.dev.java.net. RI's version is JAX-WS RI 2.2.4-b01. -->
- <!--  Generated by JAX-WS RI at http://jax-ws.dev.java.net. RI's version is JAX-WS RI 2.2.4-b01. -->
- <definitions xmlns:wsu="http://docs.oasis-open.org/wss/2004/01/oasis-200401-wss-wssecurity-utility-1.0.xsd" xmlns:wsp="http://www.w3.org/ns/ws-policy" xmlns:wsp1_2="http://schemas.xmlsoap.org/ws/2004/09/policy" xmlns:wsam="http://www.w3.org/2007/05/addressing/metadata" xmlns:soap="http://schemas.xmlsoap.org/wsdl/soap/" xmlns:tns="http://ws.esb.bsoft.com/" xmlns:xsd="http://www.w3.org/2001/XMLSchema" xmlns="http://schemas.xmlsoap.org/wsdl/" targetNamespace="http://ws.xx.sxxxx.com/" name="WebServiceEntryService">
- <types>
- <xsd:schema><xsd:import namespace="http://jaxb.dev.java.net/array" schemaLocation="http://xxx.xxx.xxx.xxx:12304/WebServiceEntry?xsd=1" /> </xsd:schema></types>
- <message name="invoke"><part name="appId" type="xsd:string" /> <part name="pwd" type="xsd:string" /> <part name="service" type="xsd:string" /> <part name="method" type="xsd:string" /> <part xmlns:ns1="http://jaxb.dev.java.net/array" name="param" type="ns1:stringArray" /> </message>
- <message name="invokeResponse"><part name="return" type="xsd:string" /> </message>
- <message name="invokeWithSingleParam"><part name="appId" type="xsd:string" /> <part name="pwd" type="xsd:string" /> <part name="service" type="xsd:string" /> <part name="method" type="xsd:string" /> <part name="param" type="xsd:string" /> </message>
- <message name="invokeWithSingleParamResponse"><part name="return" type="xsd:string" /> </message>
- <portType name="WebServiceEntry">
- <operation name="invoke" parameterOrder="appId pwd service method param"><input wsam:Action="http://ws.esb.bsoft.com/WebServiceEntry/invokeRequest" message="tns:invoke" /> <output wsam:Action="http://ws.esb.bsoft.com/WebServiceEntry/invokeResponse" message="tns:invokeResponse" /> </operation>
- <operation name="invokeWithSingleParam" parameterOrder="appId pwd service method param"><input wsam:Action="http://ws.esb.bsoft.com/WebServiceEntry/invokeWithSingleParamRequest" message="tns:invokeWithSingleParam" /> <output wsam:Action="http://ws.esb.bsoft.com/WebServiceEntry/invokeWithSingleParamResponse" message="tns:invokeWithSingleParamResponse" /> </operation></portType>
- <binding name="WebServiceEntryPortBinding" type="tns:WebServiceEntry"><soap:binding transport="http://schemas.xmlsoap.org/soap/http" style="rpc" />
- <operation name="invoke"><soap:operation soapAction="" />
- <input><soap:body use="literal" namespace="http://ws.esb.bsoft.com/" /> </input>
- <output><soap:body use="literal" namespace="http://ws.esb.bsoft.com/" /> </output></operation>
- <operation name="invokeWithSingleParam"><soap:operation soapAction="" />
- <input><soap:body use="literal" namespace="http://ws.esb.bsoft.com/" /> </input>
- <output><soap:body use="literal" namespace="http://ws.esb.bsoft.com/" /> </output></operation></binding>
- <service name="WebServiceEntryService">
- <port name="WebServiceEntryPort" binding="tns:WebServiceEntryPortBinding"><soap:address location="http://xxx.xx.xx.xx:12304/WebServiceEntry" /> </port></service></definitions>
来现在我们来解析这个webservice。首先它有invoke(string appId,string pwd,string service,string method,String[] param) 对应的返回方法是String invokeResponse 和invokeWithSingleParam(string appId,string pwd,string service,string method) 返回 String invokeWithSingleParamResponse 这两个方法 。
至于还不知道为什么是这两个方法的的童鞋,其实就是从下往上看 webservice地址 命名空间 指定引用。。。。。。
这样一理,看上去是蛮有调理。但是这一段没法直接调用,那怎么办呢?现在就要有请我们的axis出场来解析它了。
2.2 如何解析
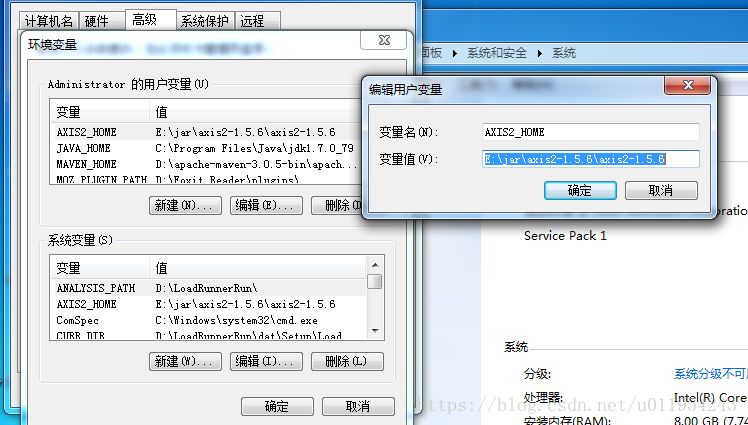
1.下载axis2 这里我用的是1.5.6的版本
无需安装,但是要在我们的环境变量里面设置好
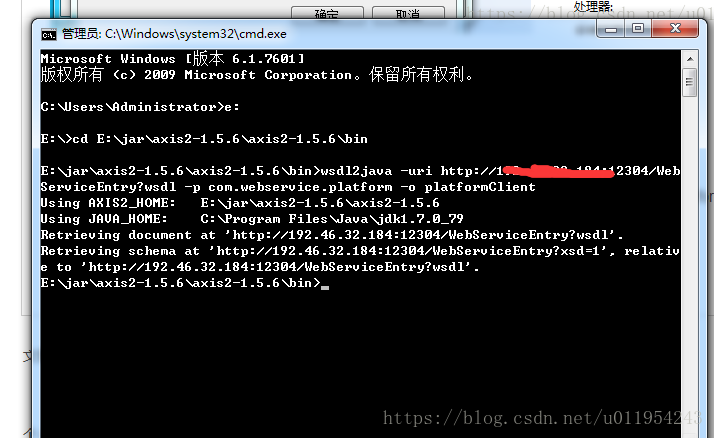
2.cmd命令打开
调试出windows控制台。 查找到axis所在的Bin目录下
输入 wsdl2java -uri http://xxx.xxx.xxx.xx:12304/WebServiceEntry?wsdl -p com.webservice.platform -o platformClient
这时候客户端java类就会自动创建了
现在就来解读一下上面这段命令:
uri :不用说了webservice地址
-p: 类的包名
-o:生成的一系列文件保存的根目录
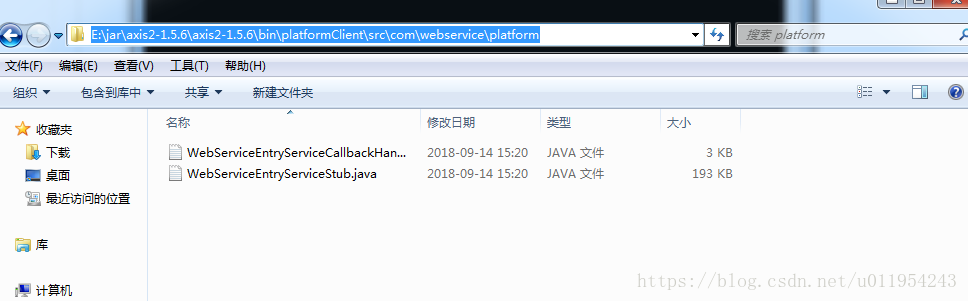
执行完之后我们就发现多了一个目录,而此时的客户端文件也就创建好了
完成一半了。接下来到了我们最重要的一步,读懂客户端创建的webservice类。
3.怎样去看
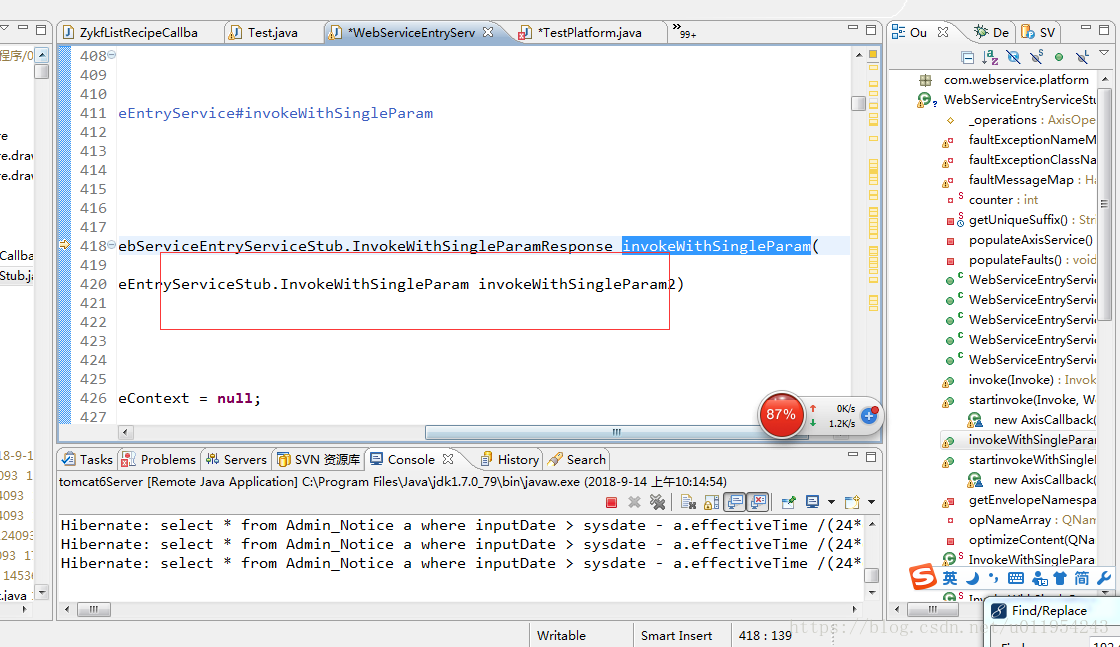
和看webservice的时候一样,我们首先找到出参的地方 也就是那个出参方法。 我这里先写出客户端调用的方法。待会再一一解释。
假设我们调用的是invokeWithSingleParam 这个方法。上面说的,这个方法所对应的返回值是从InvokeWithSingleParamResponse 这里来的。所以我们先定位InvokeWithSingleParamResponse。同时也要找到InvokeWithSingleParamResponse这个实例的对象是如何创建的。
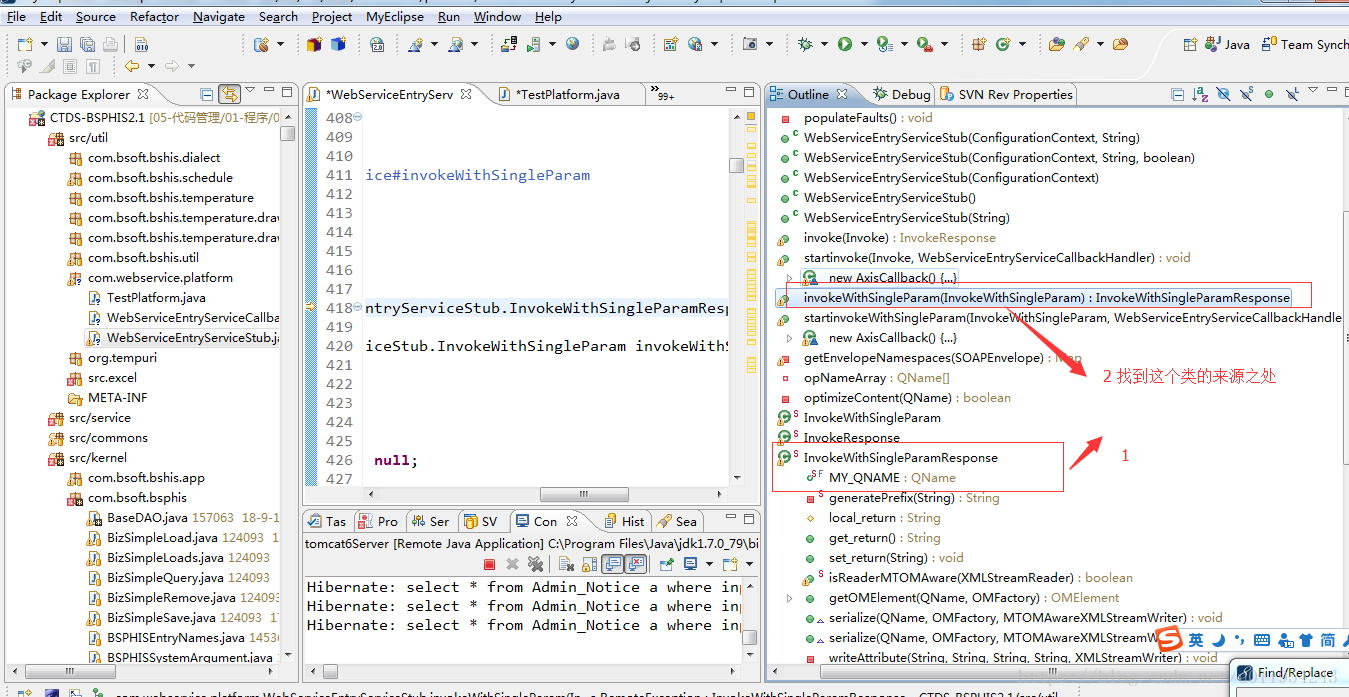
发现果然这里有get_return()这个方法。
找到了 那我们就开始了。先把该有的框架(最后返回的值是从哪里返回的)写好
package com.webservice.platform;import com.webservice.platform.WebServiceEntryServiceStub.InvokeWithSingleParamResponse;public class TestPlatform {/*** @param args* @author H7_N18* @time 2018-9-14下午3:28:45* @description*/public static void main(String[] args) {// TODO Auto-generated method stubWebServiceEntryServiceStub stub = new WebServiceEntryServiceStub();InvokeWithSingleParamResponse invokeWithSingleParamResponse = stub.invokeWithSingleParam(invokeWithSingleParam2);String resXML = invokeWithSingleParamResponse.get_return();System.out.println("返回的xml是:"+resXML);}}此时这个invokeWithSingleParam2 又是怎么来的呢?想想应该也知道这是传递参数值的方法,那我们go on !
在我们自动生成类的方法里面写了,这个类是WebServiceEntryServiceStub.InvokeWithSingleParam 也是WebServiceEntryServiceStub的一个内部类哦。
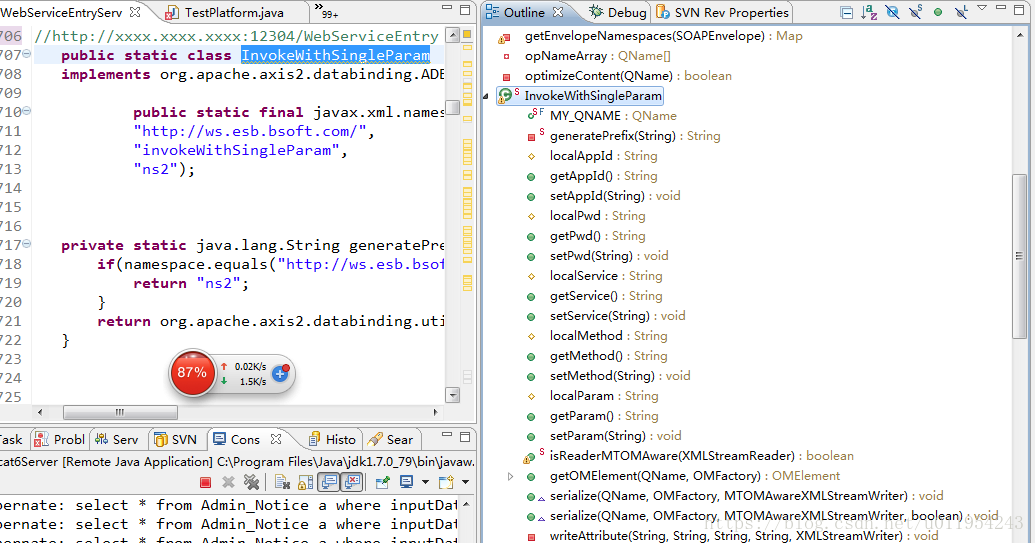
果然这些设置参数值的都在这里。
OK 那就一气呵成。代码如下:
package com.webservice.platform;import java.rmi.RemoteException;import org.apache.axis2.AxisFault;import com.webservice.platform.WebServiceEntryServiceStub.InvokeWithSingleParam;
import com.webservice.platform.WebServiceEntryServiceStub.InvokeWithSingleParamResponse;public class TestPlatform {/*** @param args* @author H7_N18* @time 2018-9-14下午3:28:45* @description*/public static void main(String[] args) {// TODO Auto-generated method stubString resXML=null;try {WebServiceEntryServiceStub stub = new WebServiceEntryServiceStub();InvokeWithSingleParam invokeWithSingleParam2 = new InvokeWithSingleParam();invokeWithSingleParam2.setAppId("appid");invokeWithSingleParam2.setPwd("pwd");invokeWithSingleParam2.setService("service");invokeWithSingleParam2.setMethod("method");invokeWithSingleParam2.setParam("<messages><setdetails><ids>name</ids>" +"</setdetails><setdetails><ids>name</ids></setdetails></messages>");InvokeWithSingleParamResponse invokeWithSingleParamResponse = stub.invokeWithSingleParam(invokeWithSingleParam2);resXML = invokeWithSingleParamResponse.get_return();} catch (AxisFault e) {// TODO Auto-generated catch blocke.printStackTrace();} catch (RemoteException e) {// TODO Auto-generated catch blocke.printStackTrace();}System.out.println("返回的xml是:"+resXML);}}
返回的xml:
SLF4J: This version of SLF4J requires log4j version 1.2.12 or later. See also http://www.slf4j.org/codes.html#log4j_version
log4j:WARN No appenders could be found for logger (org.apache.axis2.description.AxisService).
log4j:WARN Please initialize the log4j system properly.
返回的xml是:invoke failure:beanName[service] not found on server registry
服务返回的信息是 这个service未找到(因为我随便输的)。
完成了!
这篇关于根据 axis2自动生成wsdl的java类,编写客户端的文章就介绍到这儿,希望我们推荐的文章对编程师们有所帮助!


