本文主要是介绍《Linux运维总结:prometheus+altermanager+webhook-dingtalk配置文件详解》,希望对大家解决编程问题提供一定的参考价值,需要的开发者们随着小编来一起学习吧!
总结:整理不易,如果对你有帮助,可否点赞关注一下?
更多详细内容请参考:《Linux运维篇:Linux系统运维指南》
一、prometheus配置文件
Prometheus的配置文件是prometheus.yml,在启动时指定相关的文件,可对配置内容进行加载。
global:全局配置
alerting:告警配置
rule_files:规则配置
scrape_configs:目标拉取配置
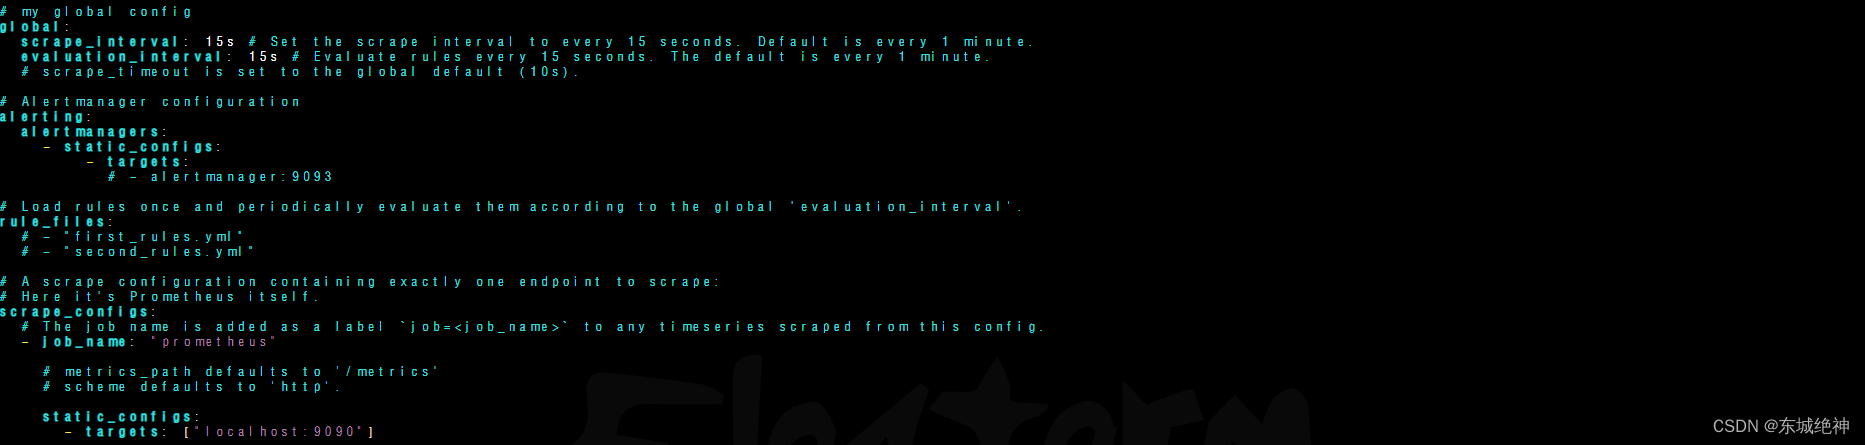
默认prometheus配置文件内容如下:
1.1、global全局配置
global:scrape_interval: 15s # 全局默认的数据拉取间隔evaluation_interval: 15s # 全局默认的规则(主要是报警规则)拉取间隔
1.2、alerting告警配置
说明:用于设置Prometheus与Alertmanager的通信。在Prometheus的整体架构中,Prometheus会根据配置的告警规则触发警报并发送到独立的Alertmanager组件,Alertmanager将对告警进行管理并发送给相关的用户。
1、alertmanager单实例
alerting:alertmanagers:- static_configs:- targets:- alertmanager:9093
2、alertmanager集群
alerting:alertmanagers:- static_configs:- targets:- alertmanager01:9093- alertmanager02:9093- alertmanager03:9093
说明:主机名可以使用ip替换。
1.3、rule_files规则配置
说明:主要是用来设置rule_files告警规则,基于设定什么指标进行报警(类似触发器trigger)。这里设定好规则以后,prometheus会根据全局global设定的evaluation_interval参数进行扫描加载,规则改动后会自动加载。其报警媒介和route路由由alertmanager插件实现。
方式一:
rule_files:- "first_rules.yml"- "second_rules.yml"
方式二:
rule_files:- "/etc/prometheus/rules/*.yml"
告警规则文件,示例如下:

说明:可以在labels字段下设置标签。
1.4、scrape_configs目标拉取配置
说明:scrape_config: 定义数据抓取目标的配置。

1.4.1、基于static_configs静态配置
示例如下:
scrape_configs:- job_name: 'example_app'scrape_interval: 5sstatic_configs:- targets: ['app1.example.com:8080', 'app2.example.com:8080']labels:env: 'onLine'app: 'app1'
1.4.2、基于file_sd_config动态配置
用json格式文件发现方式发现服务,如下所示:
- job_name: "blackbox-exporter-http"metrics_path: /probeparams:module: [http_2xx]file_sd_configs:- files:- /etc/prometheus/conf.d/blackbox-exporter-http/*.jsonrelabel_configs:- source_labels: [__address__]target_label: __param_target- source_labels: [__param_target]target_label: instance- target_label: __address__replacement: 192.168.1.111:9115
node-exporter.json文件中定义目标和标签,如下所示:
vim  node-exporter.json
[{"targets": ["192.168.1.1:9100", "192.168.1.2:9100"],"labels": {"env": "prod","region": "us-east"}},{"targets": ["192.168.1.3:9100"],"labels": {"env": "dev","region": "us-west"}}
]
用yaml格式文件发现方式发现服务,如下所示:
- job_name: "blackbox-exporter-http"metrics_path: /probeparams:module: [http_2xx]file_sd_configs:- files:- /etc/prometheus/conf.d/blackbox-exporter-http/*.ymlrelabel_configs:- source_labels: [__address__]target_label: __param_target- source_labels: [__param_target]target_label: instance- target_label: __address__replacement: 192.168.1.111:9115
node-exporter.yaml文件中定义目标和标签,如下所示:
vim  node-exporter.yml
- targets: ['192.168.1.101:9100', '192.168.1.102:9100']labels:environment: productionteam: monitoring
1.4.3、基于consul_sd_config动态配置
1.4.4、基于其它方式动态配置
1.4.5、relabel_configs配与及使用
1.4.6、prometheus热加载
# 1、在启动时给定--web.enable-lifecycle
# 2、curl -X POST http://192.168.1.201:9090/-/reload
二、altermanager配置文件
Alertmanager 的配置主要包括三部分:
# global:全局配置,包括 resolved 超时时间、SMTP 等。
# route:告警路由规则,根据匹配条件将告警发送到不同接收器。
# receivers:接收器列表,定义各种通知渠道如 email、webhook 等。
默认配置文件如下所示:
global:# The smarthost and SMTP sender used for mail notifications.smtp_smarthost: 'localhost:25'smtp_from: 'alertmanager@example.org'# The root route on which each incoming alert enters.
route:# The root route must not have any matchers as it is the entry point for# all alerts. It needs to have a receiver configured so alerts that do not# match any of the sub-routes are sent to someone.receiver: 'team-X-mails'# The labels by which incoming alerts are grouped together. For example,# multiple alerts coming in for cluster=A and alertname=LatencyHigh would# be batched into a single group.## To aggregate by all possible labels use '...' as the sole label name.# This effectively disables aggregation entirely, passing through all# alerts as-is. This is unlikely to be what you want, unless you have# a very low alert volume or your upstream notification system performs# its own grouping. Example: group_by: [...]group_by: ['alertname', 'cluster']# When a new group of alerts is created by an incoming alert, wait at# least 'group_wait' to send the initial notification.# This way ensures that you get multiple alerts for the same group that start# firing shortly after another are batched together on the first# notification.group_wait: 30s# When the first notification was sent, wait 'group_interval' to send a batch# of new alerts that started firing for that group.group_interval: 5m# If an alert has successfully been sent, wait 'repeat_interval' to# resend them.repeat_interval: 3h# All the above attributes are inherited by all child routes and can# overwritten on each.# The child route trees.routes:# This route performs a regular expression match on alert labels to# catch alerts that are related to a list of services.- matchers:- service=~"^(foo1|foo2|baz)$"receiver: team-X-mails# The service has a sub-route for critical alerts, any alerts# that do not match, i.e. severity != critical, fall-back to the# parent node and are sent to 'team-X-mails'routes:- matchers:- severity="critical"receiver: team-X-pager- matchers:- service="files"receiver: team-Y-mailsroutes:- matchers:- severity="critical"receiver: team-Y-pager# This route handles all alerts coming from a database service. If there's# no team to handle it, it defaults to the DB team.- matchers:- service="database"receiver: team-DB-pager# Also group alerts by affected database.group_by: [alertname, cluster, database]routes:- matchers:- owner="team-X"receiver: team-X-pager- matchers:- owner="team-Y"receiver: team-Y-pager# Inhibition rules allow to mute a set of alerts given that another alert is
# firing.
# We use this to mute any warning-level notifications if the same alert is
# already critical.
inhibit_rules:
- source_matchers:- severity="critical"target_matchers:- severity="warning"# Apply inhibition if the alertname is the same.# CAUTION: #   If all label names listed in `equal` are missing #   from both the source and target alerts,#   the inhibition rule will apply!equal: ['alertname', 'instance']receivers:
- name: 'team-X-mails'email_configs:- to: 'team-X+alerts@example.org, team-Y+alerts@example.org'- name: 'team-X-pager'email_configs:- to: 'team-X+alerts-critical@example.org'pagerduty_configs:- routing_key: <team-X-key>- name: 'team-Y-mails'email_configs:- to: 'team-Y+alerts@example.org'- name: 'team-Y-pager'pagerduty_configs:- routing_key: <team-Y-key>- name: 'team-DB-pager'pagerduty_configs:- routing_key: <team-DB-key>
route字段解释如下:
receiver:每个 route 至少指向一个接收器,否则告警无处发送。
group_by:合理的分组方式,避免重复通知。常用 alertname + 其他标签。
group_interval:不短于 5 分钟,避免通知过于频繁。
repeat_interval:不短于 30 分钟,重复通知的周期。
match_re:使用正则表达式匹配告警可以实现灵活路由。
2.1、抑制规则
在alertname、dev、instance 三个标签的值相同情况下,critaical 的报警会抑制 warning 级别的报警信息。
inhibit_rules:- source_match:severity: 'critical'target_match:severity: 'warning'equal: ['alertname', 'dev', 'instance']
2.2、临时静默
除了基于抑制机制可以控制告警通知的行为以外,用户或者管理员还可以直接通过Alertmanager的UI临时屏蔽特定的告警通知。
1、进入Alertmanager U–>点击Alerts—>Silence
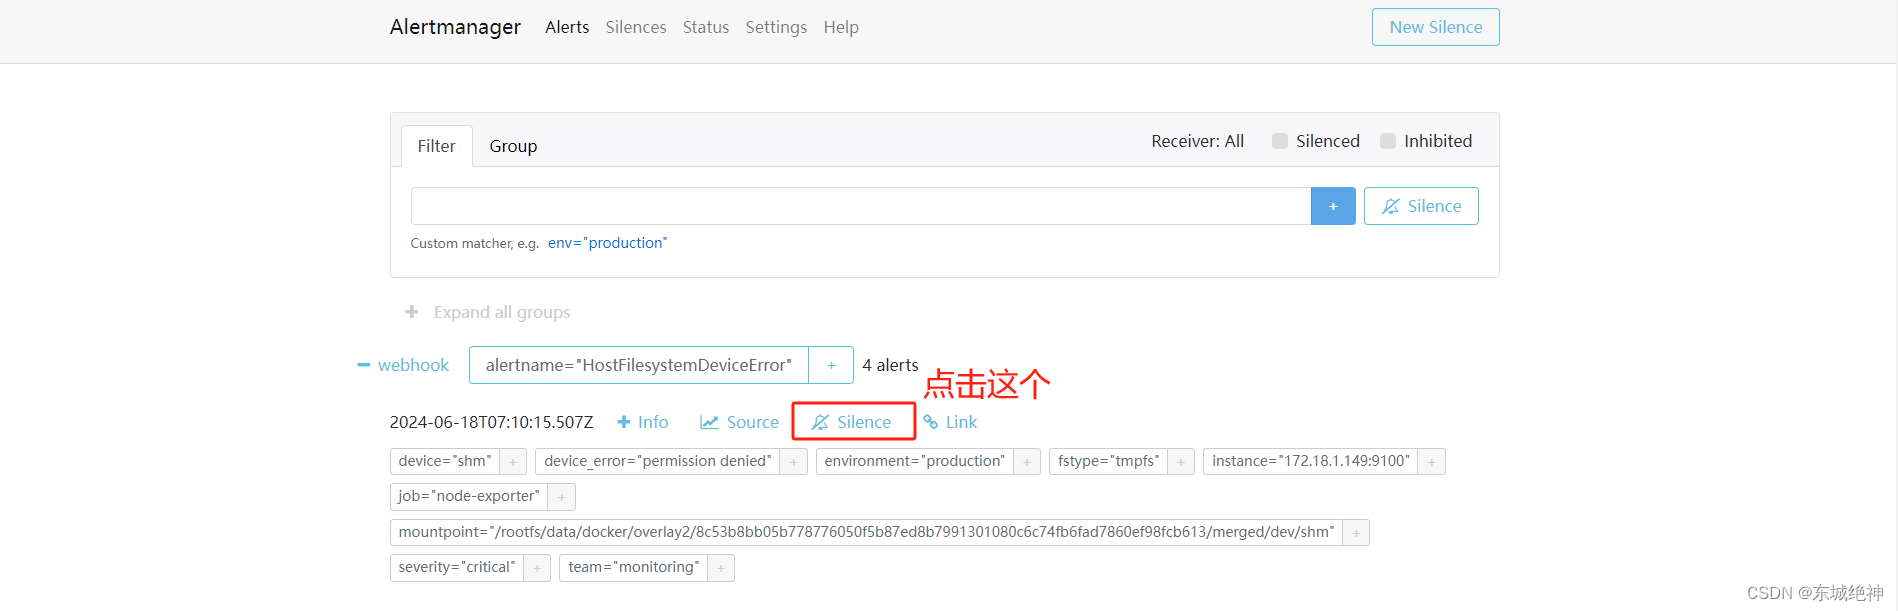
2、定义静默规则的开始时间以及持续时间和结束时间,填写当前静默规则的创建者以及创建原因后,点击Create按钮即可。

3、取消静默规则:对于已经生效的规则,用户可以通过手动点击Expire按钮使当前规则过期。

2.3、路由匹配
告警的匹配有两种方式可以选择。
1、一种方式基于字符串验证,通过设置match规则判断当前告警中是否存在标签labelname并且其值等于labelvalue。
2、第二种方式则基于正则表达式,通过设置match_re验证当前告警标签的值是否满足正则表达式的内容。
示例一:根据服务名称匹配
route:group_by: ['alertname']     #定义分组,根据label标签进行分组group_wait: 10s             #分组等待时间,也就是说在10秒内同一个组中有没有一起报警的,如果有则同时发出报警邮件,如果没有则分开发group_interval: 10s         #告警时间间隔repeat_interval: 1h         #重复告警间隔,也就是触发的一个告警在1h内没有处理则再次发一封邮件。continue: false             #若路由上的continue字段的值为false,则遇到第一个匹配的路由分支后即终止。否则,将继续匹配后续的子节点;receiver: 'webhook1'        #默认邮箱routes:                     #启用一个子路由- receiver: 'webhook1'      #接收者为webhook1group_wait: 10s           #分组等待时间match_re:                 #匹配一个正则service: mysql|db       #service标签包含mysql和db的统一发送给dba的邮箱continue: false           #若路由上的continue字段的值为false,则遇到第一个匹配的路由分支后即终止。否则,将继续匹配后续的子节点;- receiver: 'webhook2'      #接收者为webhook2group_wait: 10s           #分组时间match:         serverity: error        #将serverity标签值包含error的发送给yunwei的邮箱continue: false           #若路由上的continue字段的值为false,则遇到第一个匹配的路由分支后即终止。否则,将继续匹配后续的子节点;receivers:
- name: webhook1webhook_configs:- url: http://xx.xx.xx.xx:8060/dingtalk/webhook/sendsend_resolved: true #警报被解决之后是否通知
- name: webhook2webhook_configs:- url: http://xx.xx.xx.xx:8060/dingtalk/webhook1/sendsend_resolved: true #警报被解决之后是否通知
示例二:根据告警规则名称匹配
route:group_by: ['instance']          #根据 instance 标签分组continue: true                  #为true则还需要去匹配子路由。receiver: receiver-01routes:- receiver: 'receiver-01'match:alertname: 'InstanceDown'   #告警的名字是InstanceDown则发送给receiver-03- receiver: 'webchat'match_re:alertname: 'Cpu.*'          #告警的名字以Cpu开头的则发送给webchat- receiver: 'dingtalk'match:alertname: 'InstanceDown'   #告警的名字是InstanceDown则发送给dingtalk
receivers:
- name: 'receiver-01'                     email_configs:                - to: '1111@qq.com'
- name: 'webchat'webhook_configs:- url: 'http://xx.xx.xx.xx:5000'send_resolved: true
- name: 'dingtalk'webhook_configs:- url: 'http://xx.xx.xx.xx:8060/dingtalk/webhook1/send'send_resolved: true
示例三:同一个告警信息多通道告警发送
route:group_by: ['alertname']group_wait: 30sgroup_interval: 60srepeat_interval: 24hreceiver: webchatroutes:- receiver: wechat   group_wait: 10scontinue: true       #当消息发送给微信后,继续匹配,就能把消息在发送到钉钉 - receiver: dingtalkgroup_wait: 10sreceivers:
- name: 'wechat'webhook_configs:- url: 'http://192.168.11.60:8999/webhook?key=自己的key'
- name: 'dingtalk'webhook_configs:- url: 'http://192.168.11.60:8060/dingtalk/webhook1/send'
2.4、告警分组
Alertmanager可以对告警通知进行分组,将多条告警合合并为一个通知。这里我们可以使用group_by来定义分组规则。基于告警中包含的标签,如果满足group_by中定义标签名称,那么这些告警将会合并为一个通知发送给接收器。
route:receiver: 'default-receiver'group_wait: 30sgroup_interval: 5mrepeat_interval: 4hgroup_by: [cluster, alertname]routes:- receiver: 'database-pager'group_wait: 10smatch_re:service: mysql|cassandra- receiver: 'frontend-pager'group_by: [product, environment]match:team: frontend
三、webhook-dingtalk配置文件
说明:当 receives 为钉钉时 (webhook_configs),它的告警模板不是在 alertmanager 的配置文件中指定的,而是在钉钉插件 prometheus-webhook-dingtalk 中指定的。
钉钉告警模板如下:
[root@host-monitor webhook-dingtalk]# cat template.tmpl
{{ define "__subject" }}
[{{ .Status | toUpper }}{{ if eq .Status "firing" }}:{{ .Alerts.Firing | len }}{{ end }}]{{ end }}            {{ define "__text_alert_list" }}{{ range . }}
---
{{ if .Labels.owner }}@{{ .Labels.owner }}{{ end }}
**告警主机:** {{ .Labels.instance }}**告警级别:** {{ .Labels.severity | upper }}**告警时间:** {{ dateInZone "2006.01.02 15:04:05" (.StartsAt) "Asia/Shanghai" }}**事件信息:**
{{ range .Annotations.SortedPairs }} - {{ .Name }}: {{ .Value | markdown | html }}
{{ end }}**事件标签:**
{{ range .Labels.SortedPairs }}{{ if and (ne (.Name) "severity") (ne (.Name) "summary") }} - {{ .Name }}: {{ .Value | markdown | html }}
{{ end }}{{ end }}
{{ end }}
{{ end }}{{ define "__text_resolved_list" }}{{ range . }}
---
{{ if .Labels.owner }}@{{ .Labels.owner }}{{ end }}
**告警主机:** {{ .Labels.instance }}**告警级别:** {{ .Labels.severity | upper }}**告警时间:** {{ dateInZone "2006.01.02 15:04:05" (.StartsAt) "Asia/Shanghai" }}**恢复时间:** {{ dateInZone "2006.01.02 15:04:05" (.EndsAt) "Asia/Shanghai" }}**事件信息:**
{{ range .Annotations.SortedPairs }} - {{ .Name }}: {{ .Value | markdown | html }}
{{ end }}**事件标签:**
{{ range .Labels.SortedPairs }}{{ if and (ne (.Name) "severity") (ne (.Name) "summary") }} - {{ .Name }}: {{ .Value | markdown | html }}
{{ end }}{{ end }}
{{ end }}
{{ end }}{{ define "default.title" }}
{{ template "__subject" . }}
{{ end }}{{ define "default.content" }}{{ if gt (len .Alerts.Firing) 0 }}
**========侦测到{{ .Alerts.Firing | len  }}个故障========**
{{ template "__text_alert_list" .Alerts.Firing }}
{{ end }}{{ if gt (len .Alerts.Resolved) 0 }}
**========恢复{{ .Alerts.Resolved | len  }}个故障========**
{{ template "__text_resolved_list" .Alerts.Resolved }}
{{ end }}
{{ end }}
{{ define "ding.link.title" }}{{ template "default.title" . }}{{ end }}{{ define "ding.link.content" }}{{ template "default.content" . }}{{ end }}
{{ template "default.title" . }}
{{ template "default.content" . }}
总结:整理不易,如果对你有帮助,可否点赞关注一下?
更多详细内容请参考:《Linux运维篇:Linux系统运维指南》
这篇关于《Linux运维总结:prometheus+altermanager+webhook-dingtalk配置文件详解》的文章就介绍到这儿,希望我们推荐的文章对编程师们有所帮助!


