本文主要是介绍Android断点续传原理及实现,希望对大家解决编程问题提供一定的参考价值,需要的开发者们随着小编来一起学习吧!
常见两种网络请求方式
一、 HttpURLConnection
HttpURLConnection的setRequestProperty()方法,对我们要读取的字节部分进行控制,比如:
···
1.Range=0-100代表只读取前100个字节。
2.Range=100-500代表读取从第100个字节开始,读到第500个字节为止。
3.Range=100-则代表从第100个字节开始读取,一直读取到文件末尾结束。
···
断点续传过程
1、在暂停时记录一下已经读取到的位置,在重新开始的时候利用setRequestProperty()方法设置一下我们要读取的字节位置即可
2、RandomAccessFile来进行字节流的写入,RandomAccessFile有一个方法seek(long),允许我们指定要写入的位置
多线程断点续传实现原理相同,只是利用多个线程同时下载,每个线程指定要下载的字节部分,写入到文件的指定部分
二、 okhttp
1、调用请求获取文件长度
2、先判断文件是否找到,找到代表已经下载过,则获取其长度 判断长度是否大于文件长度 大于则创建新文件继续下载或者下载终止
3、设置请求头请求范围
//确定下载的范围,添加此头,则服务器就可以跳过已经下载好的部分
.addHeader("RANGE", "bytes=" + downloadLength + "-" + contentLength)
4、存储时候设置:RandomAccessFile这个类,但是如果不涉及到多个部分拼接的话是没必要的,直接使用输出流就好了,在输出流的构造方法上添加一个true的参数,代表是在原文件的后面添加数据即可三 、 httpurlconnection 示例
class SingleDownloadTask{private String filePath;private int contentLength;private int readLength;private RandomAccessFile file=null;private boolean isPause=false;private URL url;public boolean isDownloading() {return isDownloading;}private boolean isDownloading=false;private Handler mHandler=new Handler();public SingleDownloadTask(String urlStr,String filePath) {this.filePath=filePath;readLength=0;contentLength=0;try {url=new URL(urlStr);} catch (MalformedURLException e) {e.printStackTrace();}}//download from pospublic void download(){new Thread(new Runnable() {@Overridepublic void run() {isDownloading=true;HttpURLConnection conn=null;InputStream is=null;BufferedInputStream bis=null;try {file=new RandomAccessFile(filePath,"rw");file.seek(readLength);conn= (HttpURLConnection) url.openConnection();if(readLength==0){contentLength=conn.getContentLength();}else{conn.setRequestProperty("Range","bytes="+readLength+"-");}is=conn.getInputStream();bis=new BufferedInputStream(is);byte[] bytes=new byte[1024];int len=0;while (!isPause&&((len=bis.read(bytes,0,1024)))!=-1){file.write(bytes,0,len);readLength+=len;mHandler.post(new Runnable() {@Overridepublic void run() {float rate=((float)readLength)/contentLength;mProgressBar.setProgress((int) (100*rate));mTextView.setText((int)(100*rate)+"%");}});}isDownloading=false;if (readLength>=contentLength){mHandler.post(new Runnable() {@Overridepublic void run() {Toast.makeText(MainActivity.this, "文件下载成功,保存在"+filePath, Toast.LENGTH_SHORT).show();mImageView.setImageBitmap(BitmapFactory.decodeFile(filePath));}});}file.close();} catch (MalformedURLException e) {e.printStackTrace();} catch (IOException e) {e.printStackTrace();}finally {if (bis!=null){try {bis.close();if (is!=null){is.close();}if (conn!=null){conn.disconnect();}} catch (IOException e) {e.printStackTrace();}}}}}).start();}public void start(){isPause=false;download();}public void pause(){isPause=true;}}OKHttp3是如今非常流行的Android网络请求框架,那么如何利用Android实现断点续传呢,今天写了个Demo尝试了一下,感觉还是有点意思
准备阶段
我们会用到OKHttp3来做网络请求,使用RxJava来实现线程的切换,并且开启Java8来启用Lambda表达式,毕竟RxJava实现线程切换非常方便,而且数据流的形式也非常舒服,同时Lambda和RxJava配合食用味道更佳
打开我们的app Module下的build.gradle,代码如下
apply plugin: 'com.android.application'  android {  compileSdkVersion 24  buildToolsVersion "24.0.3"  defaultConfig {  applicationId "com.lanou3g.downdemo"  minSdkVersion 15  targetSdkVersion 24  versionCode 1  versionName "1.0"  testInstrumentationRunner "android.support.test.runner.AndroidJUnitRunner"  //为了开启Java8  jackOptions{  enabled true;  }  }  buildTypes {  release {  minifyEnabled false  proguardFiles getDefaultProguardFile('proguard-android.txt'), 'proguard-rules.pro'  }  }  //开启Java1.8 能够使用lambda表达式  compileOptions{  sourceCompatibility JavaVersion.VERSION_1_8  targetCompatibility JavaVersion.VERSION_1_8  }
}  dependencies {  compile fileTree(dir: 'libs', include: ['*.jar'])  androidTestCompile('com.android.support.test.espresso:espresso-core:2.2.2', {  exclude group: 'com.android.support', module: 'support-annotations'  })  compile 'com.android.support:appcompat-v7:24.1.1'  testCompile 'junit:junit:4.12'  //OKHttp  compile 'com.squareup.okhttp3:okhttp:3.6.0'  //RxJava和RxAndroid 用来做线程切换的  compile 'io.reactivex.rxjava2:rxandroid:2.0.1'  compile 'io.reactivex.rxjava2:rxjava:2.0.1'
}
OKHttp和RxJava,RxAndroid使用的都是最新的版本,并且配置开启了Java8
布局文件
接着开始书写布局文件
<?xml version="1.0" encoding="utf-8"?>
<LinearLayout xmlns:android="http://schemas.android.com/apk/res/android"  xmlns:tools="http://schemas.android.com/tools"  android:id="@+id/activity_main"  android:layout_width="match_parent"  android:layout_height="match_parent"  android:paddingBottom="@dimen/activity_vertical_margin"  android:paddingLeft="@dimen/activity_horizontal_margin"  android:paddingRight="@dimen/activity_horizontal_margin"  android:paddingTop="@dimen/activity_vertical_margin"  android:orientation="vertical"  tools:context="com.lanou3g.downdemo.MainActivity">  <LinearLayout  android:layout_width="match_parent"  android:layout_height="wrap_content"  android:orientation="horizontal">  <ProgressBar  android:id="@+id/main_progress1"  android:layout_width="0dp"  android:layout_weight="1"  android:layout_height="match_parent"  style="@style/Widget.AppCompat.ProgressBar.Horizontal" />  <Button  android:id="@+id/main_btn_down1"  android:layout_width="wrap_content"  android:layout_height="wrap_content"  android:text="下载1"/>  <Button  android:id="@+id/main_btn_cancel1"  android:layout_width="wrap_content"  android:layout_height="wrap_content"  android:text="取消1"/>  </LinearLayout>  <LinearLayout  android:layout_width="match_parent"  android:layout_height="wrap_content"  android:orientation="horizontal">  <ProgressBar  android:id="@+id/main_progress2"  android:layout_width="0dp"  android:layout_weight="1"  android:layout_height="match_parent"  style="@style/Widget.AppCompat.ProgressBar.Horizontal" />  <Button  android:id="@+id/main_btn_down2"  android:layout_width="wrap_content"  android:layout_height="wrap_content"  android:text="下载2"/>  <Button  android:id="@+id/main_btn_cancel2"  android:layout_width="wrap_content"  android:layout_height="wrap_content"  android:text="取消2"/>  </LinearLayout>  <LinearLayout  android:layout_width="match_parent"  android:layout_height="wrap_content"  android:orientation="horizontal">  <ProgressBar  android:id="@+id/main_progress3"  android:layout_width="0dp"  android:layout_weight="1"  android:layout_height="match_parent"  style="@style/Widget.AppCompat.ProgressBar.Horizontal" />  <Button  android:id="@+id/main_btn_down3"  android:layout_width="wrap_content"  android:layout_height="wrap_content"  android:text="下载3"/>  <Button  android:id="@+id/main_btn_cancel3"  android:layout_width="wrap_content"  android:layout_height="wrap_content"  android:text="取消3"/>  </LinearLayout>
</LinearLayout>
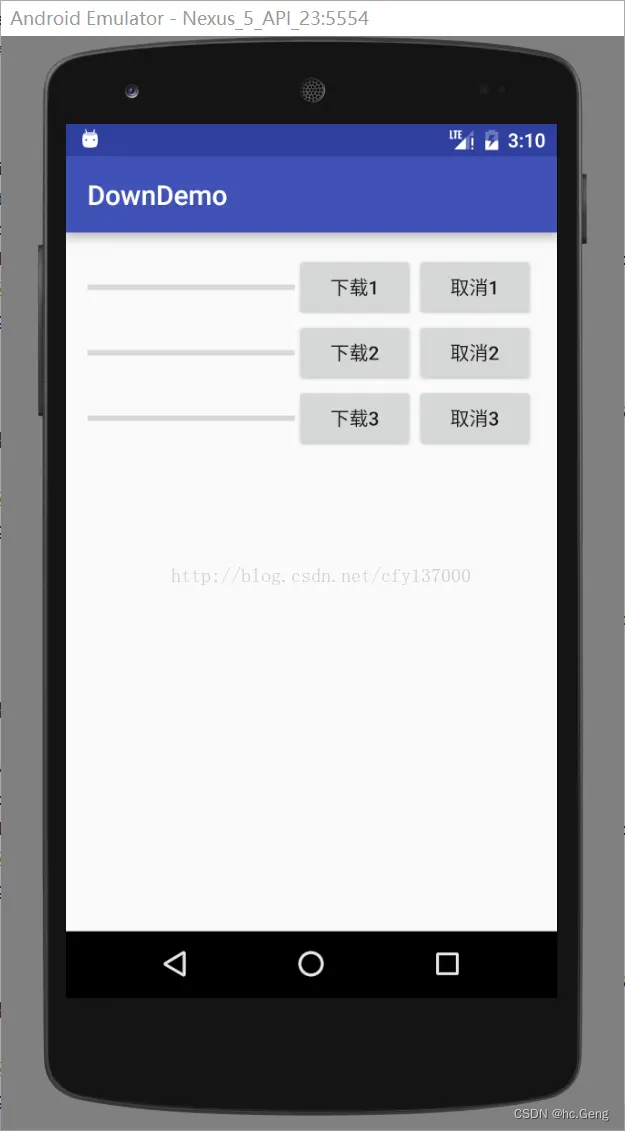 3个ProgressBar就是为了显示进度的,每个ProgressBar对应2个Button,一个是开始下载,一个是暂停(取消)下载,这里需要说明的是,对下载来说暂停和取消没有什么区别,除非当取消的时候,会顺带把临时文件都删除了,在本例里是不区分他俩的.
Application
我们这里需要用到一些文件路径,有一个全局Context会比较方便, 而Application也是Context的子类,使用它的是最方便的,所以我们写一个类来继承Application
package com.lanou3g.downdemo;  import android.app.Application;
import android.content.Context;  /** * Created by 陈丰尧 on 2017/2/2. */  public class MyApp extends Application {  public static Context sContext;//全局的Context对象  @Override  public void onCreate() {  super.onCreate();  sContext = this;  }
}
可以看到,我们就是要获得一个全局的Context对象的
我们在AndroidManifest中注册一下我们的Application,同时再把我们所需要的权限给上
<?xml version="1.0" encoding="utf-8"?>
<manifest xmlns:android="http://schemas.android.com/apk/res/android"  package="com.lanou3g.downdemo">  <!--网络权限-->  <uses-permission android:name="android.permission.INTERNET"/>  <application  android:allowBackup="true"  android:icon="@mipmap/ic_launcher"  android:label="@string/app_name"  android:supportsRtl="true"  android:name=".MyApp"  android:theme="@style/AppTheme">  <activity android:name=".MainActivity">  <intent-filter>  <action android:name="android.intent.action.MAIN" />  <category android:name="android.intent.category.LAUNCHER" />  </intent-filter>  </activity>  </application>  </manifest>
我们只需要一个网络权限,在application标签下,添加name属性,来指向我们的Application
DownloadManager
接下来是核心代码了,就是我们的DownloadManager,先上代码
package com.lanou3g.downdemo;  import java.io.File;
import java.io.FileOutputStream;
import java.io.IOException;
import java.io.InputStream;
import java.util.HashMap;
import java.util.concurrent.atomic.AtomicReference;  import io.reactivex.Observable;
import io.reactivex.ObservableEmitter;
import io.reactivex.ObservableOnSubscribe;
import io.reactivex.android.schedulers.AndroidSchedulers;
import io.reactivex.schedulers.Schedulers;
import okhttp3.Call;
import okhttp3.OkHttpClient;
import okhttp3.Request;
import okhttp3.Response;  /** * Created by 陈丰尧 on 2017/2/2. */  public class DownloadManager {  private static final AtomicReference<DownloadManager> INSTANCE = new AtomicReference<>();  private HashMap<String, Call> downCalls;//用来存放各个下载的请求  private OkHttpClient mClient;//OKHttpClient;  //获得一个单例类  public static DownloadManager getInstance() {  for (; ; ) {  DownloadManager current = INSTANCE.get();  if (current != null) {  return current;  }  current = new DownloadManager();  if (INSTANCE.compareAndSet(null, current)) {  return current;  }  }  }  private DownloadManager() {  downCalls = new HashMap<>();  mClient = new OkHttpClient.Builder().build();  }  /** * 开始下载 * * @param url              下载请求的网址 * @param downLoadObserver 用来回调的接口 */  public void download(String url, DownLoadObserver downLoadObserver) {  Observable.just(url)  .filter(s -> !downCalls.containsKey(s))//call的map已经有了,就证明正在下载,则这次不下载  .flatMap(s -> Observable.just(createDownInfo(s)))  .map(this::getRealFileName)//检测本地文件夹,生成新的文件名  .flatMap(downloadInfo -> Observable.create(new DownloadSubscribe(downloadInfo)))//下载  .observeOn(AndroidSchedulers.mainThread())//在主线程回调  .subscribeOn(Schedulers.io())//在子线程执行  .subscribe(downLoadObserver);//添加观察者  }  public void cancel(String url) {  Call call = downCalls.get(url);  if (call != null) {  call.cancel();//取消  }  downCalls.remove(url);  }  /** * 创建DownInfo * * @param url 请求网址 * @return DownInfo */  private DownloadInfo createDownInfo(String url) {  DownloadInfo downloadInfo = new DownloadInfo(url);  long contentLength = getContentLength(url);//获得文件大小  downloadInfo.setTotal(contentLength);  String fileName = url.substring(url.lastIndexOf("/"));  downloadInfo.setFileName(fileName);  return downloadInfo;  }  private DownloadInfo getRealFileName(DownloadInfo downloadInfo) {  String fileName = downloadInfo.getFileName();  long downloadLength = 0, contentLength = downloadInfo.getTotal();  File file = new File(MyApp.sContext.getFilesDir(), fileName);  if (file.exists()) {  //找到了文件,代表已经下载过,则获取其长度  downloadLength = file.length();  }  //之前下载过,需要重新来一个文件  int i = 1;  while (downloadLength >= contentLength) {  int dotIndex = fileName.lastIndexOf(".");  String fileNameOther;  if (dotIndex == -1) {  fileNameOther = fileName + "(" + i + ")";  } else {  fileNameOther = fileName.substring(0, dotIndex)  + "(" + i + ")" + fileName.substring(dotIndex);  }  File newFile = new File(MyApp.sContext.getFilesDir(), fileNameOther);  file = newFile;  downloadLength = newFile.length();  i++;  }  //设置改变过的文件名/大小  downloadInfo.setProgress(downloadLength);  downloadInfo.setFileName(file.getName());  return downloadInfo;  }  private class DownloadSubscribe implements ObservableOnSubscribe<DownloadInfo> {  private DownloadInfo downloadInfo;  public DownloadSubscribe(DownloadInfo downloadInfo) {  this.downloadInfo = downloadInfo;  }  @Override  public void subscribe(ObservableEmitter<DownloadInfo> e) throws Exception {  String url = downloadInfo.getUrl();  long downloadLength = downloadInfo.getProgress();//已经下载好的长度  long contentLength = downloadInfo.getTotal();//文件的总长度  //初始进度信息  e.onNext(downloadInfo);  Request request = new Request.Builder()  //确定下载的范围,添加此头,则服务器就可以跳过已经下载好的部分  .addHeader("RANGE", "bytes=" + downloadLength + "-" + contentLength)  .url(url)  .build();  Call call = mClient.newCall(request);  downCalls.put(url, call);//把这个添加到call里,方便取消  Response response = call.execute();  File file = new File(MyApp.sContext.getFilesDir(), downloadInfo.getFileName());  InputStream is = null;  FileOutputStream fileOutputStream = null;  try {  is = response.body().byteStream();  fileOutputStream = new FileOutputStream(file, true);  byte[] buffer = new byte[2048];//缓冲数组2kB  int len;  while ((len = is.read(buffer)) != -1) {  fileOutputStream.write(buffer, 0, len);  downloadLength += len;  downloadInfo.setProgress(downloadLength);  e.onNext(downloadInfo);  }  fileOutputStream.flush();  downCalls.remove(url);  } finally {  //关闭IO流  IOUtil.closeAll(is, fileOutputStream);  }  e.onComplete();//完成  }  }  /** * 获取下载长度 * * @param downloadUrl * @return */  private long getContentLength(String downloadUrl) {  Request request = new Request.Builder()  .url(downloadUrl)  .build();  try {  Response response = mClient.newCall(request).execute();  if (response != null && response.isSuccessful()) {  long contentLength = response.body().contentLength();  response.close();  return contentLength == 0 ? DownloadInfo.TOTAL_ERROR : contentLength;  }  } catch (IOException e) {  e.printStackTrace();  }  return DownloadInfo.TOTAL_ERROR;  }  }
代码稍微有点长,关键部位我都加了注释了,我们挑关键地方看看
首先我们这个类是单例类,我们下载只需要一个OKHttpClient就足够了,所以我们让构造方法私有,而单例类的获取实例方法就是这个getInstance();当然大家用别的方式实现单例也可以的,然后我们在构造方法里初始化我们的HttpClient,并且初始化一个HashMap,用来放所有的网络请求的,这样当我们取消下载的时候,就可以找到url对应的网络请求然后把它取消掉就可以了
接下来就是核心的download方法了,首先是参数,第一个参数url不用多说,就是请求的网址,第二个参数是一个Observer对象,因为我们使用的是RxJava,并且没有特别多复杂的方法,所以就没单独写接口,而是谢了一个Observer对象来作为回调,接下来是DownLoadObserver的代码
package com.lanou3g.downdemo;  import io.reactivex.Observer;
import io.reactivex.disposables.Disposable;  /** * Created by 陈丰尧 on 2017/2/2. */  public  abstract class DownLoadObserver implements Observer<DownloadInfo> {  protected Disposable d;//可以用于取消注册的监听者  protected DownloadInfo downloadInfo;  @Override  public void onSubscribe(Disposable d) {  this.d = d;  }  @Override  public void onNext(DownloadInfo downloadInfo) {  this.downloadInfo = downloadInfo;  }  @Override  public void onError(Throwable e) {  e.printStackTrace();  }  }
在RxJava2中 这个Observer有点变化,当注册观察者的时候,会调用onSubscribe方法,而该方法参数就是用来取消注册的,这样的改动可以更灵活的有监听者来取消监听了,我们的进度信息会一直的传送的onNext方法里,这里将下载所需要的内容封了一个类叫DownloadInfo
package com.lanou3g.downdemo;  /** * Created by 陈丰尧 on 2017/2/2. * 下载信息 */  public class DownloadInfo {  public static final long TOTAL_ERROR = -1;//获取进度失败  private String url;  private long total;  private long progress;  private String fileName;  public DownloadInfo(String url) {  this.url = url;  }  public String getUrl() {  return url;  }  public String getFileName() {  return fileName;  }  public void setFileName(String fileName) {  this.fileName = fileName;  }  public long getTotal() {  return total;  }  public void setTotal(long total) {  this.total = total;  }  public long getProgress() {  return progress;  }  public void setProgress(long progress) {  this.progress = progress;  }
}
这个类就是一些基本信息,total就是需要下载的文件的总大小,而progress就是当前下载的进度了,这样就可以计算出下载的进度信息了
接着看DownloadManager的download方法,首先通过url生成一个Observable对象,然后通过filter操作符过滤一下,如果当前正在下载这个url对应的内容,那么就不下载它,
接下来调用createDownInfo重新生成Observable对象,这里应该用map也是可以的,createDownInfo这个方法里会调用getContentLength来获取服务器上的文件大小,可以看一下这个方法的代码,
/** * 获取下载长度 * * @param downloadUrl * @return */ private long getContentLength(String downloadUrl) { Request request = new Request.Builder() .url(downloadUrl) .build(); try { Response response = mClient.newCall(request).execute(); if (response != null && response.isSuccessful()) { long contentLength = response.body().contentLength(); response.close(); return contentLength == 0 ? DownloadInfo.TOTAL_ERROR : contentLength; } } catch (IOException e) { e.printStackTrace(); } return DownloadInfo.TOTAL_ERROR; }
可以看到,其实就是在通过OK进行了一次网络请求,并且从返回的头信息里拿到文件的大小信息,一般这个信息都是可以拿到的,除非下载网址不是直接指向资源文件的,而是自己手写的Servlet,那就得跟后台人员沟通好了.注意,这次网络请求并没有真正的去下载文件,而是请求个大小就结束了,具体原因会在后面真正请求数据的时候解释
接着download方法
获取完文件大小后,就可以去硬盘里找文件了,这里调用了getRealFileName方法
private DownloadInfo getRealFileName(DownloadInfo downloadInfo) { String fileName = downloadInfo.getFileName(); long downloadLength = 0, contentLength = downloadInfo.getTotal(); File file = new File(MyApp.sContext.getFilesDir(), fileName); if (file.exists()) { //找到了文件,代表已经下载过,则获取其长度 downloadLength = file.length(); } //之前下载过,需要重新来一个文件 int i = 1; while (downloadLength >= contentLength) { int dotIndex = fileName.lastIndexOf("."); String fileNameOther; if (dotIndex == -1) { fileNameOther = fileName + "(" + i + ")"; } else { fileNameOther = fileName.substring(0, dotIndex) + "(" + i + ")" + fileName.substring(dotIndex); } File newFile = new File(MyApp.sContext.getFilesDir(), fileNameOther); file = newFile; downloadLength = newFile.length(); i++; } //设置改变过的文件名/大小 downloadInfo.setProgress(downloadLength); downloadInfo.setFileName(file.getName()); return downloadInfo; }
这个方法就是看本地是否有已经下载过的文件,如果有,再判断一次本地文件的大小和服务器上数据的大小,如果是一样的,证明之前下载全了,就再成一个带(1)这样的文件,而如果本地文件大小比服务器上的小的话,那么证明之前下载了一半断掉了,那么就把进度信息保存上,并把文件名也存上,看完了再回到download方法
之后就开始真正的网络请求了,这里写了一个内部类来实现ObservableOnSubscribe接口,这个接口也是RxJava2的,东西和之前一样,好像只改了名字,看一下代码
private class DownloadSubscribe implements ObservableOnSubscribe<DownloadInfo> { private DownloadInfo downloadInfo; public DownloadSubscribe(DownloadInfo downloadInfo) { this.downloadInfo = downloadInfo; } @Override public void subscribe(ObservableEmitter<DownloadInfo> e) throws Exception { String url = downloadInfo.getUrl(); long downloadLength = downloadInfo.getProgress();//已经下载好的长度 long contentLength = downloadInfo.getTotal();//文件的总长度 //初始进度信息 e.onNext(downloadInfo); Request request = new Request.Builder() //确定下载的范围,添加此头,则服务器就可以跳过已经下载好的部分 .addHeader("RANGE", "bytes=" + downloadLength + "-" + contentLength) .url(url) .build(); Call call = mClient.newCall(request); downCalls.put(url, call);//把这个添加到call里,方便取消 Response response = call.execute(); File file = new File(MyApp.sContext.getFilesDir(), downloadInfo.getFileName()); InputStream is = null; FileOutputStream fileOutputStream = null; try { is = response.body().byteStream(); fileOutputStream = new FileOutputStream(file, true); byte[] buffer = new byte[2048];//缓冲数组2kB int len; while ((len = is.read(buffer)) != -1) { fileOutputStream.write(buffer, 0, len); downloadLength += len; downloadInfo.setProgress(downloadLength); e.onNext(downloadInfo); } fileOutputStream.flush(); downCalls.remove(url); } finally { //关闭IO流 IOUtil.closeAll(is, fileOutputStream); } e.onComplete();//完成 } }
主要看subscribe方法
首先拿到url,当前进度信息和文件的总大小,然后开始网络请求,注意这次网络请求的时候需要添加一条头信息
.addHeader("RANGE", "bytes=" + downloadLength + "-" + contentLength)
这条头信息的意思是下载的范围是多少,downloadLength是从哪开始下载,contentLength是下载到哪,当要断点续传的话必须添加这个头,让输入流跳过多少字节的形式是不行的,所以我们要想能成功的添加这条信息那么就必须对这个url请求2次,一次拿到总长度,来方便判断本地是否有下载一半的数据,第二次才开始真正的读流进行网络请求,我还想了一种思路,当文件没有下载完成的时候添加一个自定义的后缀,当下载完成再把这个后缀取消了,应该就不需要请求两次了.
接下来就是正常的网络请求,向本地写文件了,而写文件到本地这,网上大多用的是RandomAccessFile这个类,但是如果不涉及到多个部分拼接的话是没必要的,直接使用输出流就好了,在输出流的构造方法上添加一个true的参数,代表是在原文件的后面添加数据即可,而在循环里,不断的调用onNext方法发送进度信息,当写完了之后别忘了关流,同时把call对象从hashMap中移除了.这里写了一个IOUtil来关流
package com.lanou3g.downdemo;  import java.io.Closeable;
import java.io.IOException;  /** * Created by 陈丰尧 on 2017/2/2. */  public class IOUtil {  public static void closeAll(Closeable... closeables){  if(closeables == null){  return;  }  for (Closeable closeable : closeables) {  if(closeable!=null){  try {  closeable.close();  } catch (IOException e) {  e.printStackTrace();  }  }  }  }
}
其实就是挨一个判断是否为空,并关闭罢了
这样download方法就完成了,剩下的就是切换线程,注册观察者了
MainActivity
最后是aty的代码
package com.lanou3g.downdemo;  import android.net.Uri;
import android.support.annotation.IdRes;
import android.support.v7.app.AppCompatActivity;
import android.os.Bundle;
import android.view.View;
import android.widget.Button;
import android.widget.ProgressBar;
import android.widget.Toast;  public class MainActivity extends AppCompatActivity implements View.OnClickListener {  private Button downloadBtn1, downloadBtn2, downloadBtn3;  private Button cancelBtn1, cancelBtn2, cancelBtn3;  private ProgressBar progress1, progress2, progress3;  private String url1 = "http://192.168.31.169:8080/out/dream.flac";  private String url2 = "http://192.168.31.169:8080/out/music.mp3";  private String url3 = "http://192.168.31.169:8080/out/code.zip";  @Override  protected void onCreate(Bundle savedInstanceState) {  super.onCreate(savedInstanceState);  setContentView(R.layout.activity_main);  downloadBtn1 = bindView(R.id.main_btn_down1);  downloadBtn2 = bindView(R.id.main_btn_down2);  downloadBtn3 = bindView(R.id.main_btn_down3);  cancelBtn1 = bindView(R.id.main_btn_cancel1);  cancelBtn2 = bindView(R.id.main_btn_cancel2);  cancelBtn3 = bindView(R.id.main_btn_cancel3);  progress1 = bindView(R.id.main_progress1);  progress2 = bindView(R.id.main_progress2);  progress3 = bindView(R.id.main_progress3);  downloadBtn1.setOnClickListener(this);  downloadBtn2.setOnClickListener(this);  downloadBtn3.setOnClickListener(this);  cancelBtn1.setOnClickListener(this);  cancelBtn2.setOnClickListener(this);  cancelBtn3.setOnClickListener(this);  }  @Override  public void onClick(View v) {  switch (v.getId()) {  case R.id.main_btn_down1:  DownloadManager.getInstance().download(url1, new DownLoadObserver() {  @Override  public void onNext(DownloadInfo value) {  super.onNext(value);  progress1.setMax((int) value.getTotal());  progress1.setProgress((int) value.getProgress());  }  @Override  public void onComplete() {  if(downloadInfo != null){  Toast.makeText(MainActivity.this,  downloadInfo.getFileName() + "-DownloadComplete",  Toast.LENGTH_SHORT).show();  }  }  });  break;  case R.id.main_btn_down2:  DownloadManager.getInstance().download(url2, new DownLoadObserver() {  @Override  public void onNext(DownloadInfo value) {  super.onNext(value);  progress2.setMax((int) value.getTotal());  progress2.setProgress((int) value.getProgress());  }  @Override  public void onComplete() {  if(downloadInfo != null){  Toast.makeText(MainActivity.this,  downloadInfo.getFileName() + Uri.encode("下载完成"),  Toast.LENGTH_SHORT).show();  }  }  });  break;  case R.id.main_btn_down3:  DownloadManager.getInstance().download(url3, new DownLoadObserver() {  @Override  public void onNext(DownloadInfo value) {  super.onNext(value);  progress3.setMax((int) value.getTotal());  progress3.setProgress((int) value.getProgress());  }  @Override  public void onComplete() {  if(downloadInfo != null){  Toast.makeText(MainActivity.this,  downloadInfo.getFileName() + "下载完成",  Toast.LENGTH_SHORT).show();  }  }  });  break;  case R.id.main_btn_cancel1:  DownloadManager.getInstance().cancel(url1);  break;  case R.id.main_btn_cancel2:  DownloadManager.getInstance().cancel(url2);  break;  case R.id.main_btn_cancel3:  DownloadManager.getInstance().cancel(url3);  break;  }  }  private <T extends View> T bindView(@IdRes int id){  View viewById = findViewById(id);  return (T) viewById;  }
}
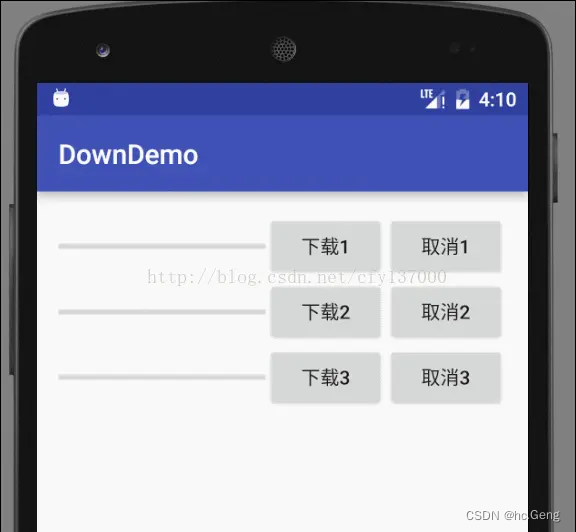
Activity里没什么了,就是注册监听,开始下载,取消下载这些了,下面我们来看看效果吧
运行效果
代码
http://download.csdn.net/detail/cfy137000/9746583
这篇关于Android断点续传原理及实现的文章就介绍到这儿,希望我们推荐的文章对编程师们有所帮助!


