1、Feign是SpringCloud的一个负载均衡组件。
Feign是一个声明式WebService客户端。使用Feign能让编写Web Service客户端更加简单, 它的使用方法是定义一个接口,然后在上面添加注解,同时也支持JAX-RS标准的注解。Feign也支持可拔插式的编码器和解码器。Spring Cloud对Feign进行了封装,使其支持了Spring MVC标准注解和HttpMessageConverters。Feign可以与Eureka和Ribbon组合使用以支持负载均衡。
Feign是一个声明式的Web服务客户端,使得编写Web服务客户端变得非常容易,只需要创建一个接口,然后在上面添加注解即可。参考官网:https://github.com/OpenFeign/feign
2、Feign能干什么。
Feign旨在使编写Java Http客户端变得更容易。前面在使用Ribbon+RestTemplate时,利用RestTemplate对http请求的封装处理,形成了一套模版化的调用方法。但是在实际开发中,由于对服务依赖的调用可能不止一处,往往一个接口会被多处调用,所以通常都会针对每个微服务自行封装一些客户端类来包装这些依赖服务的调用。所以,Feign在此基础上做了进一步封装,由他来帮助我们定义和实现依赖服务接口的定义。在Feign的实现下,我们只需创建一个接口并使用注解的方式来配置它(以前是Dao接口上面标注Mapper注解,现在是一个微服务接口上面标注一个Feign注解即可),即可完成对服务提供方的接口绑定,简化了使用Spring cloud Ribbon时,自动封装服务调用客户端的开发量。
3、Feign和Ribbon的关系。
Feign集成了Ribbon,利用Ribbon维护了MicroServiceCloud-Dept的服务列表信息,并且通过轮询实现了客户端的负载均衡。而与Ribbon不同的是,通过feign只需要定义服务绑定接口且以声明式的方法,优雅而简单的实现了服务调用。
4、Feign的使用步骤,新建microservicecloud-consumer-dept-feign项目,修改pom.xml配置文件,添加对feign的支持。如下所示:
 1 <project xmlns="http://maven.apache.org/POM/4.0.0"
 2     xmlns:xsi="http://www.w3.org/2001/XMLSchema-instance"
 3     xsi:schemaLocation="http://maven.apache.org/POM/4.0.0
 4     http://maven.apache.org/xsd/maven-4.0.0.xsd">
 5     <modelVersion>4.0.0</modelVersion>
 6     <parent>
 7         <groupId>com.bie.springcloud</groupId>
 8         <artifactId>microservicecloud</artifactId>
 9         <version>0.0.1-SNAPSHOT</version>
10     </parent>
11     <artifactId>microservicecloud-consumer-dept-feign</artifactId>
12
13     <dependencies>
14         <!-- 自己定义的api -->
15         <dependency>
16             <groupId>com.bie.springcloud</groupId>
17             <artifactId>microservicecloud-api</artifactId>
18             <version>${project.version}</version>
19         </dependency>
20         <dependency>
21             <groupId>org.springframework.boot</groupId>
22             <artifactId>spring-boot-starter-web</artifactId>
23         </dependency>
24         <!-- 修改后立即生效,热部署 -->
25         <dependency>
26             <groupId>org.springframework</groupId>
27             <artifactId>springloaded</artifactId>
28         </dependency>
29         <dependency>
30             <groupId>org.springframework.boot</groupId>
31             <artifactId>spring-boot-devtools</artifactId>
32         </dependency>
33         <!-- 将微服务consumer客户端注册进eureka -->
34         <!-- eureka需要依赖如下两个依赖包 -->
35         <dependency>
36             <groupId>org.springframework.cloud</groupId>
37             <artifactId>spring-cloud-starter-eureka</artifactId>
38         </dependency>
39         <dependency>
40             <groupId>org.springframework.cloud</groupId>
41             <artifactId>spring-cloud-starter-config</artifactId>
42         </dependency>
43         <!-- Ribbon相关,需要和eureka进行整合 -->
44         <dependency>
45             <groupId>org.springframework.cloud</groupId>
46             <artifactId>spring-cloud-starter-ribbon</artifactId>
47         </dependency>
48         <!-- feign相关的jar包 -->
49         <dependency>
50             <groupId>org.springframework.cloud</groupId>
51             <artifactId>spring-cloud-starter-feign</artifactId>
52         </dependency>
53
54     </dependencies>
55
56 </project>
由于对服务依赖的调用可能不止一处,往往一个接口会被多处调用,所以通常都会针对每个微服务自行封装一些客户端类来包装这些依赖服务的调用。所以,Feign在此基础上做了进一步封装,由他来帮助我们定义和实现依赖服务接口的定义。
修改microservicecloud-api这个工程,该工程是实体类,工具类,公共方法的抽取和配置。面向接口编程调用微服务,接口里面的东西可以放到该模块下面,方便各个模块对其进行调用。
 1 <project xmlns="http://maven.apache.org/POM/4.0.0"
 2     xmlns:xsi="http://www.w3.org/2001/XMLSchema-instance"
 3     xsi:schemaLocation="http://maven.apache.org/POM/4.0.0
 4     http://maven.apache.org/xsd/maven-4.0.0.xsd">
 5     <modelVersion>4.0.0</modelVersion>
 6     <!-- 子类里面显示声明才能有明确的继承表现,无意外就是父类的默认版本否则自己定义 -->
 7     <parent>
 8         <groupId>com.bie.springcloud</groupId>
 9         <artifactId>microservicecloud</artifactId>
10         <version>0.0.1-SNAPSHOT</version>
11     </parent>
12     <!-- 当前Module我自己叫什么名字 -->
13     <artifactId>microservicecloud-api</artifactId>
14
15     <!-- 当前Module需要用到的jar包,按自己需求添加,如果父类已经包含了,可以不用写版本号 -->
16     <dependencies>
17         <dependency>
18             <groupId>org.projectlombok</groupId>
19             <artifactId>lombok</artifactId>
20         </dependency>
21         <dependency>
22             <groupId>org.springframework.cloud</groupId>
23             <artifactId>spring-cloud-starter-feign</artifactId>
24         </dependency>
25     </dependencies>
26
27
28 </project>
创建接口并新增注解@FeignClient。value的值是微服务提供者的名称,即spring.application.name。
 1 package com.bie.service;
 2
 3 import java.util.List;
 4
 5 import org.springframework.cloud.netflix.feign.FeignClient;
 6 import org.springframework.web.bind.annotation.PathVariable;
 7 import org.springframework.web.bind.annotation.RequestMapping;
 8 import org.springframework.web.bind.annotation.RequestMethod;
 9
10 import com.bie.po.Dept;
11
12 /**
13  *
14  *
15  * @author biehl
16  *
17  *
18  */
19 @FeignClient(value = "MICROSERVICECLOUD-PROVIDER-DEPT")
20 // value的值是微服务提供者的名称,即spring.application.name。Feign使用用法,创建一个接口,使用一个注解。
21 public interface DeptClientService {
22
23     /**
24      * 查询接口
25      *
26      * @param id
27      * @return
28      */
29     @RequestMapping(value = "/dept/get/{id}", method = RequestMethod.GET)
30     public Dept get(@PathVariable("id") long id);
31
32     /**
33      * 查询接口
34      *
35      * @return
36      */
37     @RequestMapping(value = "/dept/list", method = RequestMethod.GET)
38     public List<Dept> list();
39
40     /**
41      * 新增接口
42      *
43      * @param dept
44      * @return
45      */
46     @RequestMapping(value = "/dept/add", method = RequestMethod.POST)
47     public boolean add(Dept dept);
48 }
然后将工具模块microservicecloud-api进行maven clear,然后进行maven install。修改microservicecloud-consumer-dept-feign控制层类,如下所示:
 1 package com.bie.controller;
 2
 3 import java.util.List;
 4
 5 import org.springframework.beans.factory.annotation.Autowired;
 6 import org.springframework.web.bind.annotation.PathVariable;
 7 import org.springframework.web.bind.annotation.RequestBody;
 8 import org.springframework.web.bind.annotation.RequestMapping;
 9 import org.springframework.web.bind.annotation.RestController;
10
11 import com.bie.po.Dept;
12 import com.bie.service.DeptClientService;
13
14 /**
15  *
16  * 使用Feign进行负载均衡。
17  *
18  * @author biehl
19  *
20  */
21 @RestController
22 public class DeptControllerConsumer {
23
24     @Autowired
25     private DeptClientService service = null;
26
27     /**
28      *
29      * @param dept
30      * @return
31      */
32     @RequestMapping(value = "/consumer/dept/add")
33     public boolean addDept(Dept dept) {
34
35         return this.service.add(dept);
36     }
37
38     /**
39      * 注意,从路径中获取到参数值,使用注解@PathVariable
40      *
41      * @param id
42      * @return
43      */
44     @RequestMapping(value = "/consumer/dept/get/{id}")
45     public Dept getById(@PathVariable(value = "id") Long id) {
46
47         return this.getById(id);
48     }
49
50     /**
51      *
52      * @return
53      */
54     @RequestMapping(value = "/consumer/dept/list")
55     public List<Dept> list() {
56
57         return this.service.list();
58     }
59
60 }
修改microservicecloud-consumer-dept-feign主启动类,如下所示:
 1 package com.bie;
 2
 3 import org.springframework.boot.SpringApplication;
 4 import org.springframework.boot.autoconfigure.SpringBootApplication;
 5 import org.springframework.cloud.netflix.eureka.EnableEurekaClient;
 6 import org.springframework.cloud.netflix.feign.EnableFeignClients;
 7 import org.springframework.context.annotation.ComponentScan;
 8
 9 /**
10  * Feign通过接口的方法调用Rest服务(之前是Ribbon+RestTemplate),
11  *
12  * 通过Feign直接找到服务接口,由于在进行服务调用的时候融合了Ribbon技术,
13  *
14  * 所以也支持负载均衡作用。
15  *
16  * @author biehl
17  *
18  */
19 @SpringBootApplication
20 @EnableEurekaClient // 将consumer注册到Eureka Server注册中心
21 @ComponentScan(basePackages = { "com.bie.springcloud" })
22 @EnableFeignClients(basePackages = { "com.bie.springcloud" })
23 public class MicroServiceCloudConsumerFeignApplication {
24
25     public static void main(String[] args) {
26         SpringApplication.run(MicroServiceCloudConsumerFeignApplication.class, args);
27     }
28
29 }
配置文件application.yml,如下所示:
1 server:
2   port: 80
3
4 eureka:
5   client: # 客户端注册进eureka服务列表内
6     register-with-eureka: false # eureka客户端,自己不能注册
7     service-url:
8       defaultZone: http://eureka7001.com:7001/eureka/,http://eureka7002.com:7002/eureka/,http://eureka7003.com:7003/eureka/
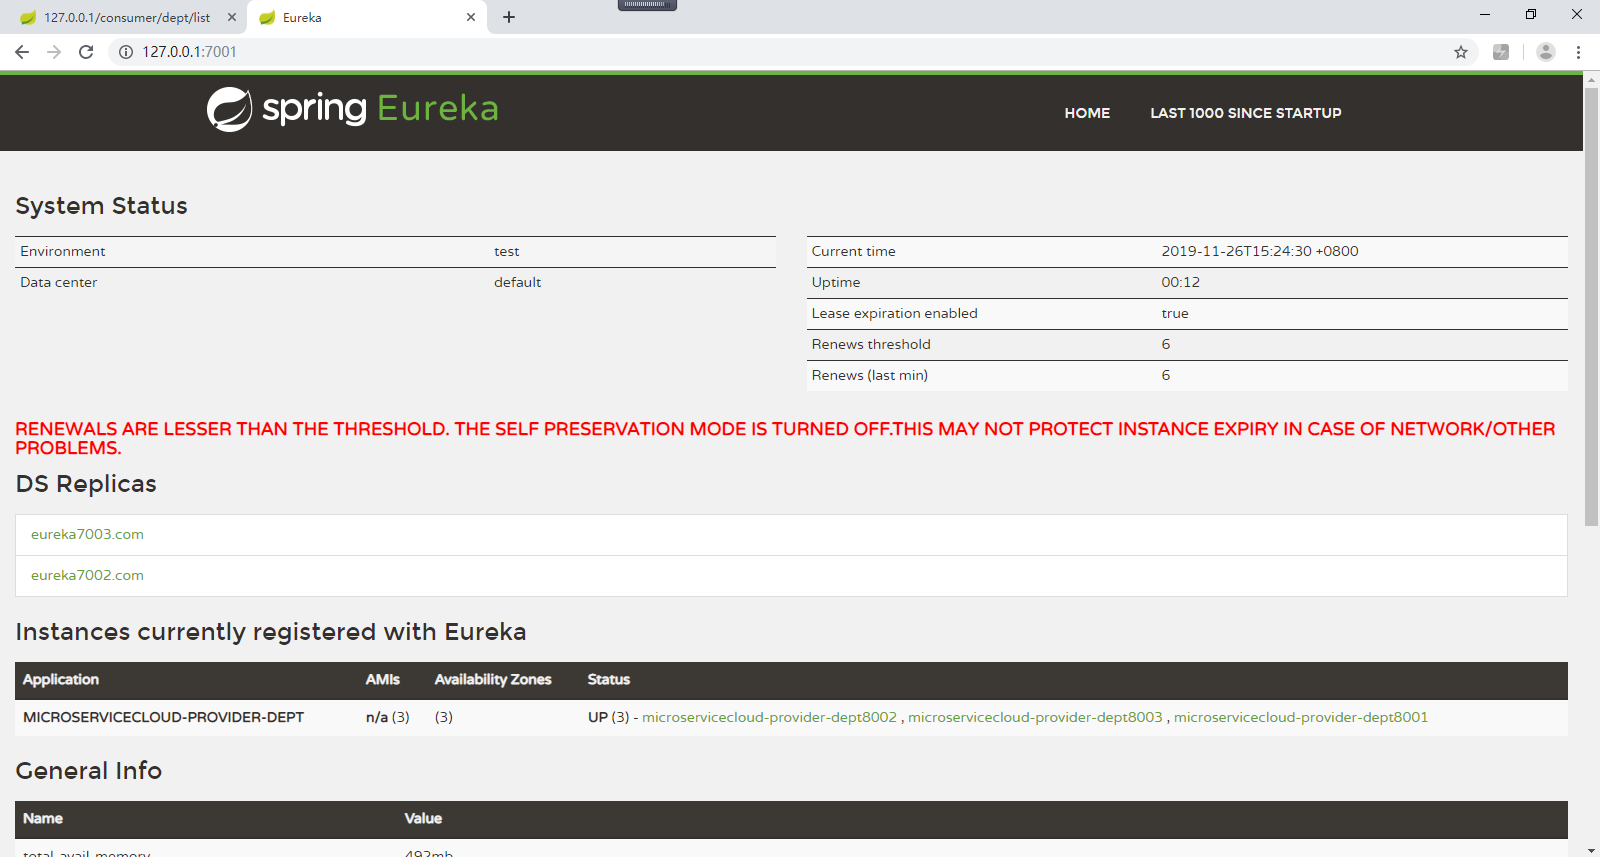
启动Eureka Server的集群,三个节点的注册中心。启动三个部门微服务提供者。启动Feign进行负载均衡(Feign自带负载均衡配置项)。如下所示:


Feign通过接口的方法调用Rest服务(之前是Ribbon+RestTemplate,面向微服务名称进行编程),该请求发送给Eureka服务器(http://MICROSERVICECLOUD-PROVIDER-DEPT/dept/list),通过Feign直接找到服务接口,由于在进行服务调用的时候融合了Ribbon技术,所以也支持负载均衡作用。面向接口编程。
作者:别先生
博客园:https://www.cnblogs.com/biehongli/
如果您想及时得到个人撰写文章以及著作的消息推送,可以扫描上方二维码,关注个人公众号哦。


