本文主要是介绍在 Kubernetes 上拉取 Harbor 私有仓库镜像并部署服务,希望对大家解决编程问题提供一定的参考价值,需要的开发者们随着小编来一起学习吧!
上一篇讲解了IntelliJ IDEA和Jib Maven插件配合,镜像一键推送到Harbor私服仓库,今天来讲解下怎么让k8s直接拉取Harbor 私有仓库上面的镜像
创建 Kubernetes Secret 用于拉取镜像
因为 Harbor 仓库是私有的,我们需要创建一个 Kubernetes Secret 来存储我们的 Docker 仓库的认证信息。
kubectl create secret docker-registry harbor-secret \--docker-server=192.168.10.229 \--docker-username=admin \--docker-password=123456
创建 Kubernetes 部署文件
接下来,我们需要创建一个 Kubernetes 部署文件,使用我们从 Harbor 拉取的镜像。我们将指定使用我们创建的 secret 来拉取私有镜像。
创建一个名为 gateway-deployment.yaml 的文件,并添加以下内容:
apiVersion: apps/v1
# 声明一个Deployment资源对象 表示这是一个部署资源。
kind: Deployment
#Deployment的元数据 如名称和标签
metadata:#Deployment的名称    name: dtb-gateway-deployment#定义了Deployment所属的命名空间为 "default"。namespace: default#labels 字段用于给Deployment添加标签,这里的标签是 app: dtb-gateway。labels:app: dtb-gateway
#spec 部分定义了Deployment的规范,包括副本数量、Pod模板等
spec:# 通过replicas声明pod个数是1 这表示Deployment将确保只有一个副本的Pod在运行。replicas: 1# 定义了如何选择要由Deployment管理的Pod。在这里,它使用标签选择器 app: dtb-gateway 来选择匹配该标签的Pod。selector:matchLabels:app: dtb-gateway# 字段为空对象,表示没有定义特定的滚动升级策略,使用默认的策略。    strategy: {}# 部分定义了要创建的Pod的模板。template:#字段用于定义Pod模板的元数据。metadata:#labels 字段给Pod模板的Pod添加了一个标签 app: dtb-gateway,这个标签与Deployment的选择器匹配。 给pod打上标签app=myapp   labels:app: dtb-gateway# 部分定义了Pod的规范,包括容器的配置。    spec:containers:- image: 192.168.10.229/dtb/dtb-gateway:2.0.1-snapshotname: dtb-gateway#字段为空对象,表示未指定容器的资源请求和限制。resources: {}#字段定义了容器的端口映射,将容器的8088端口映射到Pod的端口ports:- containerPort: 8088env:# 指定环境- name: spring.profiles.activevalue: fenlan# 指定时区- name: TZvalue: Asia/ShanghaivolumeMounts:- mountPath: /opt/logsname: log-volumeimagePullPolicy: Always# 这里加上创建的SecretsimagePullSecrets:- name: harbor-secretvolumes:- name: log-volumehostPath:path: /opt/logs/dtb-gatewaytype: DirectoryOrCreate
#表示当前的部署状态
status: {}
应用部署文件
使用 kubectl 命令来应用这个部署文件,从而在 Kubernetes 集群上创建和运行我们的应用。
kubectl apply -f gateway-deployment.yaml
报错!!:
Failed to pull image "192.168.10.229/dtb/dtb-gateway:2.0.1-snapshot": failed to pull and unpack image "192.168.10.229/dtb/dtb-gateway:2.0.1-snapshot": failed to resolve reference "192.168.10.229/dtb/dtb-gateway:2.0.1-snapshot": failed to do request: Head "https://192.168.10.229/v2/dtb/dtb-gateway/manifests/2.0.1-snapshot": dial tcp 192.168.10.229:443: connect: connection refused

这用的是https啊
然后上网搜 好像是说在创建secret 的时候指定
kubectl create secret docker-registry harbor-secret \--docker-server=http://192.168.10.229 \--docker-username=admin \--docker-password=123456
然后删除deployment重新apply,还是不行!
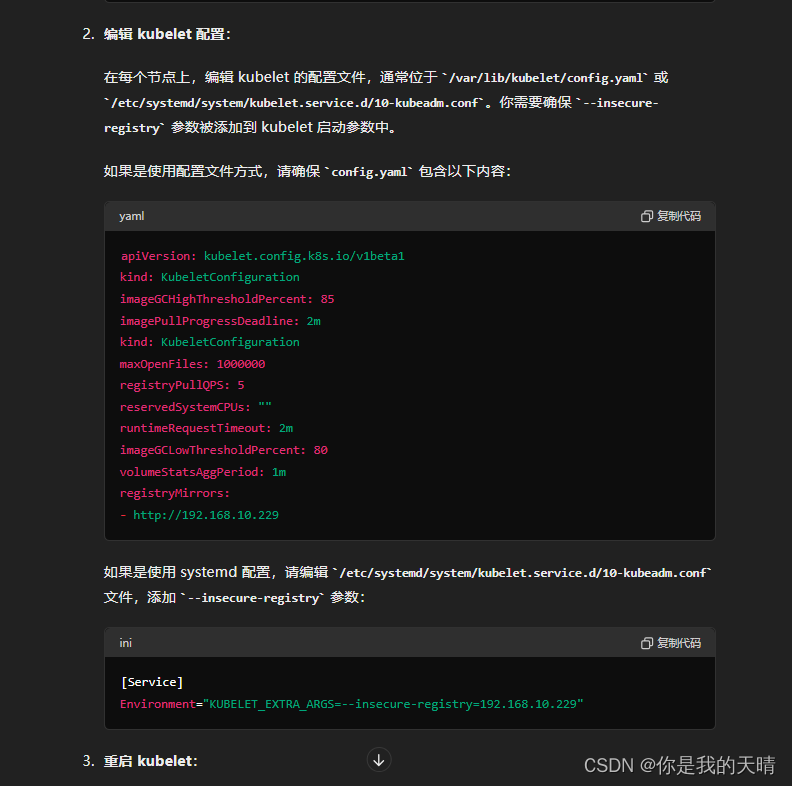
网上找不到办法问下chtgpt吧 它这样说:
1.配置 Docker 允许使用 HTTP(如前所述)
前面在做一键推送镜像到harbor已经做过
配置 Kubernetes 使用 HTTP
编辑 kubelet 配置:
在每个节点上,编辑 kubelet 的配置文件,通常位于 /var/lib/kubelet/config.yaml 或 /etc/systemd/system/kubelet.service.d/10-kubeadm.conf。你需要确保 --insecure-registry 参数被添加到 kubelet 启动参数中。
然后 sudo systemctl daemon-reload; sudo systemctl restart kubelet
也是不行 -_-

醉了!!
解决:配置containerd支持私服
咱们的k8s运行时用的是containerd,k8s默认的,网上k8s都是docker docker docker… k8s最新部署参考。k8s使用私有harbor,containerd需要配置仓库信任,修改containerd的配置:
vim /etc/containerd/config.toml
[plugins."io.containerd.grpc.v1.cri".registry]config_path = ""[plugins."io.containerd.grpc.v1.cri".registry.auths][plugins."io.containerd.grpc.v1.cri".registry.configs][plugins."io.containerd.grpc.v1.cri".registry.configs.'192.168.10.229'.tls] #新增加的insecure_skip_verify = true #新增加的[plugins."io.containerd.grpc.v1.cri".registry.headers][plugins."io.containerd.grpc.v1.cri".registry.mirrors][plugins."io.containerd.grpc.v1.cri".registry.mirrors.'192.168.10.229'] #新增加的endpoint = ["http://192.168.10.229"] #新增加的[plugins."io.containerd.grpc.v1.cri".x509_key_pair_streaming]tls_cert_file = ""tls_key_file = ""这里的配置没有添加账号密码,如果添加了账号密码就是这样:
[plugins."io.containerd.grpc.v1.cri".registry]config_path = ""[plugins."io.containerd.grpc.v1.cri".registry.auths][plugins."io.containerd.grpc.v1.cri".registry.configs][plugins."io.containerd.grpc.v1.cri".registry.configs.'192.168.10.229'.tls] #新增加的insecure_skip_verify = true #新增加的[plugins."io.containerd.grpc.v1.cri".registry.configs.'192.168.10.229'.auth] #新增加的 username = "admin" #新增加的password = "123456" #新增加的[plugins."io.containerd.grpc.v1.cri".registry.headers][plugins."io.containerd.grpc.v1.cri".registry.mirrors][plugins."io.containerd.grpc.v1.cri".registry.mirrors.'192.168.10.229'] #新增加的endpoint = ["http://192.168.10.229"] #新增加的[plugins."io.containerd.grpc.v1.cri".x509_key_pair_streaming]tls_cert_file = ""tls_key_file = ""这样的话 gateway-deployment.yaml就不用配置imagePullSecrets了 那也不用生成harbor-secret了
接下来重新启动containerd:
systemctl restart containerd.service
再次重新部署
kubectl delete -f gateway-deployment.yamlkubectl apply -f gateway-deployment.yaml
验证部署
应用成功部署后,我们可以验证 Pod 是否已成功拉取镜像并运行:
kubectl get pod -n default

通过上述步骤,我们已经成功地在 Kubernetes 集群上从 Harbor 私有仓库中拉取镜像并部署了我们的应用。使用私有镜像仓库有助于提高镜像的安全性和管理效率。希望这篇博文对你有所帮助!
这篇关于在 Kubernetes 上拉取 Harbor 私有仓库镜像并部署服务的文章就介绍到这儿,希望我们推荐的文章对编程师们有所帮助!


