本文主要是介绍QT:day1,希望对大家解决编程问题提供一定的参考价值,需要的开发者们随着小编来一起学习吧!
思维导图

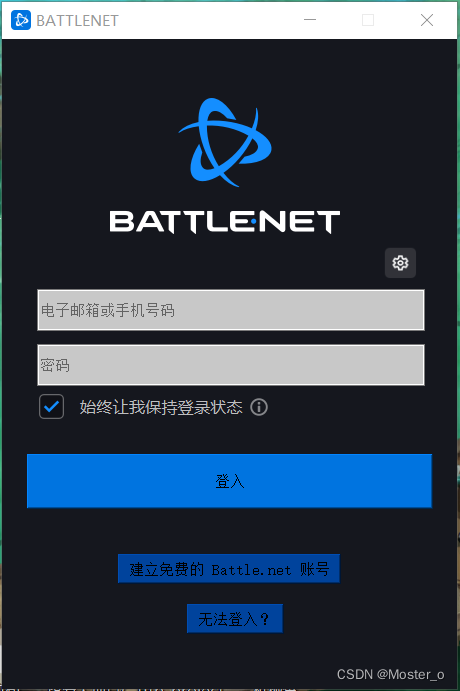
qt制作暴雪登入器
#include "mywidget.h"MyWidget::MyWidget(QWidget *parent): QWidget(parent)
{this->setWindowTitle("BATTLENET");//总体登陆器设置this->resize(455,650);this->setStyleSheet("background-color:rgb(21,23,30)");this->setWindowIcon(QIcon("D:\\everything""\\p4.png"));this->setFixedSize(455,650);QLabel *l1=new QLabel(this);//暴雪大logol1->resize(451,162);l1->move(0,40);//l1->setStyleSheet("background-color:pink");l1->setPixmap(QPixmap("D:\\everything""\\screen2024-06-13 191215.png"));QLabel *l2=new QLabel(this);//设置图片l2->resize(35,35);l2->move(380,205);l2->setPixmap(QPixmap("D:\\everything""\\sittingpicture.png"));l2->setScaledContents(true);QLineEdit *edit1=new QLineEdit(this);//账号文本框edit1->move(35,250);edit1->resize(388,42);edit1->setStyleSheet("background-color:rgb(200,200,200)");edit1->setPlaceholderText("电子邮箱或手机号码");QLineEdit *edit2=new QLineEdit(this);//密码文本框edit2->move(35,305);edit2->resize(388,42);edit2->setStyleSheet("background-color:rgb(200,200,200)");edit2->setPlaceholderText("密码");edit2->setEchoMode(QLineEdit::Password);QLabel *l3=new QLabel(this);//勾选图片l3->resize(35,35);l3->move(35,350);l3->setPixmap(QPixmap("D:\\everything""\\p2.png"));//l3->setScaledContents(true);QLabel *l4=new QLabel(this);//始终让我保持文字l4->resize(192,22);l4->move(75,357);l4->setPixmap(QPixmap("D:\\everything""\\p3.png"));//l3->setScaledContents(true);QPushButton *pbu1=new QPushButton("登入",this);//登入按钮pbu1->move(25,415);pbu1->resize(406,55);pbu1->setStyleSheet("background-color:rgb(0,116,224)");QPushButton *pbu2=new QPushButton("建立免费的 Battle.net 账号",this);//注册按钮pbu2->move(116,515);pbu2->resize(223,30);pbu2->setStyleSheet("background-color:rgb(0,67,156)");QPushButton *pbu3=new QPushButton("无法登入?",this);//无法登录按钮pbu3->move(185,565);pbu3->resize(97,30);pbu3->setStyleSheet("background-color:rgb(0,67,156)");}MyWidget::~MyWidget()
{
}
这篇关于QT:day1的文章就介绍到这儿,希望我们推荐的文章对编程师们有所帮助!


