本文主要是介绍VS2019创建c++动态链接库dll与调用方法,希望对大家解决编程问题提供一定的参考价值,需要的开发者们随着小编来一起学习吧!
VS2019创建c++动态链接库dll与调用方法
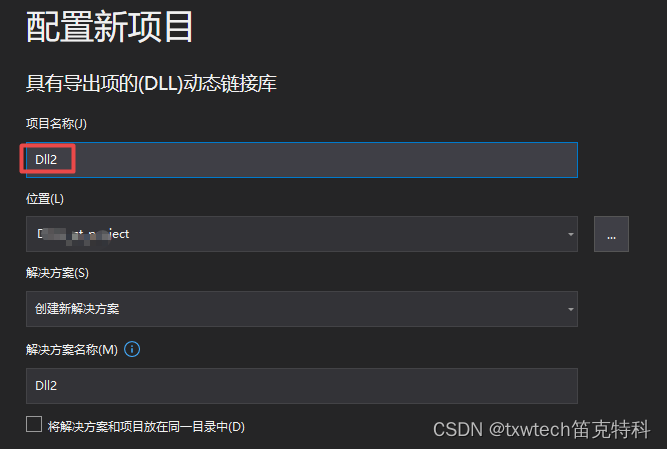
1.点击文件-》新建-》项目,输入dll,选择具有导出项的(DLL)动态链接库

2.输入一个文件名:dll2
头文件.h
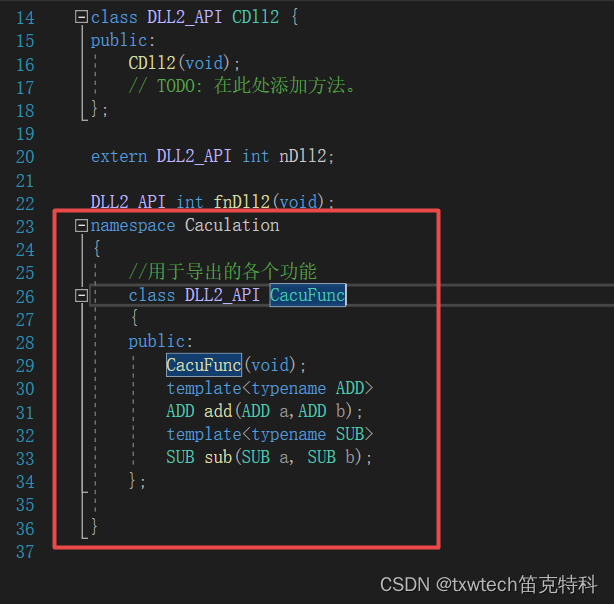
3.添加加减法函数:
// 下列 ifdef 块是创建使从 DLL 导出更简单的
// 宏的标准方法。此 DLL 中的所有文件都是用命令行上定义的 DLL2_EXPORTS
// 符号编译的。在使用此 DLL 的
// 任何项目上不应定义此符号。这样,源文件中包含此文件的任何其他项目都会将
// DLL2_API 函数视为是从 DLL 导入的,而此 DLL 则将用此宏定义的
// 符号视为是被导出的。
#ifdef DLL2_EXPORTS
#define DLL2_API __declspec(dllexport)
#else
#define DLL2_API __declspec(dllimport)
#endif// 此类是从 dll 导出的
class DLL2_API CDll2 {
public:CDll2(void);// TODO: 在此处添加方法。
};extern DLL2_API int nDll2;DLL2_API int fnDll2(void);
namespace Caculation
{//用于导出的各个功能class DLL2_API CacuFunc{public:CacuFunc(void);template<typename ADD>ADD add(ADD a,ADD b);template<typename SUB>SUB sub(SUB a, SUB b);};}
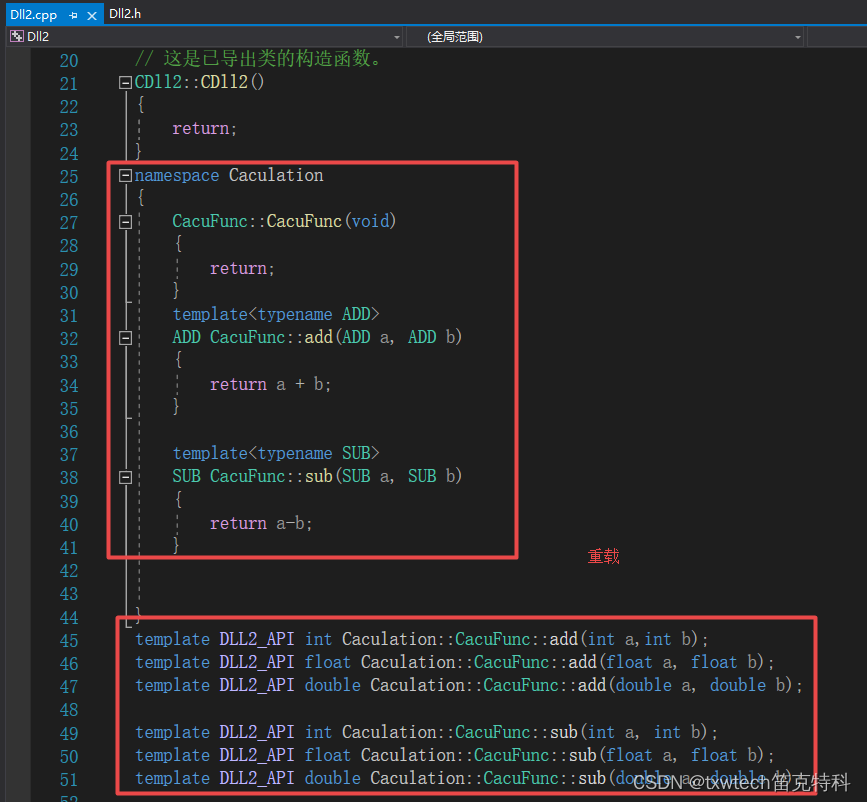
4.cpp文件里添加实现与重载方法
// Dll2.cpp : 定义 DLL 的导出函数。
//#include "pch.h"
#include "framework.h"
#include "Dll2.h"
#include <fstream>
#include <iostream>
using namespace std;
// 这是导出变量的一个示例
DLL2_API int nDll2=0;// 这是导出函数的一个示例。
DLL2_API int fnDll2(void)
{cout << "this is dll two" << endl;return 0;
}// 这是已导出类的构造函数。
CDll2::CDll2()
{return;
}
namespace Caculation
{CacuFunc::CacuFunc(void){return;}template<typename ADD>ADD CacuFunc::add(ADD a, ADD b){return a + b;}template<typename SUB>SUB CacuFunc::sub(SUB a, SUB b){return a-b;}}
template DLL2_API int Caculation::CacuFunc::add(int a,int b);
template DLL2_API float Caculation::CacuFunc::add(float a, float b);
template DLL2_API double Caculation::CacuFunc::add(double a, double b);template DLL2_API int Caculation::CacuFunc::sub(int a, int b);
template DLL2_API float Caculation::CacuFunc::sub(float a, float b);
template DLL2_API double Caculation::CacuFunc::sub(double a, double b);
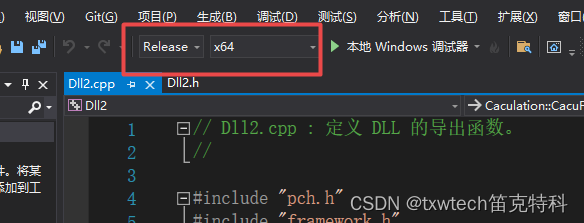
5. 配置编译成x64
6.编译解决方案:

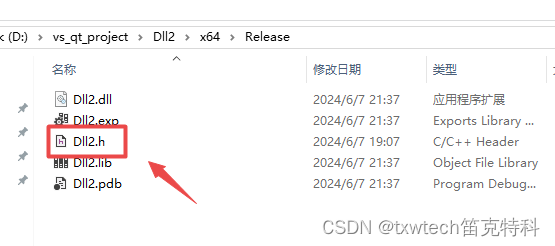
7.拷贝头文件:

8.粘贴到release文件夹
调用dll方法
9.新建控制台应用程序

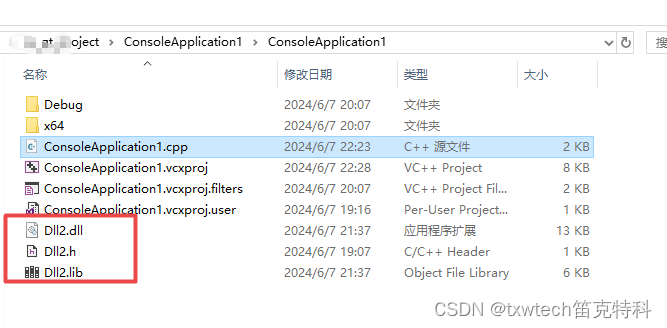
10.复制Dll2.h,Dll2.dll,Dll2.lib三个文件,参考第8步,粘贴到控制台项目文件夹
11.添加头文件并关联库

12.添加dll2.h头文件到项目


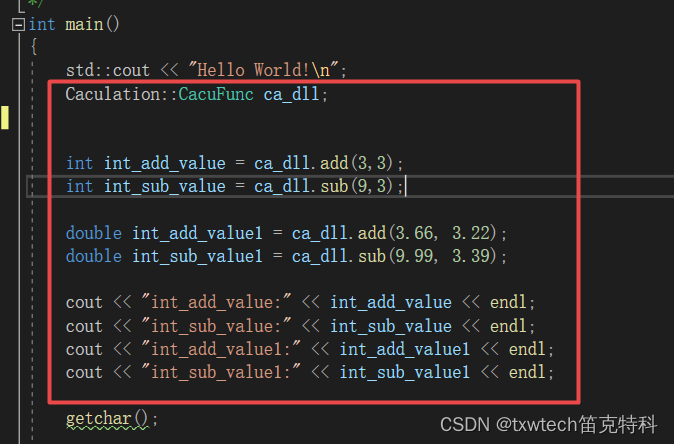
调用方法:
选择x64

编译并测试运行:

这篇关于VS2019创建c++动态链接库dll与调用方法的文章就介绍到这儿,希望我们推荐的文章对编程师们有所帮助!


