本文主要是介绍IOS学习之UiViewController带值跳转以及协议的实现(四),希望对大家解决编程问题提供一定的参考价值,需要的开发者们随着小编来一起学习吧!
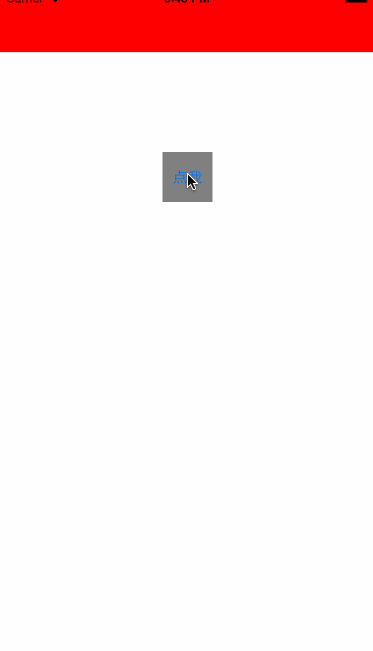
我们都知道Android里面的每个页面都是一个Activity,而Intent又是连接Activity的纽带,在IOS里面,每个页面都是一个UiViewController,而IOS中的跳转直装直接通过navigationController pushViewController:就可以了,还可以直接给跳转的页面赋值,而android里面是通过Intent把值传到第二页面,在IOS直接可以用UiviewController点出来,从后往前传值而是通过协议来实现,也就是android里面的所谓的接口。下面看看效果图:
我们新建了两个UiViewController,第一个传第二个直接赋值就可以了,第二个传第一个我们使的是协议。代码如下:
第一个FirstController:
//
//  FirstController.m
//  MyController
//
//  Created by xiaoyuan on 15/4/25.
//  Copyright (c) 2015年 xiaoyuan. All rights reserved.
//#import "FirstController.h"
#import "SecondController.h"@interface FirstController ()<changeVCDelegate>@end@implementation FirstController- (void)viewDidLoad {[super viewDidLoad];self.navigationController.navigationBar.barTintColor =[UIColor redColor];[self.navigationController.navigationBar setTranslucent:NO];UIButton*btn =[UIButton buttonWithType:UIButtonTypeRoundedRect];btn.frame = CGRectMake(0, 100, 50, 50);btn.backgroundColor =[UIColor grayColor];CGPoint center = btn.center;center.x = self.view.center.x;btn.center = center;[btn setTitle:@"点我" forState:UIControlStateNormal];[btn addTarget:self action:@selector(goon) forControlEvents:UIControlEventTouchUpInside];[self.view addSubview:btn];// Do any additional setup after loading the view.
}-(void) goon{SecondController*two =[[SecondController alloc]init];two.a = 1;//直接赋值two.delegate = self;[self.navigationController pushViewController:two animated:YES];//跳转
}
//协议方法第二个页面返回通过协议执行此方法
-(void)passValue:(NSString *)str sencode:(NSString *)secondStr
{UIAlertView *alreat  = [[UIAlertView alloc] initWithTitle:[NSString stringWithFormat:@"%@",str] message:[NSString stringWithFormat:@"%@",secondStr] delegate:self cancelButtonTitle:@"取消" otherButtonTitles:@"确定", nil];[alreat show];
}- (void)didReceiveMemoryWarning {[super didReceiveMemoryWarning];// Dispose of any resources that can be recreated.
}/*
#pragma mark - Navigation// In a storyboard-based application, you will often want to do a little preparation before navigation
- (void)prepareForSegue:(UIStoryboardSegue *)segue sender:(id)sender {// Get the new view controller using [segue destinationViewController].// Pass the selected object to the new view controller.
}
*/@end
//
//  SecondController.h
//  MyController
//
//  Created by xiaoyuan on 15/4/25.
//  Copyright (c) 2015年 xiaoyuan. All rights reserved.
//#import <UIKit/UIKit.h>
//协议
@protocol changeVCDelegate <NSObject>-(void)passValue:(NSString *) str sencode:(NSString *)secondStr;@end@interface SecondController : UIViewController
@property (nonatomic ,assign)int a;
//声明代理
@property (nonatomic ,weak) id<changeVCDelegate> delegate;
@end
//
//  SecondController.m
//  MyController
//
//  Created by xiaoyuan on 15/4/25.
//  Copyright (c) 2015年 xiaoyuan. All rights reserved.
//#import "SecondController.h"@interface SecondController ()@end@implementation SecondController- (void)viewDidLoad {[super viewDidLoad];self.view.backgroundColor = [UIColor whiteColor];// Do any additional setup after loading the view.UILabel*text =[[UILabel alloc]initWithFrame:CGRectMake(0, 100, 400, 100)];text.backgroundColor =[UIColor grayColor];[text setText:[NSString stringWithFormat:@"我是一个页面传过来的%d",self.a]];text.textAlignment =NSTextAlignmentCenter;[self.view addSubview:text];//返回键UIBarButtonItem *rightButton = [[UIBarButtonItem alloc] initWithTitle:@"返回" style:UIBarButtonItemStyleDone target:self action:@selector(backAction)];self.navigationItem.leftBarButtonItem = rightButton;}//返回 通过协议把
-(void)backAction
{[self.delegate passValue:@"我是第二个页面传的值" sencode:@"我也是第二页面传回来的"];[self.navigationController popViewControllerAnimated:YES];
}- (void)didReceiveMemoryWarning {[super didReceiveMemoryWarning];// Dispose of any resources that can be recreated.
}/*
#pragma mark - Navigation// In a storyboard-based application, you will often want to do a little preparation before navigation
- (void)prepareForSegue:(UIStoryboardSegue *)segue sender:(id)sender {// Get the new view controller using [segue destinationViewController].// Pass the selected object to the new view controller.
}
*/@end
这样就实现了!大神勿喷。
源码下载
这篇关于IOS学习之UiViewController带值跳转以及协议的实现(四)的文章就介绍到这儿,希望我们推荐的文章对编程师们有所帮助!


