本文主要是介绍MacOS13-将数据库转为markdown,docx格式,希望对大家解决编程问题提供一定的参考价值,需要的开发者们随着小编来一起学习吧!
MacOS13-将数据库转为markdown,docx格式
文章目录
- 先说踩坑点
- 各种模块缺失
- 代码
- 效果
- 总结
- 参考
先说踩坑点
各种模块缺失
tkinter
mysql
没错,你可以直接点击安装;
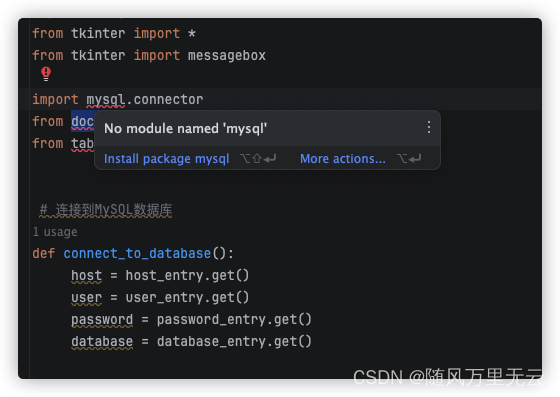
如果还出现报错
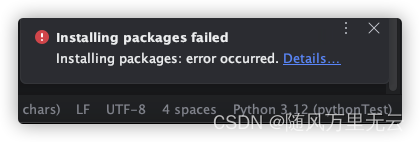
你需要打开终端
pip install mysqlclient
再次点进去安装后会出现导包,选择第二个
同样在这个页面,搜索安装各种模块
docx
报错
“Traceback (most recent call last):File "/Users/lin/Desktop/Python/mysql/tomd.py", line 4, in <module>from docx import Document”
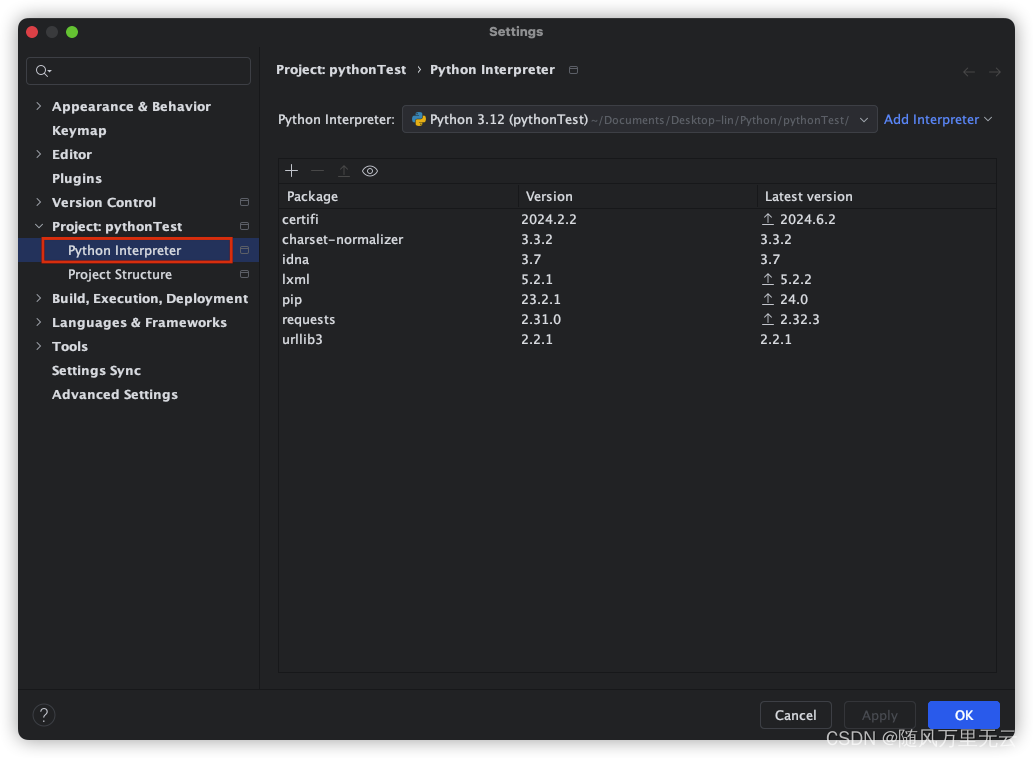
但是这里又出现了一个问题
由于我是使用anaconda的python环境
需要更换为本地的安装的python3.11
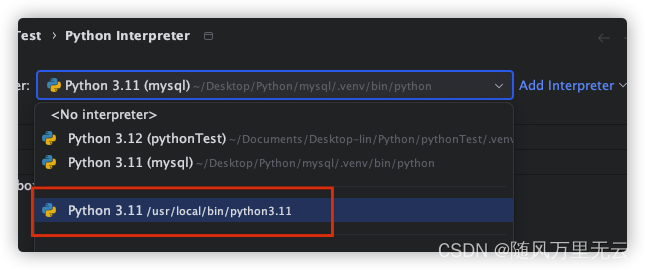
我还是使用之前项目的3.11(同一个版本),换了之后同样出现tk无法查找模块的话
先查找本机python匹配的版本
brew search python-tk
==> Formulae
python-tk@3.10     python-tk@3.9       python@3.7          python@3.9
python-tk@3.11      python-yq           python@3.8
最后安装
brew install python-tk@3.11
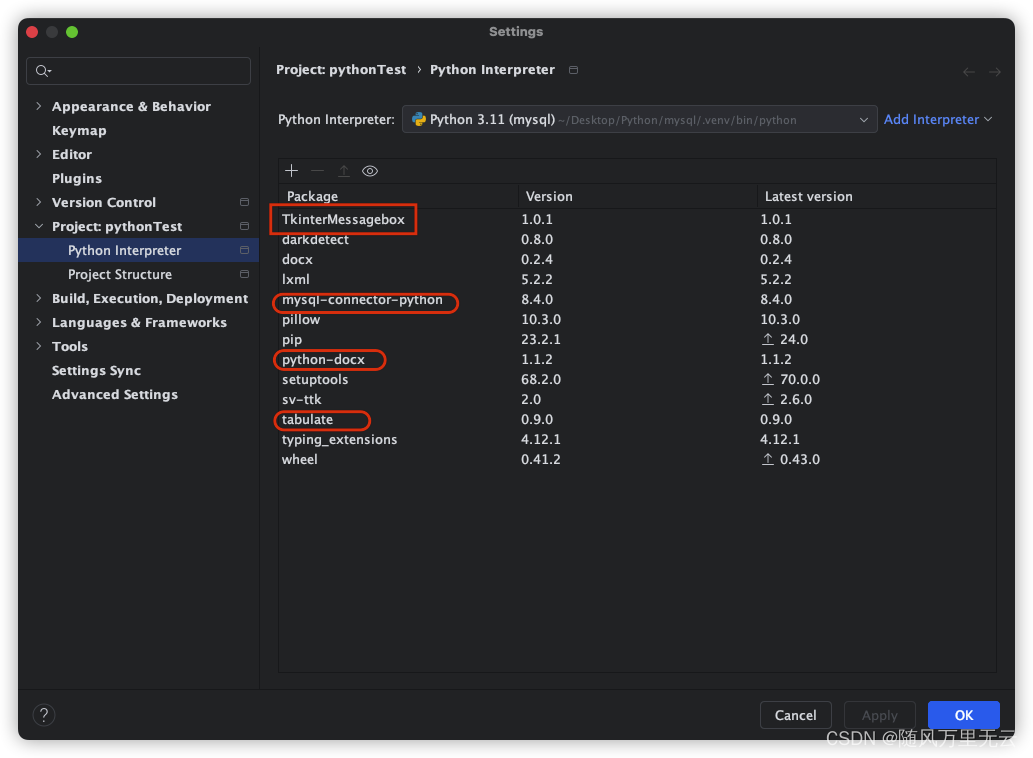
最后安装tkinterMessagebox,安装好后如下图
代码
from tkinter import *
from tkinter import messageboximport mysql.connector
from docx import Document
from tabulate import tabulate# 连接到MySQL数据库
def connect_to_database():host = host_entry.get()user = user_entry.get()password = password_entry.get()database = database_entry.get()try:conn = mysql.connector.connect(host=host,port=3306,user=user,password=password,database=database)return connexcept mysql.connector.Error as err:messagebox.showerror("错误", f"连接到MySQL数据库时出错:{err}")return None# 获取数据库中的表信息及字段注释
def get_table_info(conn):tables_info = []if conn:cursor = conn.cursor()cursor.execute("SHOW TABLES")tables = cursor.fetchall()for table in tables:table_name = table[0]cursor.execute(f"DESCRIBE {table_name}")table_structure = cursor.fetchall()tables_info.append({"table_name": table_name,"structure": table_structure})cursor.close()return tables_info# 获取字段注释
def get_field_comment(table_name, field_name):cursor = conn.cursor()cursor.execute(f"SHOW FULL COLUMNS FROM {table_name} WHERE Field = '{field_name}'")column_info = cursor.fetchone()comment = column_info[8]  # 注释信息在第9个元素中cursor.close()return comment# 生成Markdown格式的数据库文档
def generate_markdown_documentation(tables_info):documentation = "# 数据库文档\n\n"documentation += f"数据库地址:{host_entry.get()}\n"documentation += f"用户名:{user_entry.get()}\n"documentation += f"数据库名称:{database_entry.get()}\n\n"for table_info in tables_info:table_name = table_info["table_name"]structure = table_info["structure"]documentation += f"## {table_name}\n\n"headers = ["字段", "类型", "允许空值", "键", "默认值", "额外信息", "注释"]  # 添加注释列rows = []for field_info in structure:rows.append(list(field_info) +[get_field_comment(table_name, field_info[0])])  # 获取字段注释并添加到行中documentation += tabulate(rows, headers, tablefmt="pipe") + "\n\n"return documentation# 生成docx格式的数据库文档
def generate_docx_documentation(tables_info):doc = Document()doc.add_heading('数据库文档', 0)doc.add_paragraph(f"数据库地址:{host_entry.get()}")doc.add_paragraph(f"用户名:{user_entry.get()}")doc.add_paragraph(f"数据库名称:{database_entry.get()}")for table_info in tables_info:table_name = table_info["table_name"]structure = table_info["structure"]doc.add_heading(table_name, level=1)# 创建带边框的表格table = doc.add_table(rows=1, cols=7)table.style = 'Table Grid'  # 设置表格样式为带边框的样式table.autofit = False  # 禁止自动调整列宽hdr_cells = table.rows[0].cellshdr_cells[0].text = '字段'hdr_cells[1].text = '类型'hdr_cells[2].text = '允许空值'hdr_cells[3].text = '键'hdr_cells[4].text = '默认值'hdr_cells[5].text = '额外信息'hdr_cells[6].text = '注释'  # 添加注释列for field_info in structure:row_cells = table.add_row().cellsrow_cells[0].text = field_info[0]row_cells[1].text = field_info[1]row_cells[2].text = field_info[2]row_cells[3].text = field_info[3]row_cells[4].text = field_info[4] if field_info[4] is not None else ""row_cells[5].text = field_info[5]row_cells[6].text = get_field_comment(table_name,field_info[0])  # 获取并显示字段注释return doc# 创建标签和输入框
def create_input_fields(root, fields):entries = {}for row, (label_text, entry_text) in enumerate(fields):label = Label(root, text=label_text)label.grid(row=row, column=0, padx=10, pady=10, sticky="w")entry = Entry(root)entry.grid(row=row, column=1, padx=10, pady=10)entry.insert(0, entry_text)entries[label_text] = entry# 添加文档类型选择器label = Label(root, text="文档类型:")label.grid(row=len(fields), column=0, padx=10, pady=10, sticky="w")doc_type = StringVar(root)doc_type.set("Markdown")  # 默认选择 Markdowndoc_type_menu = OptionMenu(root, doc_type, "Markdown", "Docx")doc_type_menu.grid(row=len(fields), column=1, padx=10, pady=10, sticky="w")entries["文档类型:"] = doc_typereturn entries# 生成文档
def generate_document():global conn  # 在函数内部使用全局变量 connconn = connect_to_database()if conn:tables_info = get_table_info(conn)if entries["文档类型:"].get() == "Markdown":  # 获取文档类型documentation = generate_markdown_documentation(tables_info)with open("数据库文档.md", "w", encoding="utf-8") as file:file.write(documentation)messagebox.showinfo("成功", "Markdown文档生成成功!")elif entries["文档类型:"].get() == "Docx":doc = generate_docx_documentation(tables_info)doc.save("数据库文档.docx")messagebox.showinfo("成功", "Docx文档生成成功!")# 创建主窗口
root = Tk()
root.title("数据库文档生成器")
root.geometry("400x300")# 标签和输入框的内容
fields = [("主机地址:", ""), ("用户名:", ""), ("密码:", ""), ("数据库名称:", "")]
# 创建标签和输入框
entries = create_input_fields(root, fields)
# 获取输入框的内容
host_entry = entries["主机地址:"]
user_entry = entries["用户名:"]
password_entry = entries["密码:"]
database_entry = entries["数据库名称:"]
# 生成文档按钮
generate_button = Button(root, text="生成文档", command=generate_document)
generate_button.grid(row=len(fields) + 1, columnspan=2, padx=10, pady=10)
root.mainloop()
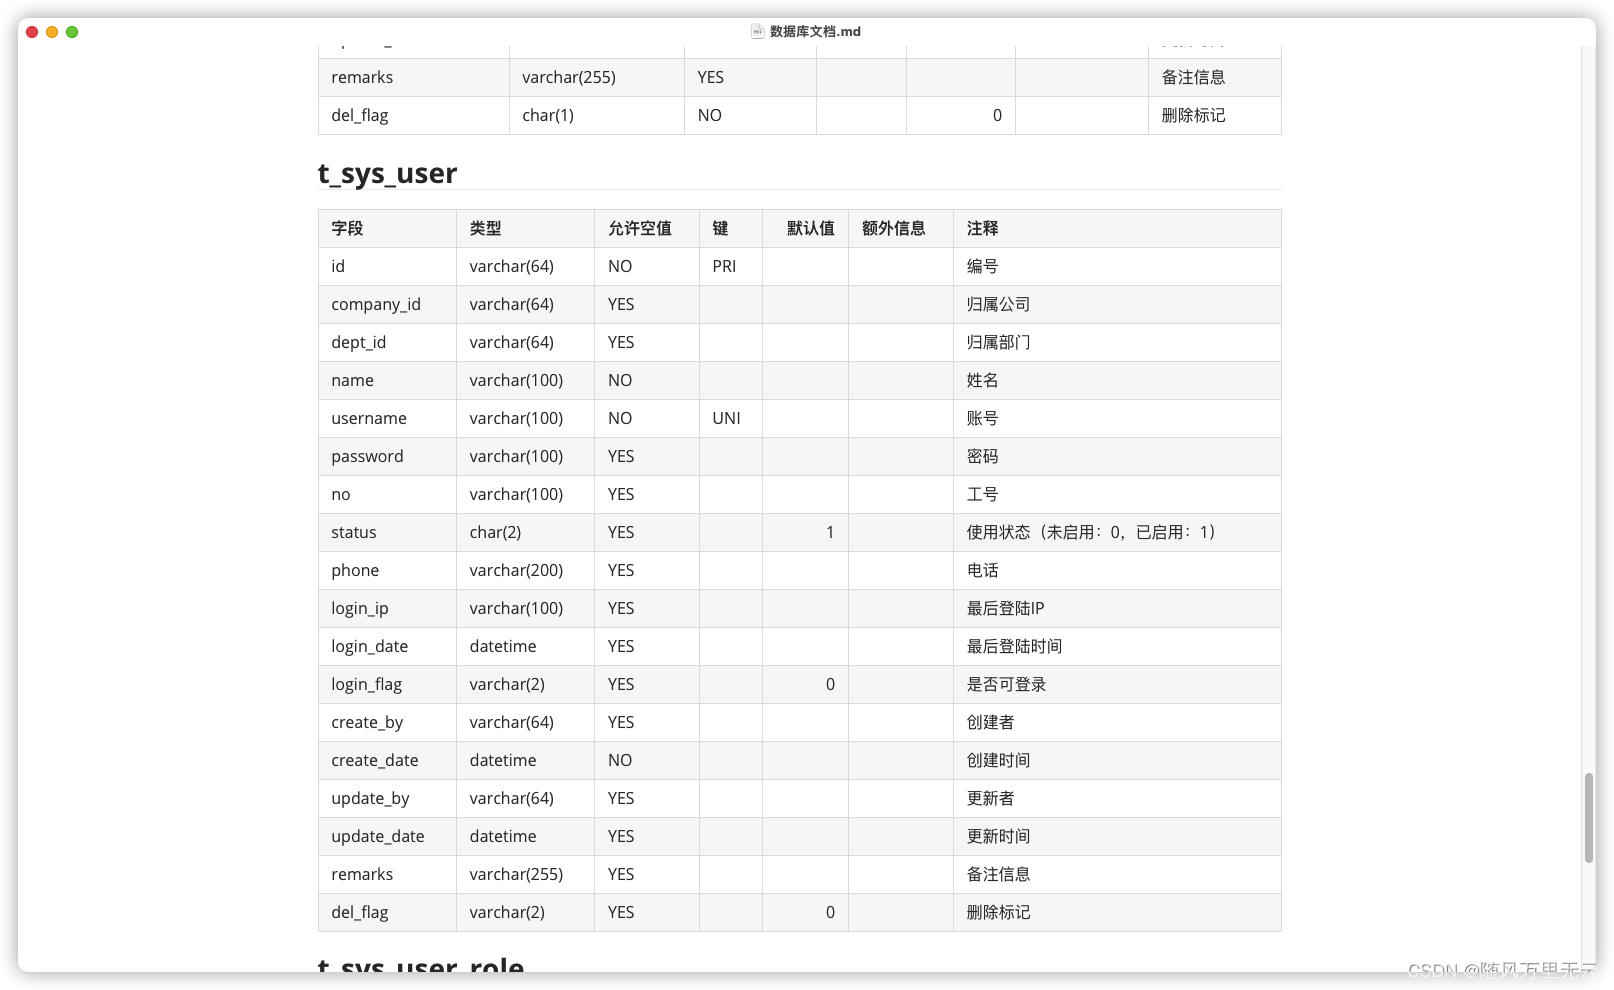
效果
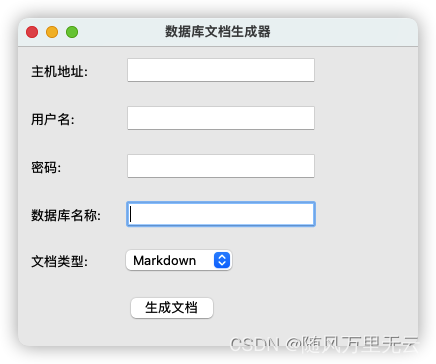
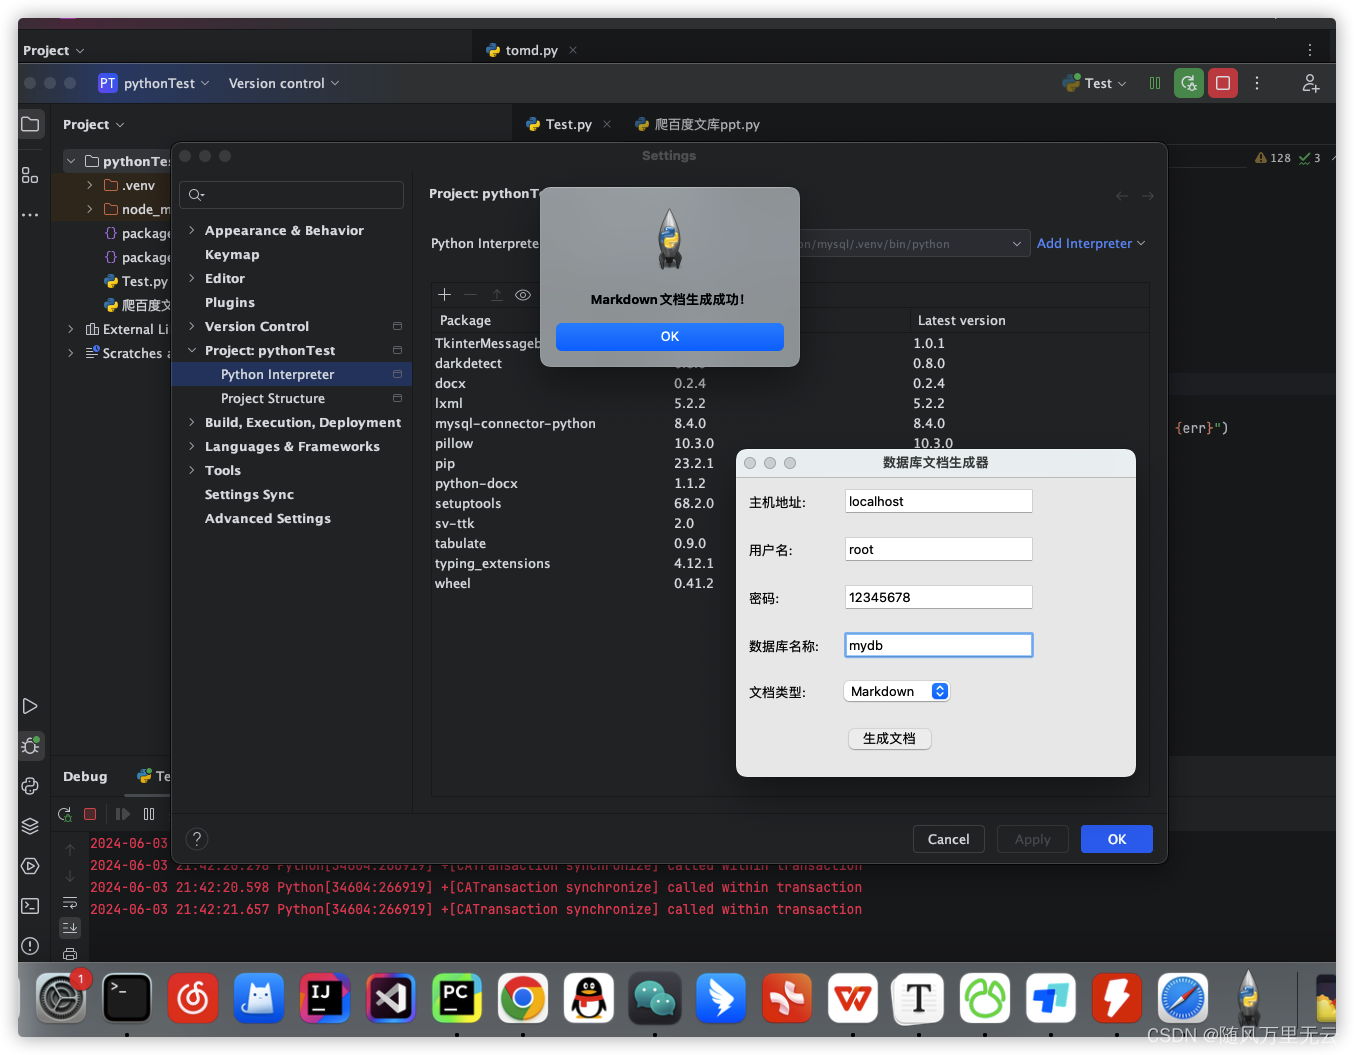
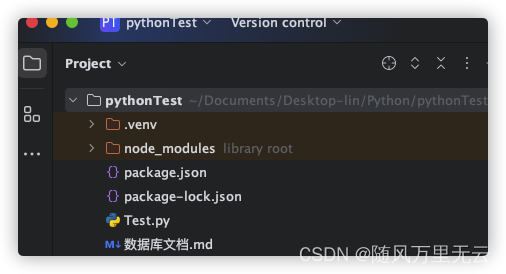
最后markdown格式会生成在py文件的同级目录下
总结
还是需要一步一步来,打好基础,比如我现在虽然写完文档了,程序可以跑了,但是依旧不是很懂基本的python设置,所以基础真的很重要,后面找个时间好好看看基础部分了
参考
https://blog.csdn.net/tekin_cn/article/details/135271779
https://zhuanlan.zhihu.com/p/692851609
https://juejin.cn/post/7346580626318983180
https://blog.csdn.net/qq_44874645/article/details/109311212
这篇关于MacOS13-将数据库转为markdown,docx格式的文章就介绍到这儿,希望我们推荐的文章对编程师们有所帮助!


